Yes, some of you probably guessed correctly, regarding where we’d go after yesterday’s Video Pixel Manipulation via Canvas Tutorial. As a background to this, we see for web applications, two primary source “partitions”, those being …
- around the “net” (in the server wooooooorrrrrlllllld, in the public areas of the Internet, which are not in “the dark web”, that is) via an absolute URL (to the same domain or beyond) and/or relative URL (in relation to the URL “home” place on the web server of the same domain as where you launched it … which we catered for yesterday, though quietly we’d have allowed absolute URLs too, it’s just that cross-domain restrictions make us shy about publicizing that) … versus …
- on the client computer (or device)
… and, yes, for all those who guessed we’d try to cater for image and/or video data coming from this client source, you are correct, and will probably win a cupie doll at some stage in your life, maybe even into the future, and we’d like to take some responsibility for the positive thoughts we sent your way in your future endeavours in this regard, and would like to have it be noted that when you said “you don’t give me anything” we say “don’t say we don’t give you anything”.
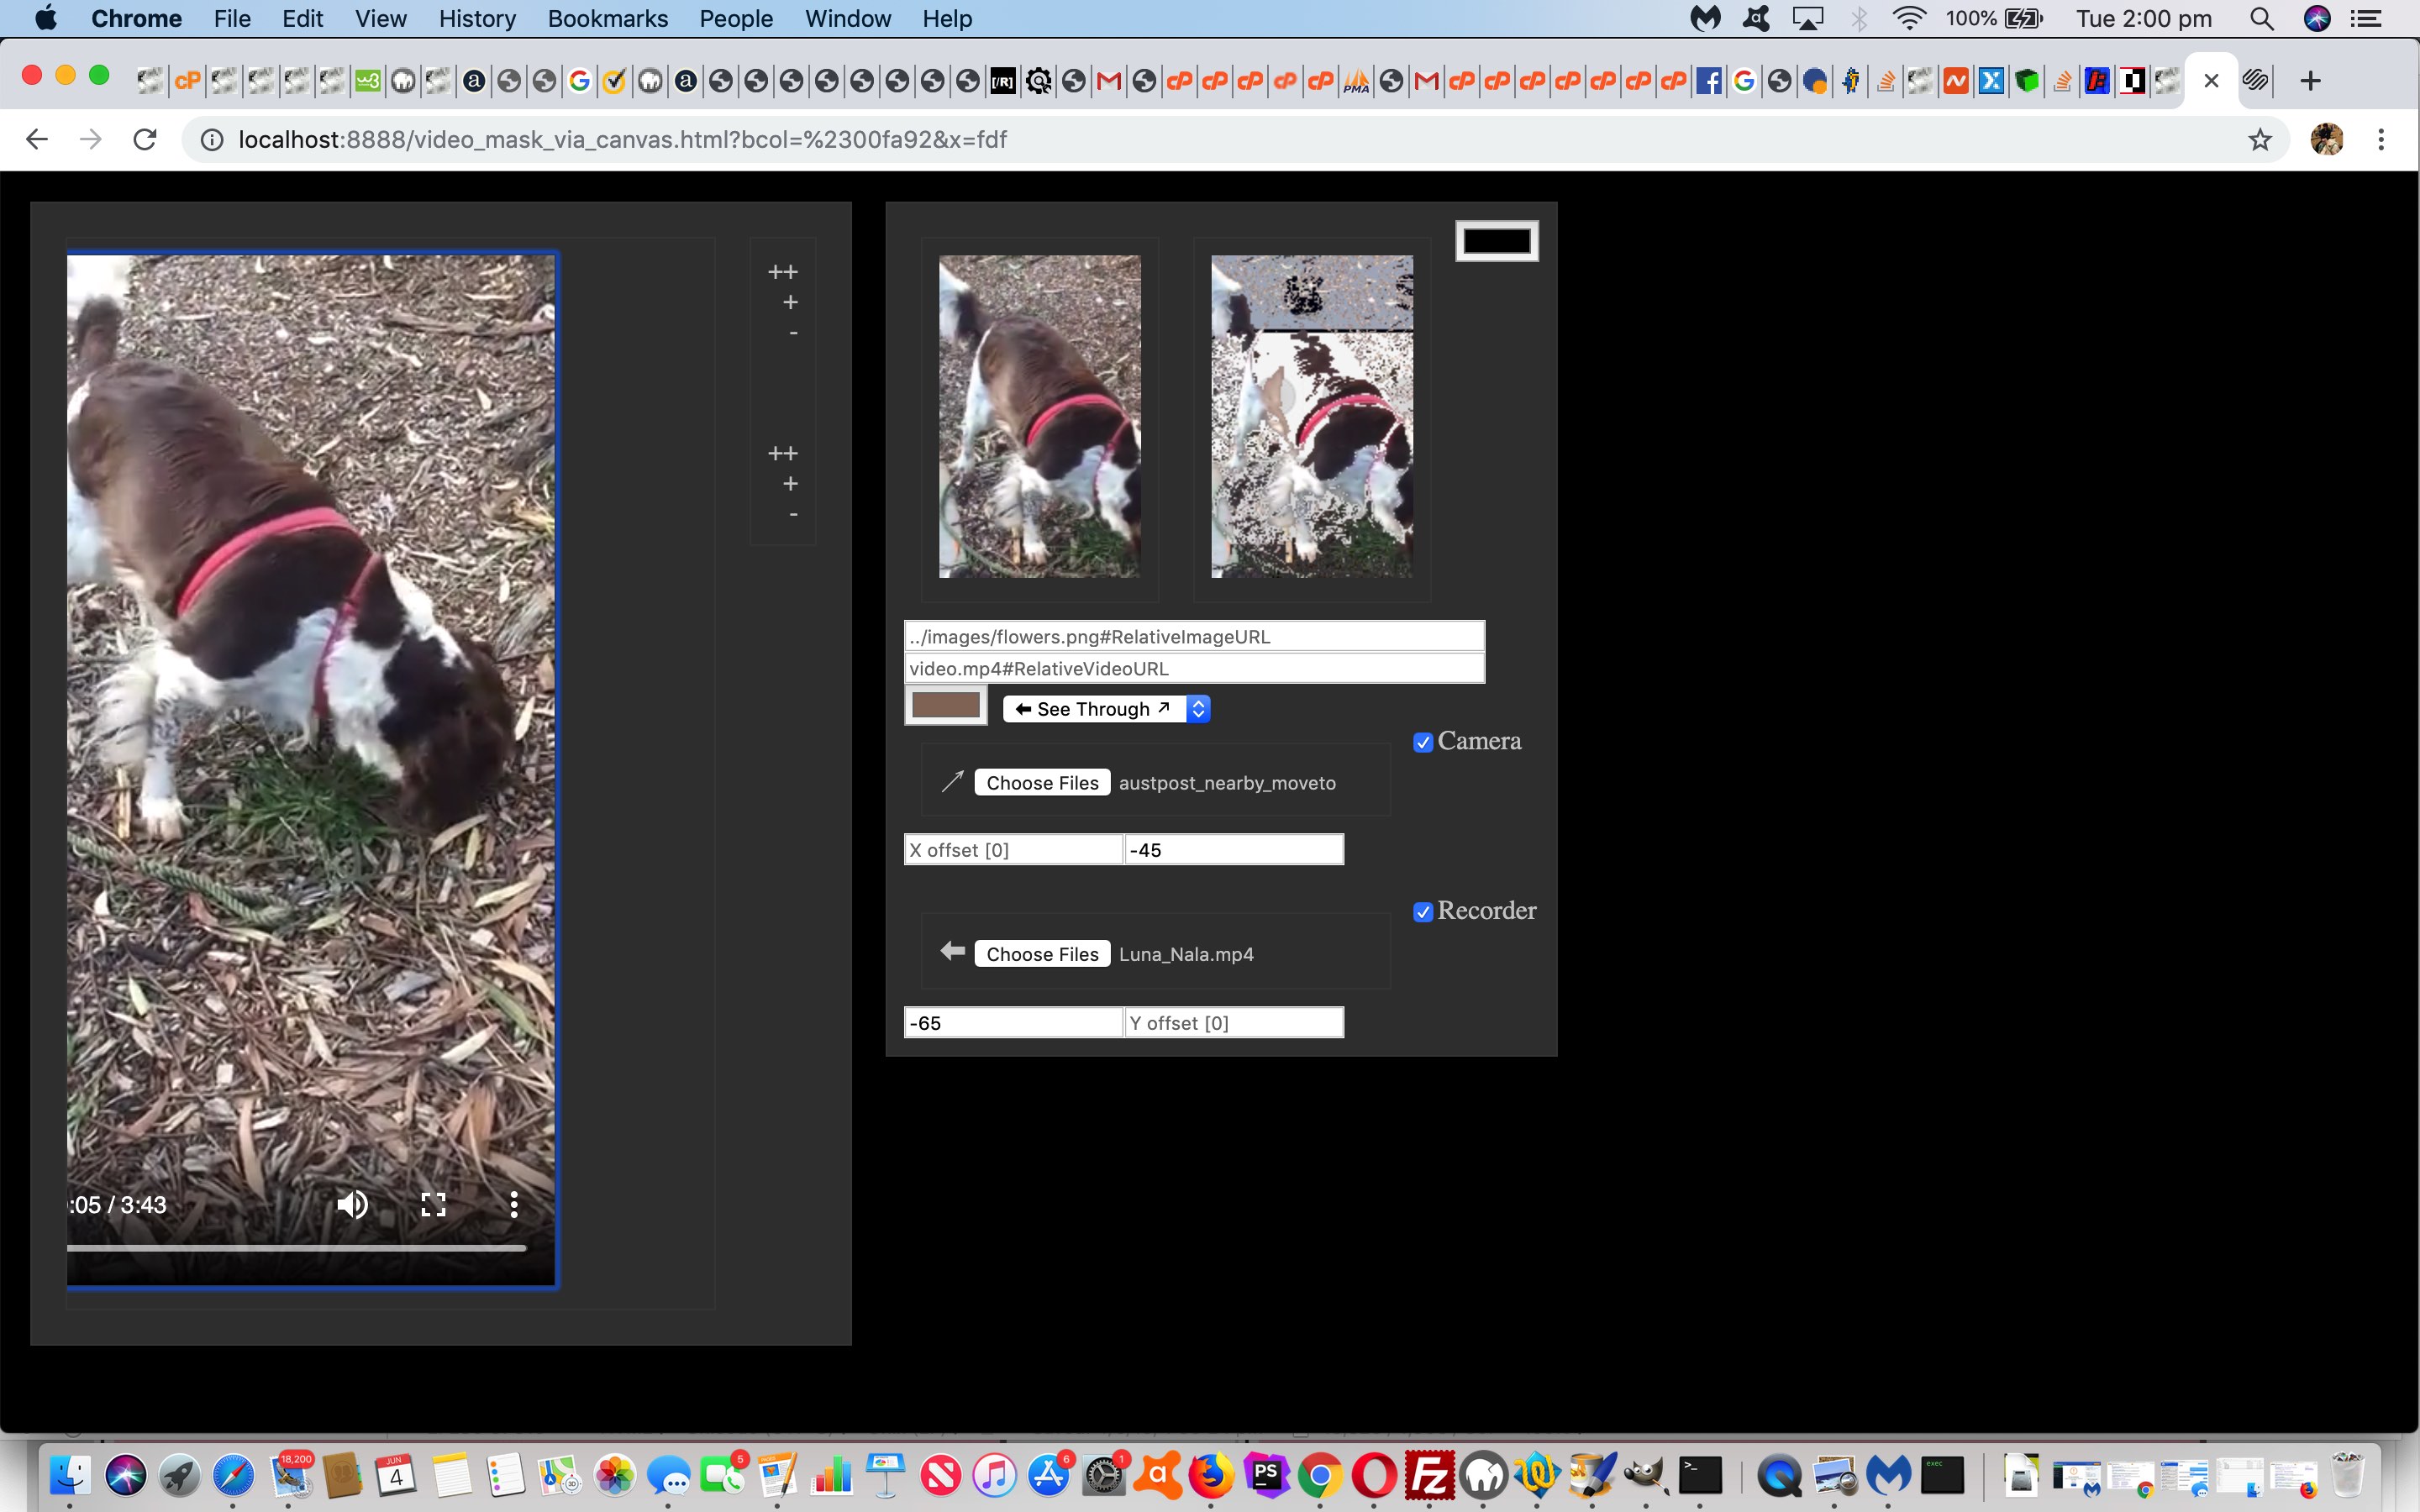
Where best to read about the File API (that came in with HTML5) that helps out so much here? We really like, and think, HTML5 Rocks! While you’re in the mood here, stay on the same domain, and read how we incorporate the “capture” attribute with the input type=file video and image browse buttons, so that for a lot of mobile devices and platforms you can capture you’re own media and “File API” it into place rather than looking about the device or computer hard disk, as you can read about at HTML5 Rock’s Capturing Audio & Video in HTML5.
What else have we included today into the mix? That’s right, we nest the video element into an HTML div in order to be able to perhaps scroll around. We give mechanisms to offset the video and background image masker. We give a resizing mechanism to the video.
If these features interest you, take a look at the changed video_mask_via_canvas.html that has this live run link for you to try, and which supervises the unchanged external Javascript processor.js.
Previous relevant Video Pixel Manipulation via Canvas Tutorial is shown below.
The recent Video Mask via Canvas Primer Tutorial got us started on a dynamic video manipulation tool that we see as …
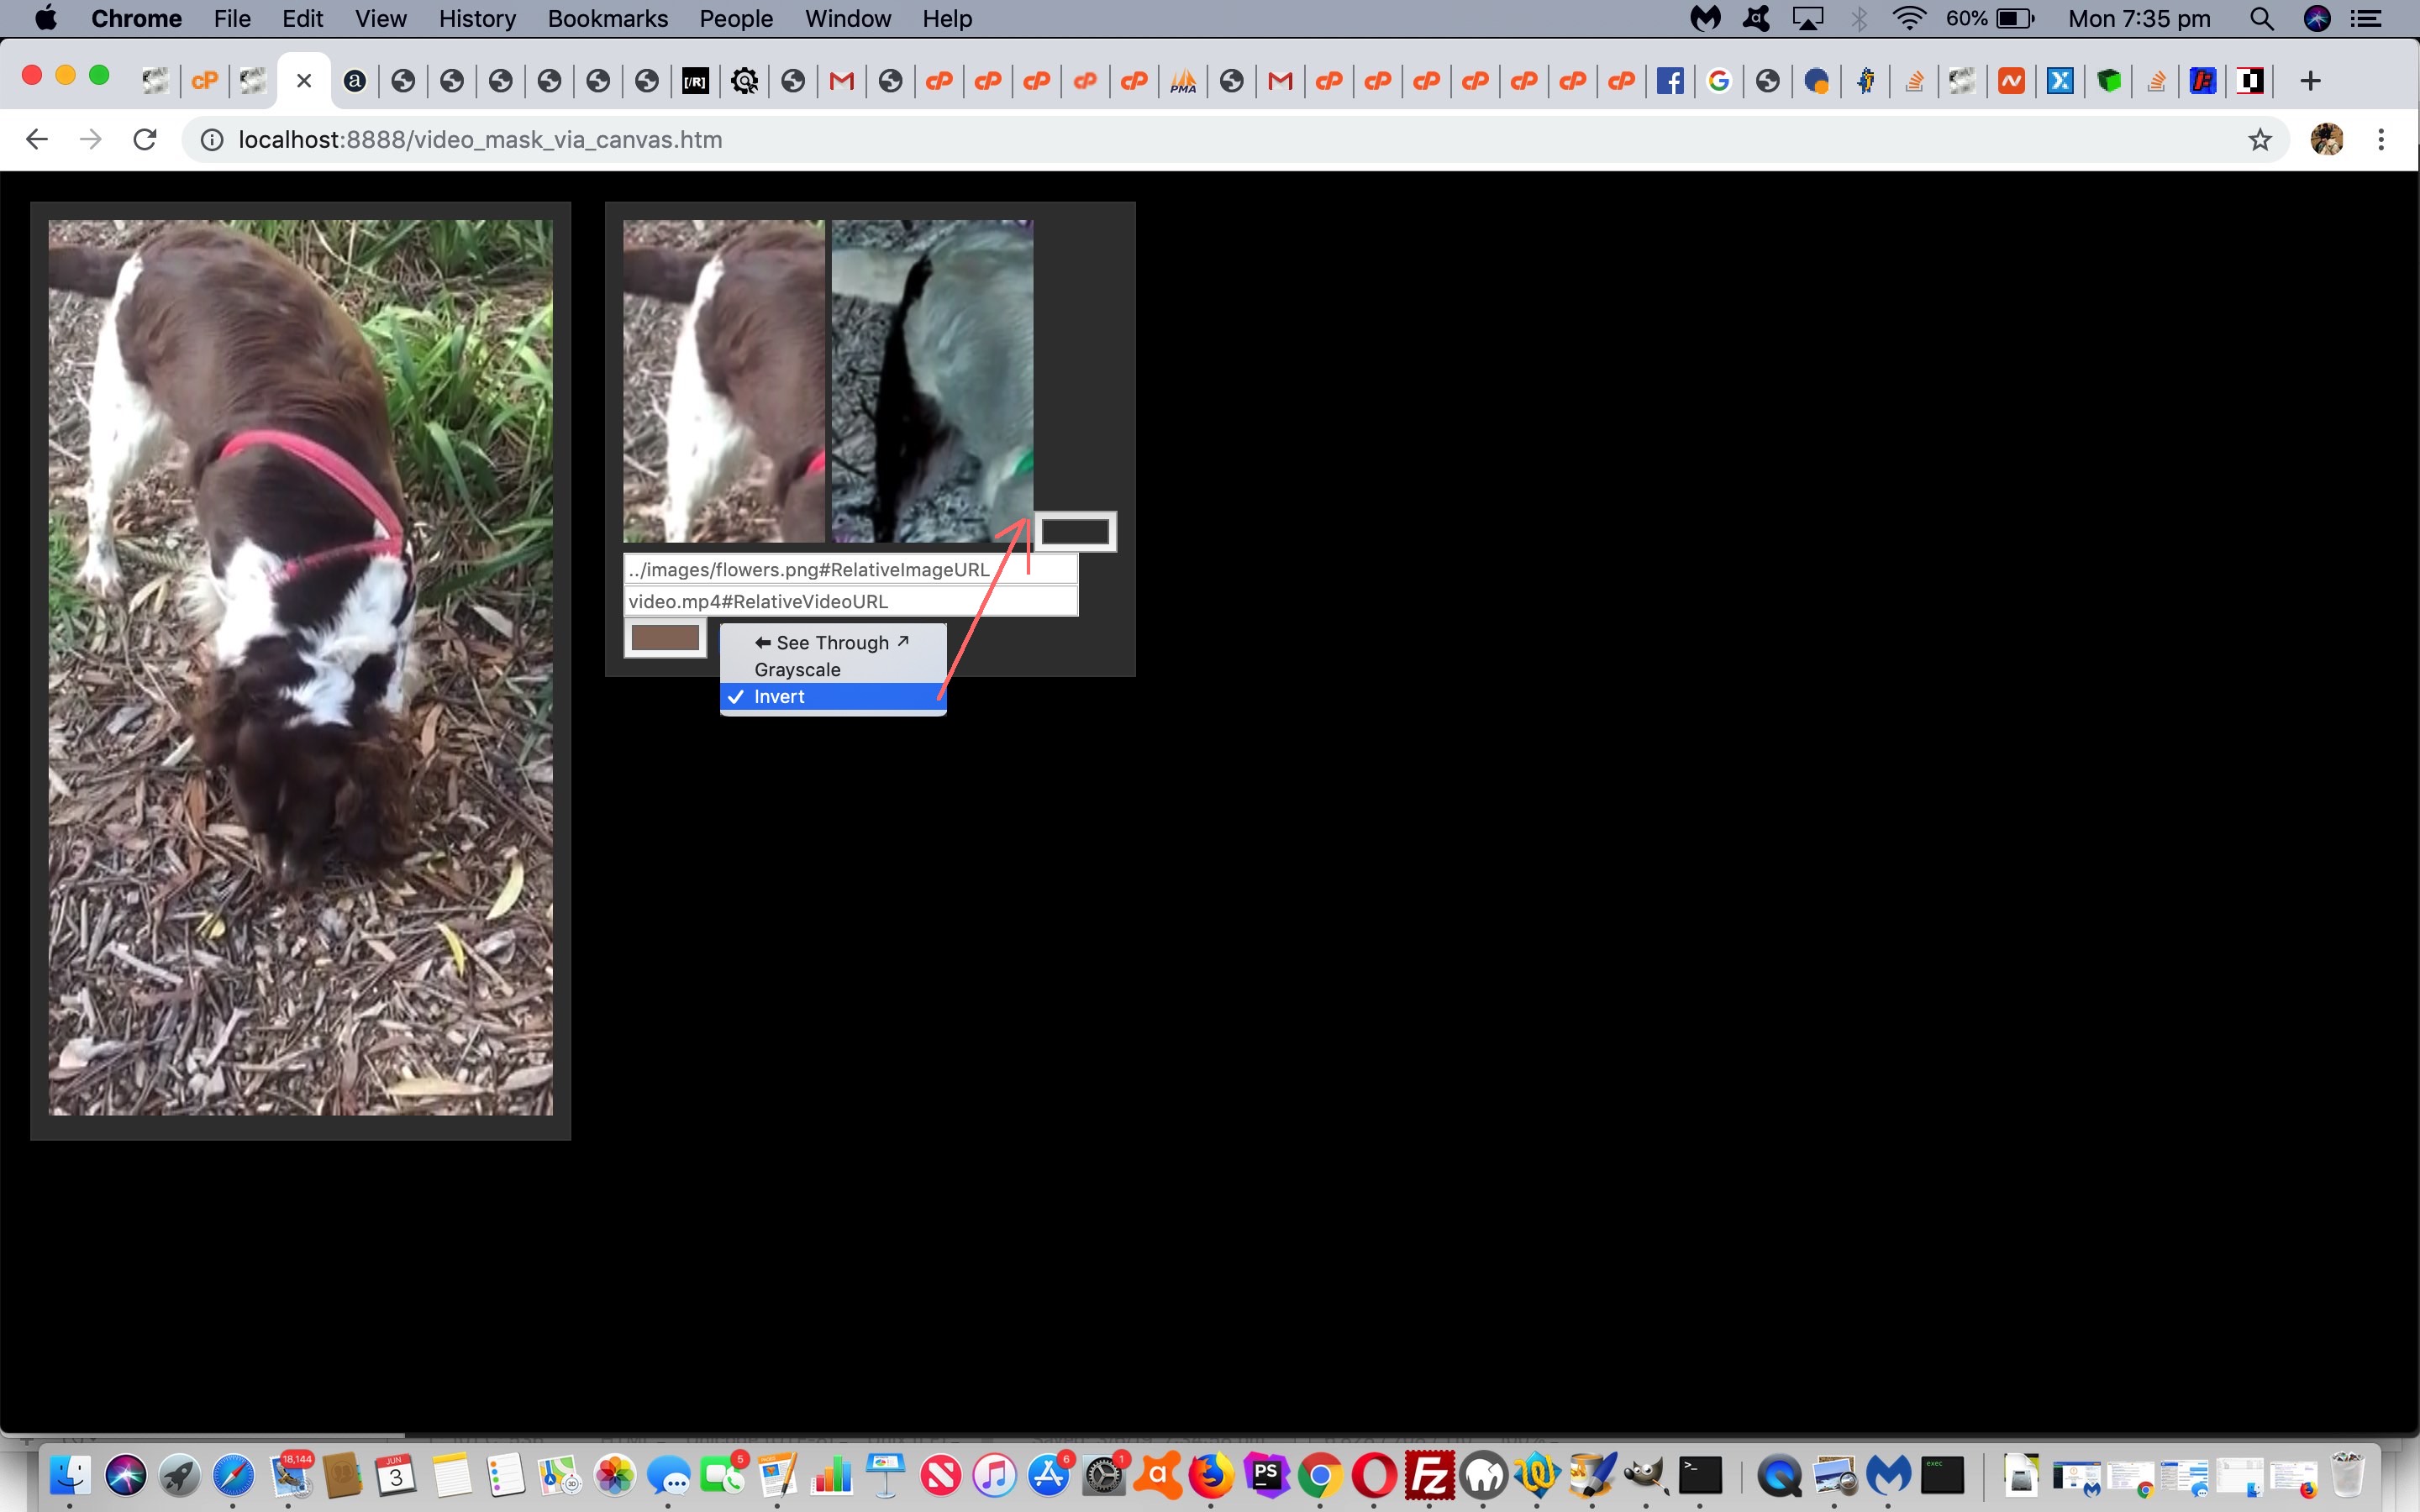
- “see through” or masking functionality … and onto that today, we’d like to add two more pixel manipulation ideas, those being …
- grayscale … and …
- colour inversion
… so that aforesaid mentioned Javascript function becomes …
    computeFrame: function() {

      var imr=146;

      var img=117;

      var imb=101;

      var mode=0; // see through

      var bright=0;

      if (document.getElementById('mr')) {

      if (document.getElementById('mr').value != '') {

      imr=eval('' + document.getElementById('mr').value);

      }

      }

      if (document.getElementById('mg')) {

      if (document.getElementById('mg').value != '') {

      img=eval('' + document.getElementById('mg').value);

      }

      }

      if (document.getElementById('mb')) {

      if (document.getElementById('mb').value != '') {

      imb=eval('' + document.getElementById('mb').value);

      }

      }

      this.ctx1.drawImage(this.video, 0, 0, this.width, this.height);

      let frame = this.ctx1.getImageData(0, 0, this.width, this.height);

          let l = frame.data.length / 4;


      if (document.getElementById('mode')) {

          mode=eval('' + document.getElementById('mode').value);

          if (mode == 1) {  // going grey

      for (let i = 0; i < l; i++) {

        bright = 0.34 * frame.data[i * 4 + 0] + 0.5 * frame.data[i * 4 + 1] + 0.16 * frame.data[i * 4 + 2];

        frame.data[i * 4 + 0]=bright;

        frame.data[i * 4 + 1]=bright;

        frame.data[i * 4 + 2]=bright;

      }

          } else if (mode == 2) { // invert colours

      for (let i = 0; i < l; i++) {

        frame.data[i * 4 + 0]=255 - frame.data[i * 4 + 0];

        frame.data[i * 4 + 1]=255 - frame.data[i * 4 + 1];

        frame.data[i * 4 + 2]=255 - frame.data[i * 4 + 2];

      }

          }

      }


      if (mode == 0) {

      for (let i = 0; i < l; i++) {

        let r = frame.data[i * 4 + 0];

        let g = frame.data[i * 4 + 1];

        let b = frame.data[i * 4 + 2];

        if ((Math.abs(r - imr) <= 43 && Math.abs(g - img) <= 43 && Math.abs(b - imb) <= 43) || (1 == 6 && r > 200)) { frame.data[i * 4 + 3] = 0; }

      }

      }

      this.ctx2.putImageData(frame, 0, 0);

      return;

    }

  };
As well, we see the video itself as a parameterizable concept of the web application (as part of our continuing “genericization drive”) and offer logics to handle a user entered relative URL as far as that goes. Perhaps here, though, you can imagine where we’ll go with this on the next occasion.
The changed video_mask_via_canvas.html has this live run link for you to try, and which supervises the changed external Javascript processor.js).
Previous relevant Video Mask via Canvas Primer Tutorial is shown below.
Thanks to Manipulating Video using Canvas we have a …
- video … meets …
- canvas … may meet …
- image … or background colour … masking mechanism
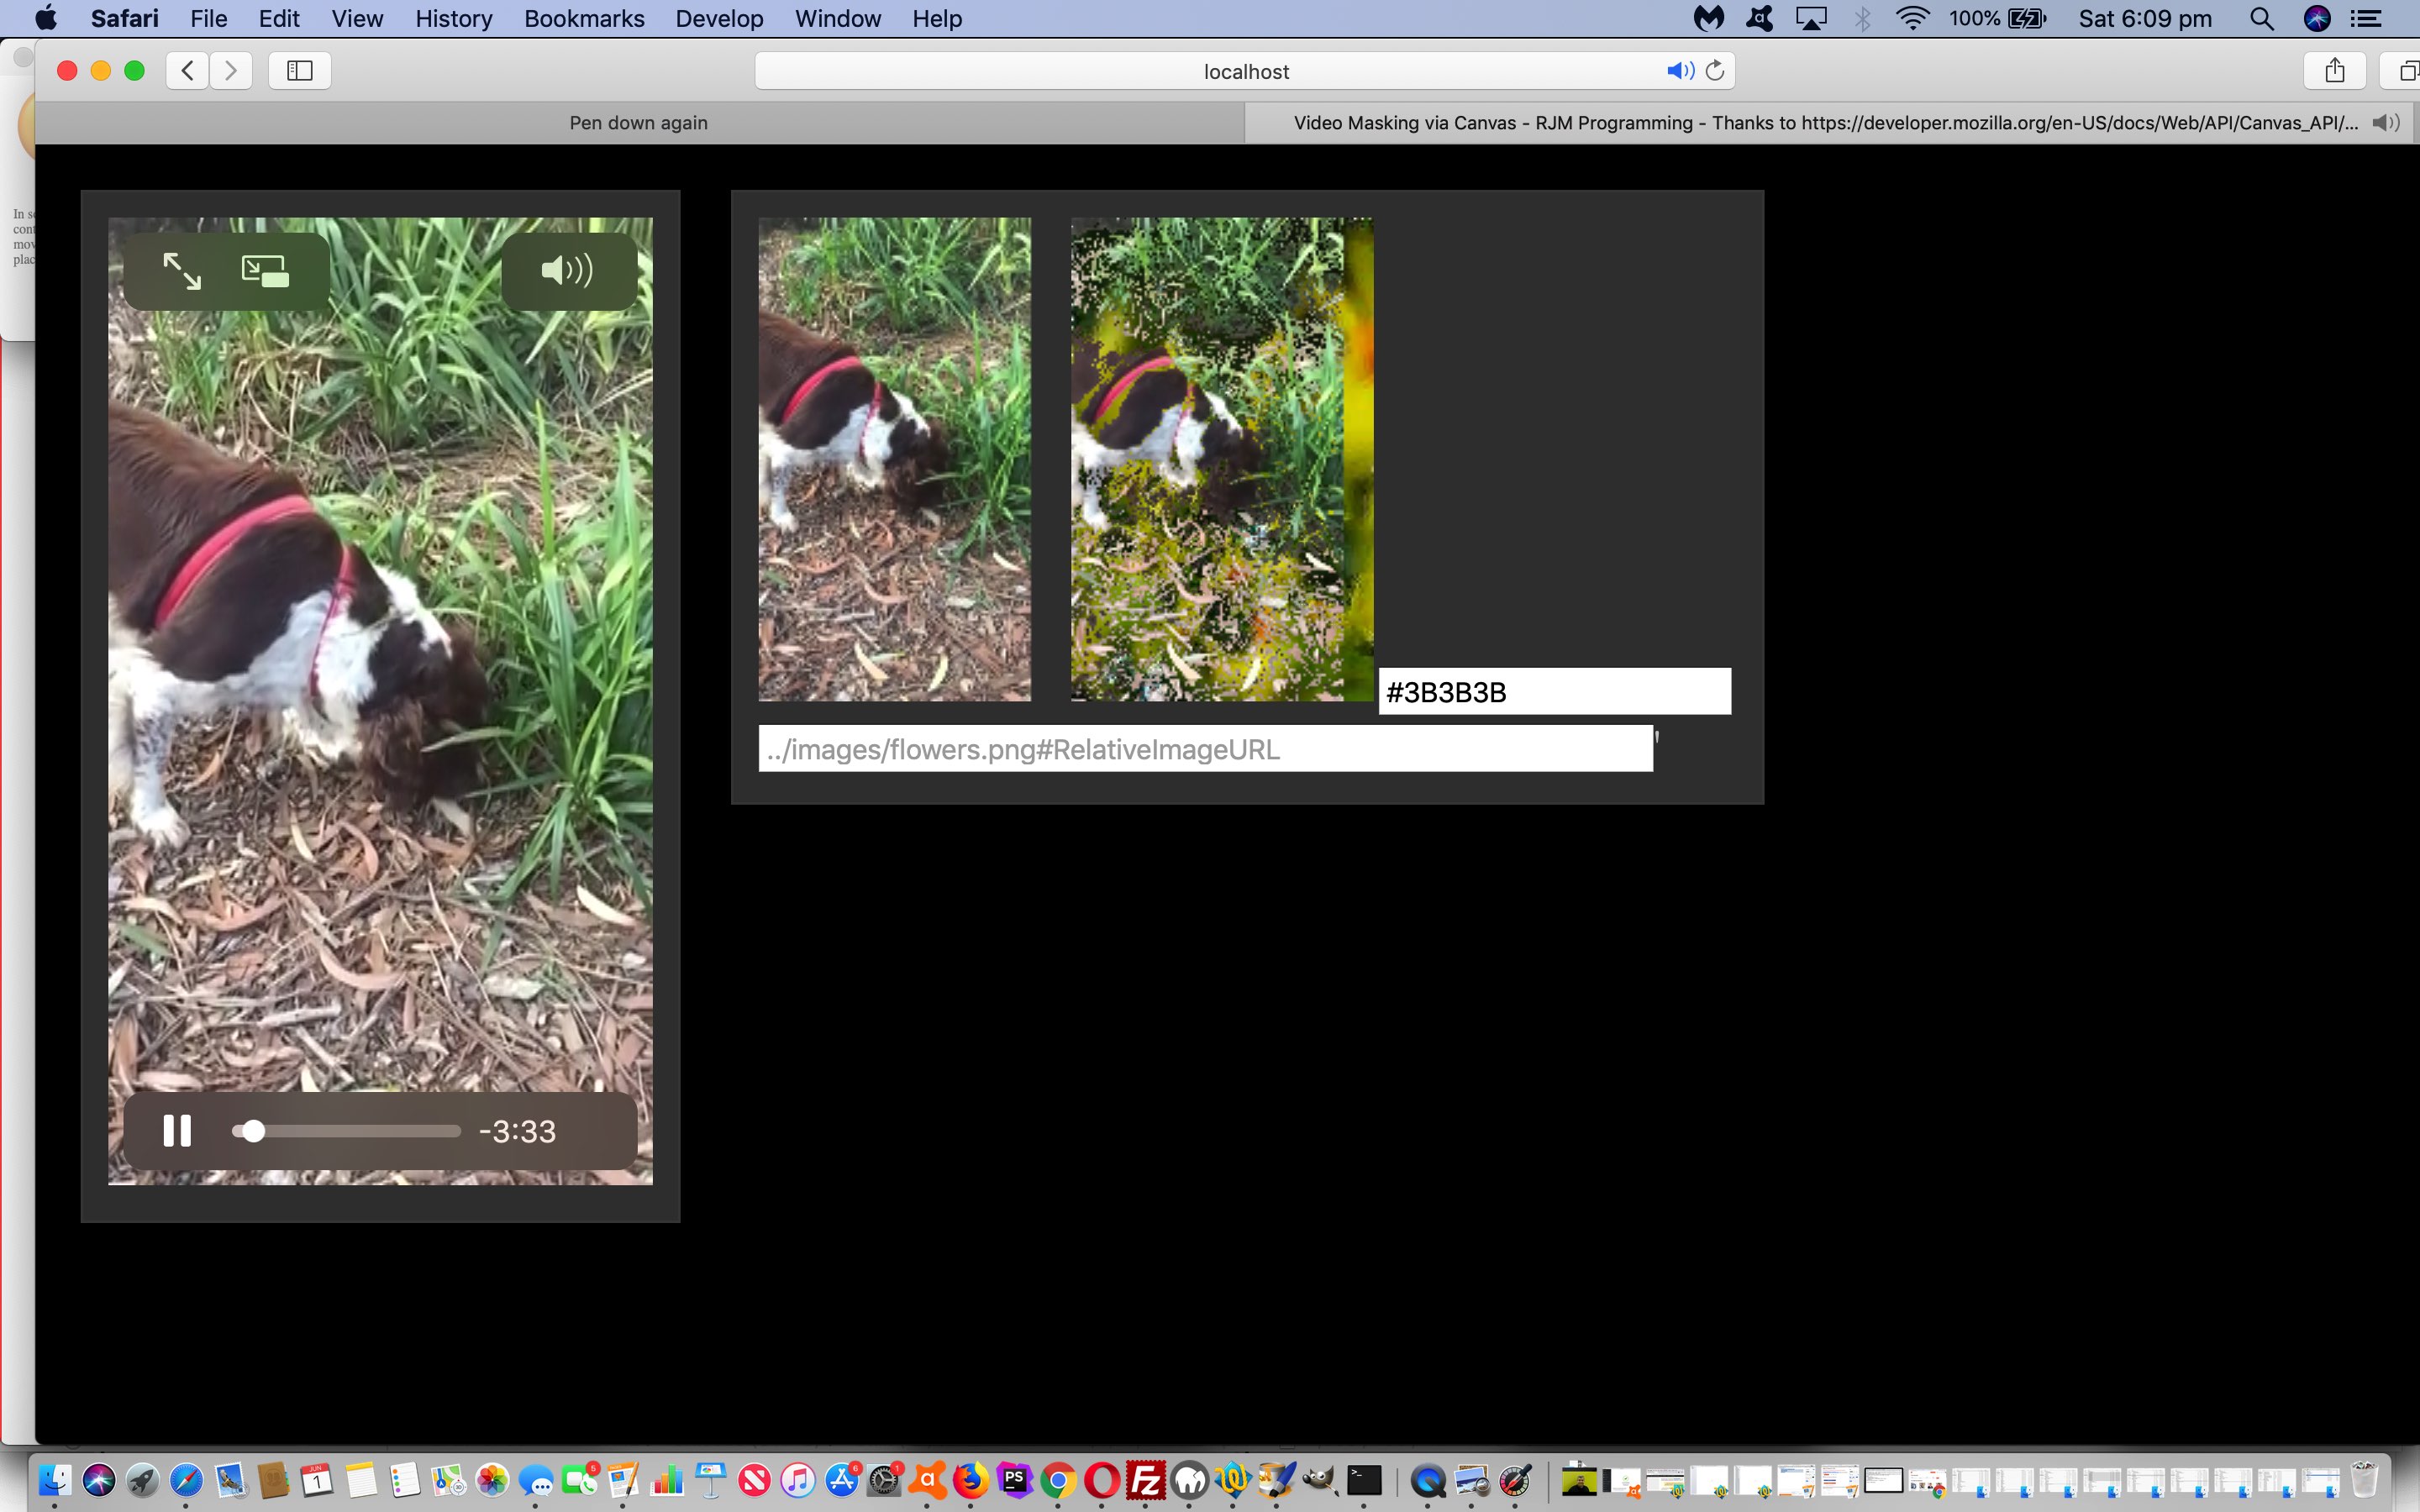
… today with a new web application (called video_mask_via_canvas.html) live run (supervising external Javascript processor.js) whereby a video is accompanied by a left canvas recreation of any one frame of the video as it plays and a right one subject to masking functionality as per …
    computeFrame: function() {

      this.ctx1.drawImage(this.video, 0, 0, this.width, this.height);

      let frame = this.ctx1.getImageData(0, 0, this.width, this.height);

          let l = frame.data.length / 4;


      for (let i = 0; i < l; i++) {
        let r = frame.data[i * 4 + 0];
        let g = frame.data[i * 4 + 1];
        let b = frame.data[i * 4 + 2];
        if ((Math.abs(r - 146) <= 43 && Math.abs(g - 117) <= 43 && Math.abs(b - 101) <= 43) || (1 == 6 && r > 200)) { frame.data[i * 4 + 3] = 0; }

      }

      this.ctx2.putImageData(frame, 0, 0);

      return;

    }

  };
… where we “masked” near to the rgb(146,117,101) dark brown (the rgb() details of which we gleaned via our MacBook Pro’s Digital Color Meter desktop application you can read more about at Digital Colour Meter on Mac Laptop Tutorial) that is near to our dog Luna’s liver coloured fur, as the star of the video. The effect of the masking is a splash of colour around Luna as pixels of that type above near to that liver “dark brown” become transparent and let through what is in the background, whether that be that background colour selected by our HTML input type=color colour picker or our HTML input type=text element optionally asking for a relative image URL to use as the masking helper.
We hope this is of interest to you.
If this was interesting you may be interested in this too.
If this was interesting you may be interested in this too.
If this was interesting you may be interested in this too.


