As we said previously with Android Disk to MacBook Pro Disk Tutorial as shown below, we love it here when we can tell you of something that works across the “big brands”, and what we mean by the two “big brands” today is Google (regarding their Android mobile phone operating system) and Microsoft (regarding their Windows operating system). Today we transfer files from the Samsung GT-S5310B Android mobile phone to our Windows XP … sorry about oldness here … desktop computer via …
- (ubiquitous) white lead … called a Micro USB Connector … the same one we used for Android Studio Real Physical Device Tutorial as shown way below … joined via the USB connection to …
- for Windows XP … remember, this is old … we needed CDC Serial Drivers we got from here … thanks
Okay, so supposing you are setup this way to do the job, roughly speaking, and you will want to consult our tutorial picture today as well as our initial “guiding hand”, thanks, we …
- Unlocked Android Phone
- Plugged Android Phone to Windows XP Desktop computer via Micro USB Connector to USB port of computer
-
Swipe down from the top of your device’s screen to see your notifications.
- Set up the transfer to be to do with Samsung’s “USB Connector mode” PTP (for Photos) rather than MTP (which it was on before) … because we are transferring Photos to the Windows XP Desktop computer
-
Tap the USB for… notification. …
- Windows “What do you want to do with …?” window opens up and we select Microsoft Scanner and Camera Wizard
- At which point the Samsung Android mobile phone becomes a new disk in Windows Explorer called, in our case, “GT-S5310B”
- Good ol’ “DCIM” … now what does that stand for? … is there … always a welcome sight … and the rest of the process involves Copying and Pasting in a normal Windows Explorer way to the Windows XP Desktop computer disk destination
- We, personally, but you may not (have this trouble), at this stage, even after a Right-Click Eject of “GT-S5310B”, found that the Internet connection was lost until a real Shutdown … not Restart, but Shutdown and Power Up … to have the Internet connection be restored
And so this thinking can be an “unofficial” Android Photo app “Clayton’s” Share functionality option for you and your Android … woof, woof, I’m mobile … and your Windows Desktop … hi, I’m deskbound.
Previous relevant Android Disk to MacBook Pro Disk Tutorial is shown below.
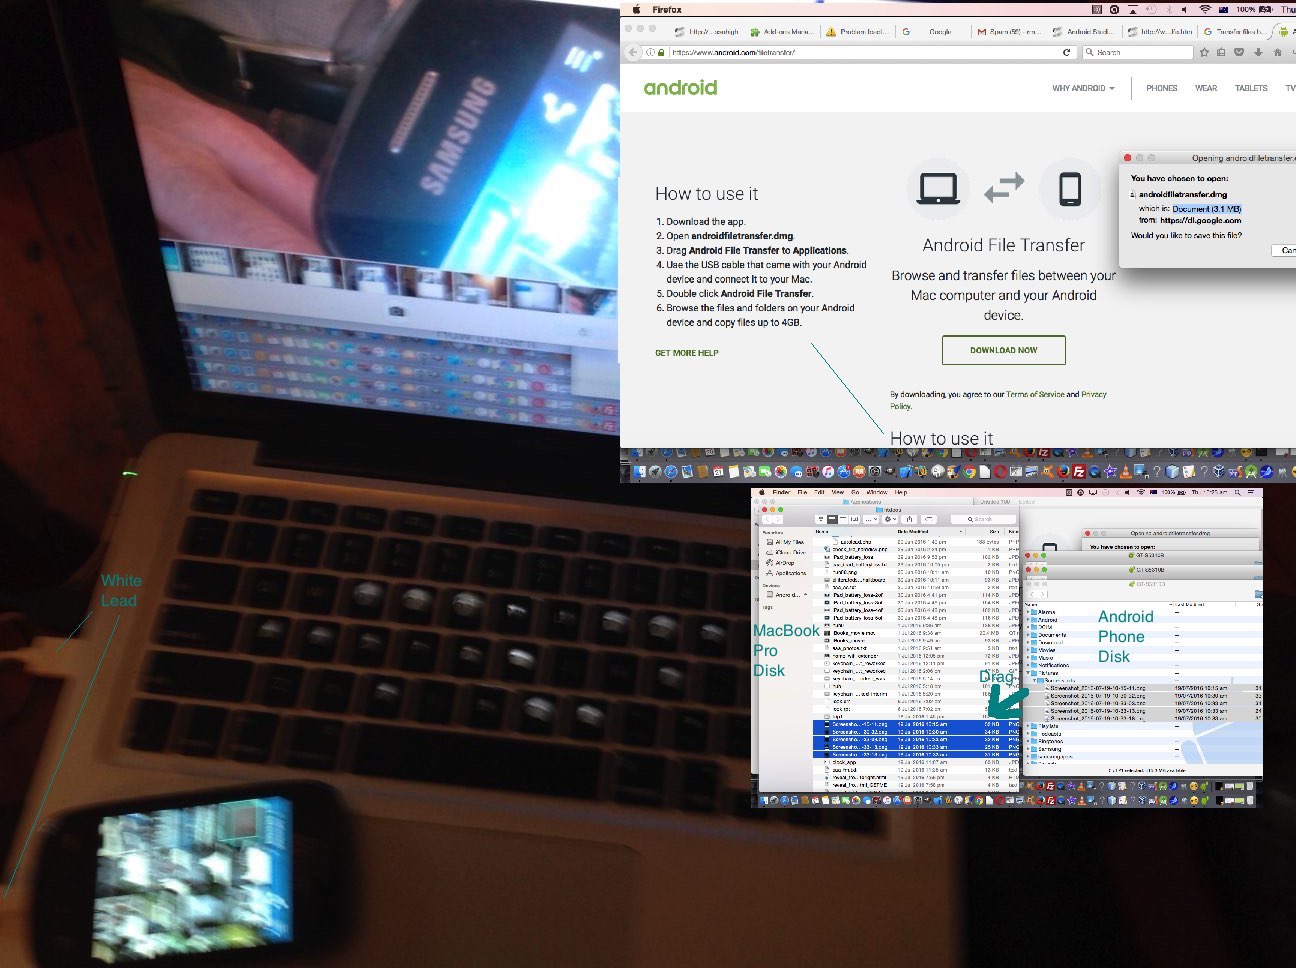
We love it here when we can tell you of something that works across the “big brands”, and what we mean by the two “big brands” today is Google (regarding their Android mobile phone operating system) and Apple (regarding their Mac OS X MacBook Pro laptop operating system). Today we transfer files from the Android mobile phone to our MacBook Pro laptop disk via …
- (ubiquitous) white lead … called a Micro USB Connector … the same one we used for Android Studio Real Physical Device Tutorial as shown below
- some great Mac OS X software we discovered at Android File Transfer
For Share ideas that involve your Android mobile phone and storing media on a local hard disk this could be a great alternative to other Share options for the MacBook Pro and some of the ideas we presented with Android Camera to Mac iPhoto Primer Tutorial.
Today’s tutorial picture shows you the setup for this functionality, and you’ll see the online advice for how you work the Mac OS X application for the Android File Transfer application.
Previous relevant Android Studio Real Physical Device Tutorial is shown below.
When creating Android apps with Android Studio IDE (or any other IDE, for that matter) it’s great to test the working of the app with various mobile phone and tablet emulators with AVD, and it’s even “greater” to extend that to testing on a real physical device.
Today, we’re going to work with …
- MacBook Pro testing that latest Android app using an Android Studio IDE project which we talked about with Android Studio on Mac OS X Primer Tutorial regarding “ESL Ideas”
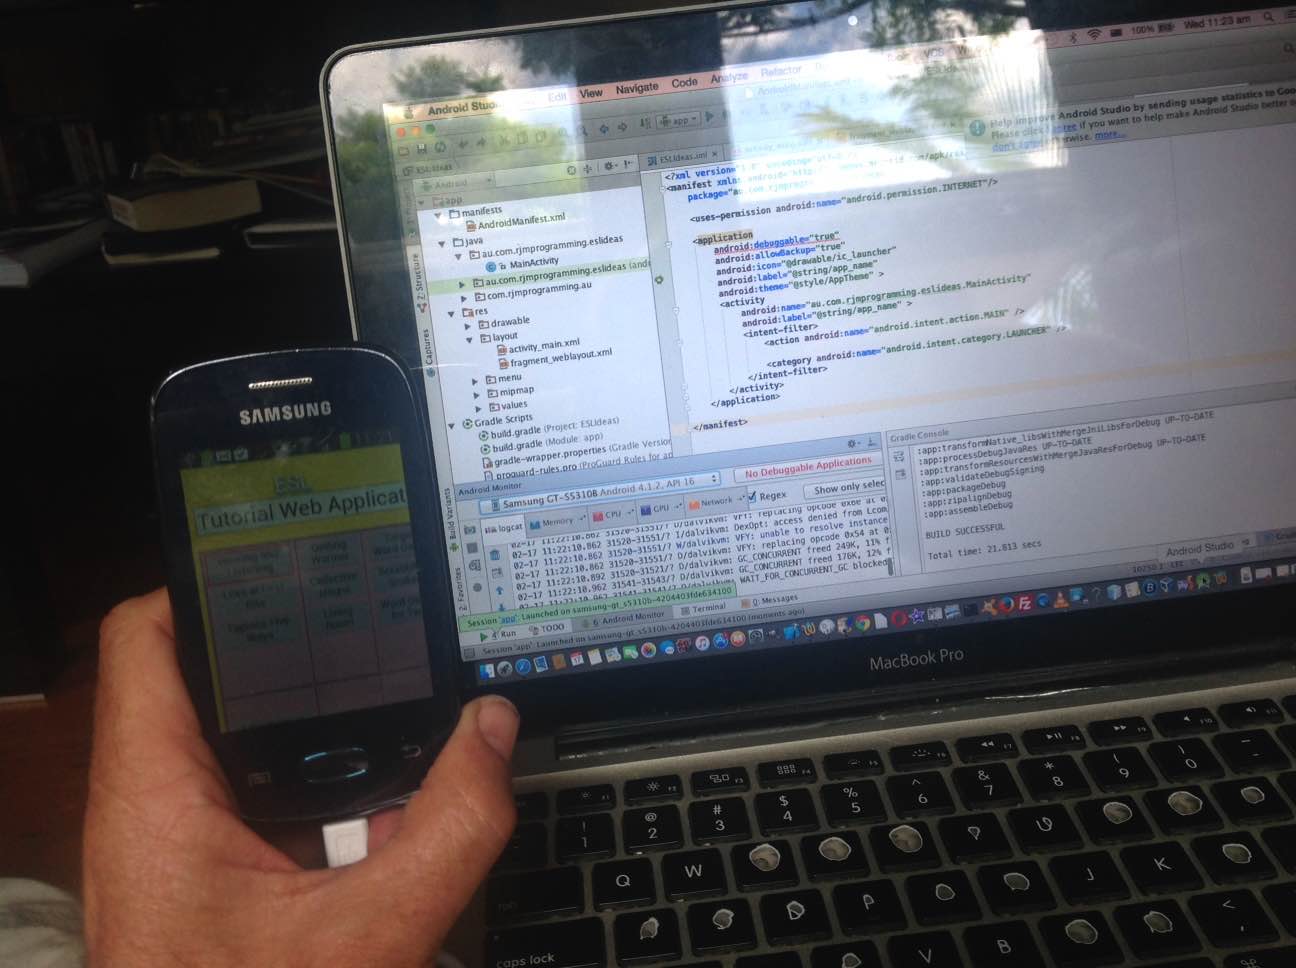
- another (ubiquitous) white lead … called a Micro USB Connector … but not Muc, pleeeeease … decided against the puce one because it just didn’t go with the cushions … but we digress
- Samsung GT-S5310B Android 4.1.2 mobile phone … and, today of all days the “4.1.2” is a bit significant … because we want to talk about ant builds … but we digress
The (ubiquitous) white lead goes from the MacBook Pro’s USB port to the “underbelly” of the Samsung GT-S5310B.
One thing to do at the “computer” Android Studio end of the lead is to adjust AndroidManifest.xml to show android:debuggable="true" now.
Now if you’re on Windows I’d have more to say about the “computer” end of the lead, and if that is you, and you’ve never tested on a real device, you’ll want to read this great Google Android Studio page.
Come to think of it, everybody who’s never tested on a real device should read Google Android Studio page. See the advice about Android 4.2 … note that … ie. if the Settings menu’s submenu Developer Options is all grayed out tap on Build number (via Settings->About device) seven times … and “twice on the pipe, if the answer is noooooooooo” … but we digress.
However, we have a mobile phone with Android 4.1.2 … and so … this search got me to this great advice … and the consequent turning on of the Settings->Developer Options “switch” to on meant … Bob’s your uncle, Fanny’s your aunt … Android Studio responded like a … like a … well … a very hot studio.
A “Run App” will default to hooking up to this connected physical device (the Samsung GT-S5310B) and run the resultant mobile app on that device.
Previous relevant Android Studio on Mac OS X Primer Tutorial is shown below.
There are a lot of choices of IDE for creating mobile applications, and if you are a developer wanting to develop mobile apps for both Android and iOS platforms, you may be looking to try to set up an environment where all this can be achieved on the one piece of computer equipment.
We prefer to think in terms of two IDEs handling the two mobile app types of iOS, with Swift and/or Objective-C as the source language, and Android, with Java as the source language. We don’t mind there being two separate IDEs involved, but we find it amazing enough that they can both sit on the one MacBook Pro laptop without resorting to any Operating System disk partitions. With the Android app, using Mac OS X (MacBook Pro) we asked Google if it could be done, and came up with the marvellous Android Studio IDE as a possibility … yay!
- iOS mobile apps get created via the Xcode IDE using Swift and/or Objective-C on a Mac OS X (MacBook Pro)
- Android apps get created via the Android Studio IDE using Java on a Mac OS X (MacBook Pro)
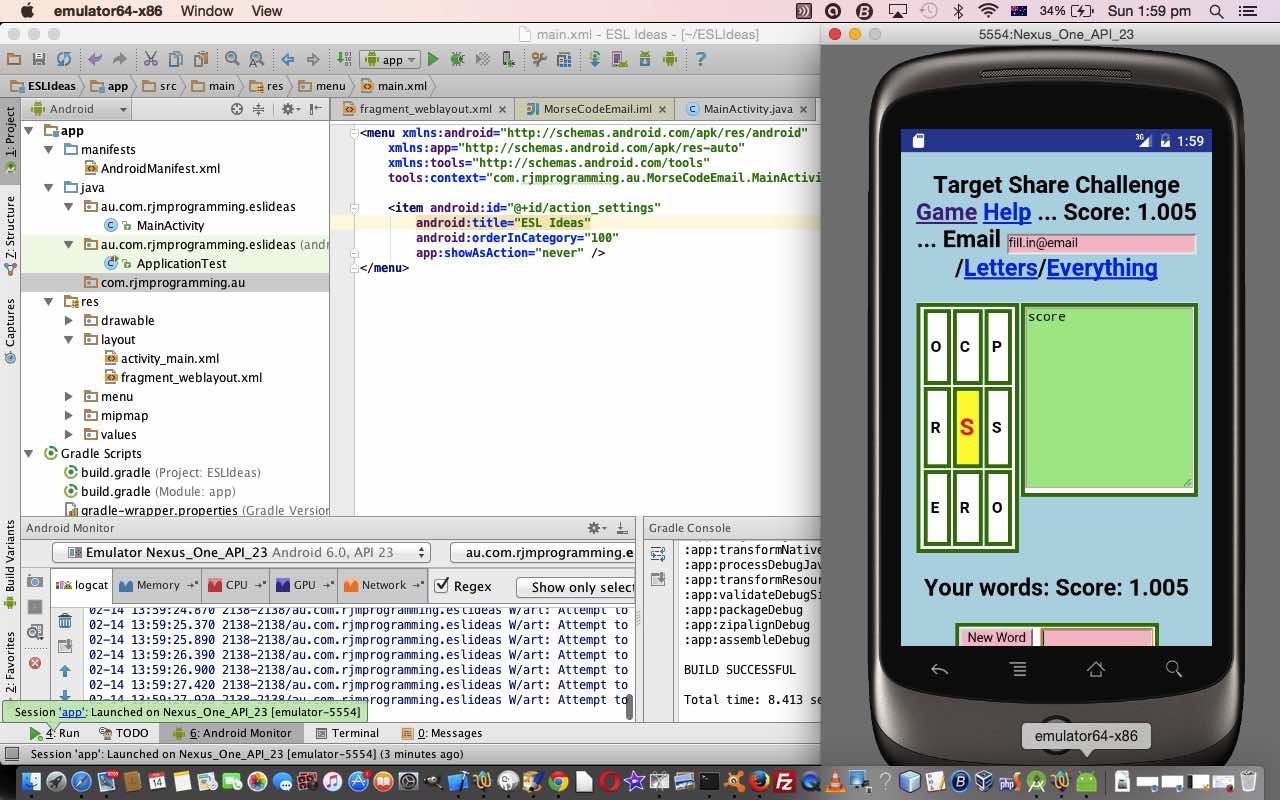
Today’s tutorial, as with the WordPress 4.1.1’s Android Studio on Mac OS X Primer Tutorial, hones in on that second idea from the install of Android Studio (to a MacBook Pro) through to the “middle game” emulation of an Android app via Android Studio and AVD onto an HTC Nexus One.
Please don’t think this is the only approach … and please research PhoneGap (PhoneGap iOS Mobile Xcode Primer Tutorial) and jQuery Mobile (jQuery Mobile Primer Tutorial) and Embarcadero (Delphi Pascal++ Embarcadero XE6 Primer Tutorial) also, perhaps for an approach that uses other ways of looking at the issue.
In the context of all this, we see the Android app “end game” as involving the creation of an .apk file that can be uploaded to Google Play for public access.
Similarly to our associated Android Studio Google Play Ready Primer Tutorial as shown below, today, the concepts in the Android Studio project regarding the “middle game”, comparing it to the Eclipse IDE (Eclipse Android App Google Play Ready Primer Tutorial), for which huge help came from this great link … thanks … are, again, for our “ESL Ideas” Android mobile app (which “channels” our project, recently, started with HTML/Javascript Themed Supervision Primer Tutorial) of today …
- Fragments – components of the Android UI … and setting of startup fragment of interest … fragment_weblayout.xml … fragments go some way to addressing that common issue for mobile developers that all the UI elements of a mobile application fit and would ideally be displayed with a tablet but it would be best to only conditionally display some when it comes to using a smaller format mobile device such as an Android mobile phone device
- Main Java in MainActivity.java … similar to Eclipse
- Layout in activity_main.xml … similar to Eclipse
- WebView … similar to Eclipse … allows an Internet web component in your Android mobile app
- Use of
myWebView.getSettings().setJavaScriptEnabled(true);to allow Javascript functionality for the WebView - AndroidManifest.xml … INTERNET permission … similar to Eclipse … to Build->”Generate Signed APK…” for Google Play publishing you need the extra …
android:debuggable="false"clause - Tools->Android->AVD Manager … emulator organization and emulator deployment help … remains the case that it is best to start the emulator all the way to the home page at the simulated device (right swipe unlocking any locks you get) … then run and attach your mobile app to this pre-established connection
You will be pleased to know that after the Android Studio install today, all is (still) well with Xcode on this Mac OS X (MacBook Pro) setup … we mostly like a happy ending … aaaaaaahhhhhhh!
Previous relevant Android Studio Google Play Ready Primer Tutorial is shown below.
Yesterday, with Android Studio Tic Tac Toe Game Tutorial as shown below, we reacquainted ourselves with Android Studio as an alternative IDE to Eclipse (and there are others too) to use the Android SDK and Java to develop mobile apps for an Android mobile device and in our aforesaid mentioned “start game”, “middle game” and “end game” view of mobile development we focussed on the “middle game”.
Today, we extend the “middle game” discussion of yesterday, with tutorial functionality touching on the “end game” with respect to Android Studio creating an Android mobile app on Google Play.
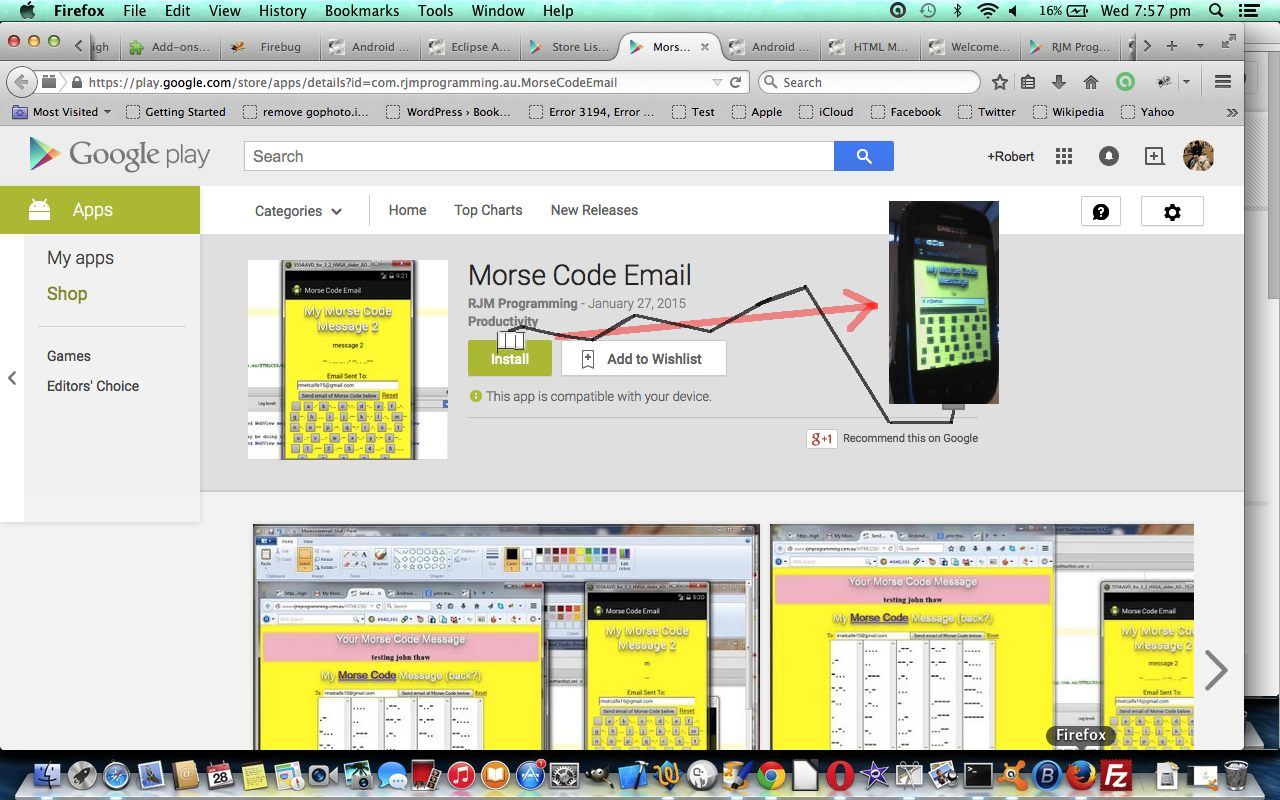
Wonder if you were around when we created the Morse Code emailer … HTML Morse Code Primer Tutorial? Well, today, we turn that into an Android mobile application using Android Studio, and publish it to Google Play for general “consumption” by the public.
So what are some of the concepts in the Android Studio project regarding the “middle game”, for which huge help came from this great link … thanks …
- Fragments – components of the Android UI … and setting of startup fragment of interest … fragments go some way to addressing that common issue for mobile developers that all the UI elements of a mobile application fit and would ideally be displayed with a tablet but it would be best to only conditionally display some when it comes to using a smaller format mobile device such as an Android mobile phone device
- Layout in activity_main.xml … similar to Eclipse
- WebView … similar to Eclipse … allows an Internet web component in your Android mobile app
- Use of
myWebView.getSettings().setJavaScriptEnabled(true);to allow Javascript functionality for the WebView - AndroidManifest.xml … INTERNET permission … similar to Eclipse … to Build->”Generate Signed APK…” for Google Play publishing you need the extra …
android:debuggable="false"clause - Tools->Android->AVD Manager … emulator organization and emulator deployment help … remains the case that it is best to start the emulator all the way to the home page at the simulated device (right swipe unlocking any locks you get) … then run and attach your mobile app to this pre-established connection
Source code wise, of interest to the “middle game”, is …
Before leaving the “middle game” thoughts, sometimes you need to adjust the code of a WebView’s innards (especially) if you want to do away with any “Back” or “Forward” button mobile application functionality, because any escape from the WebView’s control is that mobile application being effectively lost for that session. As such, the Morse Code programming HTML source code became morsecode.html (… and how we got there morsecode.html …) and the method of creating the email was made to use a PHP piece of supervised code as per morsecode.php (with a live run non-mobile web page link) to cater for Android mobile WebView compatibility … and thanks to this useful link.
And what of the “end game”? … Would direct you to the imagery of today’s tutorial … a lot of it covers the same ground as the “Eclipse” corresponding scenario tutorial called Eclipse Android App Google Play Ready Primer Tutorial.
Just to challenge you with a “middle, end, start order” … have a look at some information regarding Android Studio mobile development and the “start game” … Android Studio Primer Tutorial.
Hope this is food for thought for your Android mobile development plans! See the results of the work today at Google Play.
Previous relevant Android Studio Tic Tac Toe Game Tutorial is shown below.
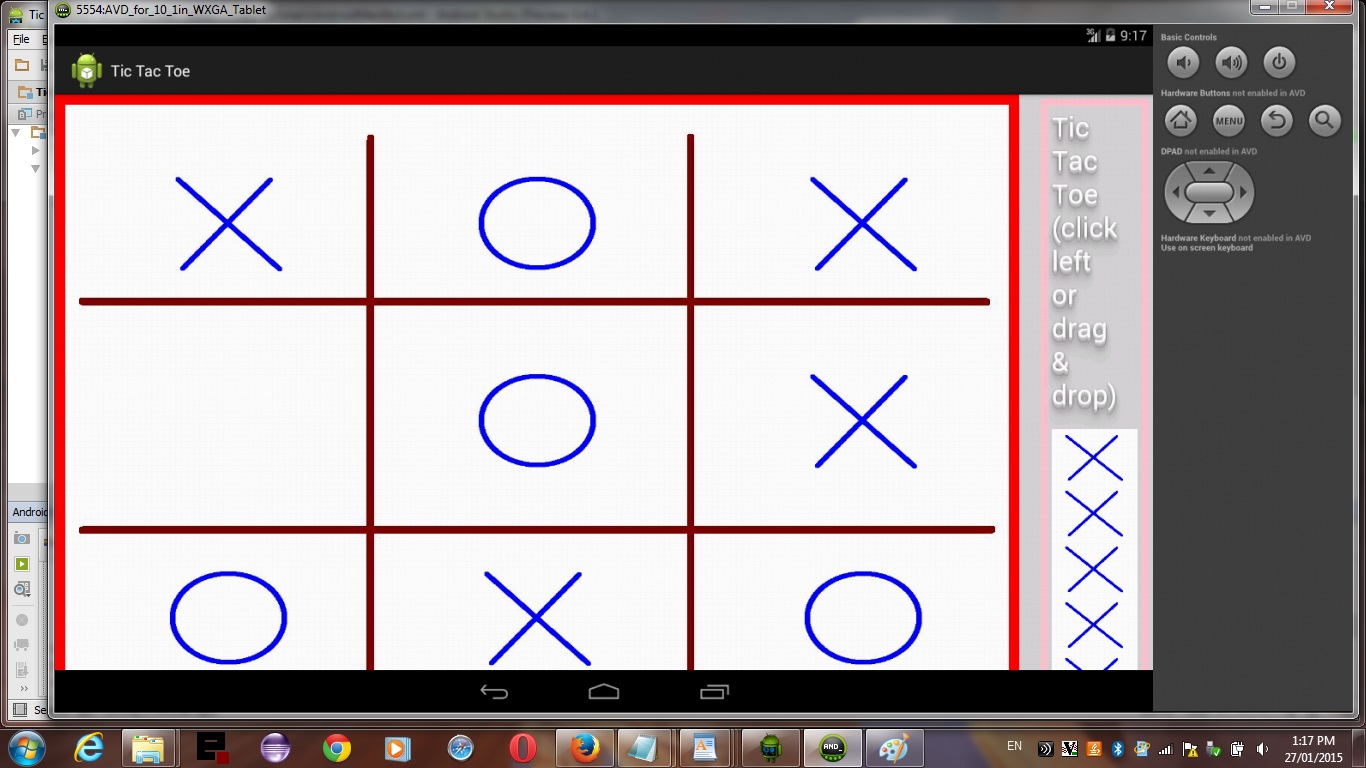
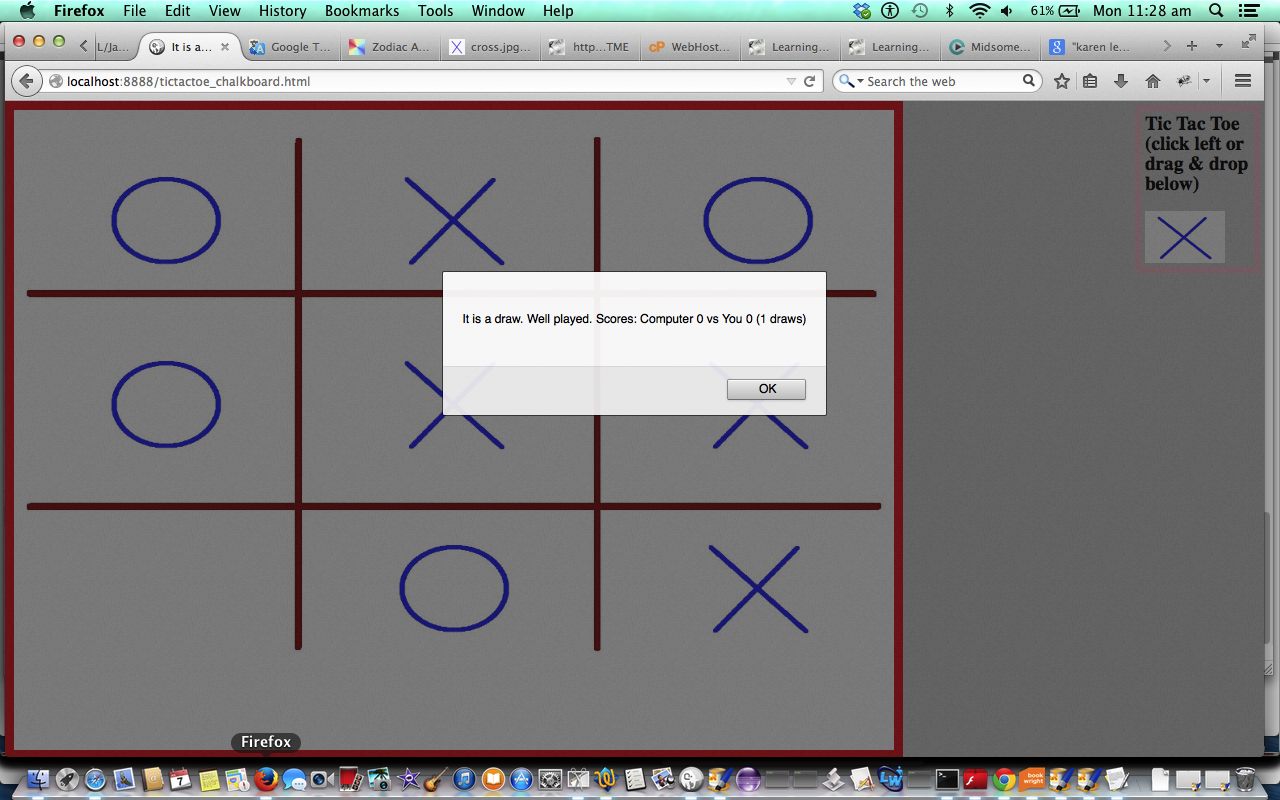
Wonder if you were around when we created Tic Tac Toe (or more like Noughts and Crosses, in Australia) using the HTML5 Canvas element and drag and drop methods (if you liked, or just plain box clicking, otherwise, which will be okay for mobile usage) … HTML/Javascript Canvas Tic Tac Toe Game Drag and Drop Tutorial as shown below? Well, today, we turn that into an Android mobile application using Android Studio.
Android Studio is an alternative IDE to Eclipse (and there are others too) to use the Android SDK and Java to develop mobile apps for an Android mobile device and in our aforesaid mentioned “start game”, “middle game” and “end game” view of mobile development we are just showing you the “middle game” today, but if you were to follow through … fore!!!!!!!! … and not shank … and not hook (ie. narrrrrrr … chortle, chortle) … then we may end up at Google Play with a mobile app … by the way, we talk about the “end game” at Eclipse Android App Google Play Ready Primer Tutorial (Android Studio has all this functionality and capability too).
So what are some of the concepts in the Android Studio project, for which huge help came from this great link … thanks …
- Fragments – components of the Android UI … and setting of startup fragment of interest … fragments go some way to addressing that common issue for mobile developers that all the UI elements of a mobile application fit and would ideally be displayed with a tablet but it would be best to only conditionally display some when it comes to using a smaller format mobile device such as an Android mobile phone device
- Layout in activity_main.xml … similar to Eclipse
- WebView … similar to Eclipse … allows an Internet web component in your Android mobile app
- Use of
myWebView.getSettings().setJavaScriptEnabled(true);to allow Javascript functionality for the WebView - AndroidManifest.xml … INTERNET permission … similar to Eclipse
- Tools->Android->AVD Manager … emulator organization and emulator deployment help … remains the case that it is best to start the emulator all the way to the home page at the simulated device (right swipe unlocking any locks you get) … then run and attach your mobile app to this pre-established connection
Source code wise, of interest, is …
So that’s a bit about the mobile world, and so concerning the innards of that WebView …
The Canvas HTML element tag can be used as the container to draw graphics on the fly usually via the use of Javascript functions for rendering and event management.
In today’s tutorial we show some image Drag and Drop functionality that you can use with the Canvas HTML5 element where we create a Tic Tac Toe game webpage. We thank w3schools for the great advice at this link.
The Drag and Drop does not work well on tablets, but for own Tic Tac Toe game today we allow either a drag and drop approach, or a touch/click approach.
You may want to read more at HTML Canvas Reference as a generic reference, or here, at the tutorial javascript – How do I add a simple onClick event handler to a canvas element? – Stack Overflow.
As you can imagine, this HTML canvas element, new to HTML5, can be very useful for some practical client-side web functionality.
Link to some downloadable HTML programming code … rename to tictactoe_chalkboard.html
You’ll notice heavy use of the Javascript Math.random() function.
We hope you enjoy this tutorial as a live run.
Should you find Tac Tac Toe (or even Noughts and Crosses) addictive you should see this … amazing!
Yes … you’ve reached the end … go first in each game and see if you can beat the computer!
Previous relevant HTML/Javascript Canvas Tic Tac Toe Game Drag and Drop Tutorial is shown below.
The Canvas HTML element tag can be used as the container to draw graphics on the fly usually via the use of Javascript functions for rendering and event management.
In today’s tutorial we show some image Drag and Drop functionality that you can use with the Canvas HTML5 element where we create a Tic Tac Toe game webpage. We thank w3schools for the great advice at this link.
The Drag and Drop does not work well on tablets, but for own Tic Tac Toe game today we allow either a drag and drop approach, or a touch/click approach.
You may want to read more at HTML Canvas Reference as a generic reference, or here, at the tutorial javascript – How do I add a simple onClick event handler to a canvas element? – Stack Overflow.
As you can imagine, this HTML canvas element, new to HTML5, can be very useful for some practical client-side web functionality.
Link to some downloadable HTML programming code … rename to tictactoe_chalkboard.html
You’ll notice heavy use of the Javascript Math.random() function.
We hope you enjoy this tutorial as a live run.
Should you find Tac Tac Toe (or even Noughts and Crosses) addictive you should see this … amazing!
Yes … you’ve reached the end … go first in each game and see if you can beat the computer!
If this was interesting you may be interested in this too.
If this was interesting you may be interested in this too.
If this was interesting you may be interested in this too.
If this was interesting you may be interested in this too.
If this was interesting you may be interested in this too.
If this was interesting you may be interested in this too.
If this was interesting you may be interested in this too.




2 Responses to Android Disk to Windows Disk Tutorial