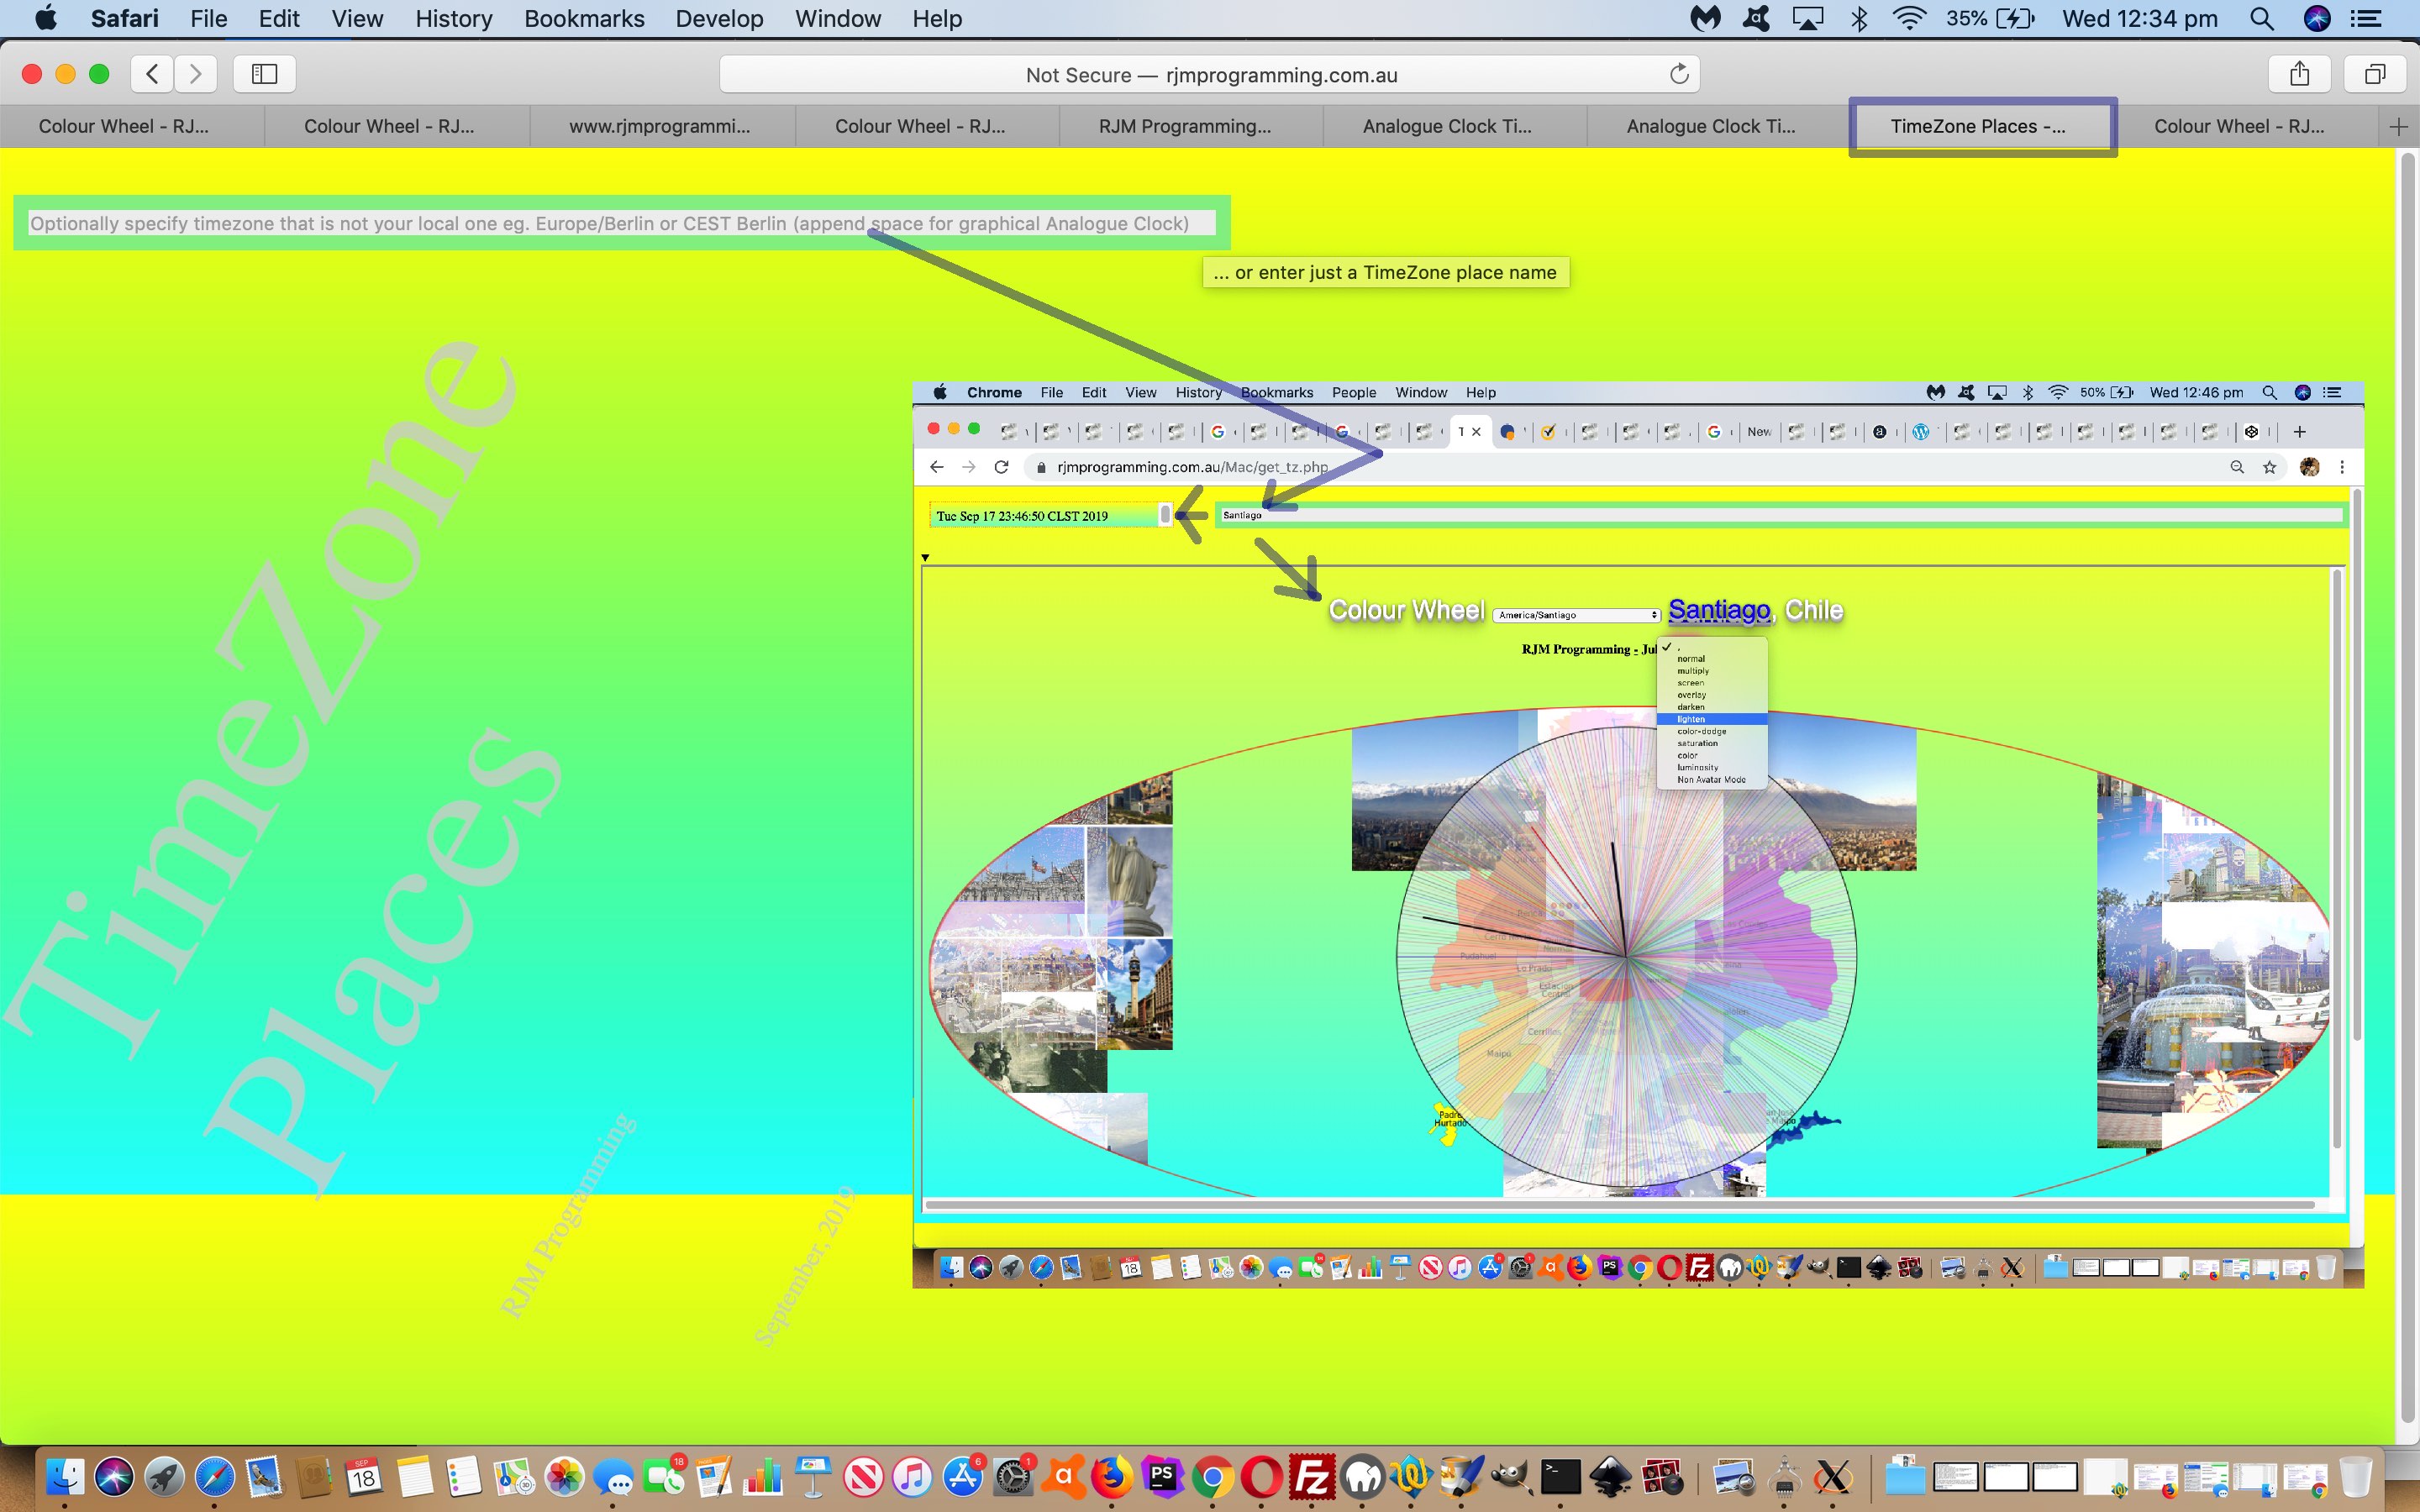
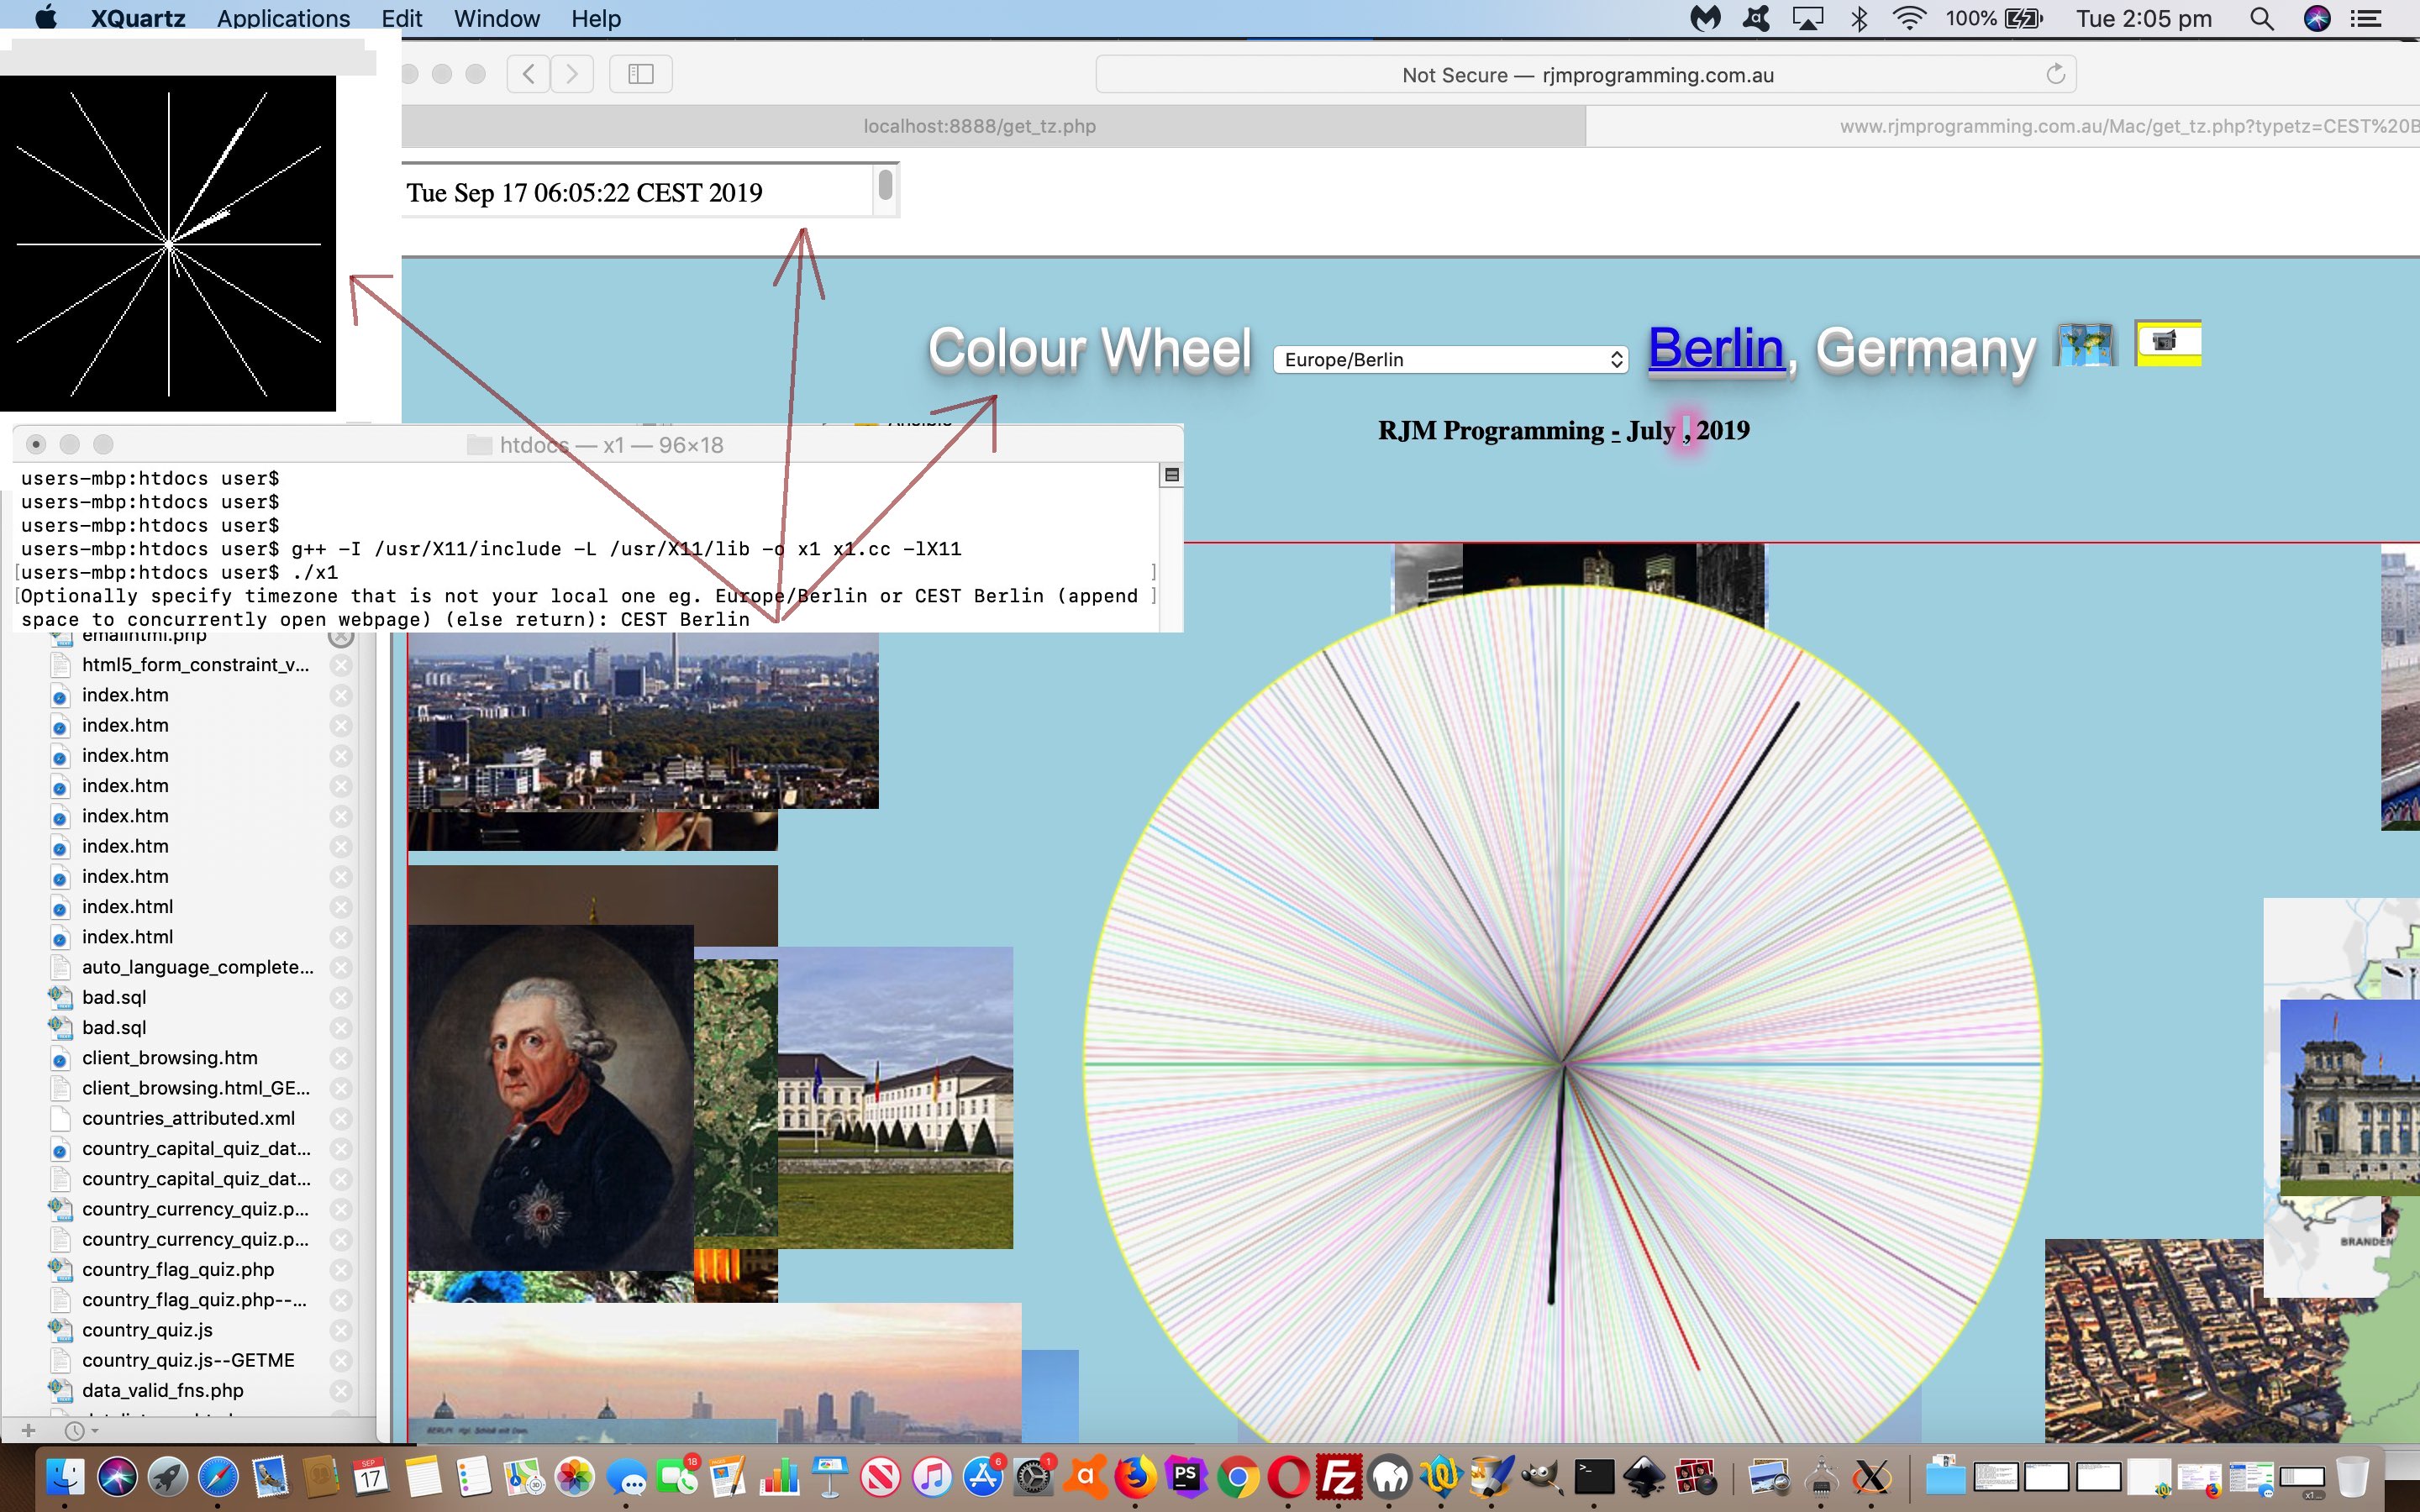
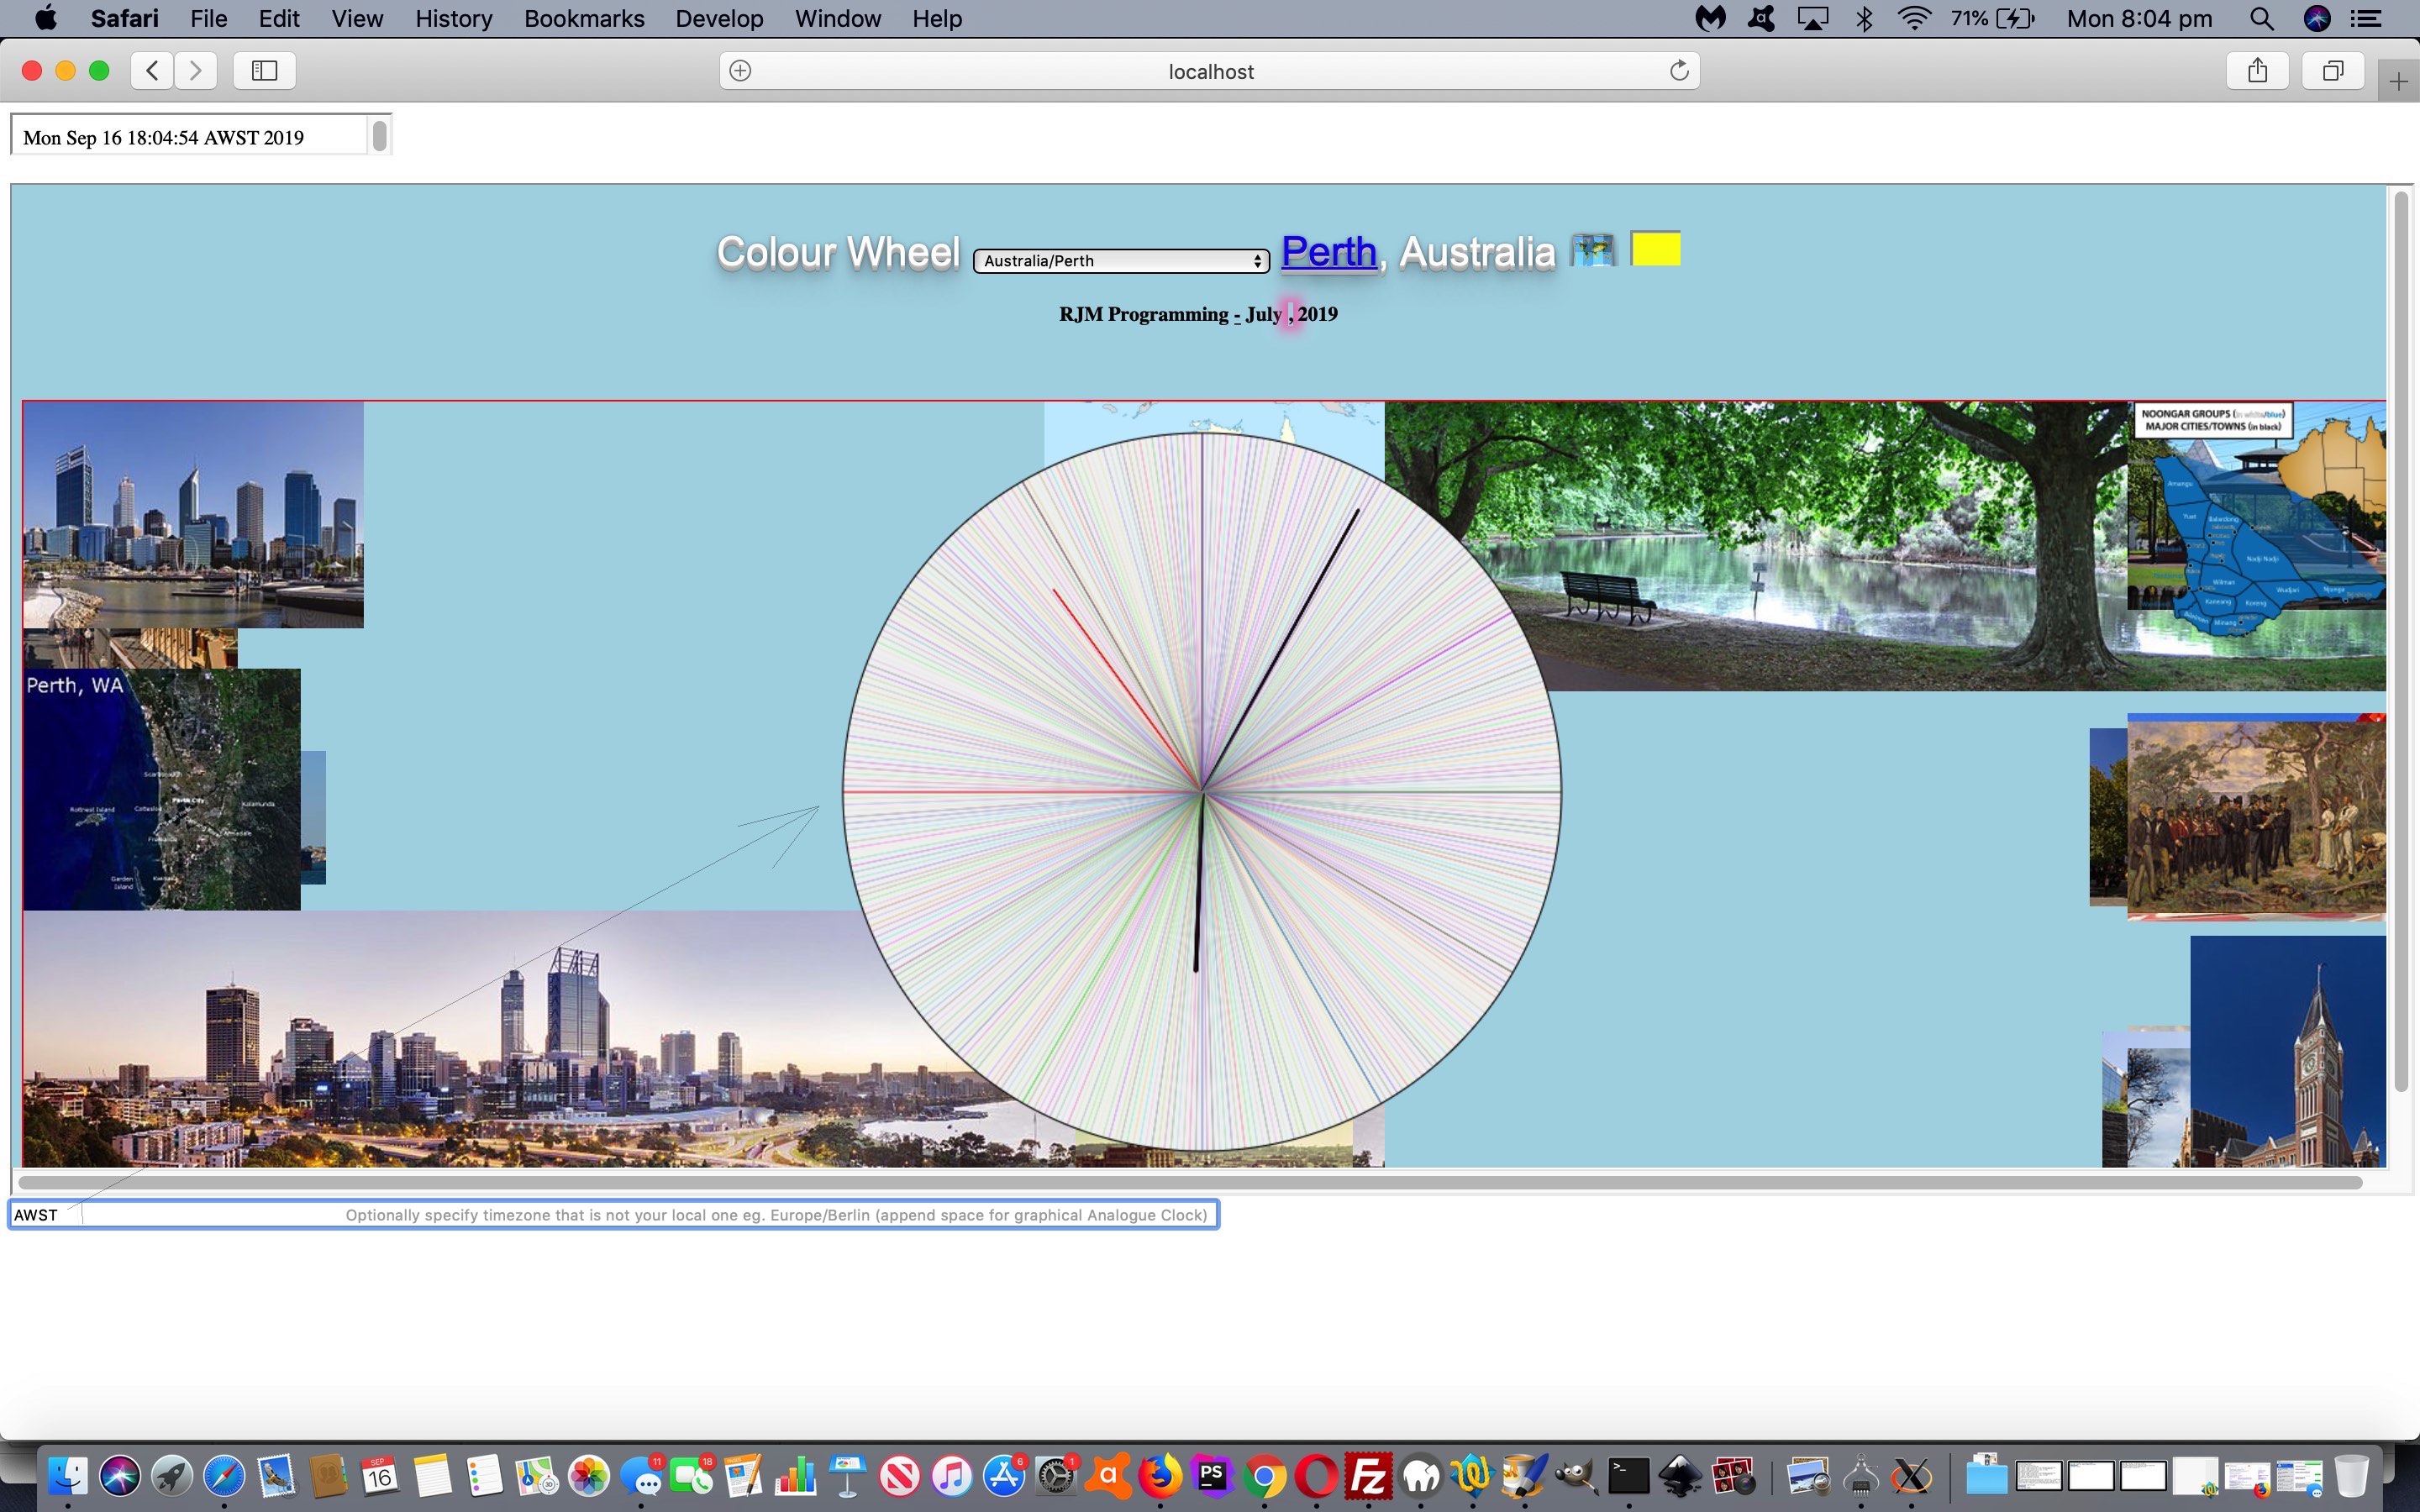
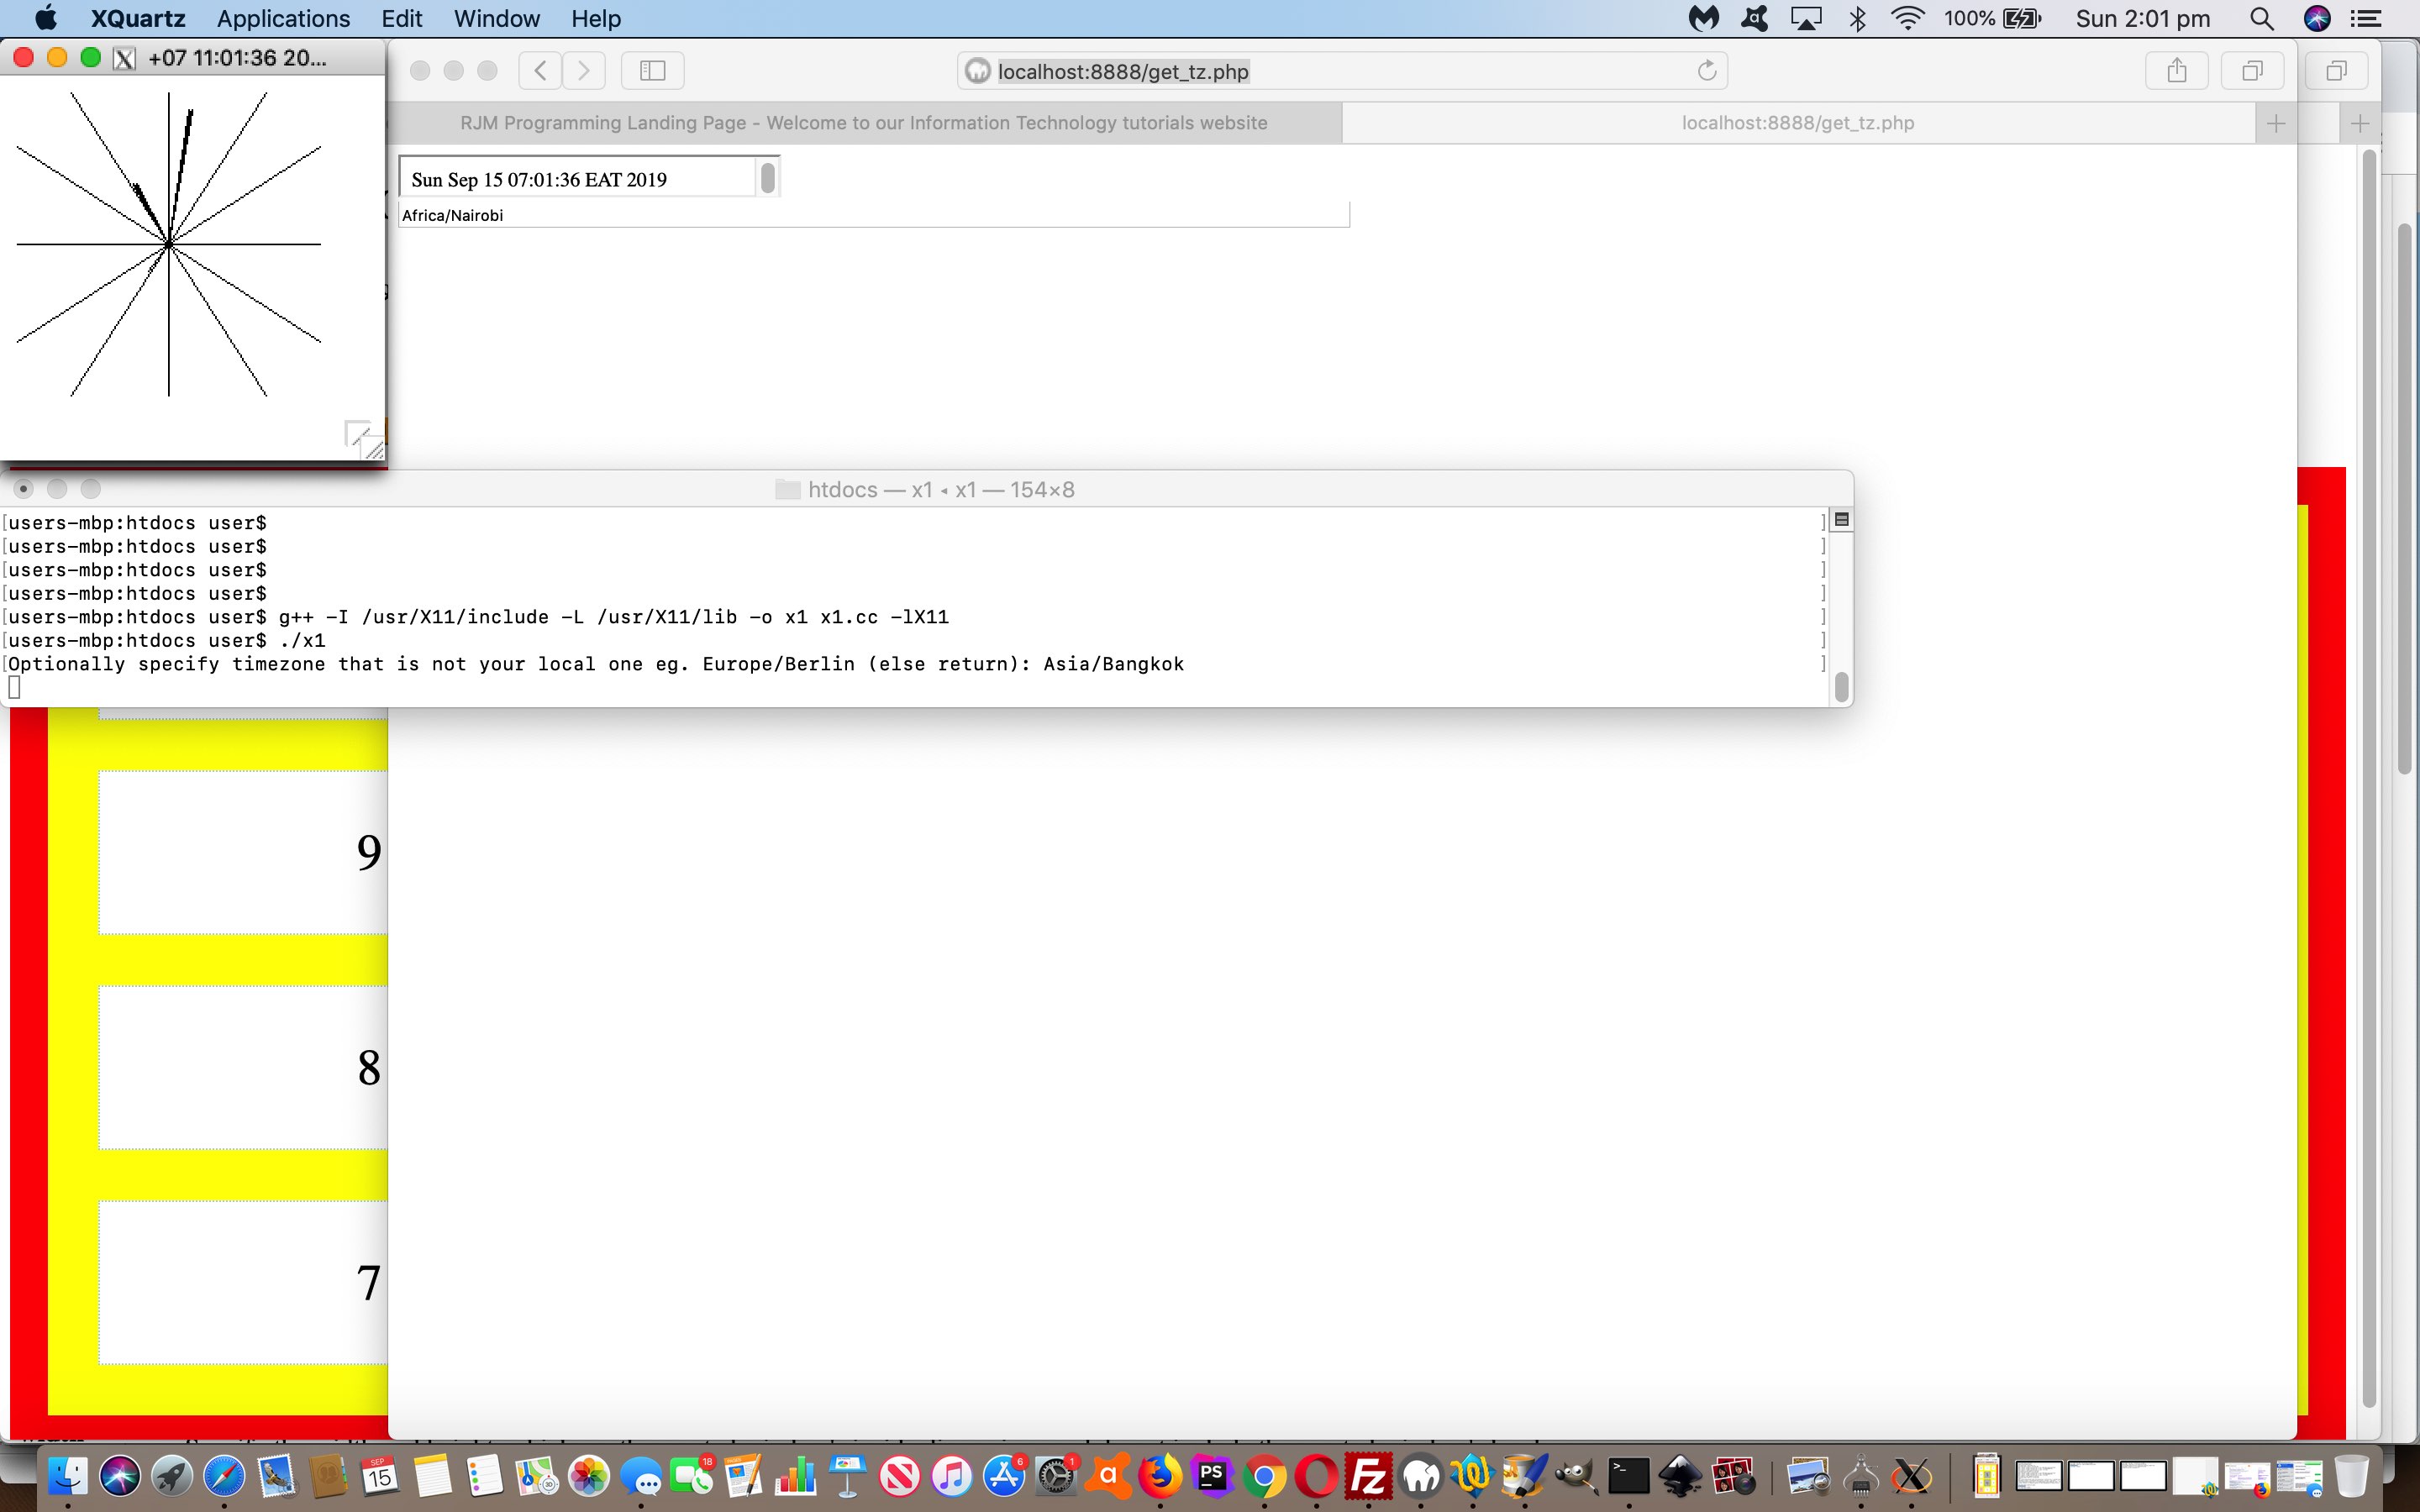
Yesterday’s C++ X11 Analogue Clock Timezone Abbreviation Tutorial work has been progressed today with a number of “nice to haves” in the modification categories (around here) of …
- a little bit of aesthetics
- a little bit of user experience (UX)
- a little bit of integration
… prime candidates in the “nice to have” categories we often leave to well into projects, especially as we want to get across the modus operandi before some of these matters. On the other hand, you will struggle to attract interest without their consideration.
Let’s go into more detail here …
- a little bit of aesthetics
- background linear gradient
- background wording (at that angle, inspired by https://codepen.io/YuvarajTana/pen/auiqx), thanks, to look like Watermark wording
- textbox and iframe borders
- textbox and iframe equality of height via those borders
- a little bit of user experience (UX)
- webpage title
- allow (just the) TimeZone place entry by user
- when there is a colour wheel, move user entry textbox up the top right, above the fold
- textbox title alluding to the fact that (just the) TimeZone place entry by user is possible
- allow “reveal” details/summary element combination show or hide any colour wheels (at least for browsers that are not Internet Explorer nor Microsoft Edge)
- focus on textbox at initial invocation, at least for non-mobile platforms
- a little bit of integration
- when the changed colour_wheel.html‘s colour wheel (at this live run link) has a dropdown change, it gets reflected back up to the changed parent get_tz.php parent (and you can try this at this live run link)
- future colour wheel changes will immediately flow through without the cache stifling this
Previous relevant C++ X11 Analogue Clock Timezone Abbreviation Tutorial is shown below.
Yesterday’s Analogue Clock Timezone Abbreviation Tutorial was about “surfing the net” mode of use PHP. Today we turn our attention to interfacing “command line” mode of use PHP to effectively interface to the C++ desktop application code. In order to create that effectiveness required, we want to explore the concept of displaying a webpage via its absolute URL within the C++, and realized we’d entered the realms of cross-platform issues.
Can C++ have the one codebase for multiple platforms? Yes, no problems there …
- regarding #include section …
#include <stdio.h>      /* puts, printf */

#include <stdlib.h>      /* puts, printf */

#include <time.h>       /* time_t, struct tm, time, localtime */

#include <string.h>

#if __has_include(<unistd.h>)

#include <unistd.h>

#endif

#include <cmath>

#include <iostream>

#include <ctime>

#include <X11/Xlib.h>

#include <X11/Xutil.h>

#if __has_include(<windows.h>)

#include <windows.h>

#endif
- and within code …
void launch(const std::string &url) {  // thanks to https://stackoverflow.com/questions/153046/launch-web-page-from-my-application

  char *args[3];

  std::string browser ("open\0\0\0\0\0\0\0\0\0\0\0\0\0\0\0\0\0\0\0\0\0\0\0\0\0\0\0\0\0\0\0\0\0\0\0\0\0\0\0\0\0\0\0\0\0\0\0\0\0\0\0\0\0\0\0\0\0\0\0\0");

#ifdef _WIN32

  ShellExecute(NULL, "open", url, NULL, NULL, SW_SHOWNORMAL);

#elif defined __unix__

  browser = getenv("BROWSER");

  if(browser == "") return;


  args[0] = (char*)browser.c_str();

  args[1] = (char*)url.c_str();

  args[2] = 0;


  pid_t pid = fork();

  if (!pid) {

    execvp(browser.c_str(), args);

  }

#elif defined __APPLE__

  args[0] = (char*)"open\0";

  args[1] = (char*)url.c_str();

  args[2] = 0;


  pid_t pid = fork();

  if (!pid) {

    execvp(browser.c_str(), args);

  }

#endif

}
… as you can see feature in the changed x1.cc C++ code.
The changed get_tz.php PHP needed to break up that “command line” mode of use specifics adding functionality …
   $line = readline("Optionally specify timezone that is not your local one eg. Europe/Berlin or CEST Berlin (append space to concurrently open webpage) (else return): ");

if (strpos(trim($line), "/") === false && $line != "") {

      $oneword=explode(" ", trim($line));

      if (sizeof($oneword) == 1) {

      if ($oneword[0] != strtoupper($oneword[0])) {

       if (!file_exists($proposed)) { $proposed="../PHP/tz_places.php"; }

       if (file_exists($proposed)) {

        $tzcont=@file_get_contents($proposed);

        if (strpos(strtoupper($tzcont), "/" . strtoupper($oneword[0])) !== false) {

          $fbit=explode("/" . strtoupper($oneword[0]), strtoupper($tzcont));

          $lbit=explode('"', substr($tzcont, 0, strlen($fbit[0])))[-1 + sizeof(explode('"', substr($tzcont, 0, strlen($fbit[0]))))];

          if (trim($line) != $line) {

          $line=$lbit . explode('"', substr($tzcont, strlen($fbit[0])))[0] . " ";

          } else {

          $line=$lbit . explode('"', substr($tzcont, strlen($fbit[0])))[0] . " ";

          }

        }

       }

      }

      } else if ($oneword[0] != strtoupper($oneword[0])) {

       if (!file_exists($proposed)) { $proposed="../PHP/tz_places.php"; }

       if (file_exists($proposed)) {

        $tzcont=@file_get_contents($proposed);

        if (strpos(strtoupper($tzcont), "/" . strtoupper(  str_replace(" ", "_", trim($line))  )) !== false) {

          $fbit=explode( "/" . strtoupper(  str_replace(" ", "_", trim($line))  ), strtoupper($tzcont));

          $lbit=explode('"', substr($tzcont, 0, strlen($fbit[0])))[-1 + sizeof(explode('"', substr($tzcont, 0, strlen($fbit[0]))))];

          if (trim($line) != $line) {

          $line=$lbit . explode('"', substr($tzcont, strlen($fbit[0])))[0] . " ";

          } else {

          $line=$lbit . explode('"', substr($tzcont, strlen($fbit[0])))[0] . " ";

          }

        }

       }

      }

}

if (strpos(trim($line), "/") !== false) {

  file_put_contents("stop_x1.x1", "");

  sleep(2);

  if (trim($line) != $line) {

  if (strpos($line, "/") !== false) {

  exec("TZ=" . $line . " ./x1 " . $line . " .");

  } else {

  exec("./x1 " . $line . " .");

  }

  }

} else {

  file_put_contents("stopx1.x1", "TZ=" . $line . " ./x1 " . $line);

  exec("./x1 " . $line . " .");

  exit(1);

}
… to feed the C++ the wherewithal of command line argument variation (for it to determine when) to open a Colour Wheel webpage to show that timezone abbreviation entered request from the user at the “command line”. Again, you can get a feel for the “surfing the net” mode of use of that PHP via this live run link.
Previous relevant Analogue Clock Timezone Abbreviation Tutorial is shown below.
Yesterday’s C++ X11 Analogue Clock Timezone Tutorial got us interested in timezone abbreviations, such as AEST, around here, for “Australian Eastern Standard Time”.
We decided to incorporate this extra layer of data knowledge into our repository for inhouse timezone functionality, the changed tz_places.php we mention in Digital Clock Styling for Daylight Saving Tutorial and with TimeZone Country Places Data Tutorial where we first establish the idea of …
we use PHP code itself, in the sense that it has a level of data hiding, but without usernames and passwords coming into play. Today we start with three simple array definitions in the PHP code for our TimeZone Places web application
… adding a fourth array … via PHP snippets like …
$zzdt = new DateTime('now', new DateTimeZone($timezonename); // eg. Europe/Berlin

$abbr = $zzdt->format('T');
… for the purposes of storing timezone abbreviations in a database feeling way (within PHP code, and maintainable within that same PHP code).
Then that fourth array gets used by the changed get_tz.php as per …
$tzcont=@file_get_contents("../PHP/tz_places.php");
… containing its lines of codes, and so the means to associate “Europe/Berlin” to the abbreviation “CEST” (and then to hone in on the correct “CEST”, we allow the user to enter “CEST Berlin”, for example).
Also, in the “surfing the net” mode of use of the PHP interface to the C++ X11 Analogue Clock we allow it to show that Analogue Clock of Colour Wheel Canvas Analogue Clock Background Blend Mode Tutorial via the appending of space characters by the user. Please note none of these changes affect the “command line usage” mode of use, and so C++ X11 remains unchanged, for all intents and purposes. Try the PHP’s live run link for yourself, and see.
Previous relevant C++ X11 Analogue Clock Timezone Tutorial is shown below.
Onto yesterday’s C++ X11 Analogue Clock Animation Tutorial we wanted to optionally …
- involve, for us, what is the meeting place of “where” and “when”, that being timezones … and because we are familiar with timezone concepts with it, we …
- involve PHP as an optional helperer outerter of …
- the changed x1.cc C++ supervisor … which nows funnels functionality via taking notice of …
- command line arguments … additional ones defining “Europe/Berlin” style timezone names
We slunk the word “optionally” in, as it is file existence in C++ …
bool doesFileExist(const std::string& name) { // thanks to https://stackoverflow.com/questions/46292764/check-for-file-existence-in-c-without-creating-file

    if (FILE *file = fopen(name.c_str(), "r")) {

        fclose(file);

        return true;

    } else {

        return false;

    }

}
… and PHP’s file_exists that directs traffic for some of this.
Also in PHP it is the “getting back to the operating system” exec and passthru functions (and C++’s std::system) that help out because on any one command line invocation you can go …
TZ=Europe/Berlin date
… on Linux or macOS (or Mac OS X), at least, to get the command line output you the current date and time in (the timezone place) Berlin (and so PHP passthru comes into its own).
This helping get_tz.php‘s live run code caters for two modes of use, out of the three we sometimes talk about, those being …
- command line usage … eg. “php get_tz.php” … helping out the C++ X11 command line … as well as (and differentiated in code via “if (isset($argc) { } else { }” test) …
- surfing the net … allowing us to have that link above functional
… and we just did not consider a use for “Curl” mode of use, though it may work for this too, we are not sure.
Previous relevant C++ X11 Analogue Clock Animation Tutorial is shown below.
If ever there was a benefit some additional animation functionality could make, it would be to yesterday’s C++ X11 Analogue Clock Primer Tutorial of an analogue clock (only) at a snapshot of time. Many of us need the clock for more than a snapshot.
X11 animation strategies are not necessarily straightforward, and reviewing the Internet discussion about this, there are many and varied ways to approach this. We decided to turn the C++’s main function into redraw function called by the new main function of the changed x1.cc …
int main() {

 int jj=0;

 std::string suff (" ... Click to refresh as required\0");

 while(1) {

   if (dsp) {

    XDestroyWindow( dsp, win );

    XCloseDisplay( dsp );

   }

   redraw(suff.substr (jj), jj);

   jj = ((jj + 1) % suff.length());

 }

 return 0;

}
… for that revamped redraw function now adding a second hand (to the minute and hour hands of yesterday’s incarnation), now that we have animation. What was the crucial difference to allow for automated animation (or with the old “click” method, as well), at the end of this C++ function …
  eventMask = ResizeRedirectMask|StructureNotifyMask|ButtonPressMask|ButtonReleaseMask;

  XSelectInput(dsp,win,eventMask); // override prev


  int i=0;


  do {

    i++;

    XNextEvent( dsp, &evt );   // calls XFlush()

    usleep(200);

    time_ptr2 = time(NULL);

    tm_local2 = localtime(&time_ptr2);

    seconds = difftime(time(NULL), time_ptr);

    XResizeWindow(dsp, win, 200 + (i % 11), 200 + (i % 11));

  } while( evt.type != ButtonRelease && seconds < 1.0 );


  XDestroyWindow( dsp, win );

  XCloseDisplay( dsp );

  dsp = NULL;


  }

  catch (int ez) { printf("%i\n", ez); }


  return 0;
Thanks go to …
- HTTP://www.cplusplus.com/reference/ctime/difftime/
- https://stackoverflow.com/questions/56454948/why-does-it-matter-when-you-draw-in-xwindows
- https://www.codeproject.com/Questions/771859/How-to-get-Linux-machine-time-zone-using-Cplusplus
- https://www.geeksforgeeks.org/stdstringassign-in-c/
- https://stackoverflow.com/questions/17816787/c-string-char-concatenation?rq=1
… for today’s work.
Previous relevant C++ X11 Analogue Clock Primer Tutorial is shown below.
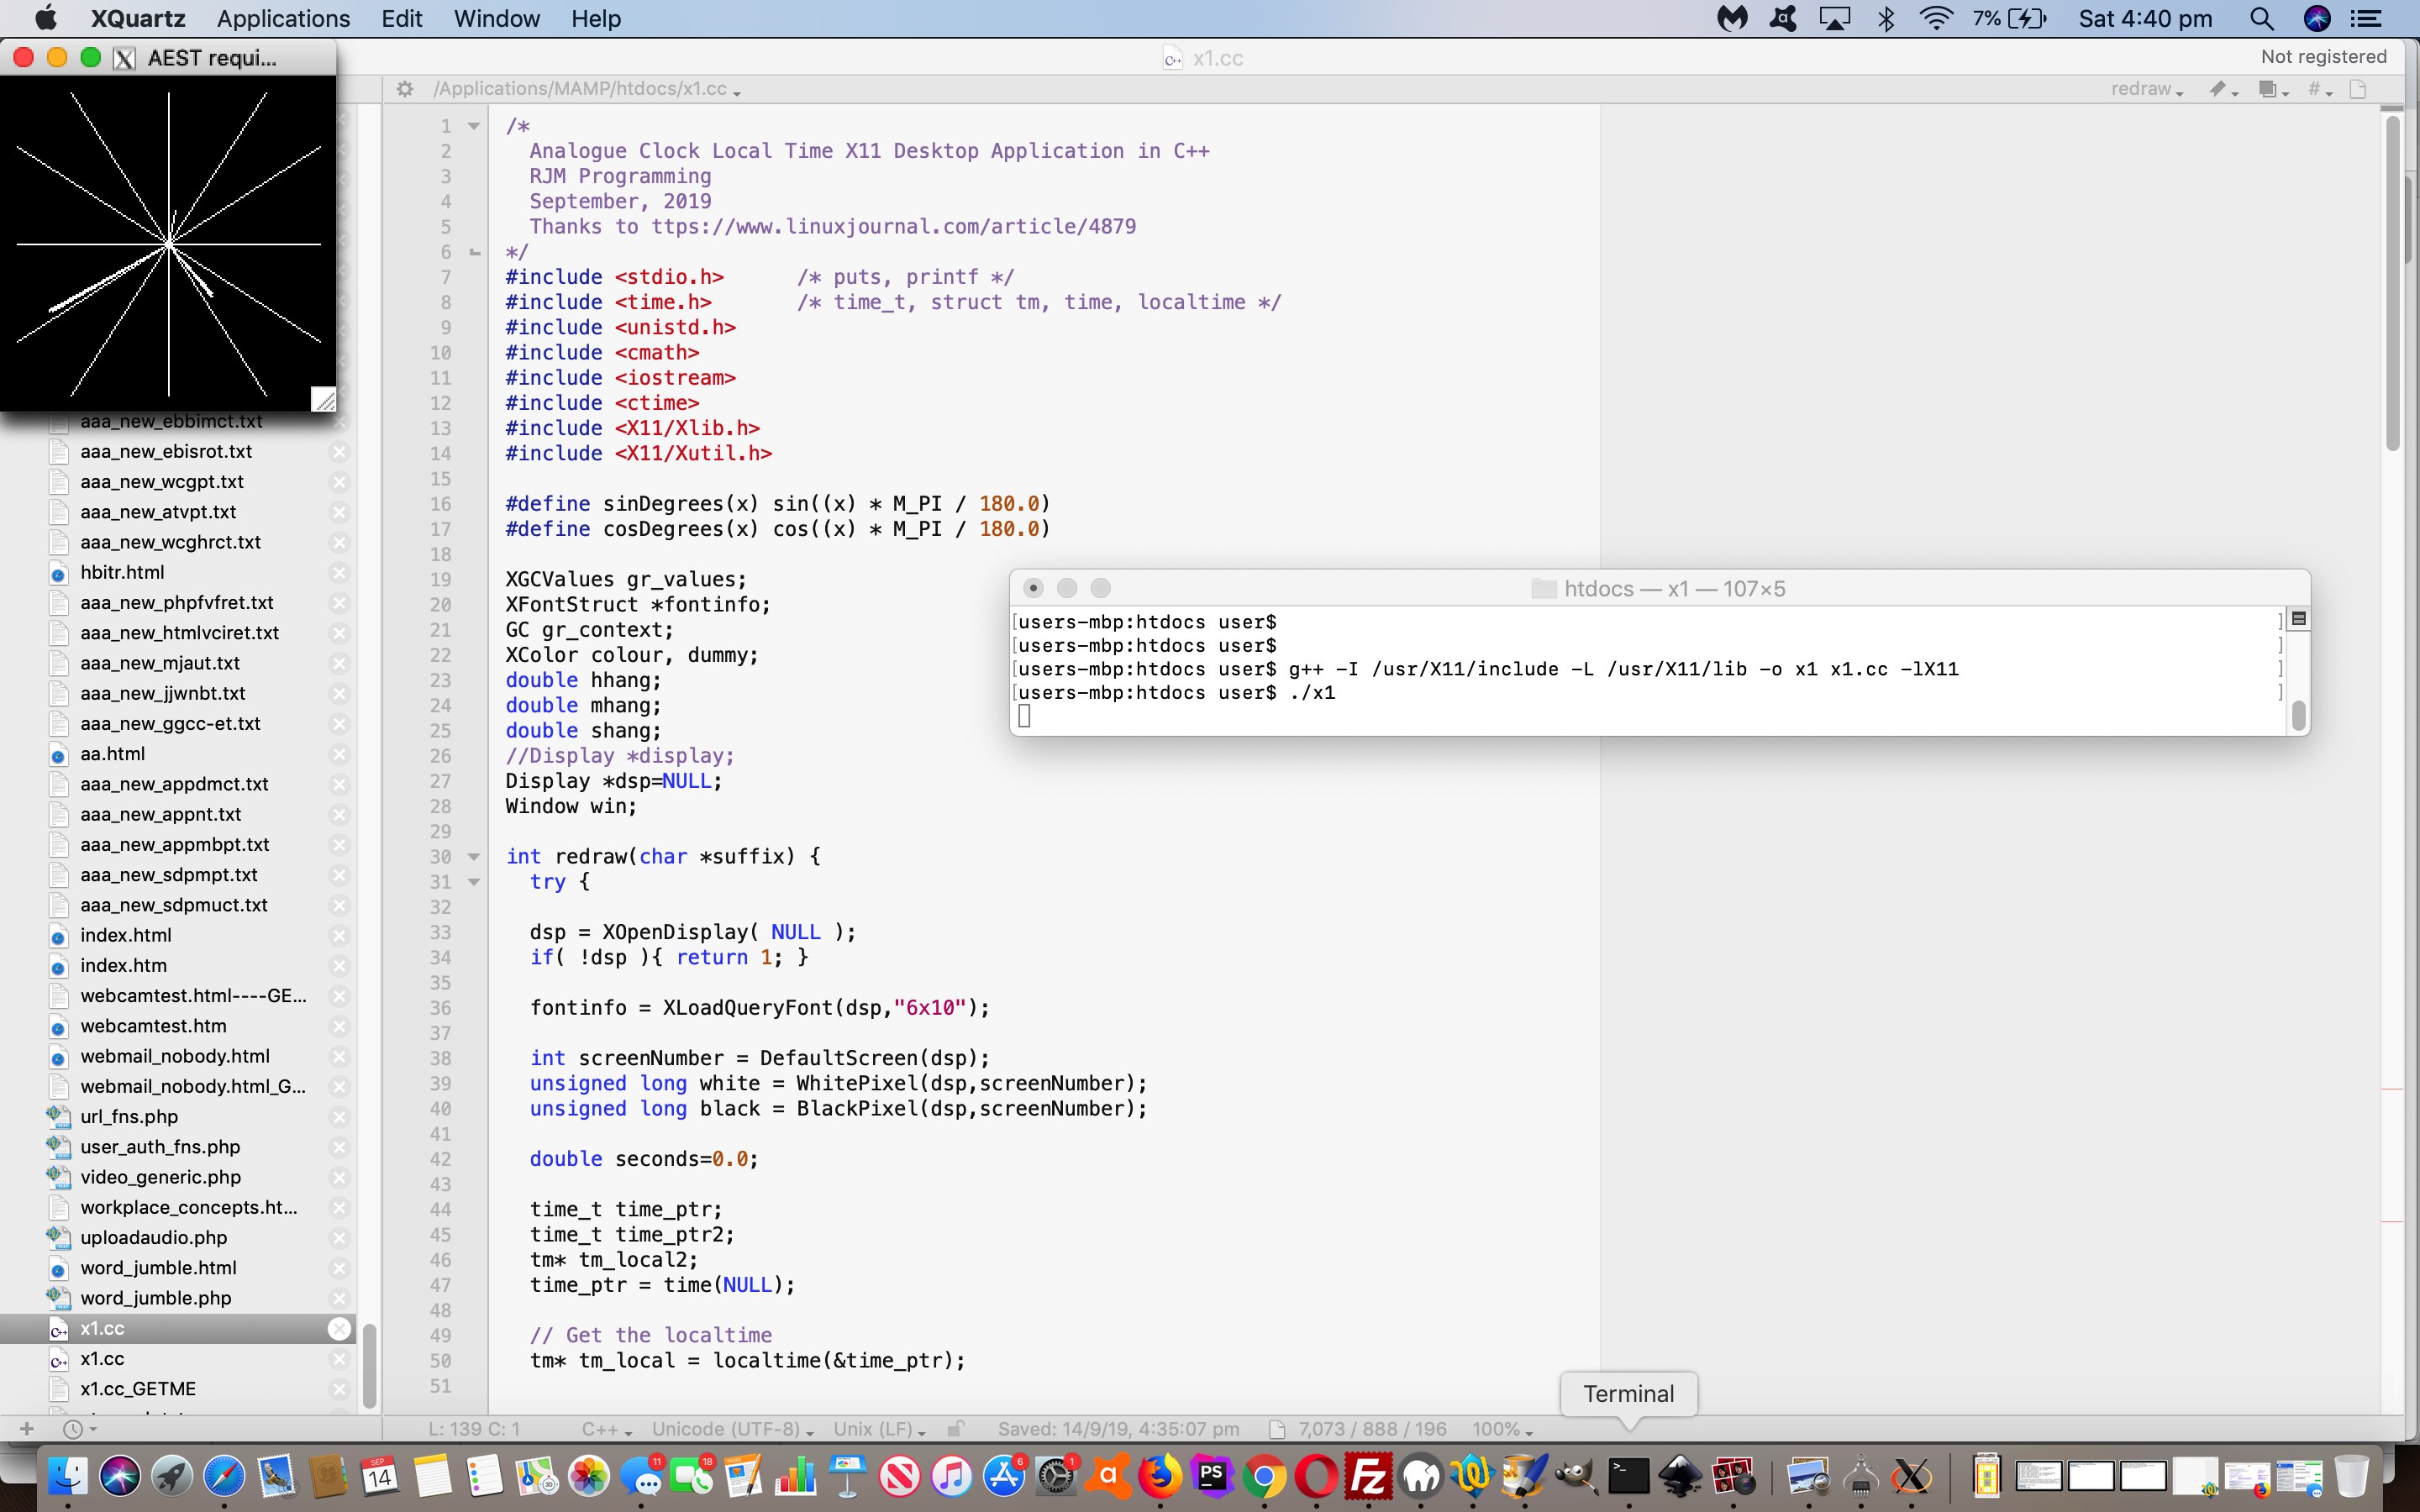
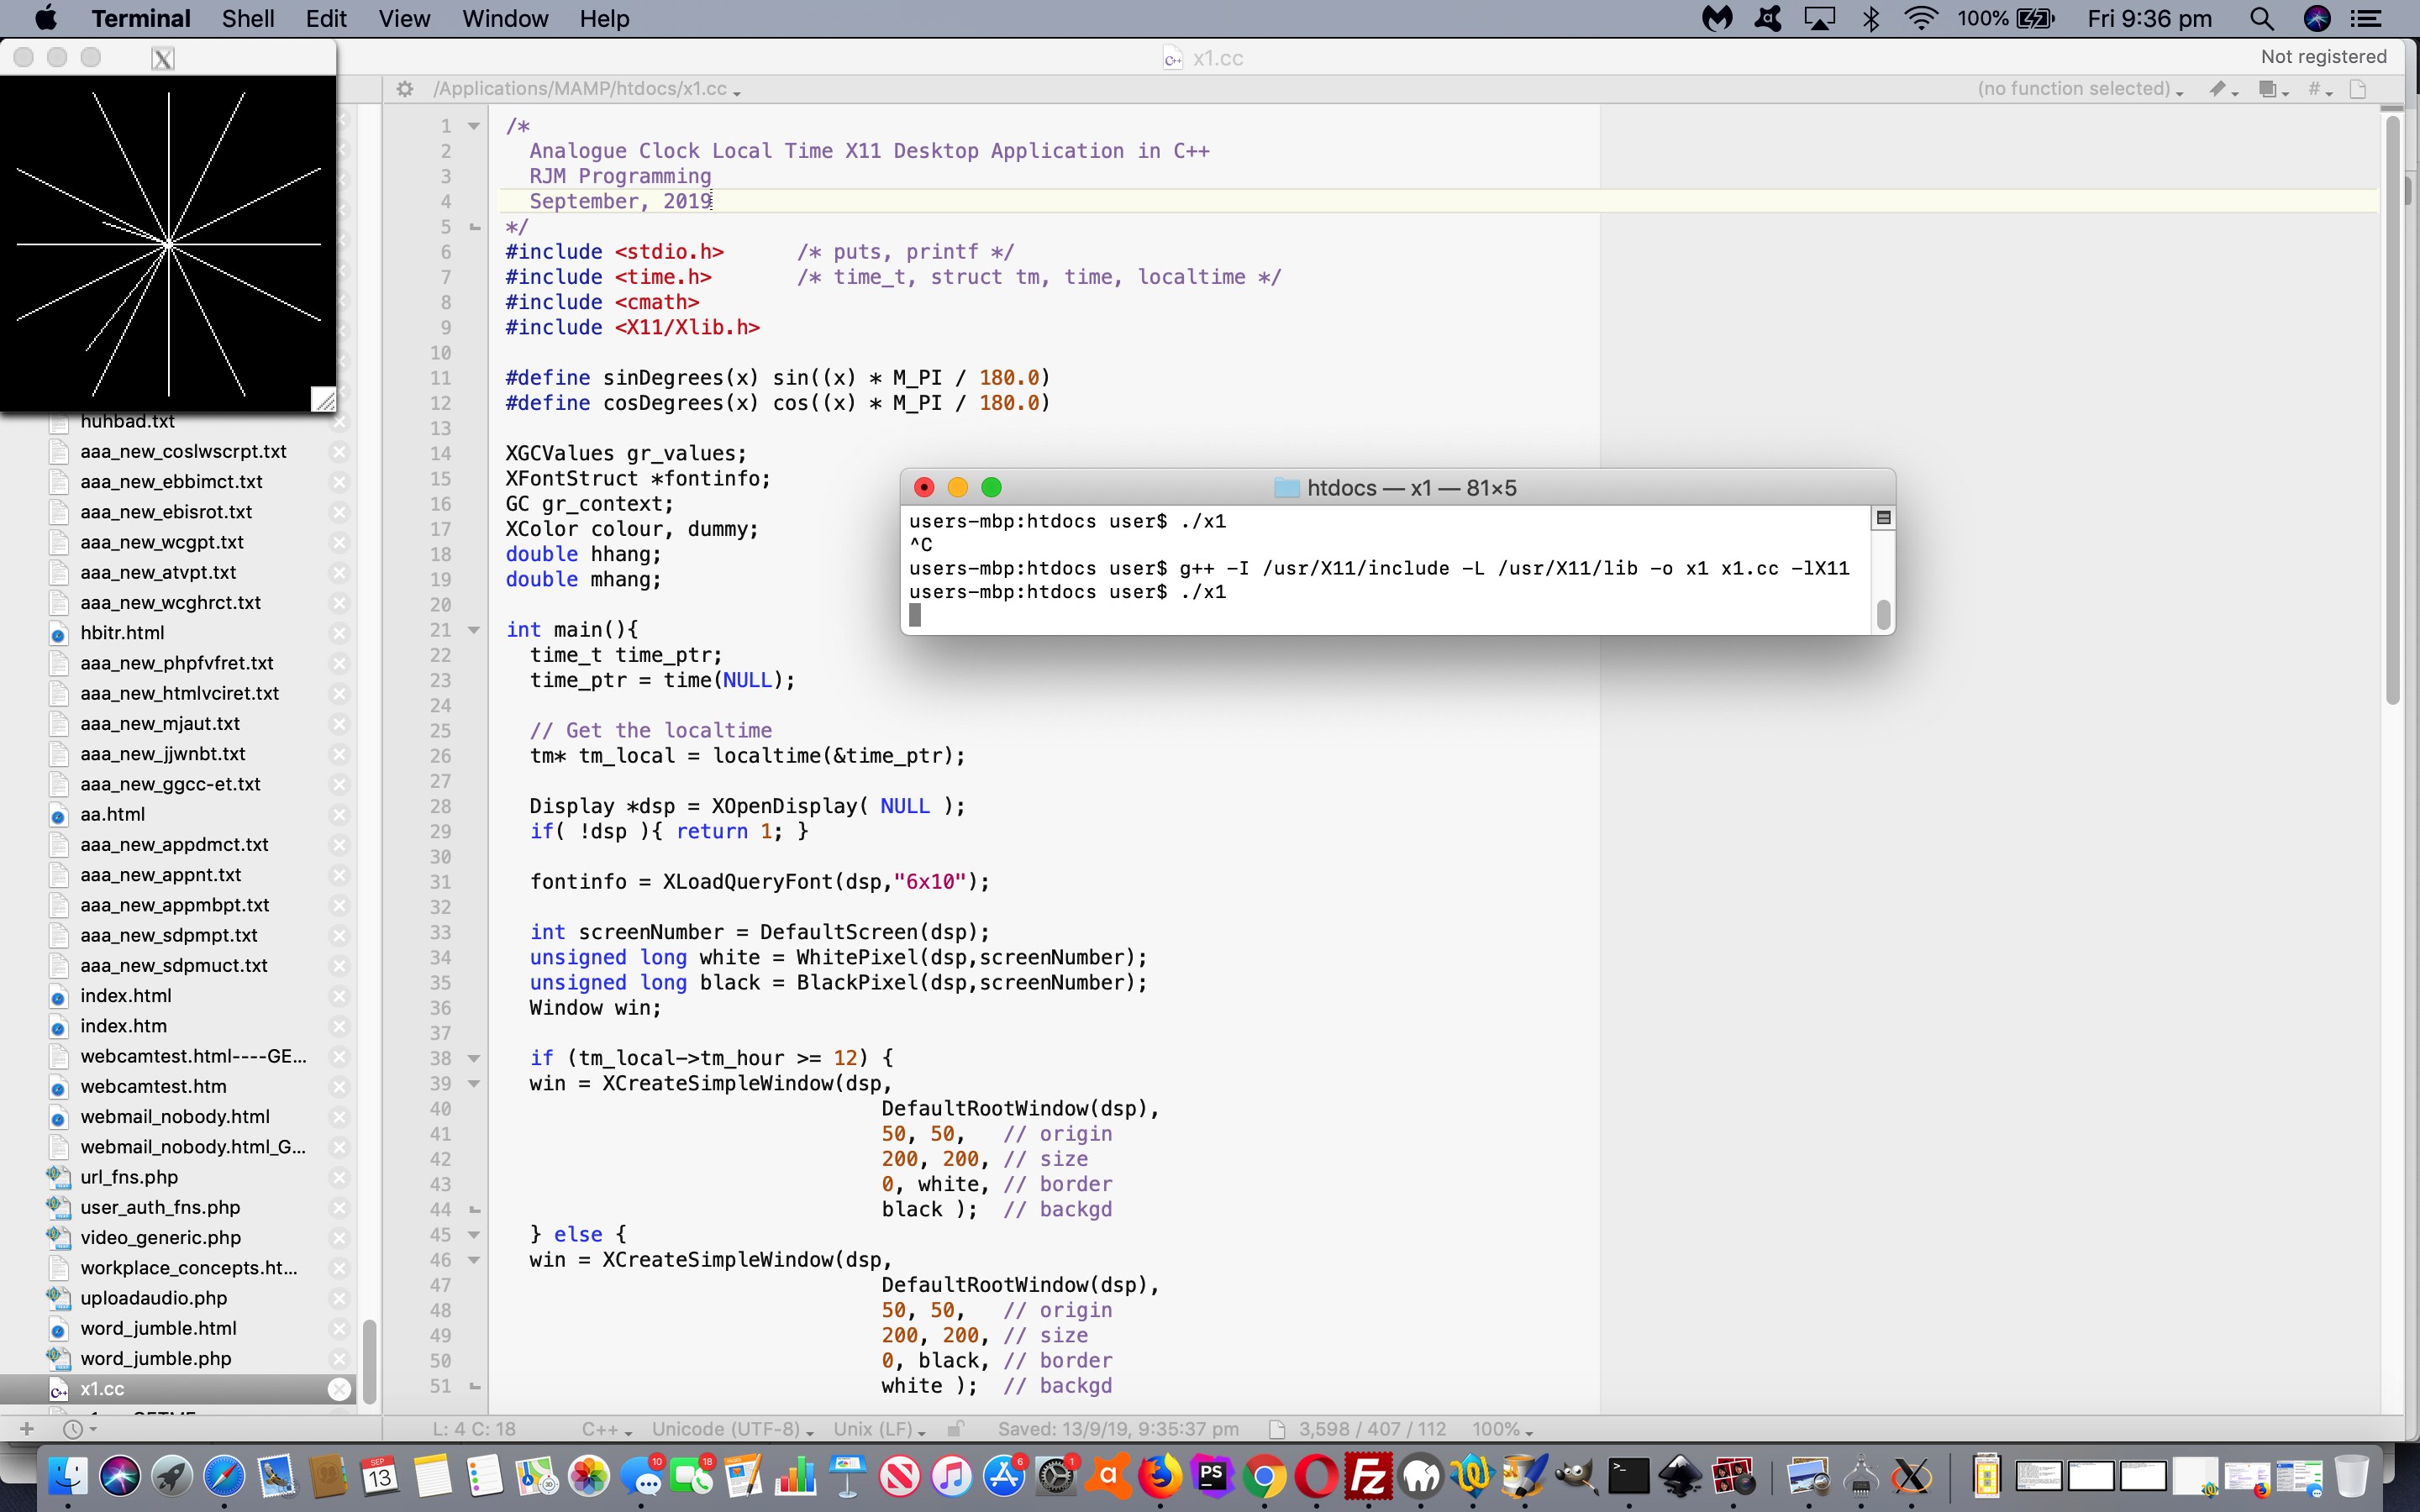
Continuing on with the X11 ideas of the recent Inkscape Vector Image Editor Watermark Tutorial blog posting thread, today we turn our attention to you creating the software …
- for a single snapshot analogue clock … in an …
- X11 (for us, MacBook Pro Terminal) window … via …
- C++ … compiled via GCC, the GNU compiler, as per …
-
g++ -I /usr/X11/include -L /usr/X11/lib -o x1 x1.cc -lX11
- execute via …
./x1
… as you can see in action with today’s tutorial picture.
Of huge help as a resource for the basis of C++ code, thanks, was …
- https://www.linuxjournal.com/article/4879 … as well as …
- HTTP://www-h.eng.cam.ac.uk/help/tpl/graphics/X/X11R5/node21.html
- https://tronche.com/gui/x/xlib/display/display-macros.html
- https://www.geeksforgeeks.org/localtime-function-in-c/
Previous relevant Inkscape Vector Image Editor Watermark Tutorial is shown below.
It’s probably a dual edge sword an uploader’s attitude to watermarks. For some it may be annoying that an image is not freeware when pretty non-specific and uncontroversial. For others they may like watermarks for a couple of reasons …
- They, too, find they want to protect their content in some way … and, as is often the case with me …
- They like the aesthetics of watermarks
And this is where we rejoin the recent Inkscape (desktop application vector image editor) discussions of recent times you can read about at Inkscape Vector Image Editor Logo Tutorial and start considering Inkscape’s talents with layers, a similar talent to that of Gimp.
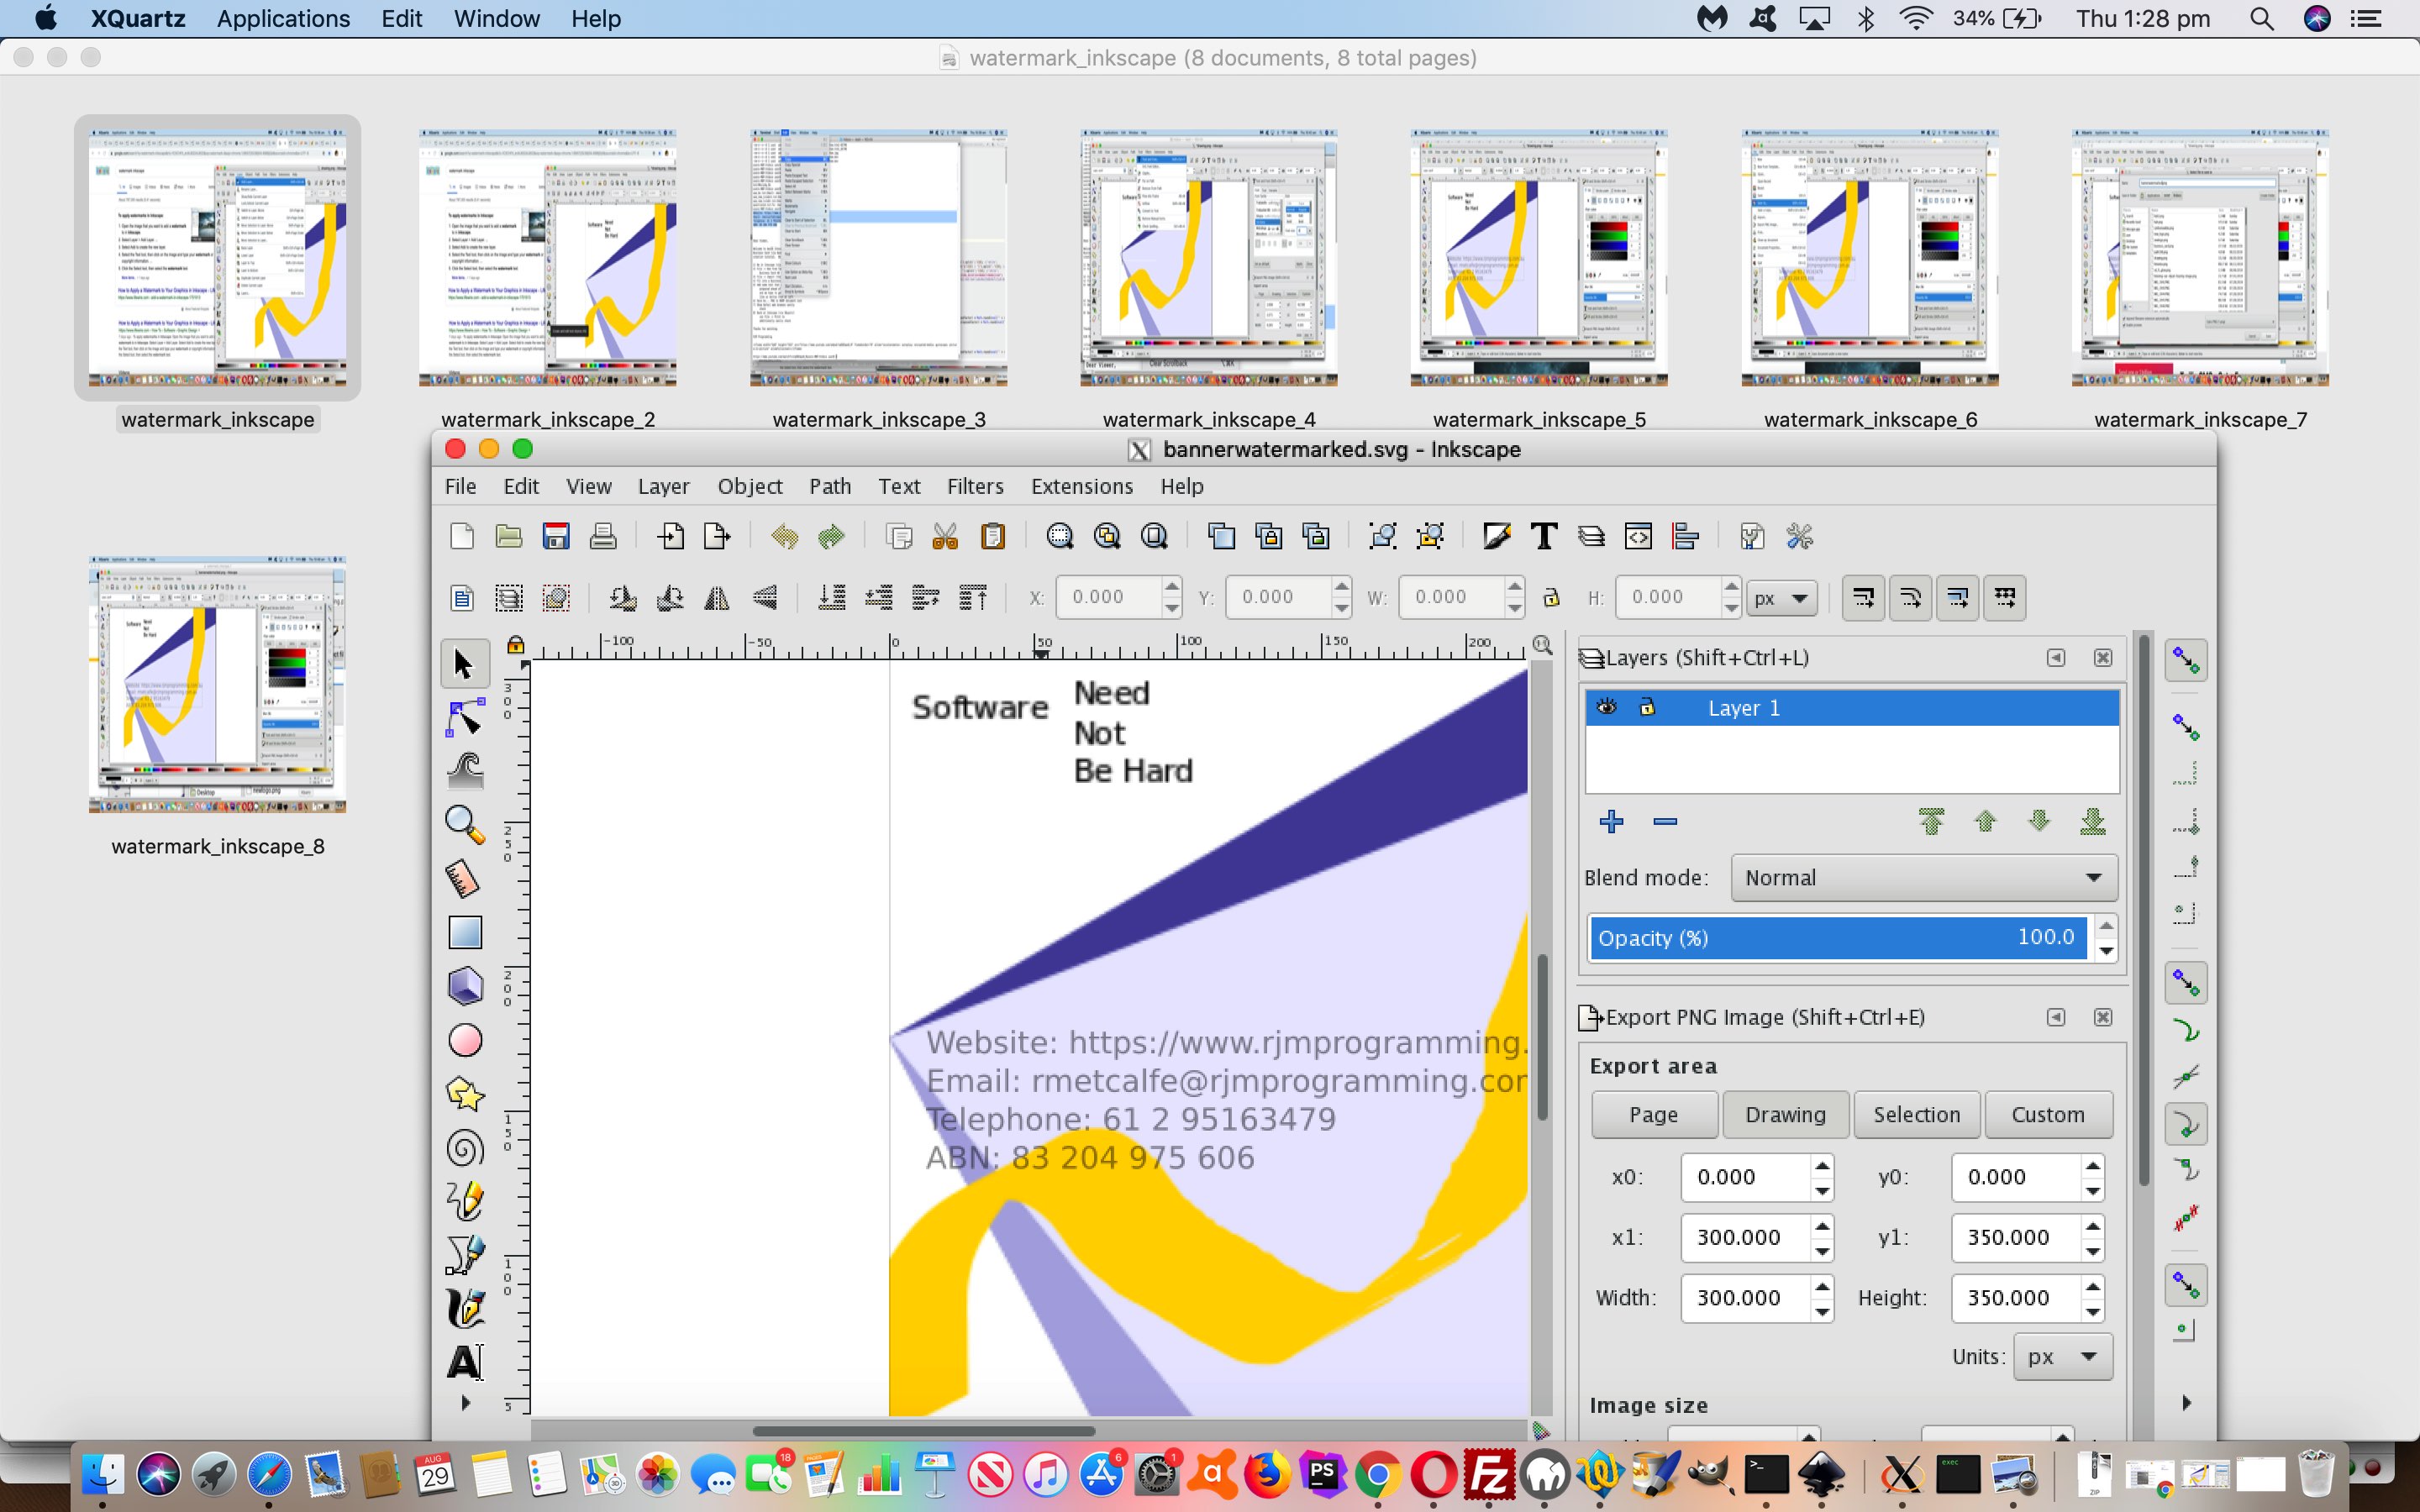
To research this we came upon this excellent “Add a Watermark in Inkscape” link, thanks. It got us using Inkscape’s …
- Layer -> AddLayer…
- Object -> Fill and Stroke…
… as we present ideas helped by “Add a Watermark in Inkscape” to help with this creation of …
| (Export to) PNG result (two layers get exported to one) |
|---|
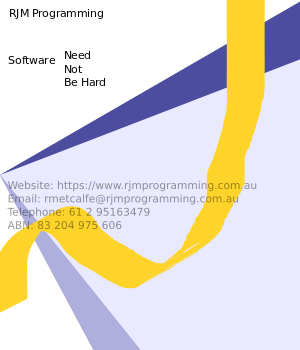 |
| (Export to) SVG result (retains the two layers) |
- Be in Inkscape (via XQuartz)
- File -> Import (the Banner PNG)
-
Select Layer > Add Layer. Placing the watermark on a separate layer makes it easier for you to move or alter later.
-
Select Add to create the new layer.
- Add some text that you have prepared ahead of time (that being website, email, phone number etcetera) via Text -> Text and Font… window for Font Family and 8px size
- Select that text
-
Go to Object > Fill and Stroke.
-
Select the Fill tab (if it isn’t already selected), then drag the Opacity slider to the left to make the text semi-transparent.
-
Once satisfied, you can save the file and export the image in various formats including PNG.
… and we would add, to retain layers save as “Inkscape SVG”
Previous relevant Inkscape Vector Image Editor Logo Tutorial is shown below.
A lot of users like consistency with business related matters, such as your company’s banner, letterhead, email signature and today’s logo ideas we’re adding onto the recent Inkscape Vector Image Editor Business Card Tutorial.
The sad bit of the logo changeover from old …
| Old | New |
|---|---|
 |
 |
 |
 |
… to new is to lose the “quirky” aspects to the “spider” and “web” connection, but a relief that now we have a much more easily recreateable logo based on shapes and linework and calligraphy that the Inkscape desktop application is so good at.
Again, to aid with consistency, we base the logo on the previously created “banner”, much like we worked it with the “business card”, as per …
- Be in Inkscape (via XQuartz)
- File -> New from Template…
Business Card A8 (74mm x 52mm)Generic canvas… set Custom Width: 102px, Custom Height: 77px … click “Create from Template” button - File -> Import (the Banner PNG)
- Fit into a
Business CardCanvas size - Add some
text that you have“Draw Bezier curves and straight lines” work being the four black lines of an “m” that breaks the yellow ribbon calligraphy into (an imagined) “r” and “j” for the letters RJM within the company name “RJM Programming”, and use the “Rectangle” functionality to overlay a white rectangle on top of the text (we had for the “Banner”)
prepared ahead of time (as above) …
and we hope to get result
like or better than at left - Save As… PNG to MAMP document root
- Show Safari web browser sanity
check - Back at Inkscape (via XQuartz)
use File -> Print to
additionally sanity check
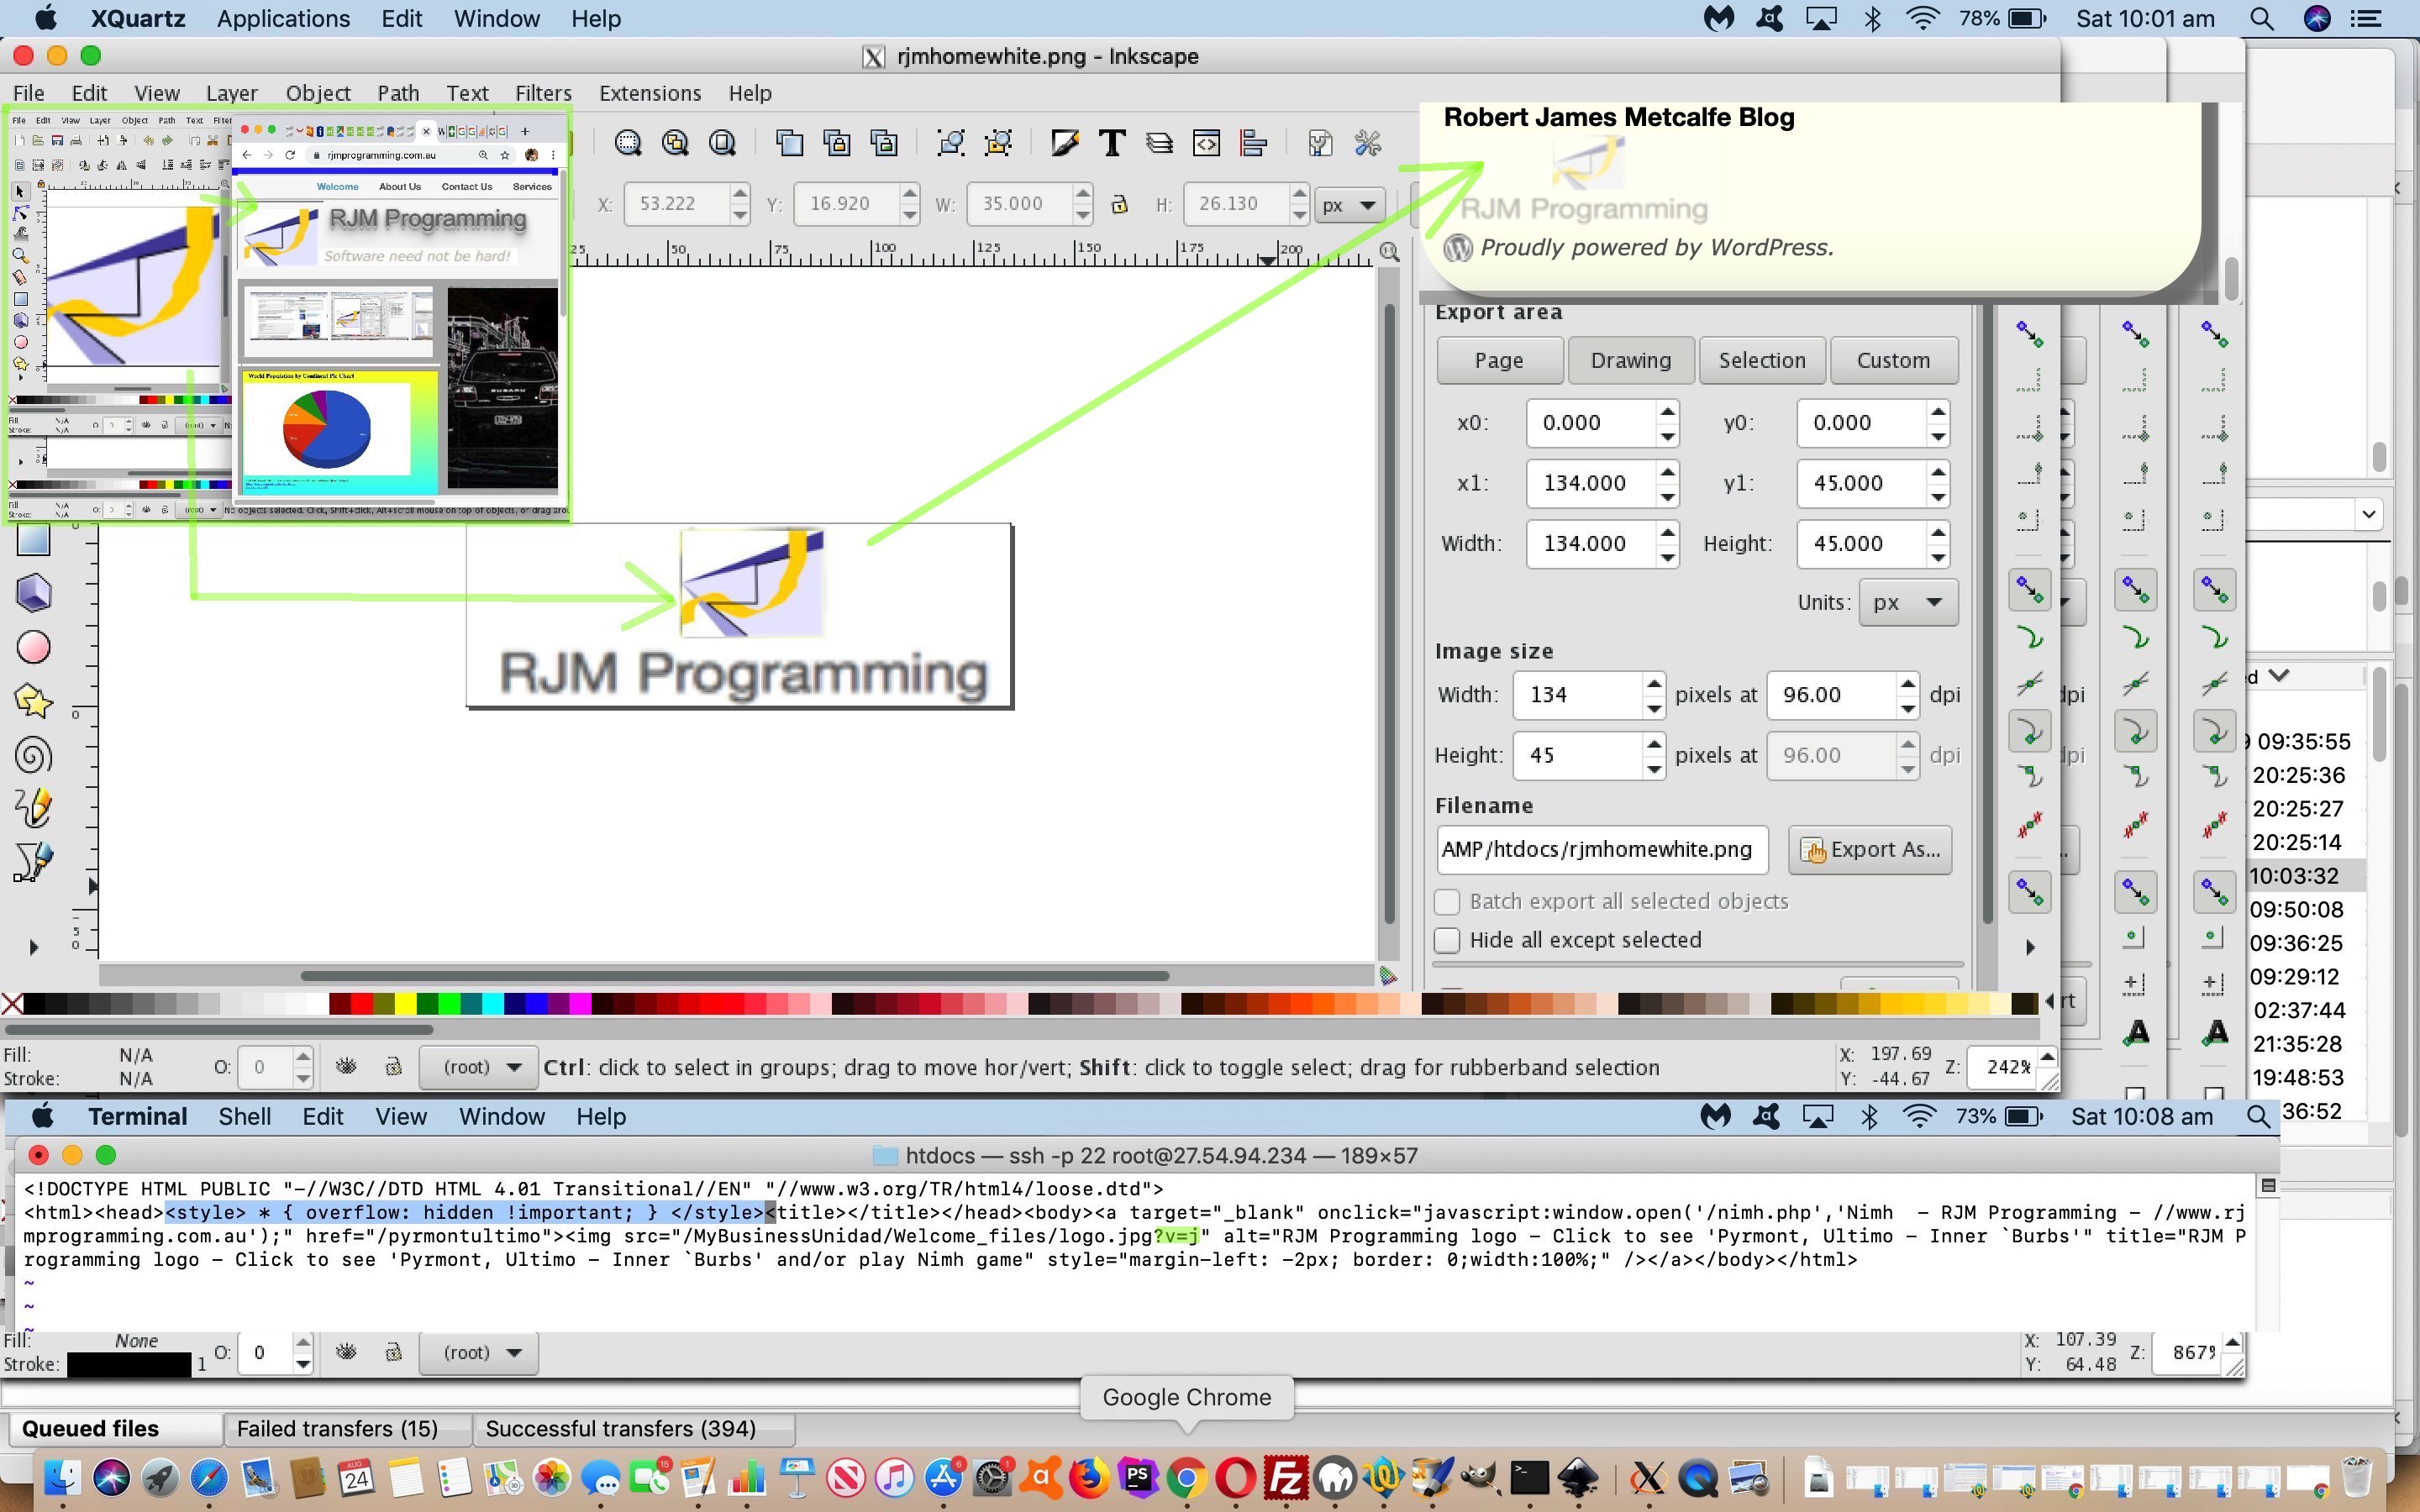
… and in turn, that created logo can “fit into” that second row logo, with the white background, above, in a similar fashion.
Along the way, implementing this to the domain landing pages and blog, we noted, again, as we did at the recent Wikipedia Flipcard Quiz Emoji Tutorial …
- Sometimes when you involve HTML iframe elements and you have an issue with scroll bars that you do not want the CSS styling (with the iframe HTML) of …
<style>

 * { overflow: hidden !important; }

</style>
… can resolve issues … and … -
Did you know?
When implementing many HTML img element change type of modifications, you make a change and nothing appears to happen, you (barring idiocy) may have run into an issue where the web browser you are on prefers to keep showing that image (img element) from the cache. So might other users (who have visited your website in the past) out there. But to force the cache to rethink itself both the …
- HTML iframe src= URL … and …
- HTML img src= (image) URL within that iframe’s HTML
… could benefit, and most likely not be in any way adversely affected, by modifying the ? and/or & arguments of the URL (yes, even for image URLs)
… as we show you with today’s tutorial picture.
Previous relevant Inkscape Vector Image Editor Business Card Tutorial is shown below.
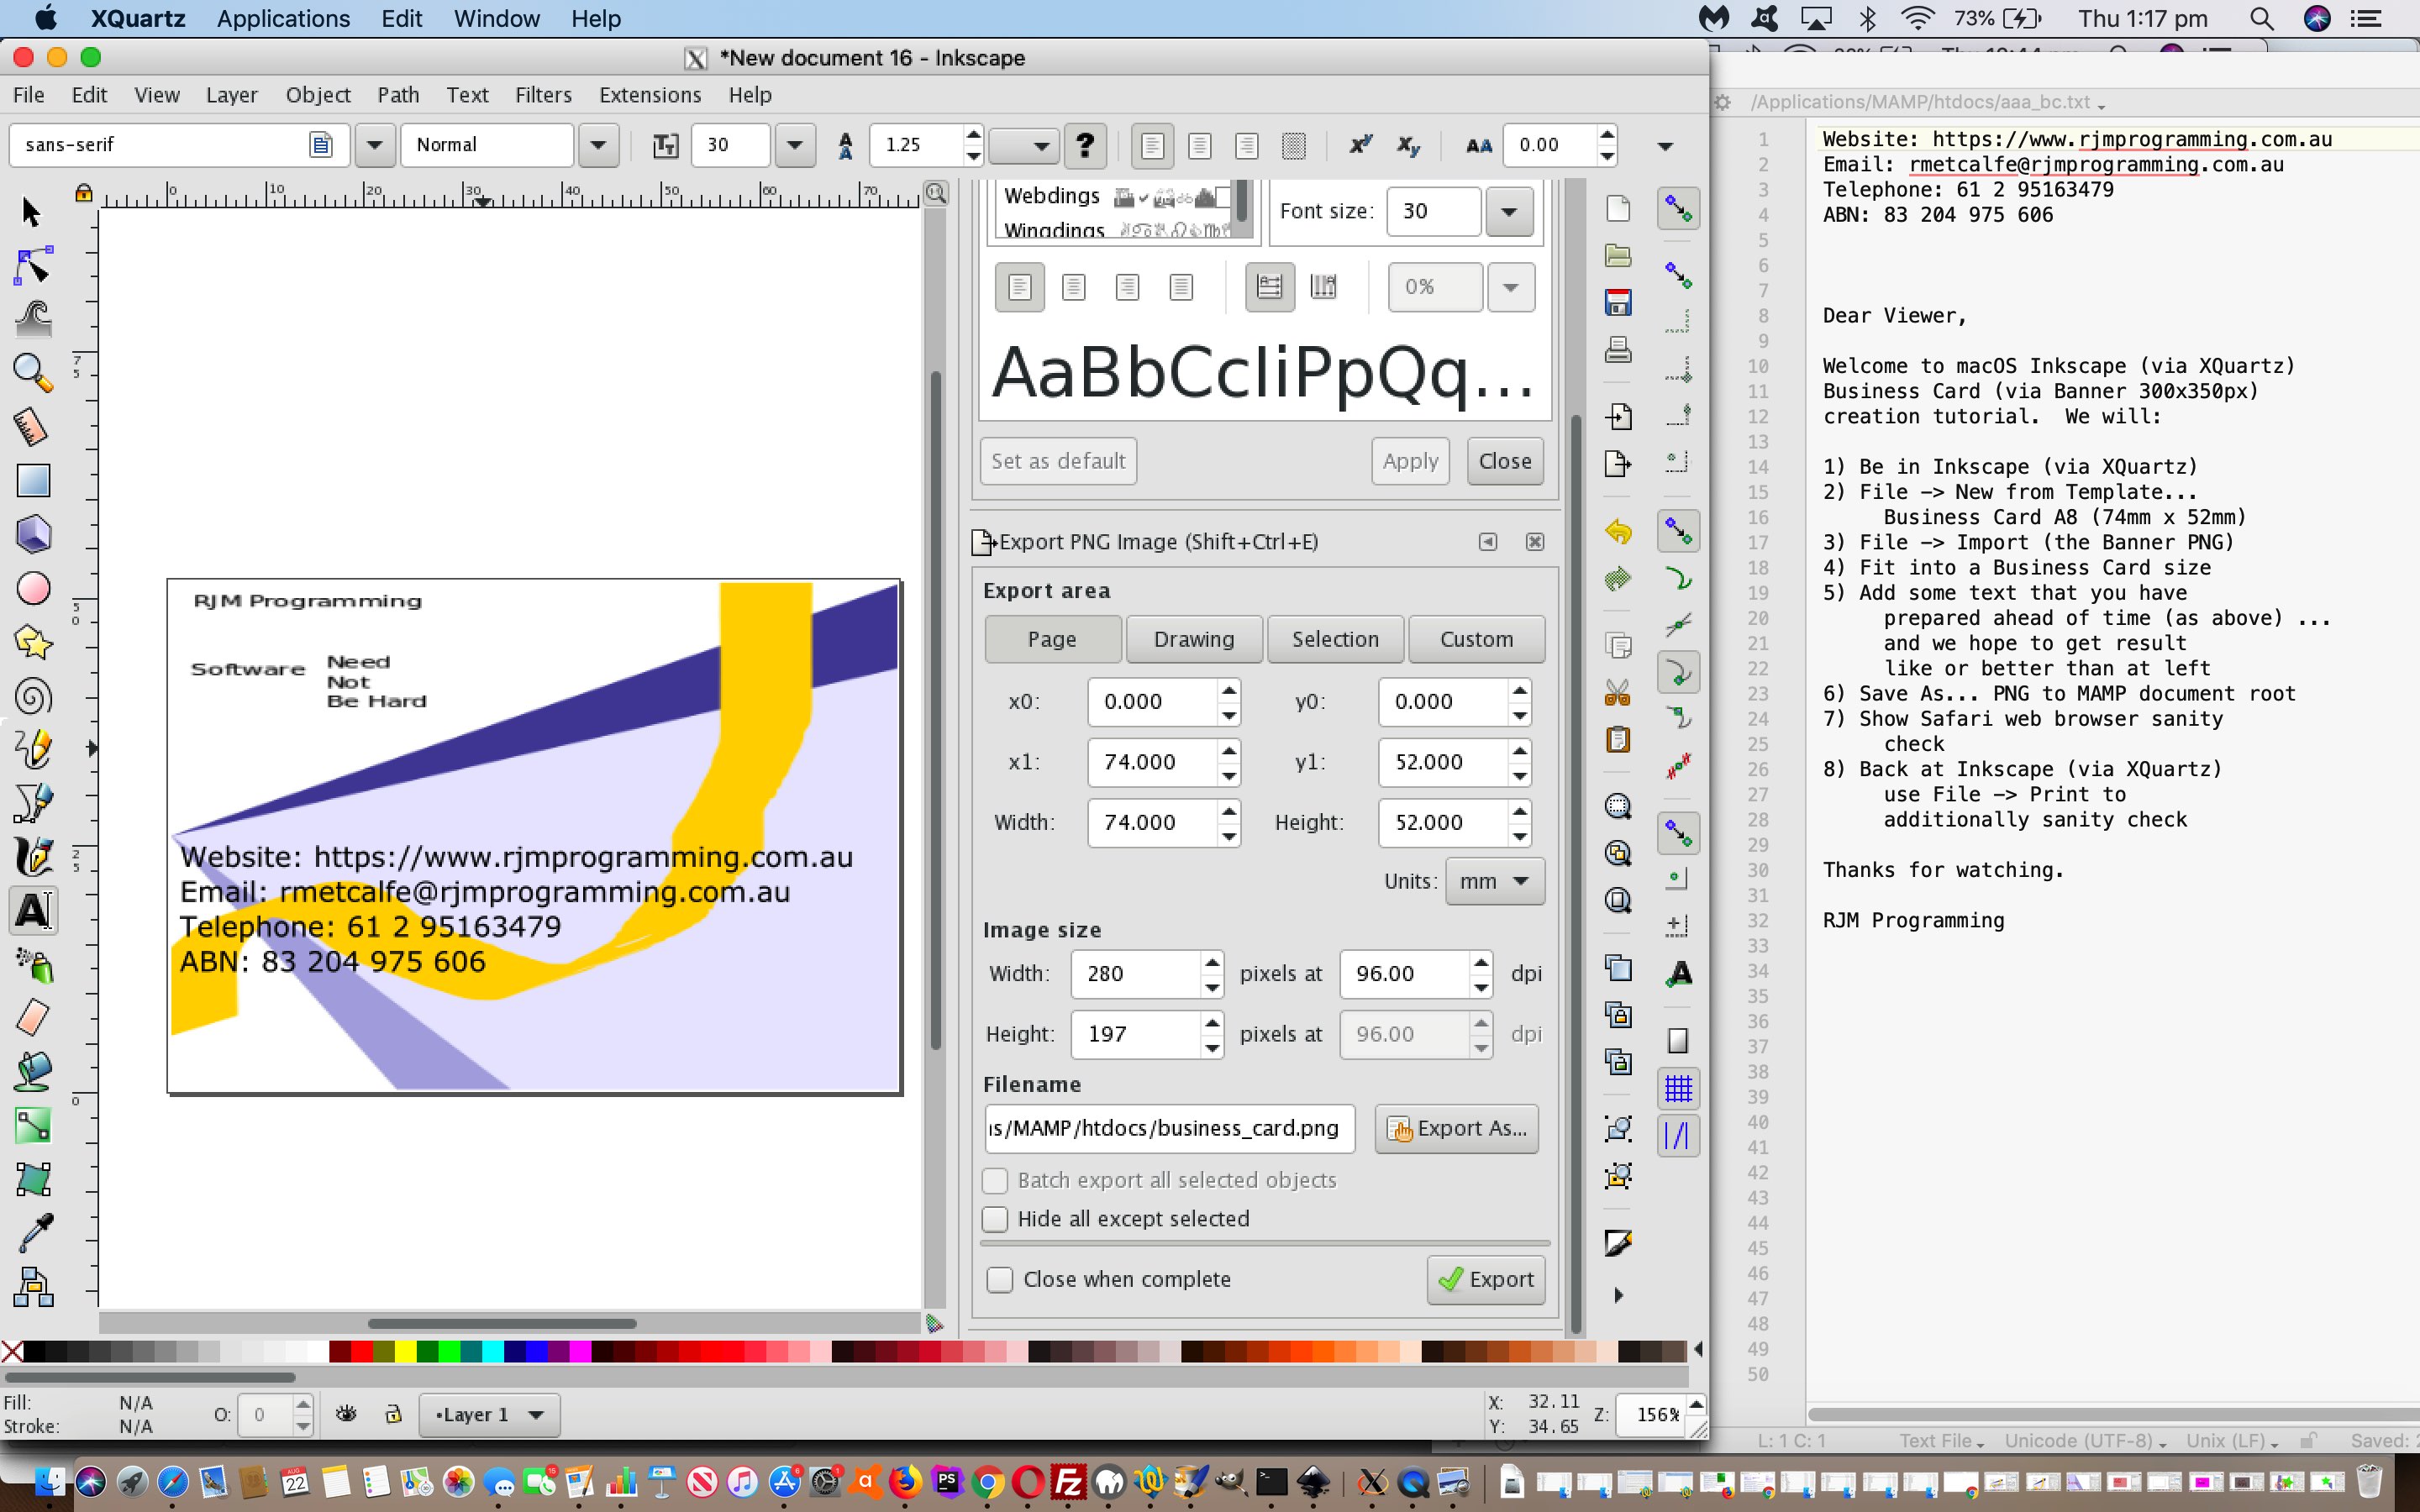
Yesterday’s Inkscape Vector Image Editor Banner Tutorial set us to thinking that we’d like to base an A8 business card … spoiler alert …
 … on the vector graphics and even that text of the banner … |
 |
… created via the steps shown in the YouTube video below …
And below is that YouTube video’s transcript (plus the Save As (step) we forgot (on the actual video’s transcript)) …
Website: https://www.rjmprogramming.com.au
Email: rmetcalfe@rjmprogramming.com.au
Telephone: 61 2 95163479
ABN: 83 204 975 606
Dear Viewer,
Welcome to macOS Inkscape (via XQuartz)
Business Card (via Banner 300x350px)
creation tutorial. We will:
- Be in Inkscape (via XQuartz)
- File -> New from Template…
Business Card A8 (74mm x 52mm)- File -> Import (the Banner PNG)
- Fit into a Business Card size
- Add some text that you have
prepared ahead of time (as above) …
and we hope to get result
like or better than at left- Save As… PNG to MAMP document root
- Show Safari web browser sanity
check- Back at Inkscape (via XQuartz)
use File -> Print to
additionally sanity check
Thanks for watching.
RJM Programming
Previous relevant Inkscape Vector Image Editor Banner Tutorial is shown below.
We got a job recently to create a banner for RJM Programming. No worries, for our MacBook Pro runnning macOS Mojave 10.14.5. Think Pages or Gimp just for starters (or read this useful link). But our specification involved a requirement for 300×350 pixels, which is not a popular banner size. Of course, you can “work” desktop graphical editors to output data in a variety of formats and sizes, but we think it might be best to decide on a method that comes from a “300×350 banner” online search. And examining the resultant links got us to revisit the “vector graphics champion” freeware (and open source) Inkscape desktop application (added to our The Best Things In Life Are Free … list) we last talked about at Inkscape Vector Image Editor Primer Tutorial.
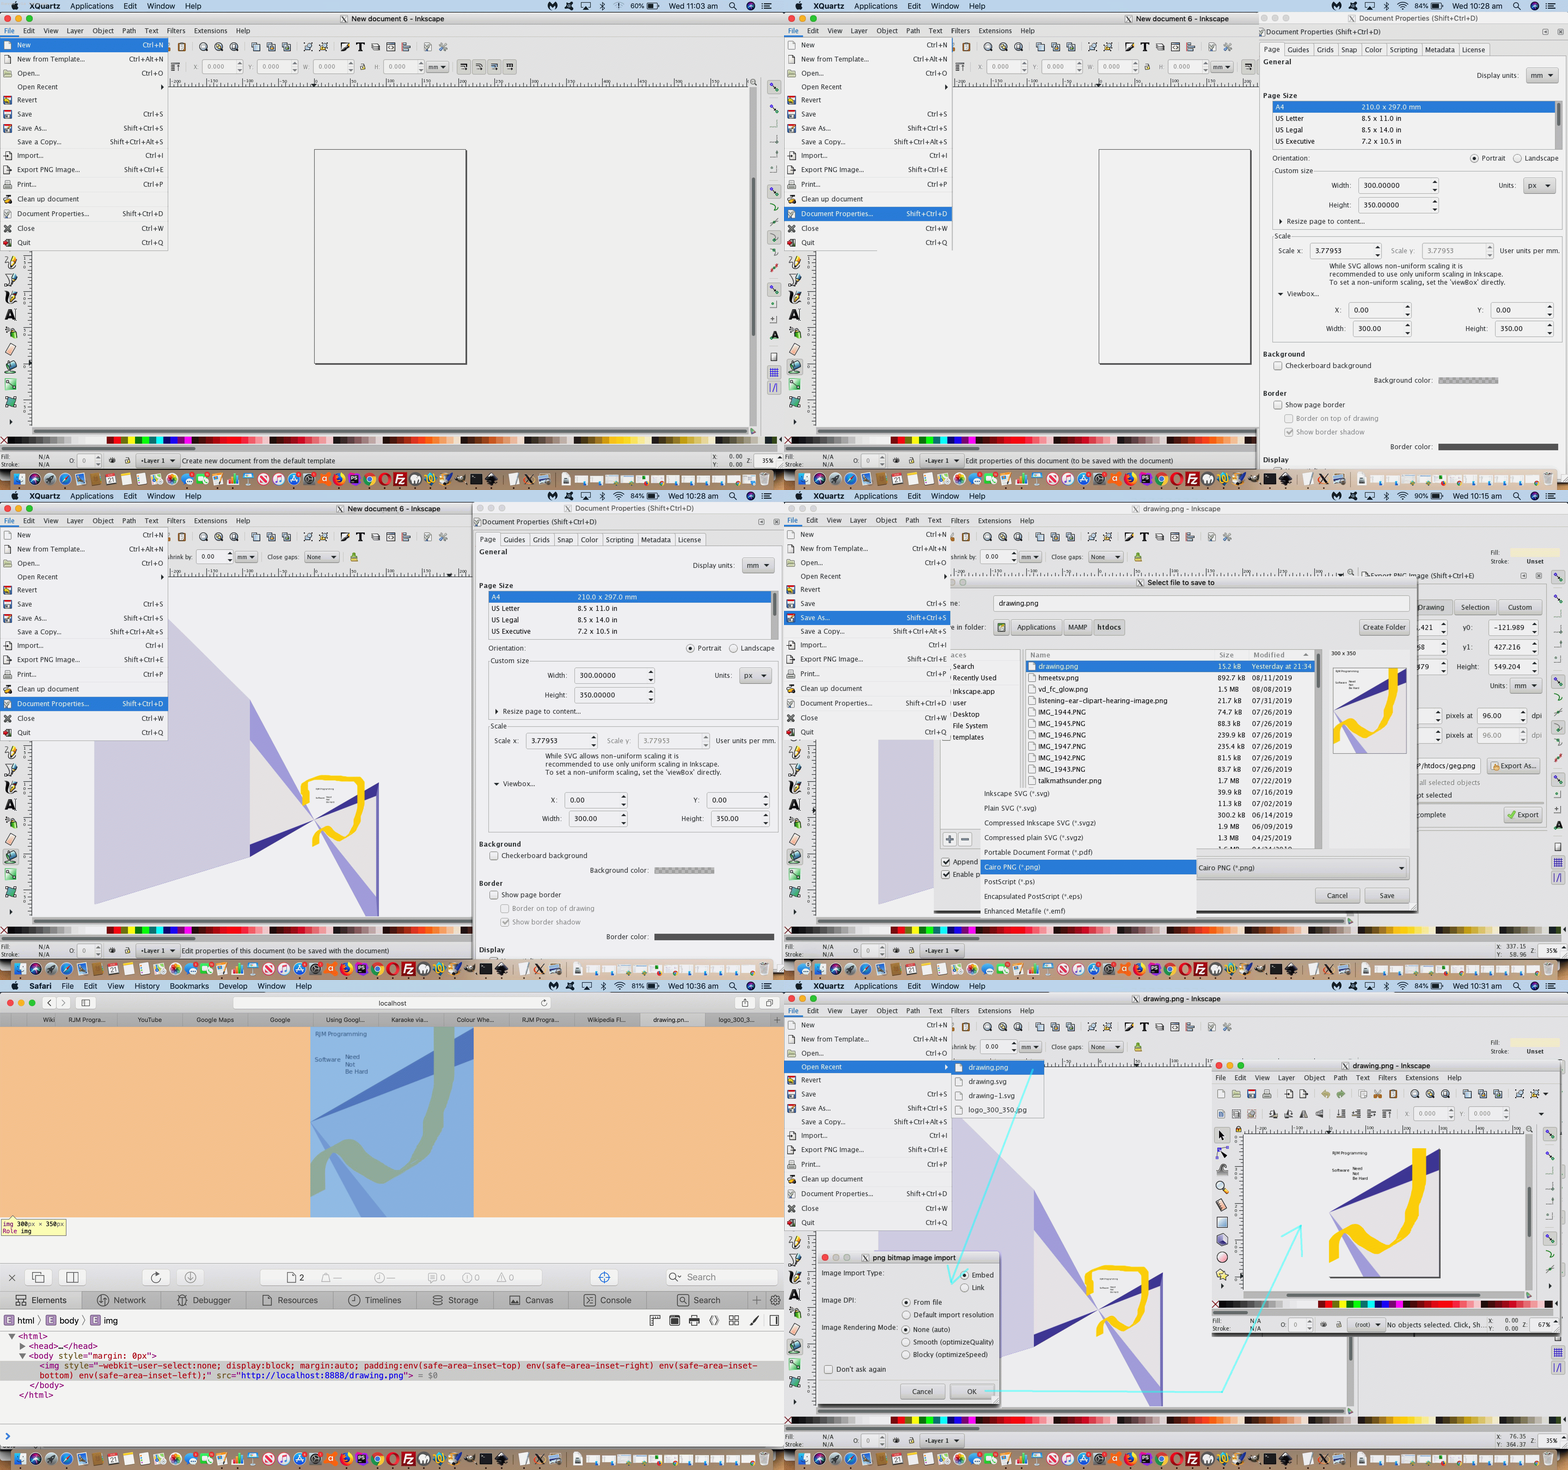
And so, with the great Inkscape, how did we create our 300×350 pixel banner below?

In broad brush terms …
- Click the Inkscape icon (which, after install, we arranged to reside in the Dock down the bottom of the screen)
- File -> New … for blank vector graphics document … but we direct your attention to the “New from Template…” which could be really useful for you to avoid having to do the step below …
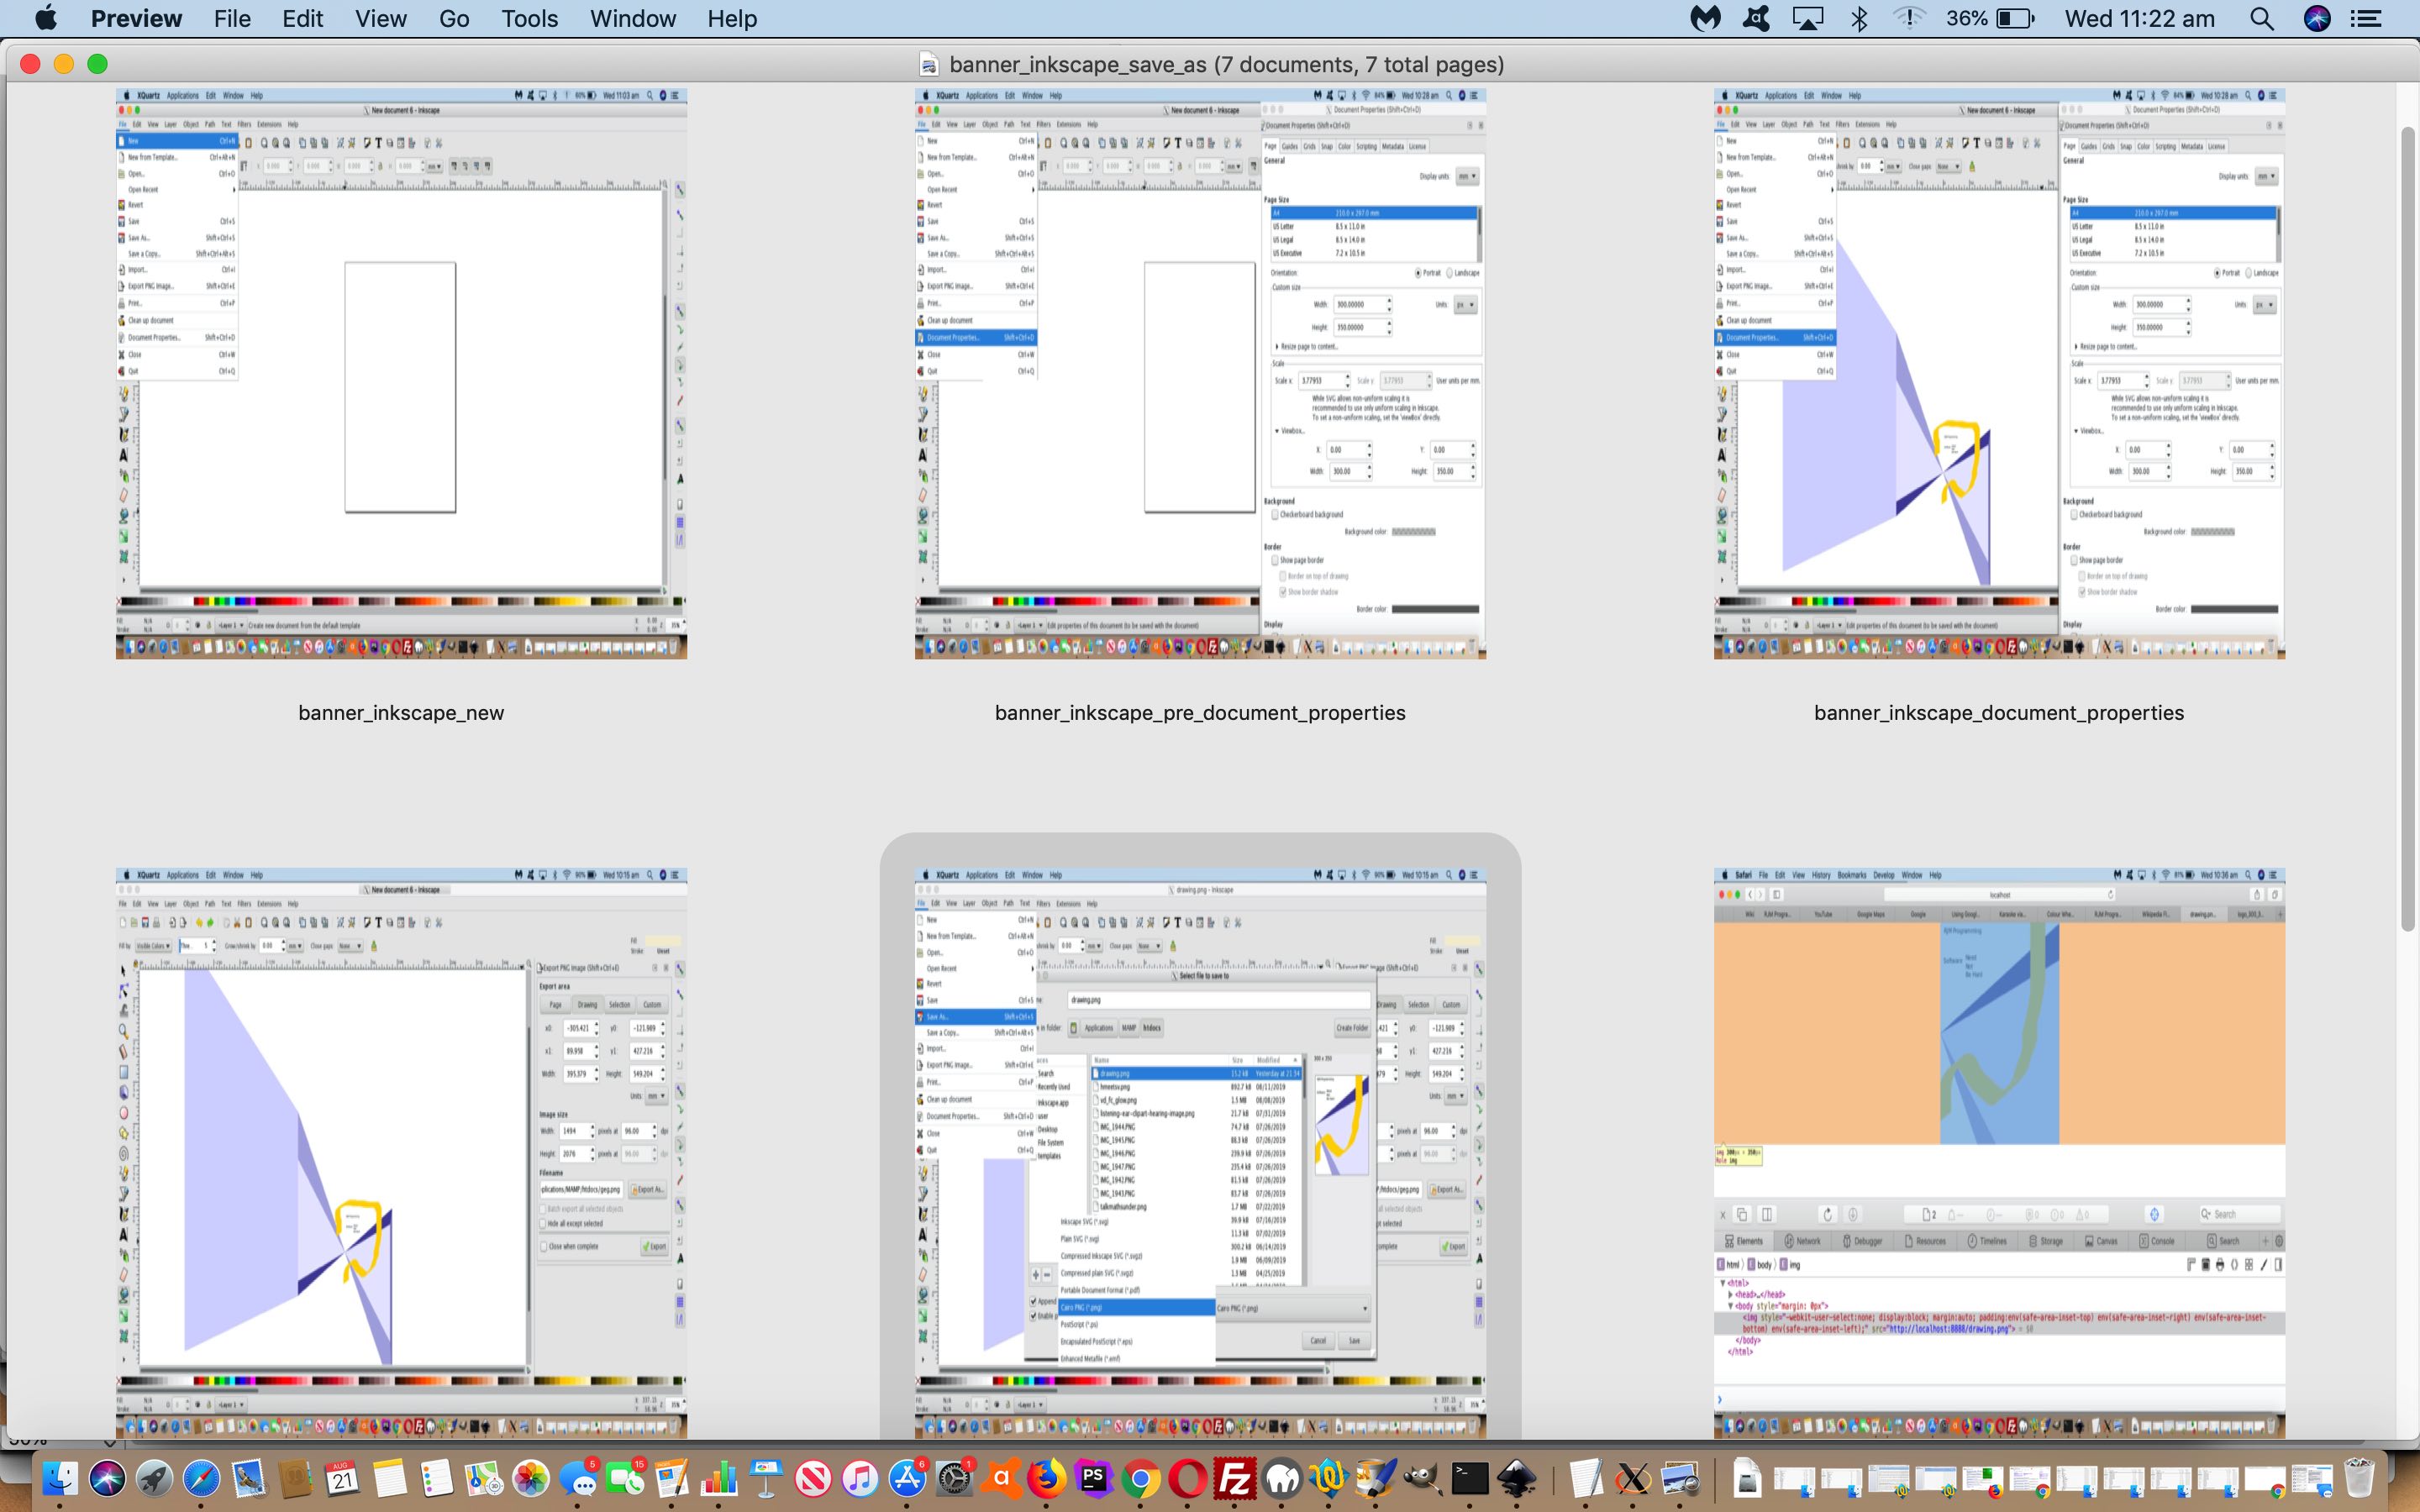
- File -> Document Properties … Custom Size: Units – pixels, Width – 300, Height – 350 … Viewbox: Width – 300, Height – 350 … Close the Document Properties window via red close icon at top left
- Did the vector graphics artwork, involving, for us, Create 3d boxes, Create and edit text objects, Draw calligraphic or brush strokes
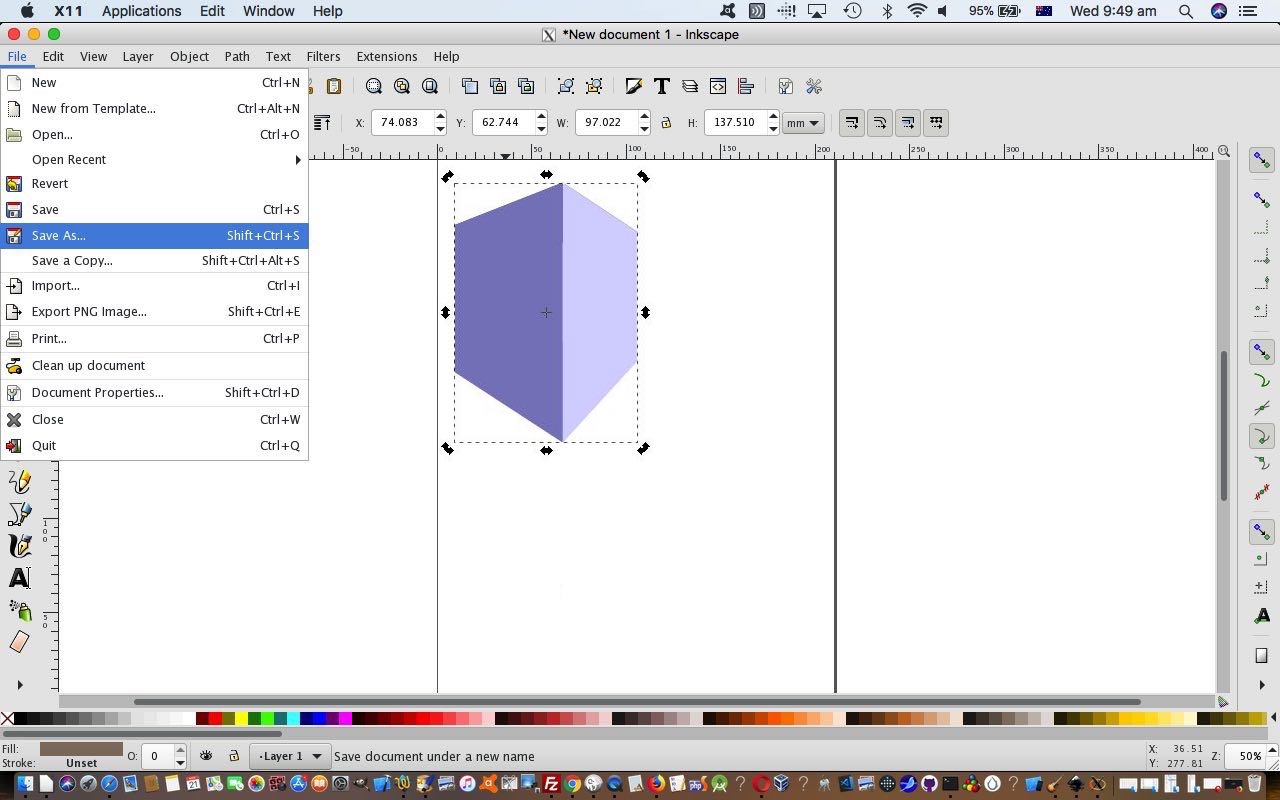
- File -> Save As… this is where we learn that Inkscape may be a vector graphics editor, but that doesn’t mean you can’t Save As another image type, and so with the Type dropdown, we choose Cairo PNG (*.png) (from the default Inkscape SVG (*.svg) format) and after arranging a good path to save to, we entered Name: drawing.png … and clicked Save button
- Separately, to check the 300×350 pixel requirement, we open our MAMP directory /Applications/MAMP/htdocs/drawing.png as http://localhost:8888/drawing.png (in a Safari web browser window), open Develop -> Show Web Inspector and click the Inspect button to highlight our Inkscape created PNG image to confirm its size as 300×350 pixels
… and rest assured it is possible via Inkscape’s File -> Open… to open this (non-vector) PNG image that gets Imported back into the vector graphics that is Inkscape’s thangthing.
Did you know?
We’re runnning macOS Mojave 10.14.5 here on this MacBook Pro in August, 2019. Inkscape needs an X11 terminal application to interface to, that being (called) XQuartz in this day and age. But installing the 2.7.11 most recent XQuartz version, at the time of writing, caused issues with the Inkscape 0.92.2 installation. You’d click the Inkscape icon and in the dock it would jump up and down then effectively die. Even in Finder, Ctrl clicking to reveal Package Contents and get to the Unix executable in the Contents and then macOS folders, to click, same problem. But, thanks to the advice at this great link, we found that going back through the XQuartz version releases to its 2.7.9 version cleared up all these issues.
Previous relevant Inkscape Vector Image Editor Primer Tutorial is shown below.
As far as image editing goes at RJM Programming, we turn to …
- PaintBrush (the Mac OS X one) for more than 90% of the simpler work … and then use …
- Preview (Mac OS X) occasionally to do with resizing tasks … but, more often, for the rest of the work we use …
- Gimp (Mac OS X desk application as XQuartz or X11) for jobs requiring special effects or filters or opacity or colourization or hue control
But what if you want to “Export As…” SVG? None of the applications above, “out of the box” “Export As…” SVG. First off, let’s get a reason for this from this very useful link, thanks …
GIMP is a raster graphics editor application. SVG is a form of vector graphics. If you want to edit SVG files, you should install the inkscape package and use Inkscape instead.
Yes, the SVG image format is a vector graphics image format, and that is the difference. So we went along with the advice and used, for our Mac OS X system the DMG method of (free, open source) install at the Inkscape website to get things rolling along.
Today’s PDF slideshow takes it up from that point, showing us Creating a 3D Box and dragging our way to creating a 3D Box shape that we “Save As…” (because now we are well and truly in the “vector” woooorrrrrrlllllld) /Applications/MAMP/htdocs/drawing.svg … why? Well, it’s our way to remind you, as we so often do, that the MAMP local Apache/PHP/MySql web server document root, by default, points at /Applications/MAMP/htdocs/ and in a web browser, with MAMP activated, points at (the URL prefix) HTTP://localhost:8888/ and so us lobbing onto …
HTTP://localhost:8888/drawing.svg
… has you seeing what we saw on MAMP (and then we uploaded this to the RJM Programming website place you are accessing with the link above). What you need to do this is a (s)ftp desktop application like FileZilla. Web server maintenance 101.
If this was interesting you may be interested in this too.
If this was interesting you may be interested in this too.
If this was interesting you may be interested in this too.
If this was interesting you may be interested in this too.
If this was interesting you may be interested in this too.
If this was interesting you may be interested in this too.
If this was interesting you may be interested in this too.
If this was interesting you may be interested in this too.
If this was interesting you may be interested in this too.
If this was interesting you may be interested in this too.
If this was interesting you may be interested in this too.

