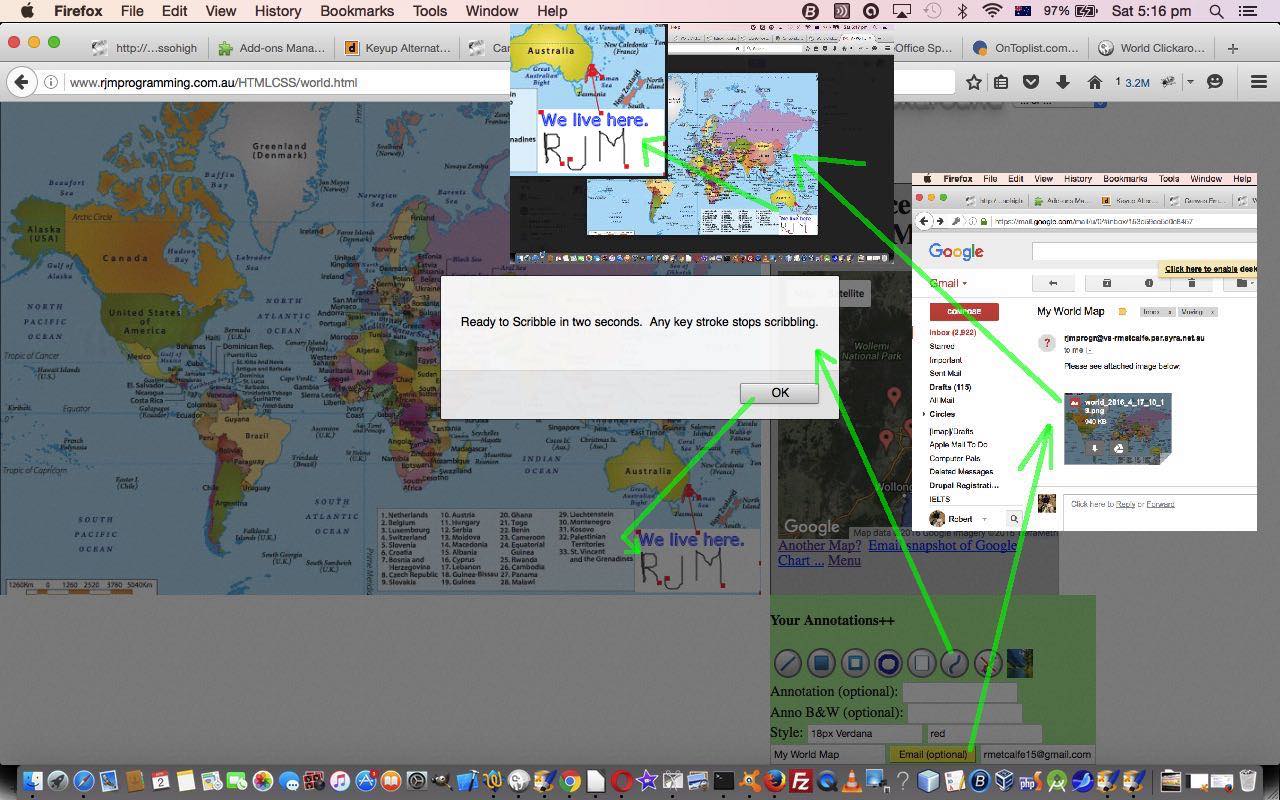
Personally think that Annotations are better when there is a “Scribble” functionality option. Perhaps you want to “sign off” on your Annotations. Without a “Scribble” option, it’s a bit impersonal relying on computer fonts as the means by which you “sign” the work.
And down the track it’s helping with our “final aim”, which will be revealed as time goes on.
To “Scribble” the main mouse event that interests us is the “onmousemove” event which happens when the mouse … moves … in which case if you are in “Scribble” mode, draw a line between the last two data points. So from that you would glean, and we’ll fill in, as well, that …
- the user needs to tell the computer it wants to start into “Scribble” mode (like a green light on the traffic light) … after a 2 second delay to allow the user to position themselves with their mouse … so we introduce a button for that, that the user can click … but how does the user do what was considered in the early days of all graphical application work … “pen up” … ie. mouse up … so …
- if onmouseup (or touchend) gets triggered we want it not to draw lines but be ready to resume (like a yellow light on the traffic light) … and when in this mode …
- if onmousedown gets triggered while “the traffic light is yellow” (ie. in the mode above) we want it to start to draw lines again with any mouse moves … and to call the whole thing off …
- if the keyboard is used stop any “Scribble” operations (or click the crossed out button supplied) (like a red light on the traffic light)
Reinventing penmanpersonship is a bit of a stretch, but nevertheless, adds a degree of authenticity to your content, for this is what you are doing, should you go on and email your work as an email attachment … you become an uploader of content … yet again, no doubt. This is a lot more common on the net for all of us, as each day passes. Maybe also, as each night passes. Even as Collingwood streams down the left wing, and passes, no doubt.
Yet again, our world.html did not need to change for this new “Scribble” functionality but our external Javascript you could call world.js changed quite a bit, setting up these mouse (or touch) event logics, as its Javascript “setTimeout” delayed onload function …
function touchHandler(event) // thanks to http://stackoverflow.com/questions/1517924/javascript-mapping-touch-events-to-mouse-events

{

    var touches = event.changedTouches,

        first = touches[0],

        type = "";

    //if (event.targetTouches.length == 1) {


    switch(event.type)

    {

        //case "touchstart": type="mousedown"; break;

        case "touchmove":  type="mousemove"; break;

        case "touchend":   type="mouseup"; break;

        default: return;

    }


             //initMouseEvent(type, canBubble, cancelable, view, clickCount,

    //           screenX, screenY, clientX, clientY, ctrlKey,

    //           altKey, shiftKey, metaKey, button, relatedTarget);


    var simulatedEvent = document.createEvent("MouseEvent");

    simulatedEvent.initMouseEvent(type, true, true, window, 1,

                              first.screenX, first.screenY,

                              first.clientX, first.clientY, false,

                              false, false, false, 0/*left*/, null);


    first.target.dispatchEvent(simulatedEvent);


    event.preventDefault();

    event.stopPropagation();


    switch(type)

    {

        //case "mousedown": if (isScribble == 1) { isScribble=2; } break;

        case "mousemove": if (isScribble == 2) {

       if (x == 0 && y == 0 && lastx == 0 && lasty == 0) {

       if (event.pageX || event.pageY) {

       x = event.pageX - elemLeft;

       y = event.pageY - elemTop;

       } else {

       x = event.clientX - elemLeft;

       y = event.clientY - elemTop;

       }

       lastx=x;

       lasty=y;

       } else {

       lastx=x;

       lasty=y;

       if (event.pageX || event.pageY) {

       x = event.pageX - elemLeft;

       y = event.pageY - elemTop;

       } else {

       x = event.clientX - elemLeft;

       y = event.clientY - elemTop;

       }

       }

     if (x != lastx || y != lasty) {

      document.getElementById('divannotation').style.display='block';

      document.getElementById('myisubject').style.display = 'inline';

      document.getElementById('myiemail').style.display = 'inline';

    context.strokeStyle=document.getElementById('mycolour').value;

    context.beginPath();

    context.moveTo(x,y);

    context.lineTo(lastx,lasty);

    context.stroke();

	}

    }

    break;

        case "mouseup":  if (isScribble == 2) { isScribble=1; } break;

        default: return;

    }

}


function tryit() {

 var tds=document.getElementsByTagName('td'), hstuff='';

 if (tds.length > 0) {

    hstuff+="<div style='position: absolute; top:600px; left:860px; display:none; background-color: lightgreen; ' id='divan" + "notation'><h4>Your Annotations++</h4>";

    hstuff+=" <img src='http://www.rjmprogramming.com.au/MarkItUp/line.png' onclick=' doline(); ' alt='Line' title='Line'></img>";

    hstuff+=" <img src='http://www.rjmprogramming.com.au/MarkItUp/rectangle.png' onclick=' dorectangle(); ' alt='Rectangle' title='Rectangle'></img>";

    hstuff+=" <img src='http://www.rjmprogramming.com.au/MarkItUp/rectangleborder.png' onclick=' dorectangleborder(); ' alt='Rectangle Border' title='Rectangle Border'></img>";

    hstuff+=" <img src='http://www.rjmprogramming.com.au/MarkItUp/circle.png' onclick=' docircle(); ' alt='Circle' title='Circle'></img>";

    hstuff+=" <img src='http://www.rjmprogramming.com.au/MarkItUp/clear.png' onclick=' clearall(); ' alt='Clear' title='Clear'></img>";

    hstuff+=" <img src='http://www.rjmprogramming.com.au/MarkItUp/sline.png' onclick=\" alert('Ready to Scribble in two seconds.  Any key stroke stops scribbling.'); setTimeout(intwo,2000); \" alt='Scribble' title=''></img>";

    hstuff+=" <img src='http://www.rjmprogramming.com.au/MarkItUp/zline.png' onclick=' isScribble=0; ' alt='End of scribble' title='End of scribble'></img>";

    hstuff+=" <img src='http://www.rjmprogramming.com.au/MarkItUp/image.png' onclick=\" document.getElementById('file').click();  document.getElementById('file').style.display='block'; document.getElementById('dpf').style.display='block'; \" alt='Image' title='Image'></img><input style='display:none;' id='file' type='file' name='file'><div id=dpf style='display:none;'>  <span class='readBytesButtons'><button style='display:none;' data-endbyte='4' data-startbyte='0'>1-5</button><button style='display:none;' data-endbyte='14' data-startbyte='5'>6-15</button><button style='display:none;' data-endbyte='7' data-startbyte='6'>7-8</button><br>... vs Image URL: <input type='url' value='+' onblur='readUBlob(this.value,0,0);' style='width:60%;'></input><br>... Offset X: <input style='width:25%;' id='xoff' type='number' value='0'></input> Offset Y: <input style='width:25%;' id='yoff' type='number' value='0'></input><br><button onclick='readBlob(0,0);'>Place into Canvas</button><button onclick='readOBlob(0,0);'>Overlay into Canvas</button></div><div id='byte_range' style='display:none;'></div><div id='byte_content' style='display:none;'></div><input id='fil' value='' type='hidden'></input><img id='spareimg' src='' style='display:none;'></img>";

    hstuff+="<br>Annotation (optional): <input onblur='placeannotation(this);' id='iannotation' type='text' value=''></input><br><span>Anno B&W (optional): <input onblur='placeannotation(this);' id='jannotation' type='text' value=''></input><br>Style: <input type='text' id='myfont' value='18px Verdana'></input> <input type='text' id='mycolour' value='black'></input></span><br>";

    hstuff+="<form style='display:none;' id='myform' method='post' enctype='application/x-www-urlencoded' action='http://www.rjmprogramming.com.au/HTMLCSS/world.php' target='myiframetwo'><input type='hidden' name='mysubject' id='mysubject' value='My World Map'></input><input type='hidden' name='myfname' id='myfname' value=''></input><input type='submit' id='bsubmit' value='Submit' style='display:none;'></input><input type='hidden' name='ismobile' id='ismobile' value=''></input><input type='hidden' name='mode' id='mode' value='1'></input><input type='hidden' name='to' id='to' value=''></input><input type='hidden' name='mydurl' id='mydurl' value=''></input></form>";

    hstuff+="<iframe style='display:none;' id='myiframetwo' src='http://www.rjmprogramming.com.au/HTMLCSS/world.php'></iframe>";

    hstuff+="<input style='display:none;' onblur='fixmyemail(this.value + String.fromCharCode(32),1);' type='text' id='myisubject' value='My World Map '></input> <input style='background-color: yellow;' type='button' value='Email (optional)' onclick='  capture(document.getElementById(" + '"' + "mydurl" + '"' + "),document.getElementById(" + '"' + "bsubmit" + '"' + "),document.getElementById(" + '"' + "myemail" + '"' + "));   '></input> <a style='display:none;' target='_blank' id='myemail' href='mailto:fill.in.email@address?subject=My%20World%20Map&body='></a><input style='display:none;' onblur='fixmyemail(this.value,0);' type='text' id='myiemail' value='' title='Fill this in for emailed attachment'></input>";

    hstuff+="</div>";

    if (tds[eval(-1 + tds.length)].innerHTML.indexOf('diva' + 'nnotaxtion') == -1) tds[eval(-1 + tds.length)].innerHTML+=hstuff;

    var today = new Date();

    var dd = today.getDate();

    var mm = today.getMonth()+1; //January is 0!

    var yyyy = today.getFullYear();

    var hh = today.getHours();

    var minm = today.getMinutes(); //January is 0!

    var ss = today.getSeconds();

    document.getElementById('myfname').value = "world_" + yyyy + "_" + mm + "_" + hh + "_" + minm + "_" + ss + ".png";

    document.getElementById('myform').action = document.getElementById('myform').action.replace('?mode=1', '');

    document.getElementById('mode').value = '';

    document.getElementById('ismobile').value = 'y';

    document.getElementById('myisubject').style.display = 'inline';

    document.getElementById('myiemail').style.display = 'inline';

    document.getElementById('myform').action = document.getElementById('myform').action.replace('?mode=1', '');

    document.getElementById('myform').action = document.getElementById('myform').action.replace('mode=1', 'mode=');

    //document.getElementById('myemail').href = '#' + document.getElementById('myemail').href;

 }


    document.body.addEventListener('keyup', function(event) {

       if (isScribble == 2 || isScribble == 1) {

        isScribble=0;

       }

    });


    if (isTouch || isiPad) {

    //elem.addEventListener("touchstart", touchHandler, true);

    elem.addEventListener("touchmove", touchHandler, true);

    elem.addEventListener("touchend", touchHandler, true);

    elem.addEventListener("touchcancel", touchHandler, true);


    //elem.addEventListener('touchstart', function(event) {

    //   if (isScribble == 1) {

    //    isScribble=2;

    //   }

    //});


	} else {


    elem.addEventListener('mouseup', function(event) {

       if (isScribble == 2) {

        isScribble=1;

       }

    });


    elem.addEventListener('touchend', function(event) {

       if (isScribble == 2) {

        isScribble=1;

       }

    });


    elem.addEventListener('touchstart', function(event) {

       if (isScribble == 1) {

        isScribble=2;

       }

    });


    elem.addEventListener('mousedown', function(event) {

       if (isScribble == 1) {

        isScribble=2;

       }

    });


    elem.addEventListener('mousemove', function(event) {

       if (isScribble == 2) {


       if (x == 0 && y == 0 && lastx == 0 && lasty == 0) {

       if (event.pageX || event.pageY) {

       x = event.pageX - elemLeft;

       y = event.pageY - elemTop;

       } else {

       x = event.clientX - elemLeft;

       y = event.clientY - elemTop;

       }

       lastx=x;

       lasty=y;

       } else {

       lastx=x;

       lasty=y;

       if (event.pageX || event.pageY) {

       x = event.pageX - elemLeft;

       y = event.pageY - elemTop;

       } else {

       x = event.clientX - elemLeft;

       y = event.clientY - elemTop;

       }

       }


    if (x != lastx || y != lasty) {

      document.getElementById('divannotation').style.display='block';

      document.getElementById('myisubject').style.display = 'inline';

      document.getElementById('myiemail').style.display = 'inline';

    context.strokeStyle=document.getElementById('mycolour').value;

    context.beginPath();

    context.moveTo(x,y);

    context.lineTo(lastx,lasty);

    context.stroke();

	}

    }


    });

    }


setTimeout(tryit, 2000);
… as you can see from this link. Regarding some mobile platform issues we’d like to thank this really useful link … so, thanks. And if actions speak louder than words no doubt you’ll be wanting the live run link.
As for …
We “might” have genericized the world.html changes into other HTMLs of its ilk … well, we decided against that for now … but will later … and partly the reason is that there is more to do, and we just want to concentrate on world.html
… from last time’s Canvas Email Attachment New Image Tutorial as shown below, that still remains the case … there is more to do. Hope to see you back again for that then.
Previous relevant Canvas Email Attachment New Image Tutorial is shown below.
When we last left off with Canvas Image Email Attachment External Javascript Tutorial project we posed two ongoing “trailers”/”spoiler alerts” …
- We “might” have genericized the world.html changes into other HTMLs of its ilk … well, we decided against that for now … but will later … and partly the reason is that there is more to do, and we just want to concentrate on world.html with …
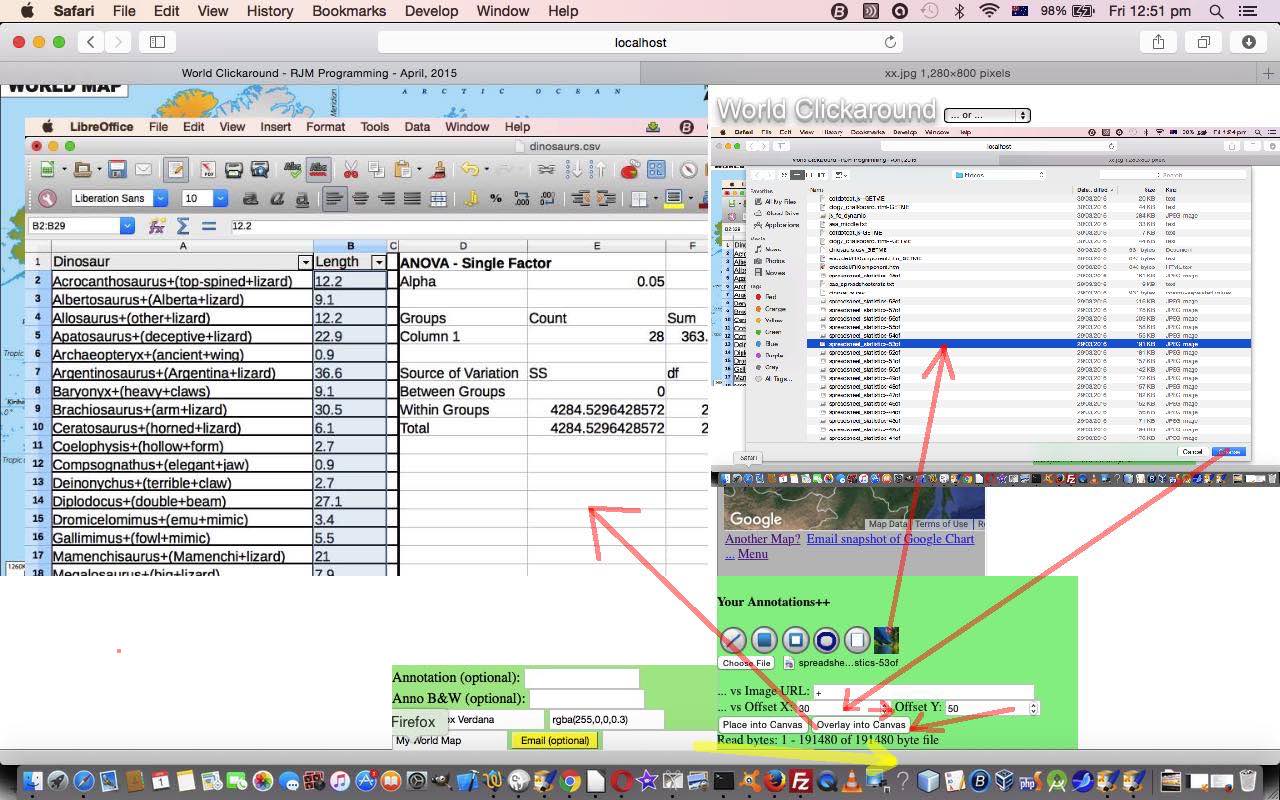
- Did you guess what functionality we might want to do next? We want to allow the user to “overlay” or “clobber” the existing canvas’s map image with an image of their choosing in one of two entry methods …
- via a Browse button selection of an image on their computer … or …
- via the specification of a URL pointing at an image (on the web, probably)
We’ve grappled with the relatively newly arrived brilliance of HTML5 with ideas off Browse buttons and their manipulation of file data, the methods of which don’t even need PHP or ASP.Net (or any other server side language) to proceed … cute, huh?! We referenced this great link when we presented PHP/HTML/Javascript Media & Document File Browse Tutorial, and you may want to reference that regarding the useful Javascript HTML5 FileReader methods. Another really useful link for today’s work is … what we just linked … we presume … thanks. We find FileReader.readAsDataURL() method to be just what we want today to take the data of a file as a data URL and be able to use the canvas.drawImage() to place that image data onto the canvas by “overlaying” it or “clobbering” it.
Our world.html did not need to change for this new image friendly functionality but our external Javascript you could call world.js changed quite a bit as you can see from this link.
To envisage all this, you really should try a live run of our interactive World Map (with Annotation and Email Attachment functionality) web application. We hope some Browse button thoughts start springing forth from the bit below the hair (or if you’re standing on your head right now … the bit above the hair).
Previous relevant Canvas Image Email Attachment External Javascript Tutorial is shown below.
Rome wasn’t built in a day … just read “SPQR A History of Ancient Rome” by Mary Beard, to confirm that. And software takes time, and often revisits and rethinks, in between, running it past people, perhaps. So it is with the build up of our “cause”, which we’ll eventually reveal, that started with Canvas Image Email Attachment Primer Tutorial as shown below, and moves on today, in two directions …
- Organization wise … we move some of the “Annotation++” functionality specifics to external Javascript … via …
<script type='text/javascript' src='world.js' defer></script>
… to be more modular, and to apply it to other web applications like world.html that aren’t world.html (which we will also do event-U-al-ly … maybe even today?! … you’ll see at the end of this blog posting if we have) - Functionality wise … we allow for more than “Annotations” now … hence the “Annotation++” notation above … we’ve been delving into our HTML canvas codes for logic to draw lines and rectangles (including a “huge white rectangle” to “clear” the canvas) and circles today
When you redesign arrangements this way, you should retest all the functionality combinations to make sure you haven’t broken anything … because that would be kinda’ stUpid. The adage should be that you leave things better than when you start, to do a good job … doh!
So there’s still an important bit of “base” functionality missing, and we’ll get to that next time, though maybe you’ve guessed what it would be yourself?!
So take a look at our HTML and Javascript and CSS world.html which changed as per this link which now calls on new external Javascript you could call world.js if you like. Unchanged is the concept (and the content) regarding the HTML using PHP server side code you could call world.php within an HTML iframe element. Again, please don’t think you’ll be able to achieve this functionality just with client-side Javascript. It involves server data. So here is a live run link in order for you to try this new functionality, which kicks into action from the second canvas click/touch, and on.
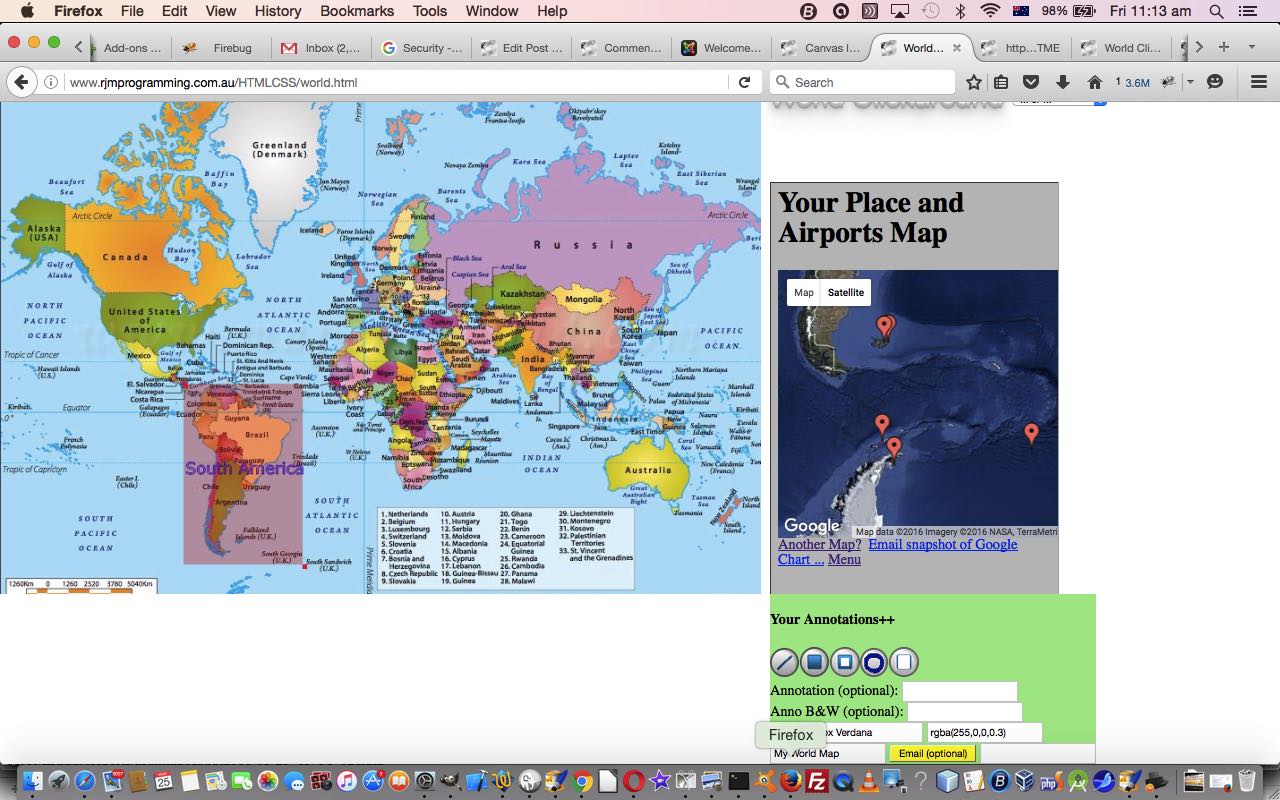
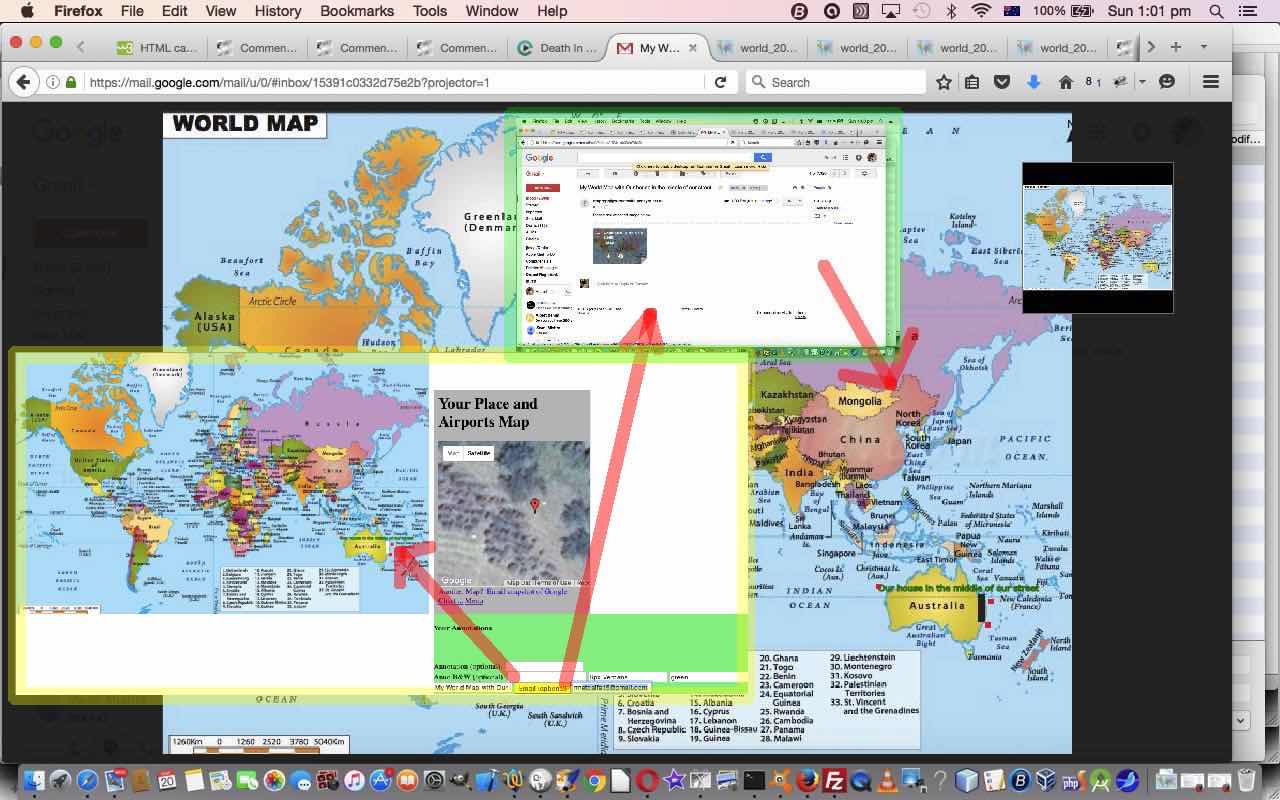
Hint: Don’t be shy to try some “rgba([red0-255],[blue0-255],[green0-255],[opacity0.0-1.0])” colour field possibilities in combination with the filled in rectangle option to improve your “overlay” functionality possibilities, as with today’s main tutorial picture.
Previous relevant Canvas Image Email Attachment Primer Tutorial is shown below.
Maybe you remember the series of blog postings that we last visited with HTML5 Canvas Map Clickaround Onresize Tutorial some time ago? We’ve been, over the last couple of days, working out how to …
- take an HTML canvas element’s [canvasContext].drawImage() image
- be able to overlay some interactively entered textual annotations over the top of user entered rectangle corners
- take a snapshot of this canvas with its annotations via [canvasContext].toDataURL() (woh!)
- use an HTML form element with method=POST target=myiframetwo to post the data to our (new) PHP (featuring the use of php://input for the first time, for us anyway) … which …
- emails that snapshot to someone
We allow for …
- non-mobile platforms to use their email clients, perhaps, via a body link to an image file stored on the rjmprogramming.com.au domain web server … or, because such functionality is awkward for mobile platforms, we …
- allow for the canvas contents be turned into image data that can be used as the data for an email attachment, thus allowing the web server to not have to store the data (there) now
Here’s some of the PHP code to create that email with its attachment, for your perusal (where $idata has that data URL data of the canvas’s contents, that is image/png data (in base64)) …
        //$headers = 'From: ' . 'rmetcalfe@rjmprogramming.com.au' . $eol;

        $headers = 'Reply-To: ' . 'rmetcalfe@rjmprogramming.com.au' . $eol;

                   //     'X-Mailer: PHP/' . phpversion();

        $contents = "";

        if ($idata != "") $contents = $idata;

        if (strpos('~' . $mybody, '~http') !== false || $contents != "") {

          if ($contents == "") $contents = @file_get_contents($mybody);

          if ($contents != '') {

//

    		date_default_timezone_set('Australia/Perth');

//

            //$mysubject .= ' ... ' . $mybody;

    		$fs = explode("/", $mybody);

    		$filename = $fs[-1 + sizeof($fs)];

    		$content = chunk_split(base64_encode($contents));

//

    		// a random hash will be necessary to send mixed content

    		$separator = md5(time());

//

    		$headers .= "MIME-Version: 1.0" . $eol;

    		$headers .= "Content-Type: multipart/mixed; boundary=\"" . $separator . "\"" . $eol . $eol;

    		$headers .= "Content-Transfer-Encoding: 7bit" . $eol;

    		$headers .= "This is a MIME encoded message." . $eol . $eol;

//

    		// message

    		$headers .= "--" . $separator . $eol;

    		$headers .= "Content-Type: text/plain; charset=\"iso-8859-1\"" . $eol;

    		$headers .= "Content-Transfer-Encoding: 8bit" . $eol . $eol;

//

    		$headers .= "Please see attached image below:" . $eol . $eol;

//

    		// attachment

    		$headers .= "--" . $separator . $eol;

    		$headers .= "Content-Type: application/octet-stream; name=\"" . $filename . "\"" . $eol;

    		$headers .= "Content-Transfer-Encoding: base64" . $eol;

    		$headers .= "Content-Disposition: attachment;filename=\"" . $filename . "\"" . $eol;

    		$headers .= $content . $eol . $eol;

    		$headers .= "--" . $separator . "--";

//

            ourpremail($tem, $mysubject, "", $headers); // emails to $tem

          }

        }
And so, with our proof of concept ideas, the world becomes (hopefully, lots of) our (collective) oyster(s), given a little imagination, here. Really, take a look at our HTML and Javascript and CSS world.html which changed as per this link. It has new PHP server side code you could call world.php within an HTML iframe element. Please don’t think you’ll be able to achieve this functionality just with client-side Javascript. It involves server data. So here is a live run link in order for you to try this new functionality, which kicks into action from the second canvas click/touch, and on.
Previous relevant HTML5 Canvas Map Clickaround Onresize Tutorial is shown below.
Yesterday we came back after quite some time in the (PHP) server world to some client (Javascript and HTML) work, and today, after yesterday’s HTML5 Canvas Map Clickaround Overlay Tutorial as shown below, we tackle a client Javascript event, the “onresize” event (best intervened with in terms of looking at the Javascript DOM “window” object rather than the “document” object), that is often “left until last” in a programmer’s mind … and often not thought about at all. That’s often me … but not today.
Perhaps the reason it is (often) neglected is that the design (you’ve come up with) leaves lots of room, and the styling “position:absolute;” concept is not used at all with your web application. Yesterday, though, “position:absolute;” is pivotal to the working of the web application, as is the positioning of the HTML canvas element at (0,0) … why? … the slightly glib answer here is that to complicate life is to complicate your web application, and if you can cater for the simple case, why not work with that simple case, with its simplified coding logic?
Okay, so what’s the scenario with yesterday’s HTML5 Canvas Map Clickaround Overlay Tutorial where the Javascript “onresize” event gets triggered. On a laptop or desktop computer, it is when you “drag” (a window corner) and, we anticipate, shrink your window (by then “dropping” (a window corner)) to end up with a window smaller than the set established size, width or height, we cater for with the HTML canvas element’s width or height.
Now we currently rely on the right hand side being the user controlling side, but if a user shrinks the window, and we refuse to get into any “zooming” logic … my strong advice is not to go there … you have two choices to my mind …
- “copy” the right hand HTML (into an existant blank HTML div element’s innerHTML) and “overlay” at (0,0) (with less opacity than the rest)
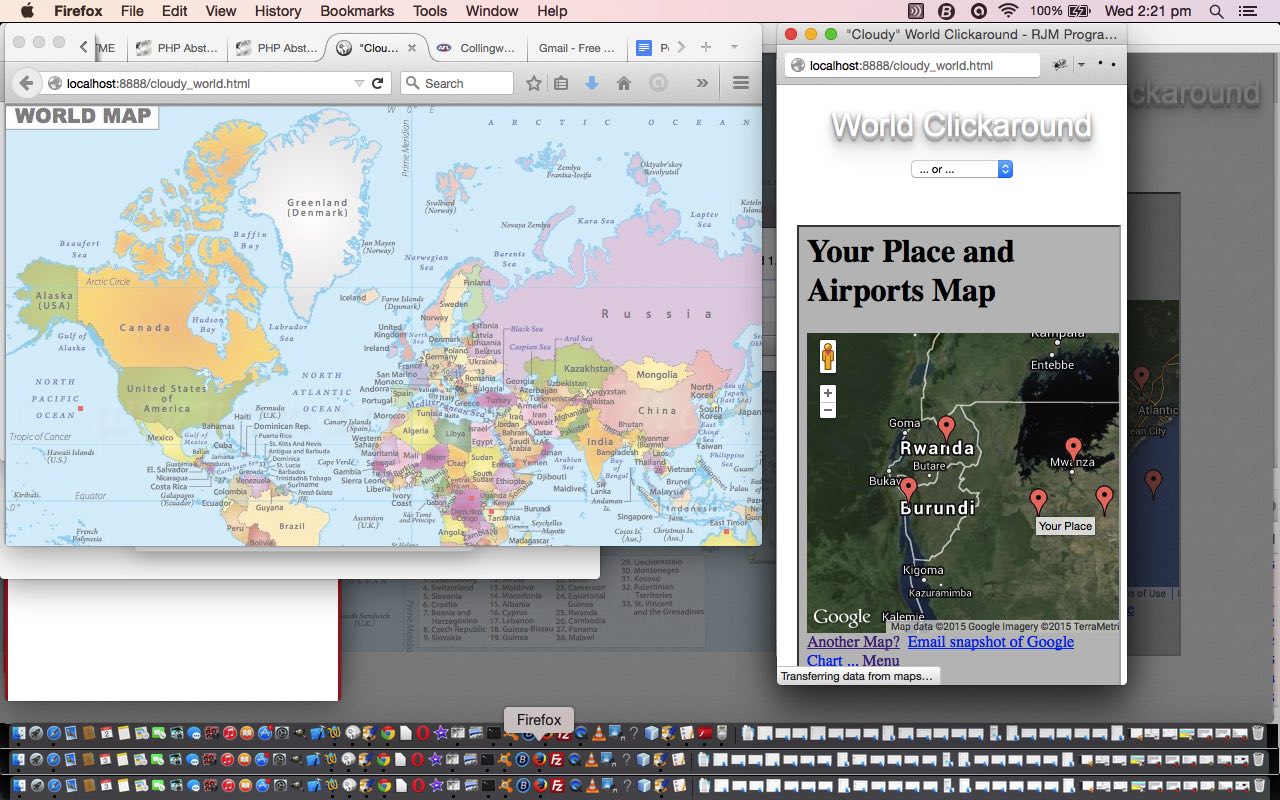
- “copy” the right hand HTML and use Javascript (where myWidth is calculated width of the HTML canvas element … remember this functionality from yesterday?) … and use window.open(“”,”Title”,”top=0px,left=” + eval(20 + myWidth) + “px,width=350px,height=600px”) (along with a global variable wadd) … for a popup window, as per …
wadd = window.open("","Your Place and Airports Map Goes Here ...","top=0px,left=" + eval(20 + myWidth) + "px,width=350px,height=600px");
var newhtml="<!doctype html><html><head>" + document.head.innerHTML + "</head><body>" + document.getElementById('dhuh').innerHTML.replace(/opacity:0.0;/g, "opacity:1.0;").replace('"Cloudy"', '').replace('id="myqiframe', 'id="myiframe').replace('id="mypqiframe', 'id="mypiframe').replace('id="myqa', 'id="mya');

wadd.document.write(newhtml);
You’ve probably guessed by the added detail in the second of above, the first idea was awkward, but if you want to pursue it yourself, via leads, look for the (left in) if (additional != ”) { } logic parts in the HTML/Javascript coding of cloudy_world.html (or try the live run).
We later use a Javascript setTimeout() call to wait a while while the hidden right hand side’s HTML iframe element is filled out with the Airport Data Near Your World Map Clicked Position, and through that knowledge over to the “wadd” window (where it is viewable, presumably … unless you’ve repositioned again (which is okay to test if you want)).
So, today, everything should be as per yesterday with no “resizing” (and of course the programmer adage to “not make things backward in functionality” would tell you that to hold onto this “tooth and nail” should be thought of as extremely important … probably of higher priority than any new functionality … think probably users get pretty annoyed by things that used to work, not working later, because of your own newly introduced bug).
It behoves me, my liege, to leave you with the HTML/Javascript code differences, to make this happen, from yesterday, here, and we hope it helps you in some small way. We also want to thank the “powers that be” for the excellent advice at this link, for this topic … thanks, as always.
Previous relevant HTML5 Canvas Map Clickaround Overlay Tutorial is shown below.
After some time in the (PHP) server world, it’s time to dive back into some client (Javascript and HTML) work, in this client/server world of web applications.
Today we revisit the “overlay” theme of blog postings, as the web application world is full of possibilities for overlay ideas.
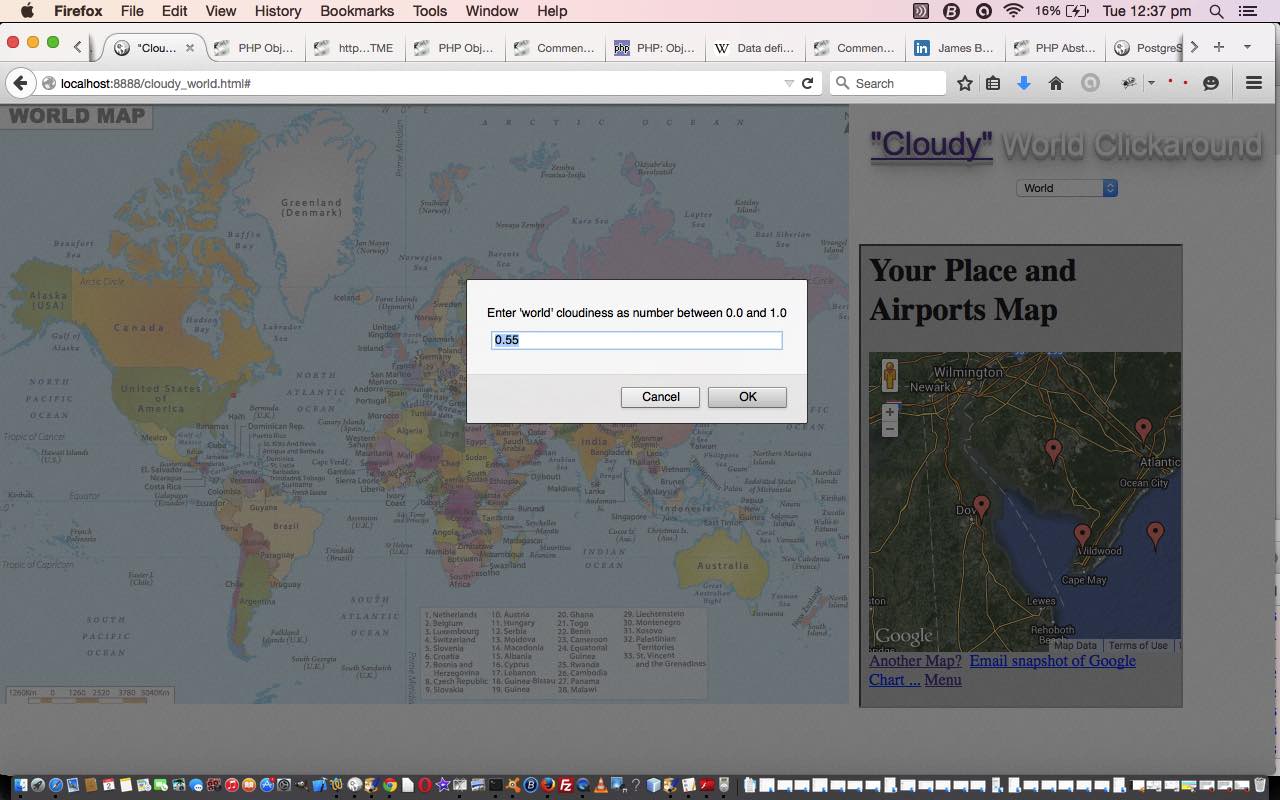
This time we overlay an HTML div element completely on top of an HTML canvas element, with some opacity (or some transparency), during the body “onload” event. We do not adjust the DOM “z-index” style property for either element. So what happens in this scenario when you click on this “multiple” HTML element combination? Well, it pans out you click on the HTML div element, so we have another task to do at the body “onload” event, to see things right, regarding the working of this web application, which starts where we left off with HTML5 Canvas Map Clickaround Follow Up Tutorial as shown below.
From this basis, this is how we got to today … there was HTML cloudy_world.html that changed like here.
You’ll see in the code above some great code presented at useful link (thanks) which is great for defining an HTML element’s size via …
        function SetBox(what) {

            var div = document.getElementById(what);

            if (div.getBoundingClientRect) {        // Internet Explorer, Firefox 3+, Google Chrome, Opera 9.5+, Safari 4+

              // do stuff

            }

        }
… and we hope you can see that the implications for “overlay” ideas you have are huge … and that is fine … but you may wonder how the HTML div element is made to drape right over all the canvas element … well, it uses styling as per …
- position: absolute;
- top and left and width and height parameters are all defined
- borderTop defined as having a size the same as height above as per our HTML div id=’boxdiv’ element …
                document.getElementById('boxdiv').style.position = 'absolute';

                document.getElementById('boxdiv').style.top = y + "px";

                document.getElementById('boxdiv').style.left = x + "px";

                document.getElementById('boxdiv').style.width = w + "px";

                document.getElementById('boxdiv').style.height = h + "px";

                document.getElementById('boxdiv').style.borderTop = h + 'px solid rgba(255,255,255,0.5)';
… and you’ll also see with the code how the HTML div id=’boxdiv’ element’s “onclick” details are transferred to the (effectively underlying) HTML canvas element, where all the previous business logic of the web application resided, and continues to function (once you make variables “x” and “y” global and control how they are derived at the HTML div id=’boxdiv’ element’s “onclick” event logic).
So please try the live run to see all this in action.
Previous relevant HTML5 Canvas Map Clickaround Follow Up Tutorial is shown below.
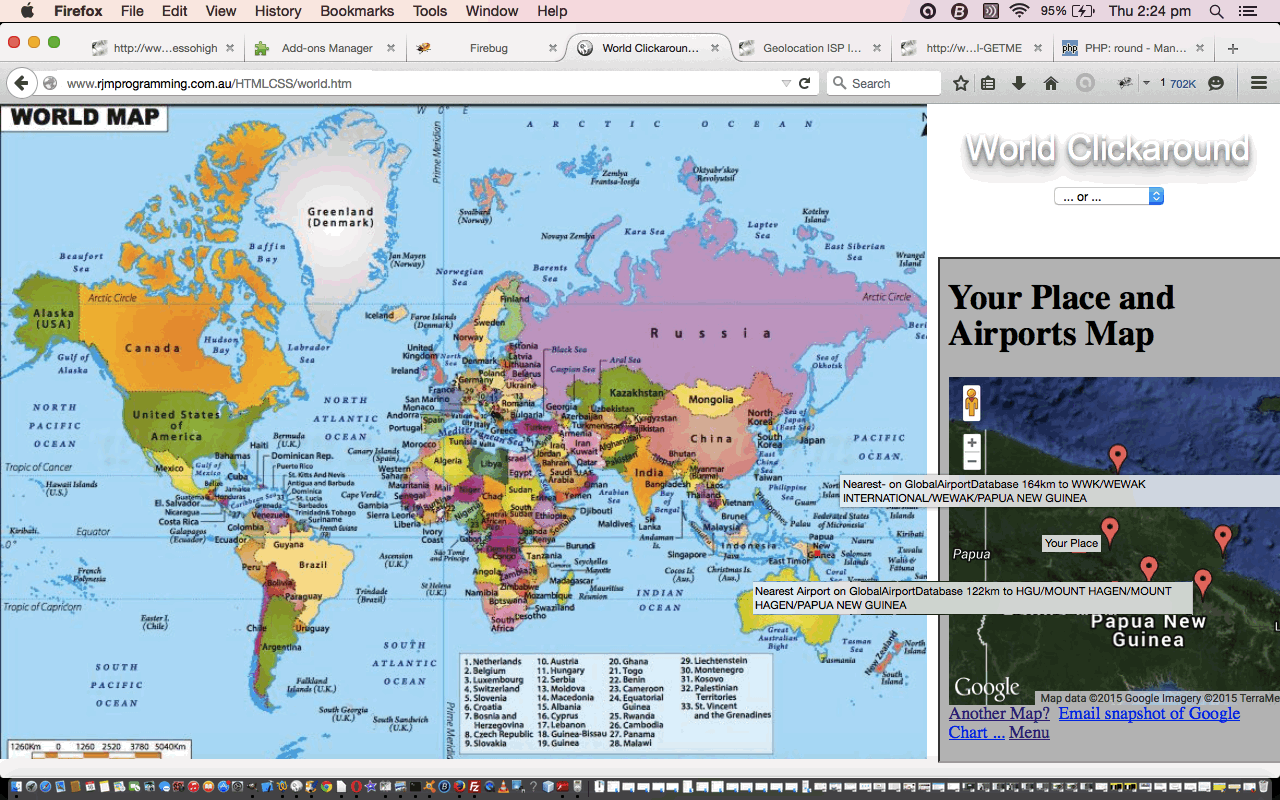
HTML5 brought in the incredibly useful “canvas” element, for the first time. Its existence opens up a whole new world of possibilities for web applications that are graphical by nature, as we saw yesterday with HTML5 Canvas Map Clickaround Primer Tutorial as shown below. Today, we extend that functionality as of yesterday, by adding the use of a public data feed to enhance the information we present with the Google Map “iframe” we use, and for this we need to thank, profusely, The Global Airport Database project by Arash Partow … thanks very much. Now this database (really a file), as you can imagine, has data that changes over time, so is probably best used as a data feed. Nevertheless, the exercise of using it as a snapshot is useful, and we go ahead and show the nearest 4 airports on the database, in that Google Map “iframe” as of April, 2015.
This involved the use of PHP (intair.php) to read the file and parse it, which wasn’t hard as it contains well formed “:” delimited data, and there is just the check needed for security hidden data given a latitude and longitude of zero … unless I’m mistaken, and where the water goes down the sink the other way as you cross the equator due south of London has several hundred microscopic airports run by ants … what a movie script?!
With the canvas element’s drawImage() method, we use to position the image map of interest, you can draw more than your own geometrical constructs, you can have an image, and that image could be a map, as for today’s “World Clickaround” web application (with access to maps of Brazil and Ireland and United States of America too), where you click on the map (and thanks to mapsofworld.com for downloadable free maps here) to show a Google Map of interest via Google Chart Map Chart. Maybe you can use the map of the World to …
- plan a trip
- look up where relatives live
- count the fire hydrants in Monaco
This web application calls on tiny bits of mapping knowledge, namely the “orientation” of your “map”, as you are effectively digitizing to show where you want your Google Map to zoom in on.
Please have a go of our live run or download the HTML programming source code you could call world.htm (brazil.htm, ireland.htm, united_states.htm), or do both?!
From yesterday, this is how we got to today … there was new PHP you could call intair.php … and then there was changed HTML, the changes for which look like … world.htm, brazil.htm, ireland.htm, united_states.htm
Previous relevant HTML5 Canvas Map Clickaround Primer Tutorial is shown below.
HTML5 brought in the incredibly useful “canvas” element, for the first time. Its existence opens up a whole new world of possibilities for web applications that are graphical by nature.
With the canvas element’s drawImage() method you can draw more than your own geometrical constructs, you can have an image, and that image could be a map, as for today’s “Ireland Clickaround” web application (with access to maps of Brazil and United States of America and the World too), where you click on the map (and thanks to mapsofworld.com for downloadable free maps here) to show a Google Map of interest via Google Chart Map Chart. Maybe you can use the map of Ireland to …
- plan a trip
- look up where relatives live
- imagine you’re in O’Connell Street
This web application calls on tiny bits of mapping knowledge, namely the “orientation” of your “map”, as you are effectively digitizing to show where you want your Google Map to zoom in on.
This is one of those occasions that your (simple) software is a lot more effective using the Mercator map projection (that exaggerates the polar areas (like you might have had at school) because the simple latitude and longitude distances everywhere are the same (but relative areas definitely are not (ie. much bigger than reality near the poles))). Unfortunately, our United States of America projection is not Mercator, but you’ll still get a “ball park” Google Maps feel.
So we can have it that if the user doesn’t zoom, they need no orientation checks, but otherwise we need to determine a scale, by the user clicking on Dublin, on the map, and from that, we can work out the scaling that needs to be applied, as the top left co-ordinate is arranged to be (0,0) via the style=”position: absolute; top:0; left:0; “ part of …
<canvas id="canvaselement" width=600 height=600 style="position: absolute; top:0; left:0; " />
Please have a go of our live run or download the HTML programming source code you could call ireland.html (brazil.html, united_states.html, world.html), or do both?!
If this was interesting you may be interested in this too.
If this was interesting you may be interested in this too.
If this was interesting you may be interested in this too.
If this was interesting you may be interested in this too.
If this was interesting you may be interested in this too.
If this was interesting you may be interested in this too.
If this was interesting you may be interested in this too.
If this was interesting you may be interested in this too.


24 Responses to Canvas Email Attachment Scribble Tutorial