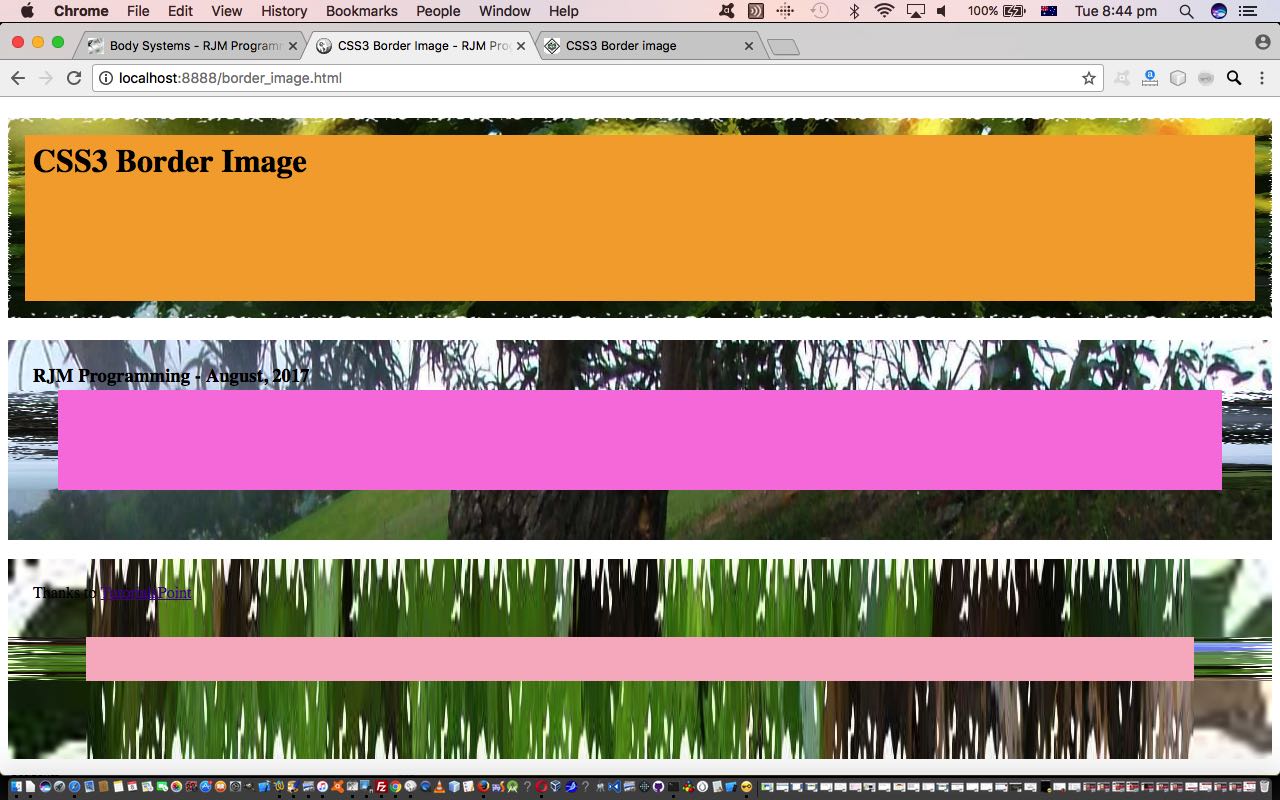
Adding to our recent CSS3 Filters Primer Tutorial, today, we’d like to delve further into the great things CSS3 brought to the client side “aesthetics” of web application work. Today’s “proof of concept” web application’s topic is border images. How often when developing a webpage or blog post via HTML, if you are into that kind of thangthing, have you wanted to enhance something and make it stand out, but were satisfied enough with its content? Lots, I’d imagine, and perhaps you put a normal border around it from the CSS days. That can be impactive, and there are lots of styling choices here. But what if you wanted to “theme” the content via the “look” of its border? You can pattern a normal border via dashed and dotted styles, and other methods, but unless the content is about Morse Code, or some such content, it is unlikely there, that you have “themed” your content to align with the “look” of your border. That is where CSS3’s border images can come to the fore. Today, we don’t “theme” and match with the “look”, as we just try to make things “stand out”, and this can be good with these border image styling approaches too.
Researching this topic, we lobbed onto the great resource that TutorialsPoint provides and based our HTML and CSS3 and Javascript live run‘s border_image.html source code off their example code, so thanks.
You’ll see the border image CSS3 parts to this proof of concept code below …
<style>

         #borderimg1 {

            border: 10px solid transparent;

            padding: 15px;

            border-image-source: url(body_systems.jpg);

            border-image-repeat: round;

            border-image-slice: 30;

            border-image-width: 10px;

            height:150px;

            background-color: yellow;

            text-align: center;

         }

         #borderimg2 {

            border: 10px solid transparent;

            padding: 15px;

            border-image-source: url(body_systems.jpg);

            border-image-repeat: round;

            border-image-slice: 30;

            border-image-width: 20px;

            height:150px;

            background-color: yellow;

            text-align: center;

         }

         #borderimg3 {

            border: 10px solid transparent;

            padding: 15px;

            border-image-source: url(body_systems.jpg);

            border-image-repeat: round;

            border-image-slice: 30;

            border-image-width: 30px;

            height:150px;

            background-color: yellow;

            text-align: center;

         }

</style>
… which sets up the “static” first up scenario, but to add some randomness into the web application workings, we use some Javascript DOM (kicked off via a document.body onload event call and then perpetuated by good ol’ setTimeout method calls) as below to make the web application more dynamic, using images used with our “one image webpage” Ephemeral …
 function randomize() {

   var choice=Math.floor(Math.random() * border_images.length);

   document.getElementById('borderimg1').style.borderImageSource="url(" + border_images[choice] + ")";

   choice=Math.floor(Math.random() * 100);

   document.getElementById('borderimg1').style.borderImageWidth='' + choice + 'px';

   choice=Math.floor(Math.random() * 100);

   document.getElementById('borderimg1').style.borderImageSlice='' + choice;

   document.getElementById('borderimg1').style.backgroundColor='rgba(' + Math.floor(Math.random() * 256) + "," + Math.floor(Math.random() * 256) + "," + Math.floor(Math.random() * 256) + "," + eval(Math.floor(Math.random() * 10) / 10) + ")";

   choice=Math.floor(Math.random() * border_images.length);

   document.getElementById('borderimg2').style.borderImageSource="url(" + border_images[choice] + ")";

   choice=Math.floor(Math.random() * 100);

   document.getElementById('borderimg2').style.borderImageWidth='' + choice + 'px';

   choice=Math.floor(Math.random() * 100);

   document.getElementById('borderimg2').style.borderImageSlice='' + choice;

   document.getElementById('borderimg2').style.backgroundColor='rgba(' + Math.floor(Math.random() * 256) + "," + Math.floor(Math.random() * 256) + "," + Math.floor(Math.random() * 256) + "," + eval(Math.floor(Math.random() * 10) / 10) + ")";

   choice=Math.floor(Math.random() * border_images.length);

   document.getElementById('borderimg3').style.borderImageSource="url(" + border_images[choice] + ")";

   choice=Math.floor(Math.random() * 100);

   document.getElementById('borderimg3').style.borderImageWidth='' + choice + 'px';

   choice=Math.floor(Math.random() * 100);

   document.getElementById('borderimg3').style.borderImageSlice='' + choice;

   document.getElementById('borderimg3').style.backgroundColor='rgba(' + Math.floor(Math.random() * 256) + "," + Math.floor(Math.random() * 256) + "," + Math.floor(Math.random() * 256) + "," + eval(Math.floor(Math.random() * 10) / 10) + ")";

   setTimeout(randomize, 5000);

 }
We hope this “aesthetic” is something you might be interested in applying, on occasions, to your blog postings or webpages yourself.
You can also see this play out at WordPress 4.1.1’s CSS3 Border Image Primer Tutorial.
Previous relevant CSS3 Filters Primer Tutorial is shown below.
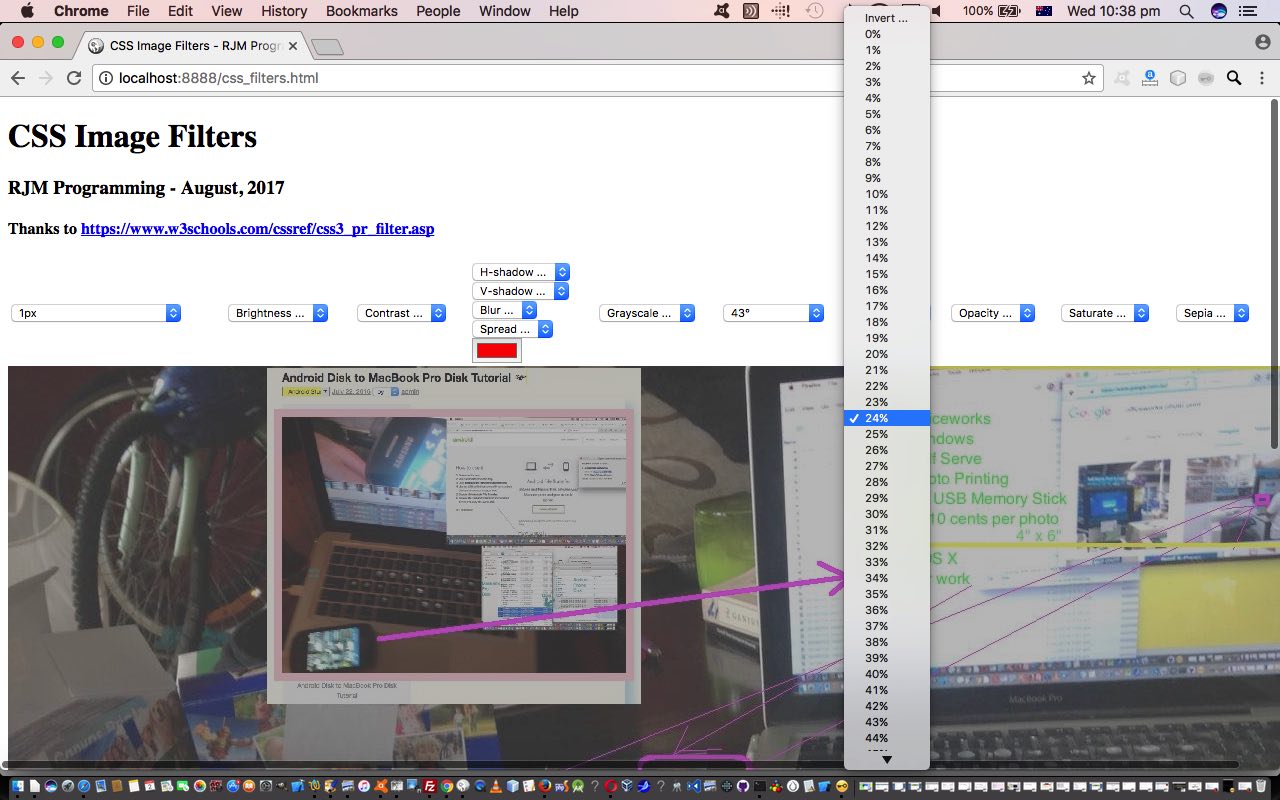
It’s not just the image editor Gimp that has “filters” as tools to create effects with image data (files), as you might see with tutorials like Gimp Decor Filters Revisit Tutorial. These days, with CSS, and with CSS3 these days, there are some great “filters” to play around with, that modify an image there and then with CSS and/or Javascript DOM (as per the HTML select “dropdown” element onchange event logic …
function selchange(selo) {

  var bs="";

  if (selo == null) {

  if (document.getElementById("sh-shadow").value != "" && document.getElementById("sv-shadow").value != "") {

  if (document.getElementById("xblur").value != "") bs+=document.getElementById("xblur").value + document.getElementById("xblur").title + " ";

  if (document.getElementById("sspread").value != "") bs+=document.getElementById("sspread").value + document.getElementById("sspread").title + " ";

  //alert("drop-shadow(" + document.getElementById("sh-shadow").value + document.getElementById("sh-shadow").title + " " + document.getElementById("sv-shadow").value + document.getElementById("sv-shadow").title + " " + bs + document.getElementById("mycolour").value + ")");

  document.getElementById("myimage").style.filter = "drop-shadow(" + document.getElementById("sh-shadow").value + document.getElementById("sh-shadow").title + " " + document.getElementById("sv-shadow").value + document.getElementById("sv-shadow").title + " " + bs + document.getElementById("mycolour").value + ")";

  document.getElementById("myimage").style.WebkitFilter = "drop-shadow(" + document.getElementById("sh-shadow").value + document.getElementById("sh-shadow").title + " " + document.getElementById("sv-shadow").value + document.getElementById("sv-shadow").title + " " + bs + document.getElementById("mycolour").value + ")";

  }

  } else if (selo.id.substring(1) == 'h-shadow') {

  if (document.getElementById("sv-shadow").value != "") {

  if (document.getElementById("xblur").value != "") bs+=document.getElementById("xblur").value + document.getElementById("xblur").title + " ";

  if (document.getElementById("sspread").value != "") bs+=document.getElementById("sspread").value + document.getElementById("sspread").title + " ";

  document.getElementById("myimage").style.filter = "drop-shadow(" + selo.value + selo.title + " " + document.getElementById("sv-shadow").value + document.getElementById("sv-shadow").title + " " + bs + document.getElementById("mycolour").value + ")";

  document.getElementById("myimage").style.WebkitFilter = "drop-shadow(" + selo.value + selo.title + " " + document.getElementById("sv-shadow").value + document.getElementById("sv-shadow").title + " " + bs + document.getElementById("mycolour").value + ")";

  }

  } else if (selo.id.substring(1) == 'v-shadow') {

  if (document.getElementById("sh-shadow").value != "") {

  if (document.getElementById("xblur").value != "") bs+=document.getElementById("xblur").value + document.getElementById("xblur").title + " ";

  if (document.getElementById("sspread").value != "") bs+=document.getElementById("sspread").value + document.getElementById("sspread").title + " ";

  //alert("drop-shadow(" + document.getElementById("sh-shadow").value + document.getElementById("sh-shadow").title + " " + selo.value + selo.title + " " + bs + document.getElementById("mycolour").value + ")");

  document.getElementById("myimage").style.filter = "drop-shadow(" + document.getElementById("sh-shadow").value + document.getElementById("sh-shadow").title + " " + selo.value + selo.title + " " + bs + document.getElementById("mycolour").value + ")";

  document.getElementById("myimage").style.WebkitFilter = "drop-shadow(" + document.getElementById("sh-shadow").value + document.getElementById("sh-shadow").title + " " + selo.value + selo.title + " " + bs + document.getElementById("mycolour").value + ")";

  }

  } else if (selo.id == 'xblur') {

  if (document.getElementById("sh-shadow").value != "" && document.getElementById("sv-shadow").value != "") {

  if (document.getElementById("xblur").value != "") bs+=document.getElementById("xblur").value + document.getElementById("xblur").title + " ";

  if (document.getElementById("sspread").value != "") bs+=document.getElementById("sspread").value + document.getElementById("sspread").title + " ";

  document.getElementById("myimage").style.filter = "drop-shadow(" + document.getElementById("sh-shadow").value + document.getElementById("sh-shadow").title + " " + document.getElementById("sv-shadow").value + document.getElementById("sv-shadow").title + " " + bs + document.getElementById("mycolour").value + ")";

  document.getElementById("myimage").style.WebkitFilter = "drop-shadow(" + document.getElementById("sh-shadow").value + document.getElementById("sh-shadow").title + " " + document.getElementById("sv-shadow").value + document.getElementById("sv-shadow").title + " " + bs + document.getElementById("mycolour").value + ")";

  }

  } else if (selo.id.substring(1) == 'spread') {

  if (document.getElementById("sh-shadow").value != "" && document.getElementById("sv-shadow").value != "") {

  if (document.getElementById("xblur").value != "") bs+=document.getElementById("xblur").value + document.getElementById("xblur").title + " ";

  if (document.getElementById("sspread").value != "") bs+=document.getElementById("sspread").value + document.getElementById("sspread").title + " ";

  document.getElementById("myimage").style.filter = "drop-shadow(" + document.getElementById("sh-shadow").value + document.getElementById("sh-shadow").title + " " + document.getElementById("sv-shadow").value + document.getElementById("sv-shadow").title + " " + bs + document.getElementById("mycolour").value + ")";

  document.getElementById("myimage").style.WebkitFilter = "drop-shadow(" + document.getElementById("sh-shadow").value + document.getElementById("sh-shadow").title + " " + document.getElementById("sv-shadow").value + document.getElementById("sv-shadow").title + " " + bs + document.getElementById("mycolour").value + ")";

  }

  } else {

  document.getElementById("myimage").style.filter = selo.id.substring(1) + "(" + selo.value + selo.title + ")";

  document.getElementById("myimage").style.WebkitFilter = selo.id.substring(1) + "(" + selo.value + selo.title + ")";

  }

}
) … or jQuery means by which to make this happen with a lot of the modern web browsers. If you see “CSS3” mentioned, then don’t expect everything to work on super-old web browsers, but expect that anything you implement could be aesthetically interesting or pleasing, as it would not have taken until CSS3 to come along if it was a dead set simple thing to have implemented in the early days of the internet.
Today’s simple (really) proof of concept web application owes a debt of gratitude to this very useful link, which gave us the parameters by which we could construct today’s live run with its pretty simple HTML and CSS (via CSS3) and Javascript DOM css_filters.html source code for you to peruse, and make of what you will. So what (CSS3) filters are we talking about here?
- blur(px)
- brightness(%)
- contrast(%)
- drop-shadow(h-shadow v-shadow blur spread color)
- grayscale(%)
- hue-rotate(deg)
- invert(%)
- opacity(%)
- saturate(%)
- sepia(%)
… which are mostly self explanatory we hope. Let’s just say you’re me … “You’re me.” … ta … please explain “drop shadow” … oh … you mean … me?
In graphic design, a drop shadow is a visual effect consisting of a drawing element which looks like the shadow of an object, giving the impression that the object is raised above the objects behind it.
… thanks, Wikipedia.
As you can imagine, this opening up of this functionality to the client-side web developer opens up lots of opportunities to make your webpages stand out.
Previous relevant Gimp Decor Filters Revisit Tutorial is shown below.
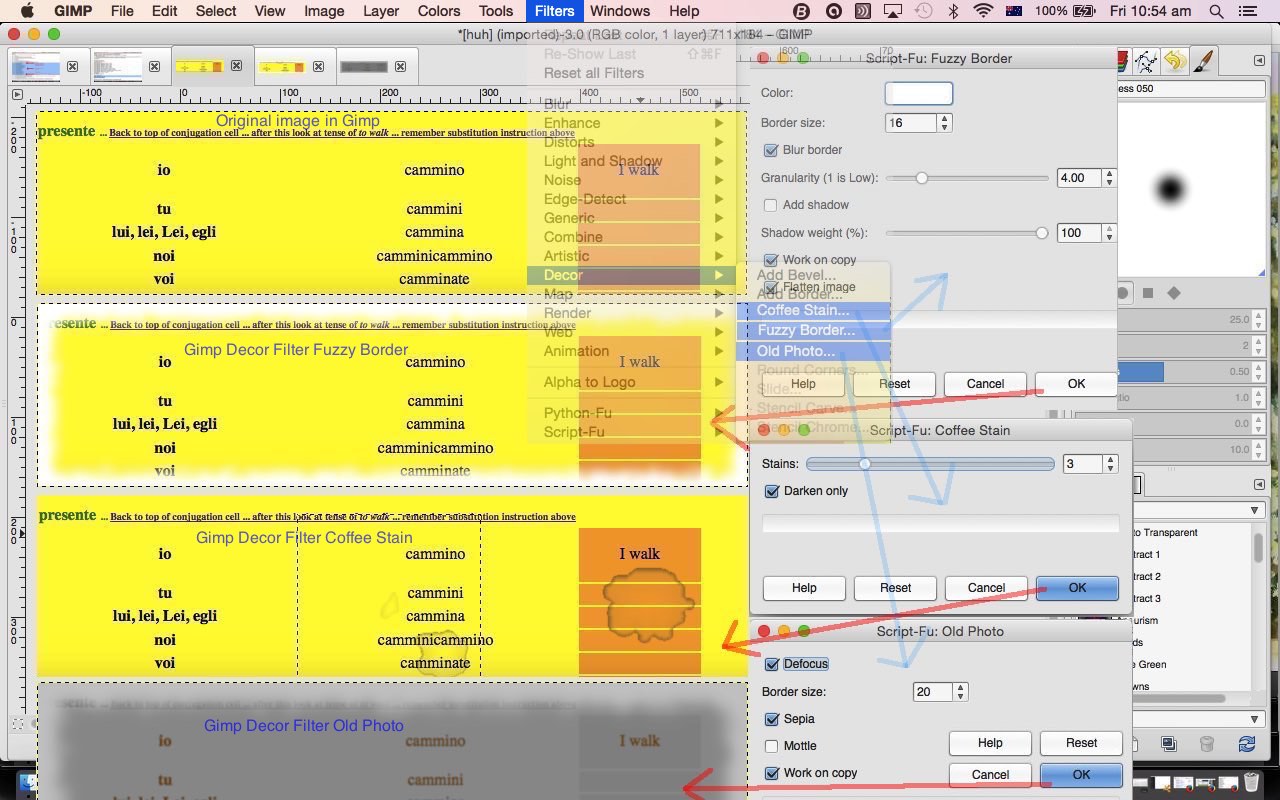
Today we return to the wonderful, marvellous and stupendous Gimp image editor and examine some more of its filters, following up on concepts last discussed with Gimp Decor Border Filters Primer Tutorial in the “Decor” category, namely …
- Fuzzy Border
- Coffee Stain
- Old Photo … in the tutorial picture … plus below …
- Add Bevel
- Add Border
- Slide
- Rounded Corners
… which create quite good effects we feel, especially the Fuzzy Border filter, as it is quite difficult, otherwise to create a “smudged” border effect, perhaps for vignetting purposes, without this filter. We imagine an old map photo could be glamourized using “Coffee Stain” (for the accident prone) or “Old Photo”.
These “Decor” filters are available off Gimp’s Filter menu as a submenu containing these and some other effects. They use “Script-Fu” based on the Scheme interpretive language. These “Script-Fu” filters are not only powerful and useful for what they are, but also for how you can introduce predictability with your effects, in that you can record settings you use, make them public, as necessary, to help create a unified creative but predictable set of effects in the photographs you are applying filters to.
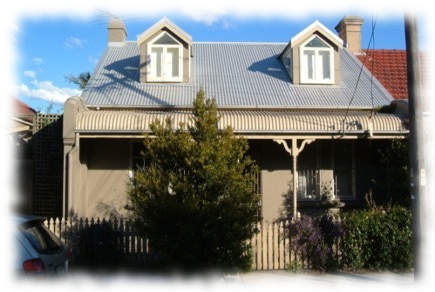
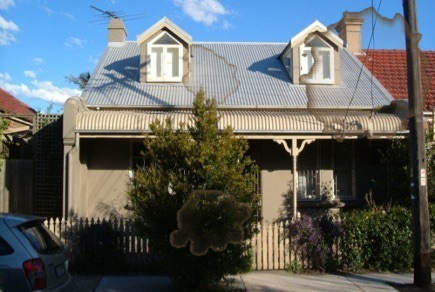
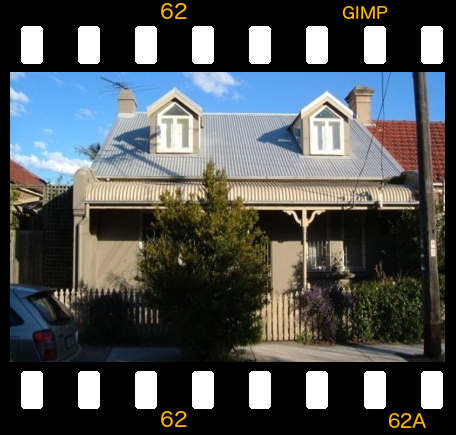
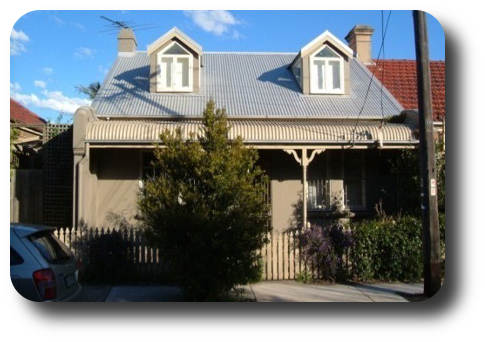
So we’ll leave you with a photo of our house …

… with …
- Fuzzy Border …
- Coffee Stain (“Darken only” unchecked) … probably not so apt for this image’s subject matter …
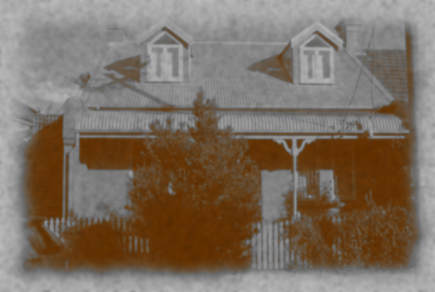
- Old Photo (“Defocus”, “Sepia”, “Mottle” all checked) …
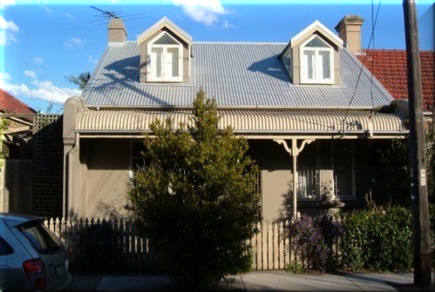
- Add Bevel (30, “Keep bump layer” checked) …
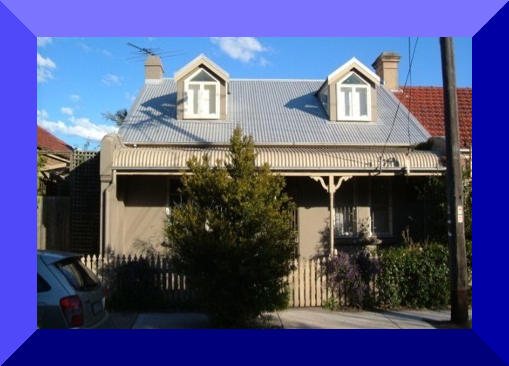
- Add Border (37 x and 37 y width, 85 delta value on default blue colour) …
- Slide (62) …
- Rounded Corners (Edge radius 30, Shadow x offset 15, y 15, Blur radius 25) …
If this was interesting you may be interested in this too.
If this was interesting you may be interested in this too.
If this was interesting you may be interested in this too.
