A while back we presented a series of web application ideas that do away with Javascript (ie. only needing HTML and CSS) to perform some functionality of interest. In that series we finished up with Missing Javascript Audio on Unmute Tutorial where through this series we touched on …
- CSS3 @keyframes rules we first talked about at CSS3 @keyframes Rule Primer Tutorial that assist with animations that we can make work via …
- CSS3 transitions for scheduled functionality (we’d have used Javascript setTimeout (and setInterval) methods to cover the same “territory”) we first talked about at CSS3 Transition Primer Tutorial … specified with CSS Criteria involving …
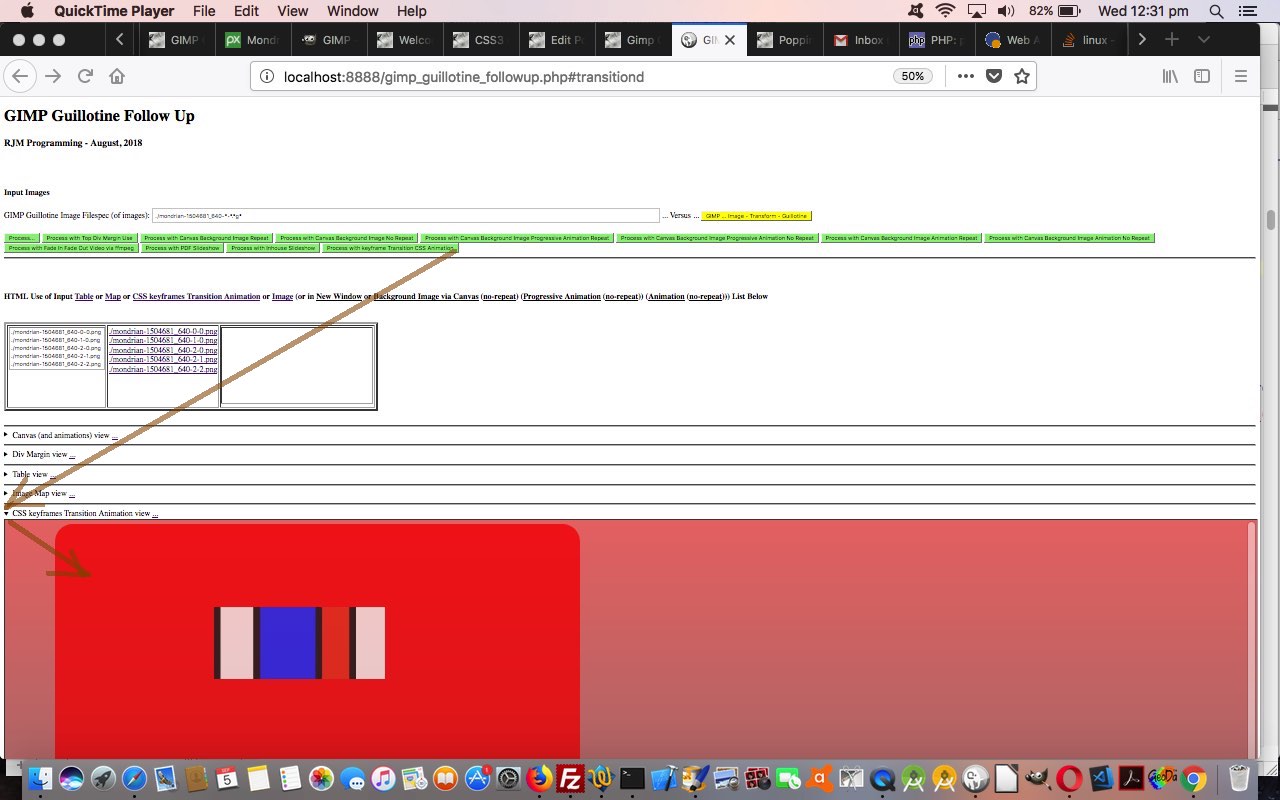
… and these feature today with our functionality extensions to yesterday’s Gimp Guillotine Follow Up PDF Slideshow and Video Tutorial where, again, we have a ‘piece of code modelled on a big long “template” piece of HTML that we make substitutions into to create the functionality’.
We found that this was all fine and good to create an overall animation “blob” of webpage activity, but what was in that “template” didn’t help reflect GIMP Guillotine left and top “offsets” within that animation. To do this with our HTML div element, this, along with the change of background content, made us introduce some Javascript DOM changes where …
- [divObject].style.backgroundImage=”url(‘” + dataURIofImageVar + “‘)”;
- [divObject].style.backgroundPosition=’ ‘ + parent.document.getElementById(‘lefttop’).value.split(‘,’)[eval(iparlist * 2)] + ‘px ‘ + parent.document.getElementById(‘lefttop’).value.split(‘,’)[eval(iparlist * 2 + 1)] + ‘px’;
… as in the Javascript function controlled by setTimeout timer calls (to help animate) …
    var parlist=['mondrian-1504681_640-0-0png','mondrian-1504681_640-1-0png','mondrian-1504681_640-2-0png','mondrian-1504681_640-2-1png','mondrian-1504681_640-2-2png'];

    var divo=null;

    var iparlist=0;

    function workit() {

      if (divo == null) {

        divo=document.getElementsByTagName('div')[0];

      }

      if (iparlist >= parlist.length) iparlist=0;

      divo.style.backgroundRepeat='no-repeat';

      divo.style.backgroundPosition=' ' + parent.document.getElementById('lefttop').value.split(',')[eval(iparlist * 2)] + 'px ' + parent.document.getElementById('lefttop').value.split(',')[eval(iparlist * 2 + 1)] + 'px';

      divo.style.backgroundImage="url('" + parent.document.getElementById(parlist[iparlist]).src + "')";

      iparlist++;

      setTimeout(workit, 6000);

    }

    setTimeout(workit, 500);
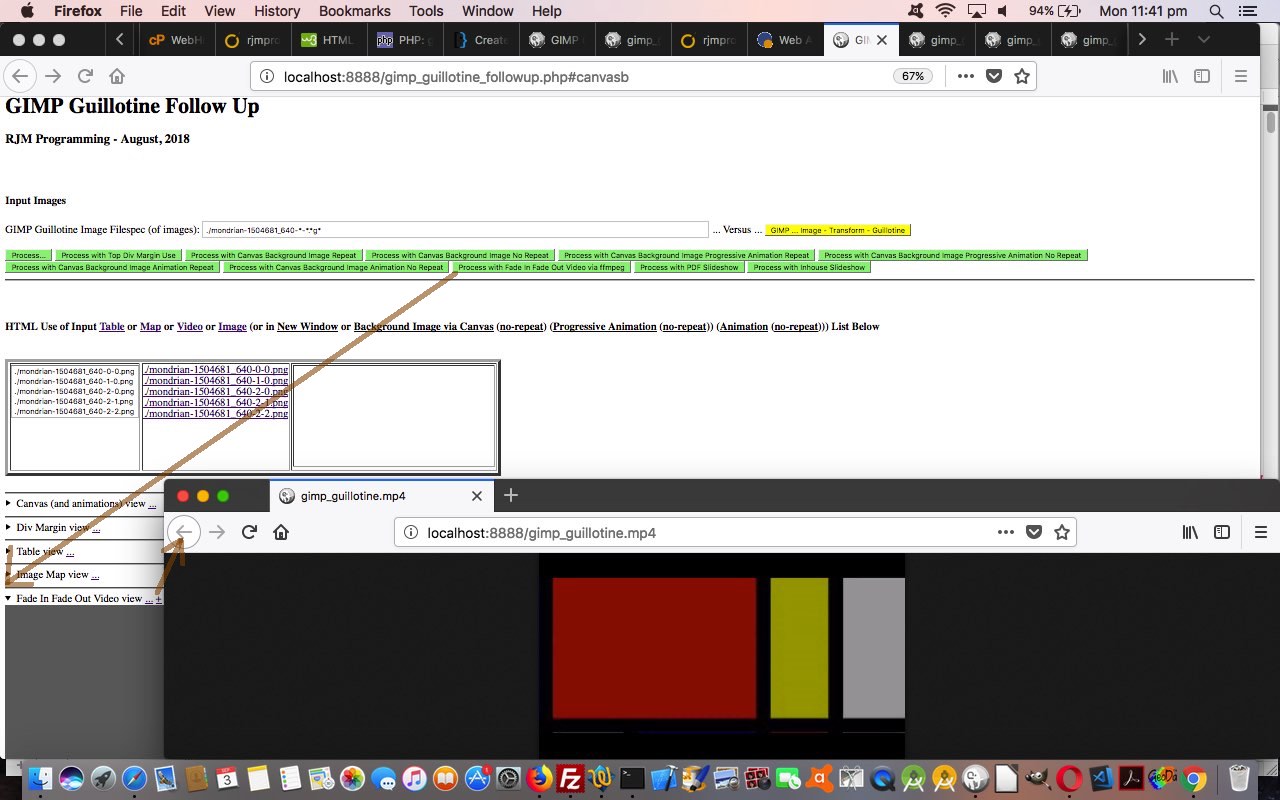
… the act of which starts the video below (if not playing click here for alternate playing method) …
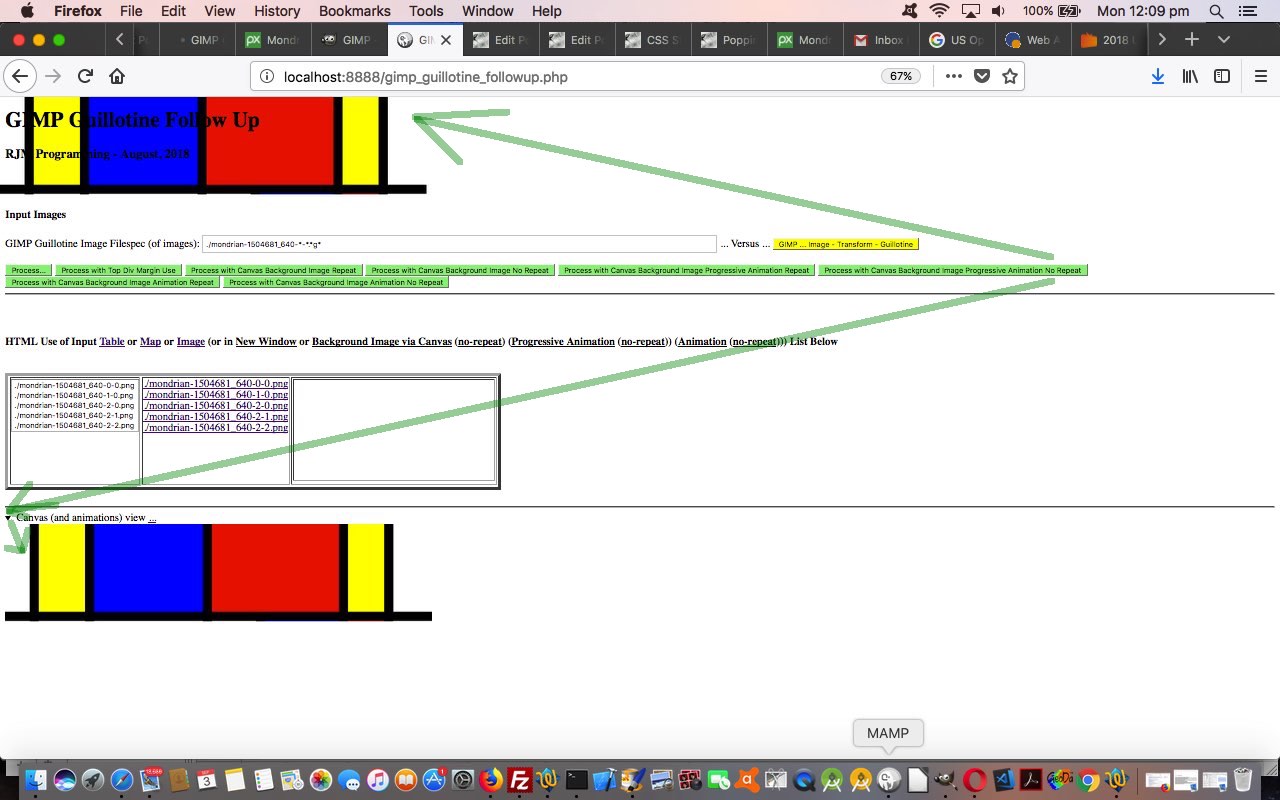
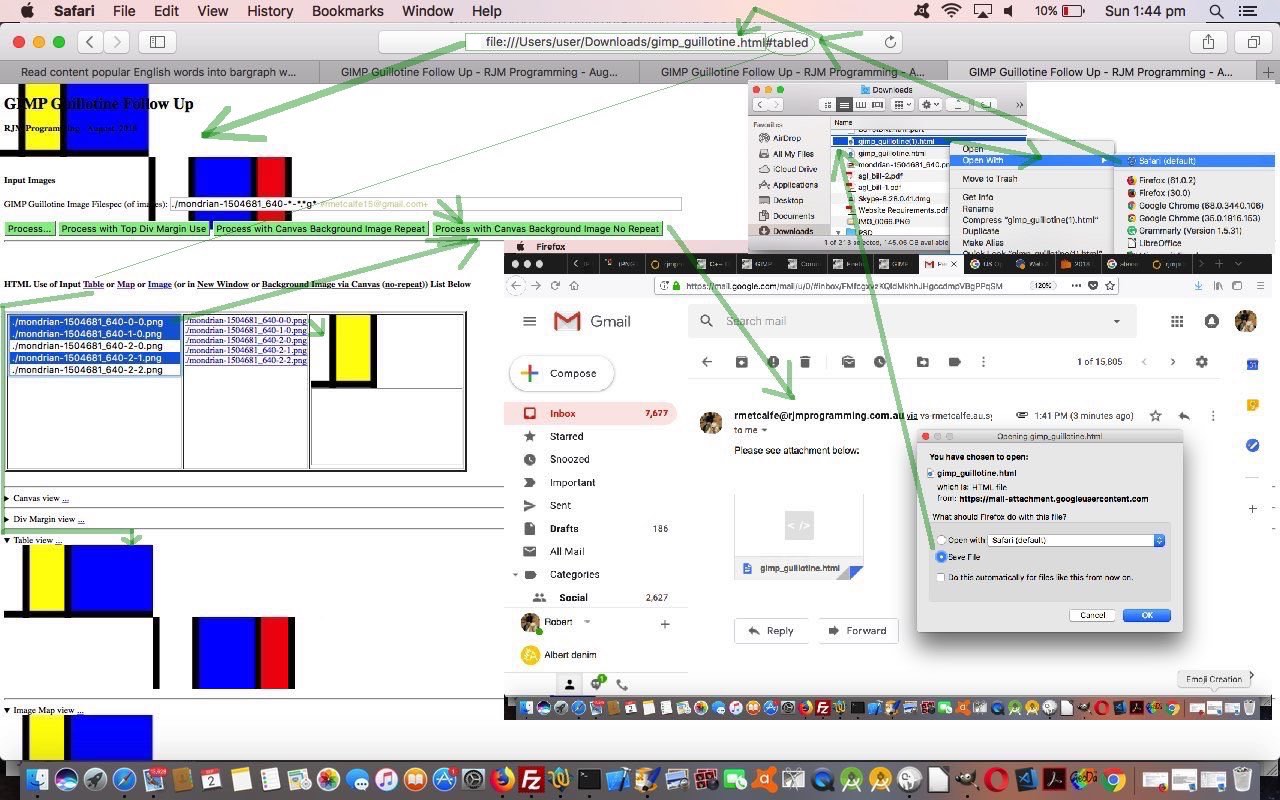
Let’s catch up with some more URLs showing (and sharing) some recent scenarios below …
Hopefully you can see more of what we mean at a live run‘s PHP gimp_guillotine_followup.php today changed in this way.
Previous relevant Gimp Guillotine Follow Up CSS keyframes Transition Tutorial is shown below.
As the blog posting title intimates, adding onto yesterday’s Gimp Guillotine Follow Up Javascript DOM Animation Tutorial, today’s work looks at functionality to help create …
- PDF slideshow
- Inhouse style slideshow
- Video
… and the top and bottom of these depend on, respectively, the amazing, the stupendous …
- convert (by ImageMagick)
- ffmpeg
… that are looked for on the operating system (or web server) you are running the Gimp Guillotine Follow Up web application from, and if found offer HTML input type=submit methods of submitting the image file specification form.
We’ve talked about the fade in, fade out style of ffmpeg video before when we presented Firefox Inspector Debugging via Network Tab Primer Tutorial but today with variability within image sizes we found the additional switches like in the command below, necessary …
ffmpeg -loop 1 -t 5 -i /Applications/MAMP/htdocs/mondrian-1504681_640-0-0.png -loop 1 -t 5 -i /Applications/MAMP/htdocs/mondrian-1504681_640-1-0.png -loop 1 -t 5 -i /Applications/MAMP/htdocs/mondrian-1504681_640-2-0.png -loop 1 -t 5 -i /Applications/MAMP/htdocs/mondrian-1504681_640-2-1.png -loop 1 -t 5 -i /Applications/MAMP/htdocs/mondrian-1504681_640-2-2.png -filter_complex "[0:v]scale=1280:720:force_original_aspect_ratio=decrease,pad=1280:720:(ow-iw)/2:(oh-ih)/2,setsar=1,fade=t=out:st=4:d=1[v0]; [1:v]scale=1280:720:force_original_aspect_ratio=decrease,pad=1280:720:(ow-iw)/2:(oh-ih)/2,setsar=1,fade=t=in:st=0:d=1,fade=t=out:st=4:d=1[v1]; [2:v]scale=1280:720:force_original_aspect_ratio=decrease,pad=1280:720:(ow-iw)/2:(oh-ih)/2,setsar=1,fade=t=in:st=0:d=1,fade=t=out:st=4:d=1[v2]; [3:v]scale=1280:720:force_original_aspect_ratio=decrease,pad=1280:720:(ow-iw)/2:(oh-ih)/2,setsar=1,fade=t=in:st=0:d=1,fade=t=out:st=4:d=1[v3]; [4:v]scale=1280:720:force_original_aspect_ratio=decrease,pad=1280:720:(ow-iw)/2:(oh-ih)/2,setsar=1,fade=t=in:st=0:d=1,fade=t=out:st=4:d=1[v4]; [v0][v1][v2][v3][v4]concat=n=5:v=1:a=0,format=yuv420p[v]" -map "[v]" /Applications/MAMP/htdocs/gimp_guillotine.mp4
… resulting in (if not playing click here for alternate playing method) …
The PDF slideshow creation is a doddle for ImageMagick, an example of a command line (via PHP exec) command being …
convert /Applications/MAMP/htdocs/mondrian-1504681_640-0-0.png /Applications/MAMP/htdocs/mondrian-1504681_640-1-0.png /Applications/MAMP/htdocs/mondrian-1504681_640-2-0.png /Applications/MAMP/htdocs/mondrian-1504681_640-2-1.png /Applications/MAMP/htdocs/mondrian-1504681_640-2-2.png /Applications/MAMP/htdocs/gimp_guillotine.pdf
… resulting in (if not showing click here for alternate method) …
And our Internal Slideshow is a piece of code modelled on a big long “template” piece of HTML that we make substitutions into to create the functionality …
Again, we hope you can see more of what we mean at a live run‘s PHP gimp_guillotine_followup.php today changed in this way.
Previous relevant Gimp Guillotine Follow Up Javascript DOM Animation Tutorial is shown below.
Adding to yesterday’s Gimp Guillotine Follow Up Email Attachment Tutorial we now want to add an “onions of the 4th dimension” layer on top “feel” to all this, by starting to think about animation functionality. We’re going to start out quite simply, and the simplest animation approach we can think of is …
- have access to a bunch of image data URIs … check …
- either …
- progressively show … or …
- one at a time show
… this imagery at a point of time as a (pseudo Javascript) …
document.body.backgroundImage="URL('" + thatDataURIVar + "')"
… idea the timing of which can be controlled by the Javascript setTimeout timer method
As you can imagine “one at a time” is a relative doddle, but “progressively show” is not quite such a doddle. But it is an uncle’s doddle if ahead of time you had …
- set up an array and an index variable pointing to a relevant index into it …
var canvascset=[];

var icanvascset=0;

var elem=document.getElementById('mycanvas');

var context=elem.getContext('2d');
- wherever in the code as it was, you had used the [canvasContext].drawImage you canvascset.push([thatCommand]) adding onto that array as per …
canvascset.push("context.drawImage(ourdocumentgetElementById('img" + eval(-1 + myimagec.split(',' + pfix + '-' + icol + '-' + irow + ext)[0].split(',').length) + "'), " + left + "," + top + ");");

context.drawImage(ourdocumentgetElementById('img' + eval(-1 + myimagec.split(',' + pfix + '-' + icol + '-' + irow + ext)[0].split(',').length)), left, top);
- then set up some “a” links using the Javascript function featuring setTimeout timing functionality, and good ol’ eval as per …
  function canvasanimation() {

    if (canvascset.length > 0 && icanvascset >= 0) {

      if (icanvascset <= 0) {

        icanvascset=0;

        context.clearRect(0, 0, elem.width, elem.height);

        eval(canvascset[0]);

        document.body.style.backgroundImage=\"url('\" + elem.toDataURL() + \"')\";

        icanvascset++;

        if (clearalot) {

        setTimeout(canvasanimation, 600);

        } else {

        setTimeout(canvasanimation, 3000);

        }

      } else if (icanvascset > canvascset.length) {

        icanvascset=0;

        if (clearalot) {

        setTimeout(canvasanimation, 1200);

        } else {

        setTimeout(canvasanimation, 6000);

        }

      } else {

        if (clearalot) context.clearRect(0, 0, elem.width, elem.height);

        eval(canvascset[icanvascset]);

        document.body.style.backgroundImage=\"url('\" + elem.toDataURL() + \"')\";

        icanvascset++;

        if (clearalot) {

        setTimeout(canvasanimation, 600);

        } else {

        setTimeout(canvasanimation, 3000);

        }

      }

    } else if (canvascset.length > 0) {

      icanvascset=0;

    }

  }
… noting how the animations can be stopped by setting that indexing variable negative (at other functionality events)
The joy of this Javascript DOM animation approach is that the creation of any new media is avoided, hence our assertion that this is perhaps the easiest animation idea we can think of. More to come, though.
Previous relevant Gimp Guillotine Follow Up Email Attachment Tutorial is shown below.
We’ve got some good news for followers of the latest thread of blog postings following up on Gimp Guillotine usage thoughts as exemplified by yesterday’s Gimp Guillotine Follow Up Table and Image Map Tutorial efforts. Up to today, the “accountability” score was not so great without a live run opportunity to show you what we mean. But today we’ve decided to open up all but the “GIMP Listening” aspects of this web application live to the rjmprogramming.com.au domain. Why the change of heart? Well, now it’s worth it, with the sharing email dual options …
- email a canvas element based overall image view as an email attachment … as well as, now, by appending a “+” to your email declaration …
- email all that you are seeing on the screen at the time as an email attachment
… because, now, we believe we have a useful enough “tool” for collaboration purposes, not that we are saying it is no longer a “use this PHP with a local web server like MAMP” proposition as well. It is, but you can learn a bit in advance trying out what you’ve been seeing us talk about here over the last few days, because we’ve also uploaded to the rjmprogramming.com.au domain those Piet Mondrian inspired image jigsaw parts which Pixabay webpage, thanks, helped us create via GIMP’s “Image -> Transform -> Guillotine” functionality quite a few days ago now.
The other issue which makes all this feasible is the involvement of PHP (though perhaps HTML and Javascript and Ajax might swing it too) being able to express the web application’s image (img elements) totally as data URIs, and so be totally mobile and transportable to email with HTML email attachments, which continue their functionality, being as they don’t require the http nor https protocol absolute URL need.
Another aspect that might have been gnawing away at the patience of people following this blog posting thread was the dumbness of the HTML textarea element we’d presented as a displayer of image jigsaw filename information. To us, to make this part of the web application much more useful was to turn the HTML textarea element into an HTML select (dropdown) “multiple” mode element which allows the user to work with the “display subset” of the whole set (though behind the scenes they are all there courtesy of the CSS usage of visibility:hidden; (leaving in whitespace) rather than display:none; (scrunching up whitespace) styling which you can read more about at CSS Style Display and Visibility Tall Poppies Tutorial) as well.
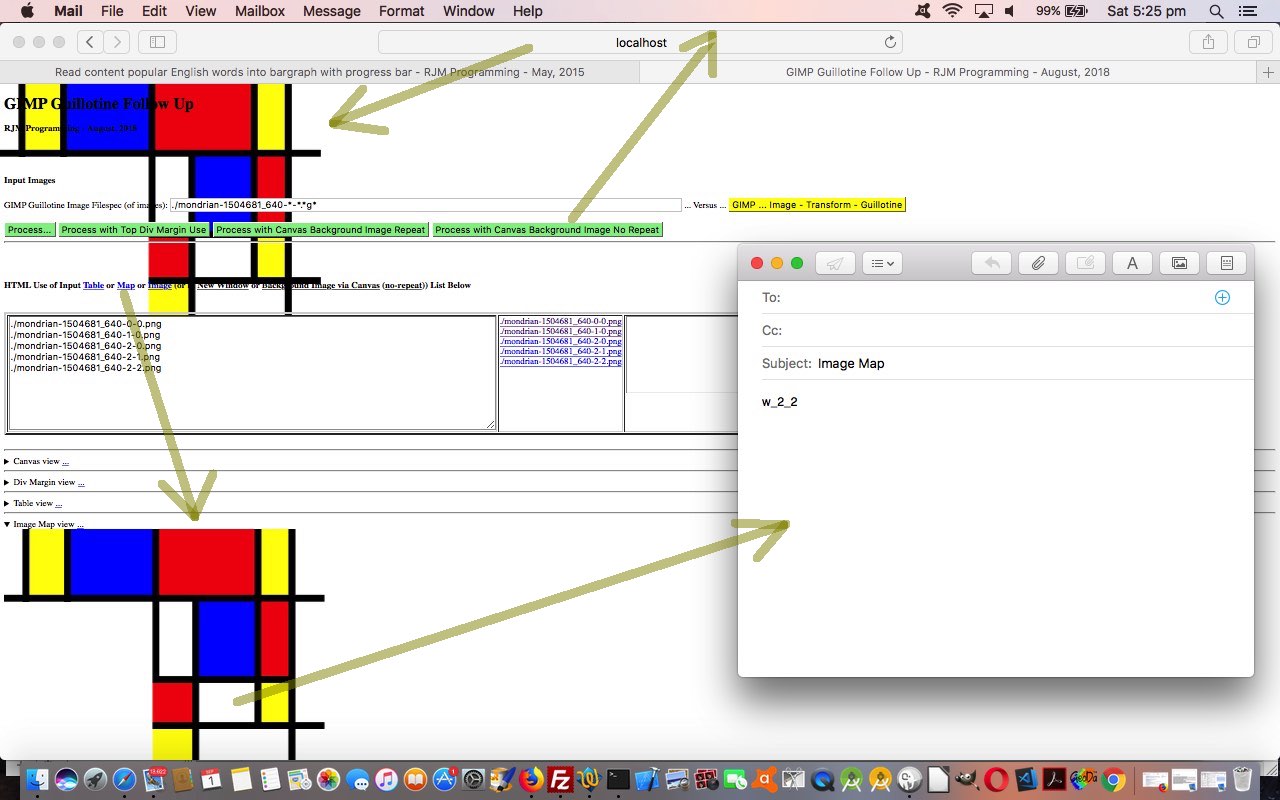
This all means we can show you some URLs showing (and sharing) some of these scenarios below too, which we will now, rather than later … know you’re in a hurry …
We hope you can see more of what we mean at a live run‘s PHP gimp_guillotine_followup.php today changed in this way.
Previous relevant Gimp Guillotine Follow Up Table and Image Map Tutorial is shown below.
The recent Gimp Guillotine Follow Up Canvas Tutorial had us with “jigsaw pieced together” image representations for …
- Div Margin
- Canvas
… and today we add to that …
- Table
- Image Map
… inspired by existant GIMP functionalities, respectively …
- Filters -> Web -> Slice…
- Filters -> Web -> Image Map…
We service these new functionalities by new “a” link hashtags. We also add to the viewing adaptability by encasing all these display options within the (introduced with HTML5) details tag and its nested summary tag “revealers”. These great HTML elements can help clarify situations where there are many choices but the user is in all likelihood wanting to focus on just one at a time. These details/summary tags are initially set “closed” for lack of clutter but as a user clicks on an associated “a” link hashtag they are “opened” on the fly via (the (pseudo) Javascript) …
document.getElementById([detailTagObjectID]).open=true;
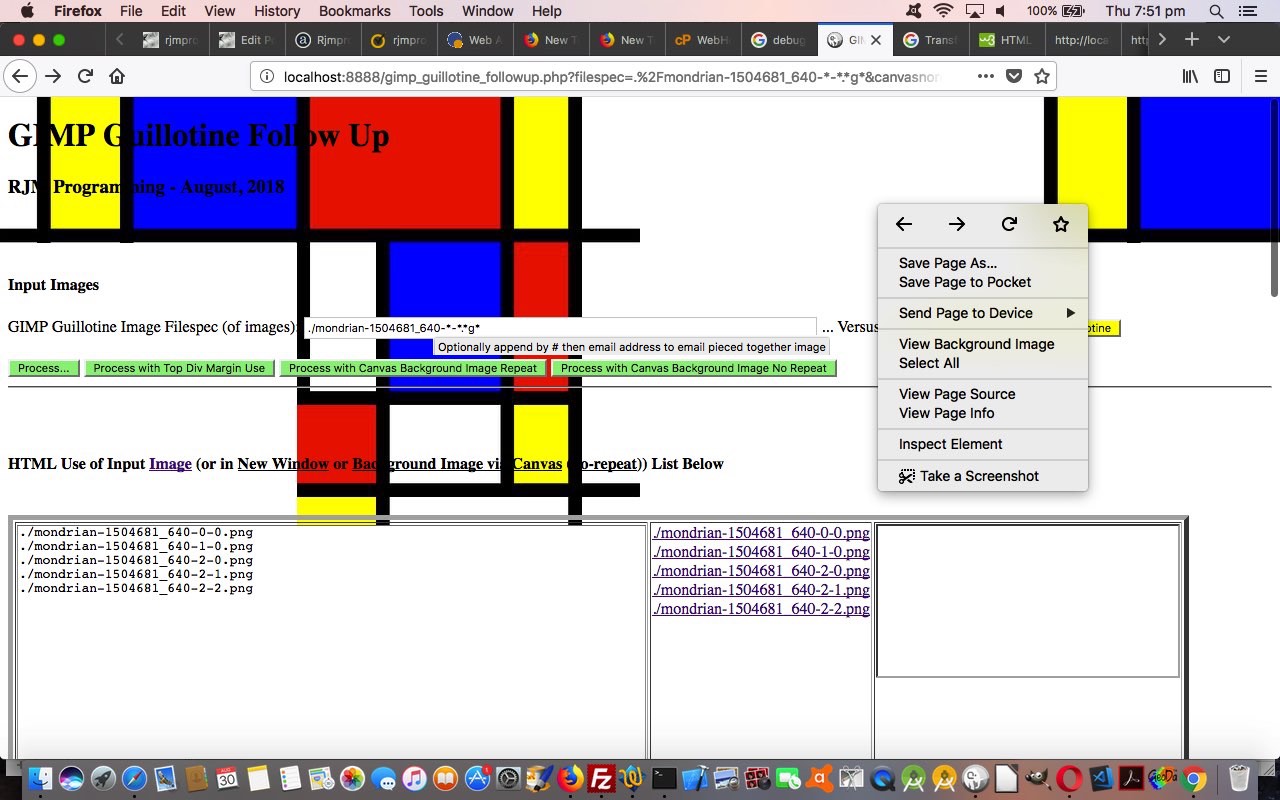
So see how we got to the new PHP gimp_guillotine_followup.php today changed in this way and, again, it is more than likely you will use this PHP with a local web server like MAMP.
Previous relevant Gimp Guillotine Follow Up Canvas Tutorial is shown below.
The second of the non-primer tutorial themes to improve and build on yesterday’s Gimp Guillotine Follow Up Div Margin Tutorial …
HTML div element housing HTML img elements (no position: absolute like we like so much for overlay work) using style property margin-left and HTML br (line break) element (which sometimes requires negative margin-top tweaking)
… involves the ever useful canvas element introduced with HTML5 as per …
HTML canvas element object's drawImage method helps draw HTML img elements positionally so as to recreate the original image look from constituent "jigsaw image element" HTML img elements
Let’s take a step back, reread Emoji Border or Background Image Canvas Tutorial …
What’s the big deal with the HTML5 canvas element? For a few things …
- the HTML5 canvas element right click or two finger gesture functionality includes Copy options …
- the canvas can collect both images and text and be able to summarize that into …
- a single image can be derived from the canvas element, encapsulating its contents … so that …
- the canvas element can export that graphical content into a data URI that involves no absolute URLs … and so ties in nicely with …
- email attachments can go hand in hand with the canvas element via a serverside function such as PHP’s mail function to enhance sharing functionalities
… because it is both pertinent to this project and shows how the canvas element is such a great generic “graphic” sharing element. Express all its content by data URIs and you have a totally “mobile” and transportable container of graphical or pixel data.
The PHP gimp_guillotine_followup.php today changed for canvas use this way and it is more than likely you will use this PHP with a local web server like MAMP. We hope this gives you ideas, and please feel free to download this PHP.
Previous relevant Gimp Guillotine Follow Up Div Margin Tutorial is shown below.
The first non-primer tutorial theme to improve and build on the recent Gimp Guillotine Follow Up Primer Tutorial are a series of representations to put the Gimp Guillotine “jigsaw image pieces” back together to make humpty dumpty … down, Nala … representations of the original image back for the user. Sounds a bit counterproductive, but these are all steps in a process to eventually be able to do quite a bit we hope. Today’s “first cab off the rank” representation is …
HTML div element housing HTML img elements (no position: absolute like we like so much for overlay work) using style property margin-left and HTML br (line break) element (which sometimes requires negative margin-top tweaking)
Gasp, how rudimentary! But sometimes the rudimentary things are the best. We display this “pieced back together original image” data (from the data you guillotined (which may not be the whole picture, as with today’s data we test)) in three different ways …
- an “a” link hashtag navigates the user below the fold to the “pieced back together original image”
- another “a” link hashtag navigates the user to a new window with the “pieced back together original image”
- a new type=submit name=divmarginuse button of the HTML form is an alternate processing option that automatically “underlays” (you say underlay, I say overlay, we go) the “pieced back together original image” under whatever webpage data appears at the top left, with an opacity less than 1 (ie. 0.5 to show with some transparency), this “underlay” being position:absolute but not asking that of an pre-existant webpage data … it is added dynamically via Javascript DOM techniques
This last option’s usage we find pretty efficient, and you can read more on this at HTML Multiple Form Multiple Submit Buttons Primer Tutorial. As you might surmise, we’ll be adding more of these as time goes on, and we dip our toes into the myriad number of representations of this “pieced back together original image” data we visit.
The PHP gimp_guillotine_followup.php today changed this way it is more than likely you will use this PHP with a local web server like MAMP (though into the future we may offer a command line mode of use).
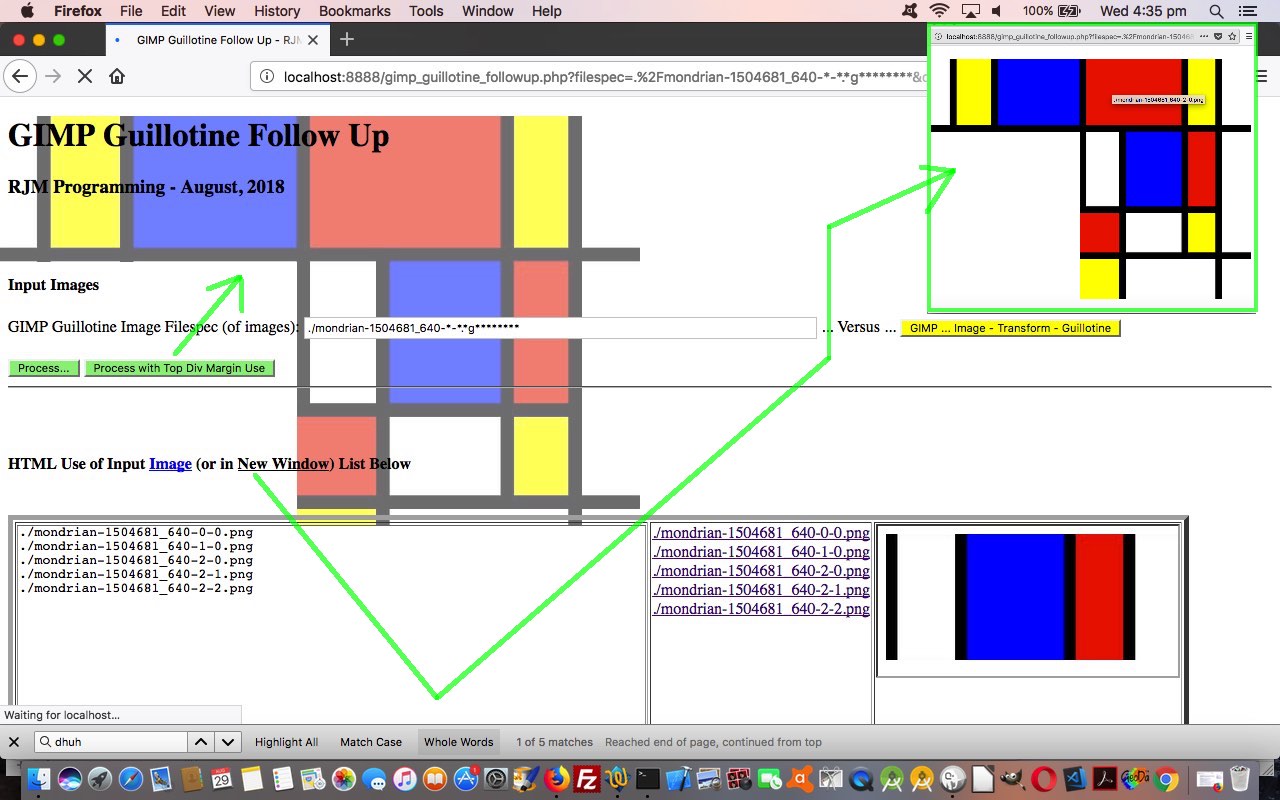
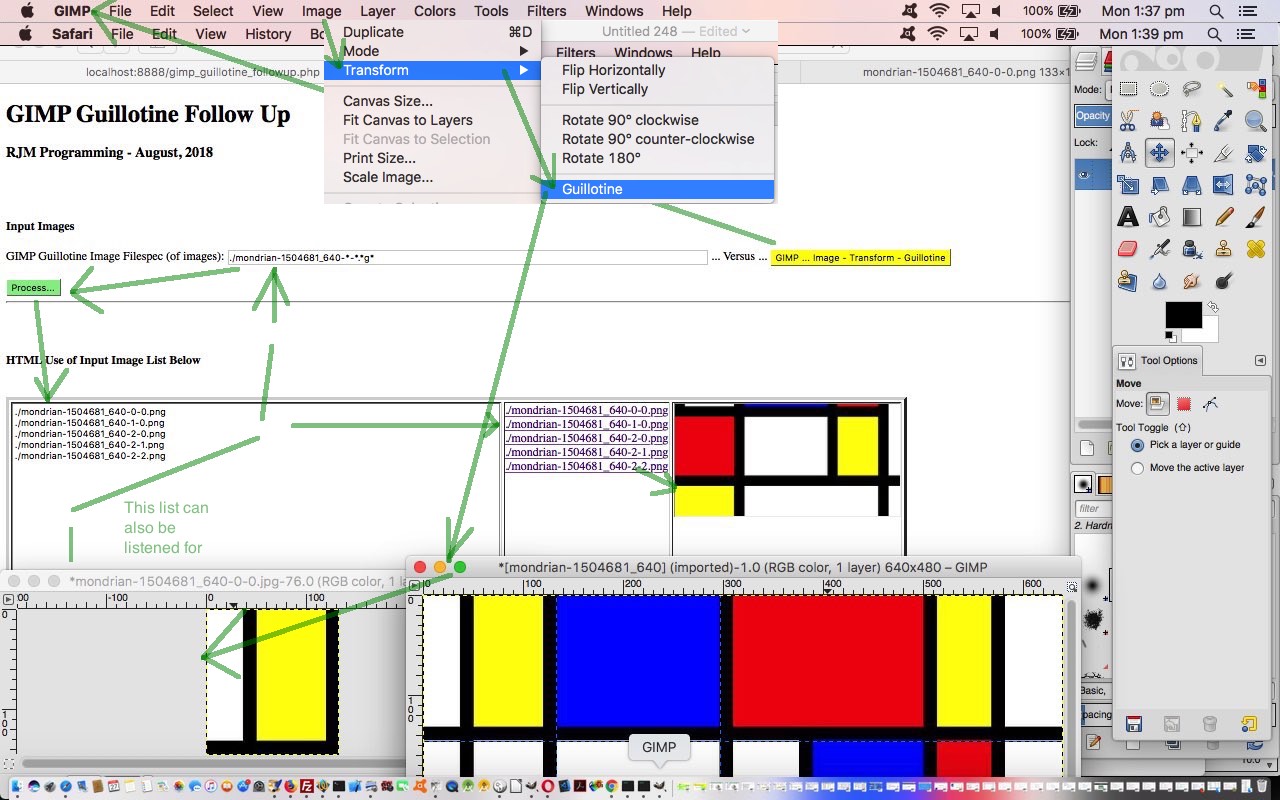
Hopefully today’s tutorial picture makes what we are talking about here more clear for you.
Previous relevant Gimp Guillotine Follow Up Primer Tutorial is shown below.
Still on yesterday’s Gimp Image Map HTML Primer Tutorial‘s Gimp themes do you remember us saying, relating to GIMP …
… precursor to being able to break an image into component parts via “Image -> Transform -> Guillotine” or the more enticing, for those web developers out there, “Filters -> Web -> Slice” which effectively does what Guillotine does and writes out some HTML in the form of an HTML table element that includes some “a” link opportunities to do something special for individual images of the new “image jigsaw” surrounded by Guides
… down below? Well, yes, today is a revisit to the “Guillotine” bit of that, because it is all well and good to use “Filters -> Web -> Slice” for a fait accompli HTML table “slicing” approach, but as you can imagine, there are lots of reasons, such as responsive design, why you might want to stop at the “Guillotine” “just give me the images, manperson” stage and from there, do your own thingthang, manperson.
We’re just starting down the road of this today in our “Primer” tutorial, just being able to either …
- image creation method …
- start GIMP and listen out for new images created … we’re hoping via “Image -> Transform -> Guillotine” … or …
- specify your own filespec of images … we’re hoping got there via “Image -> Transform -> Guillotine”
- list those image files …
- show those image files
GIMP being a desktop application, you might have guessed that we’d use a serverside language for this work, and yes, we’re using PHP gimp_guillotine_followup.php today, but don’t show you any live run links because it is more than likely you will use this PHP with a local web server like MAMP (though into the future we may offer a command line mode of use).
So please feel free to download that PHP and/or see its approach via today’s tutorial picture.
Previous relevant Gimp Image Map HTML Primer Tutorial is shown below.
As we intimated yesterday with Gimp Guides to HTML Primer Tutorial regarding the GIMP image editor’s “Filters -> Web” menu …
… you would also see an “Image Map” option helping out in a similar fashion to the stupendous mobilefish functionality.
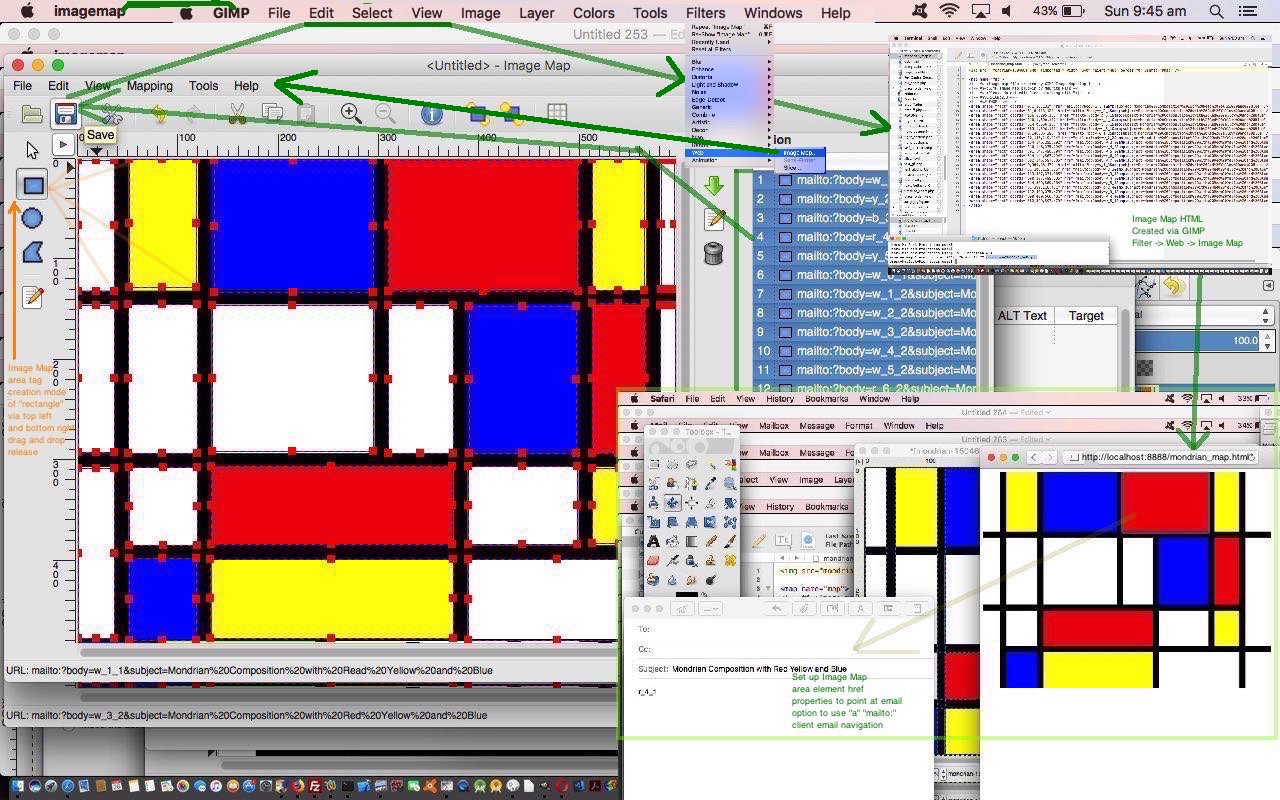
… and so we are here today to show you how that functionality works via a PDF slideshow for your perusal. There are options to shape what goes into the resultant HTML’s map element’s area (as rectangle or ellipse or polygon) tag href property link types as per …
… as a very extensive ideas list on top of options to define event logic for …
- onmouseover
- onmouseout
- onfocus
- onblur
… and that there is the option to define exact co-ordinates, and to define the alt attribute and HTML iframe name as applicable, also.
We’ll leave you with the resultant HTML we had GIMP create for us as a result of the goings on in that PDF slideshow (noting that the only adjustment to HTML in out TextWrangler editing session was to point at the image img element src attribute location properly), and we hope this is of benefit for you …
<img src="mondrian-1504681_640.jpg" width="640" height="480" border="0" usemap="#map" />


<map name="map">

<!-- #$-:Image map file created by GIMP Image Map plug-in -->

<!-- #$-:GIMP Image Map plug-in by Maurits Rijk -->

<!-- #$-:Please do not edit lines starting with "#$" -->

<!-- #$VERSION:2.3 -->

<!-- #$AUTHOR:User -->

<area shape="rect" coords="0,1,36,132" href="mailto:?body=w_1_1&subject=Mondrian%20Composition%20with%20Read%20Yellow%20and%20Blue" />

<area shape="rect" coords="51,0,118,128" href="mailto:?body=y_2_1&subject=Mondrian%20Composition%20with%20Red%20Yellow%20and%20Blue" />

<area shape="rect" coords="136,1,295,133" href="mailto:?body=b_3_1&subject=Mondrian%20Composition%20with%20Red%20Yellow%20and%20Blue" />

<area shape="rect" coords="310,1,500,132" href="mailto:?body=r_4_1&subject=Mondrian%20Composition%20with%20Red%20Yellow%20and%20Blue" />

<area shape="rect" coords="514,0,566,131" href="mailto:?body=y_5_1&subject=Mondrian%20Composition%20with%20Red%20Yellow%20and%20Blue" />

<area shape="rect" coords="583,1,596,130" href="mailto:?body=w_6_1&subject=Mondrian%20Composition%20with%20Red%20Yellow%20and%20Blue" />

<area shape="rect" coords="0,146,36,293" href="mailto:?body=w_1_2&subject=Mondrian%20Composition%20with%20Red%20Yellow%20and%20Blue" />

<area shape="rect" coords="50,145,119,294" href="mailto:?body=w_2_2&subject=Mondrian%20Composition%20with%20Red%20Yellow%20and%20Blue" />

<area shape="rect" coords="134,146,295,292" href="mailto:?body=w_3_2&subject=Mondrian%20Composition%20with%20Red%20Yellow%20and%20Blue" />

<area shape="rect" coords="310,146,375,294" href="mailto:?body=w_4_2&subject=Mondrian%20Composition%20with%20Red%20Yellow%20and%20Blue" />

<area shape="rect" coords="391,147,498,294" href="mailto:?body=w_5_2&subject=Mondrian%20Composition%20with%20Red%20Yellow%20and%20Blue" />

<area shape="rect" coords="514,144,567,294" href="mailto:?body=r_6_2&subject=Mondrian%20Composition%20with%20Red%20Yellow%20and%20Blue" />

<area shape="rect" coords="582,146,597,385" href="mailto:?body=w_7_2&subject=Mondrian%20Composition%20with%20Red%20Yellow%20and%20Blue" />

<area shape="rect" coords="0,309,36,479" href="mailto:?body=w_1_3&subject=Mondrian%20Composition%20with%20Red%20Yellow%20and%20Blue" />

<area shape="rect" coords="51,308,119,386" href="mailto:?body=w_2_3&subject=Mondrian%20Composition%20with%20Red%20Yellow%20and%20Blue" />

<area shape="rect" coords="133,307,374,385" href="mailto:?body=r_3_3&subject=Mondrian%20Composition%20with%20Red%20Yellow%20and%20Blue" />

<area shape="rect" coords="390,307,499,385" href="mailto:?body=w_4_3&subject=Mondrian%20Composition%20with%20Red%20Yellow%20and%20Blue" />

<area shape="rect" coords="514,309,569,384" href="mailto:?body=y_5_3&subject=Mondrian%20Composition%20with%20Red%20Yellow%20and%20Blue" />

<area shape="rect" coords="51,399,118,481" href="mailto:?body=b_2_4&subject=Mondrian%20Composition%20with%20Red%20Yellow%20and%20Blue" />

<area shape="rect" coords="132,400,375,479" href="mailto:?body=y_3_4&subject=Mondrian%20Composition%20with%20Red%20Yellow%20and%20Blue" />

<area shape="rect" coords="390,400,568,481" href="mailto:?body=w_4_4&subject=Mondrian%20Composition%20with%20Red%20Yellow%20and%20Blue" />

<area shape="rect" coords="582,399,597,479" href="mailto:?body=w_5_4&subject=Mondrian%20Composition%20with%20Red%20Yellow%20and%20Blue" />

</map>
Previous relevant Gimp Guides to HTML Primer Tutorial is shown below.
The great GIMP image editor has several ways to create Guides, which are the precursor to being able to break an image into component parts via “Image -> Transform -> Guillotine” or the more enticing, for those web developers out there, “Filters -> Web -> Slice” which effectively does what Guillotine does and writes out some HTML in the form of an HTML table element that includes some “a” link opportunities to do something special for individual images of the new “image jigsaw” surrounded by Guides. Within the options of that last menu you would also see an “Image Map” option helping out in a similar fashion to the stupendous mobilefish functionality.
With this in mind, we almost immediately thought of the great Piet Mondrian and his rectangle paintings in primary colours, wondering if by now you could get image downloads of his work, given he died some time ago now. And yes, there at this Pixabay webpage, thanks, we were able to do that and download an image version of “Composition with Red Yellow and Blue” to open with GIMP.
Which ways, then, in GIMP, can you create Guides?
- precise Horizontal or Vertical position specification in pixels (via Image -> Guides -> New Guide…) or percentage (via Image -> Guides -> New Guide (by Percent)…) values
- position via a Selection (via Image -> Guides -> New Guides from Selection) … and today’s method of choice …
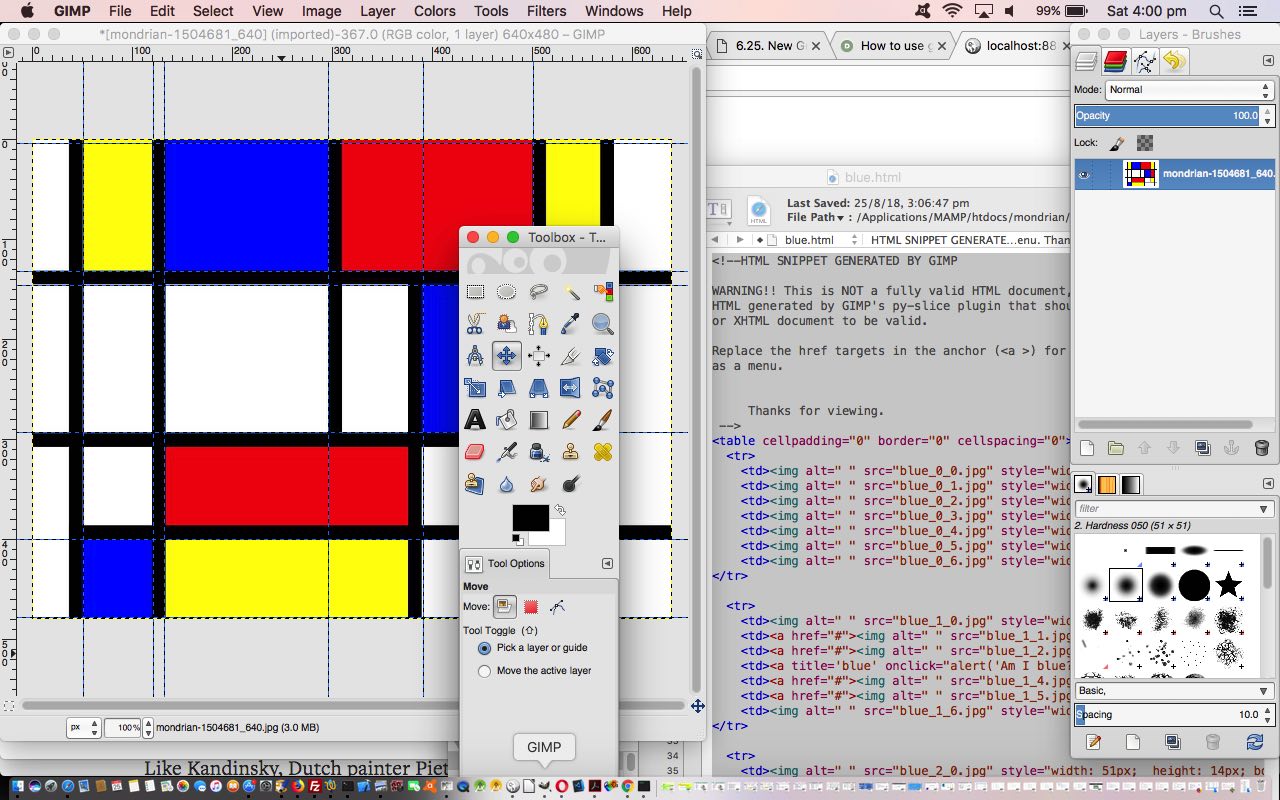
- user long hover then drag of the rulers at the top and left for dynamic Horizontal and Vertical Guides respectively
Best for this is that you can see us doing this with YouTube video we made for the purpose on our MacBook Pro using QuickTime Player “File -> New Screen Recording” resultant presentation you can play below.
… and the resultant HTML code snippet, including our bits, produced looked like …
<!--HTML SNIPPET GENERATED BY GIMP


WARNING!! This is NOT a fully valid HTML document, it is rather a piece of

HTML generated by GIMP's py-slice plugin that should be embedded in an HTML

or XHTML document to be valid.


Replace the href targets in the anchor (<a >) for your URLS to have it working

as a menu.


     Thanks for viewing.

 -->

<table cellpadding="0" border="0" cellspacing="0">

  <tr>

    <td><img alt=" " src="blue_0_0.jpg" style="width: 51px;  height: 4px; border-width: 0px;"></td>

    <td><img alt=" " src="blue_0_1.jpg" style="width: 70px;  height: 4px; border-width: 0px;"></td>

    <td><img alt=" " src="blue_0_2.jpg" style="width: 11px;  height: 4px; border-width: 0px;"></td>

    <td><img alt=" " src="blue_0_3.jpg" style="width: 164px;  height: 4px; border-width: 0px;"></td>

    <td><img alt=" " src="blue_0_4.jpg" style="width: 95px;  height: 4px; border-width: 0px;"></td>

    <td><img alt=" " src="blue_0_5.jpg" style="width: 110px;  height: 4px; border-width: 0px;"></td>

    <td><img alt=" " src="blue_0_6.jpg" style="width: 139px;  height: 4px; border-width: 0px;"></td>

</tr>

  <tr>

    <td><img alt=" " src="blue_1_0.jpg" style="width: 51px;  height: 128px; border-width: 0px;"></td>

    <td><a href="#"><img alt=" " src="blue_1_1.jpg"  style="width: 70px; height: 128px; border-width: 0px;"></a></td>

    <td><a href="#"><img alt=" " src="blue_1_2.jpg"  style="width: 11px; height: 128px; border-width: 0px;"></a></td>

    <td><a title='blue' onclick="alert('Am I blue?');" href="#"><img alt=" " src="blue_1_3.jpg"  style="width: 164px; height: 128px; border-width: 0px;"></a></td>

    <td><a href="#"><img alt=" " src="blue_1_4.jpg"  style="width: 95px; height: 128px; border-width: 0px;"></a></td>

    <td><a href="#"><img alt=" " src="blue_1_5.jpg"  style="width: 110px; height: 128px; border-width: 0px;"></a></td>

    <td><img alt=" " src="blue_1_6.jpg" style="width: 139px;  height: 128px; border-width: 0px;"></td>

</tr>

  <tr>

    <td><img alt=" " src="blue_2_0.jpg" style="width: 51px;  height: 14px; border-width: 0px;"></td>

    <td><a href="#"><img alt=" " src="blue_2_1.jpg"  style="width: 70px; height: 14px; border-width: 0px;"></a></td>

    <td><a href="#"><img alt=" " src="blue_2_2.jpg"  style="width: 11px; height: 14px; border-width: 0px;"></a></td>

    <td><a href="#"><img alt=" " src="blue_2_3.jpg"  style="width: 164px; height: 14px; border-width: 0px;"></a></td>

    <td><a href="#"><img alt=" " src="blue_2_4.jpg"  style="width: 95px; height: 14px; border-width: 0px;"></a></td>

    <td><a href="#"><img alt=" " src="blue_2_5.jpg"  style="width: 110px; height: 14px; border-width: 0px;"></a></td>

    <td><img alt=" " src="blue_2_6.jpg" style="width: 139px;  height: 14px; border-width: 0px;"></td>

</tr>

  <tr>

    <td><img alt=" " src="blue_3_0.jpg" style="width: 51px;  height: 147px; border-width: 0px;"></td>

    <td><a href="#"><img alt=" " src="blue_3_1.jpg"  style="width: 70px; height: 147px; border-width: 0px;"></a></td>

    <td><a href="#"><img alt=" " src="blue_3_2.jpg"  style="width: 11px; height: 147px; border-width: 0px;"></a></td>

    <td><a href="#"><img alt=" " src="blue_3_3.jpg"  style="width: 164px; height: 147px; border-width: 0px;"></a></td>

    <td><a href="#"><img alt=" " src="blue_3_4.jpg"  style="width: 95px; height: 147px; border-width: 0px;"></a></td>

    <td><a title='Blue' onclick="alert('Am i Blue?');" href="#"><img alt=" " src="blue_3_5.jpg"  style="width: 110px; height: 147px; border-width: 0px;"></a></td>

    <td><img alt=" " src="blue_3_6.jpg" style="width: 139px;  height: 147px; border-width: 0px;"></td>

</tr>

  <tr>

    <td><img alt=" " src="blue_4_0.jpg" style="width: 51px;  height: 107px; border-width: 0px;"></td>

    <td><a href="#"><img alt=" " src="blue_4_1.jpg"  style="width: 70px; height: 107px; border-width: 0px;"></a></td>

    <td><a href="#"><img alt=" " src="blue_4_2.jpg"  style="width: 11px; height: 107px; border-width: 0px;"></a></td>

    <td><a href="#"><img alt=" " src="blue_4_3.jpg"  style="width: 164px; height: 107px; border-width: 0px;"></a></td>

    <td><a href="#"><img alt=" " src="blue_4_4.jpg"  style="width: 95px; height: 107px; border-width: 0px;"></a></td>

    <td><a href="#"><img alt=" " src="blue_4_5.jpg"  style="width: 110px; height: 107px; border-width: 0px;"></a></td>

    <td><img alt=" " src="blue_4_6.jpg" style="width: 139px;  height: 107px; border-width: 0px;"></td>

</tr>

  <tr>

    <td><img alt=" " src="blue_5_0.jpg" style="width: 51px;  height: 78px; border-width: 0px;"></td>

    <td><a title='BLUE' onclick="alert('Am i BLUE?');" href="#"><img alt=" " src="blue_5_1.jpg"  style="width: 70px; height: 78px; border-width: 0px;"></a></td>

    <td><a href="#"><img alt=" " src="blue_5_2.jpg"  style="width: 11px; height: 78px; border-width: 0px;"></a></td>

    <td><a href="#"><img alt=" " src="blue_5_3.jpg"  style="width: 164px; height: 78px; border-width: 0px;"></a></td>

    <td><a href="#"><img alt=" " src="blue_5_4.jpg"  style="width: 95px; height: 78px; border-width: 0px;"></a></td>

    <td><a href="#"><img alt=" " src="blue_5_5.jpg"  style="width: 110px; height: 78px; border-width: 0px;"></a></td>

    <td><img alt=" " src="blue_5_6.jpg" style="width: 139px;  height: 78px; border-width: 0px;"></td>

</tr>

  <tr>

    <td><img alt=" " src="blue_6_0.jpg" style="width: 51px;  height: 2px; border-width: 0px;"></td>

    <td><img alt=" " src="blue_6_1.jpg" style="width: 70px;  height: 2px; border-width: 0px;"></td>

    <td><img alt=" " src="blue_6_2.jpg" style="width: 11px;  height: 2px; border-width: 0px;"></td>

    <td><img alt=" " src="blue_6_3.jpg" style="width: 164px;  height: 2px; border-width: 0px;"></td>

    <td><img alt=" " src="blue_6_4.jpg" style="width: 95px;  height: 2px; border-width: 0px;"></td>

    <td><img alt=" " src="blue_6_5.jpg" style="width: 110px;  height: 2px; border-width: 0px;"></td>

    <td><img alt=" " src="blue_6_6.jpg" style="width: 139px;  height: 2px; border-width: 0px;"></td>

</tr>

</table>
We hope you find these GIMP “Slice and Dice” webpage creation ideas of interest.
If this was interesting you may be interested in this too.
If this was interesting you may be interested in this too.
If this was interesting you may be interested in this too.
If this was interesting you may be interested in this too.
If this was interesting you may be interested in this too.
If this was interesting you may be interested in this too.
If this was interesting you may be interested in this too.
If this was interesting you may be interested in this too.
If this was interesting you may be interested in this too.
If this was interesting you may be interested in this too.
