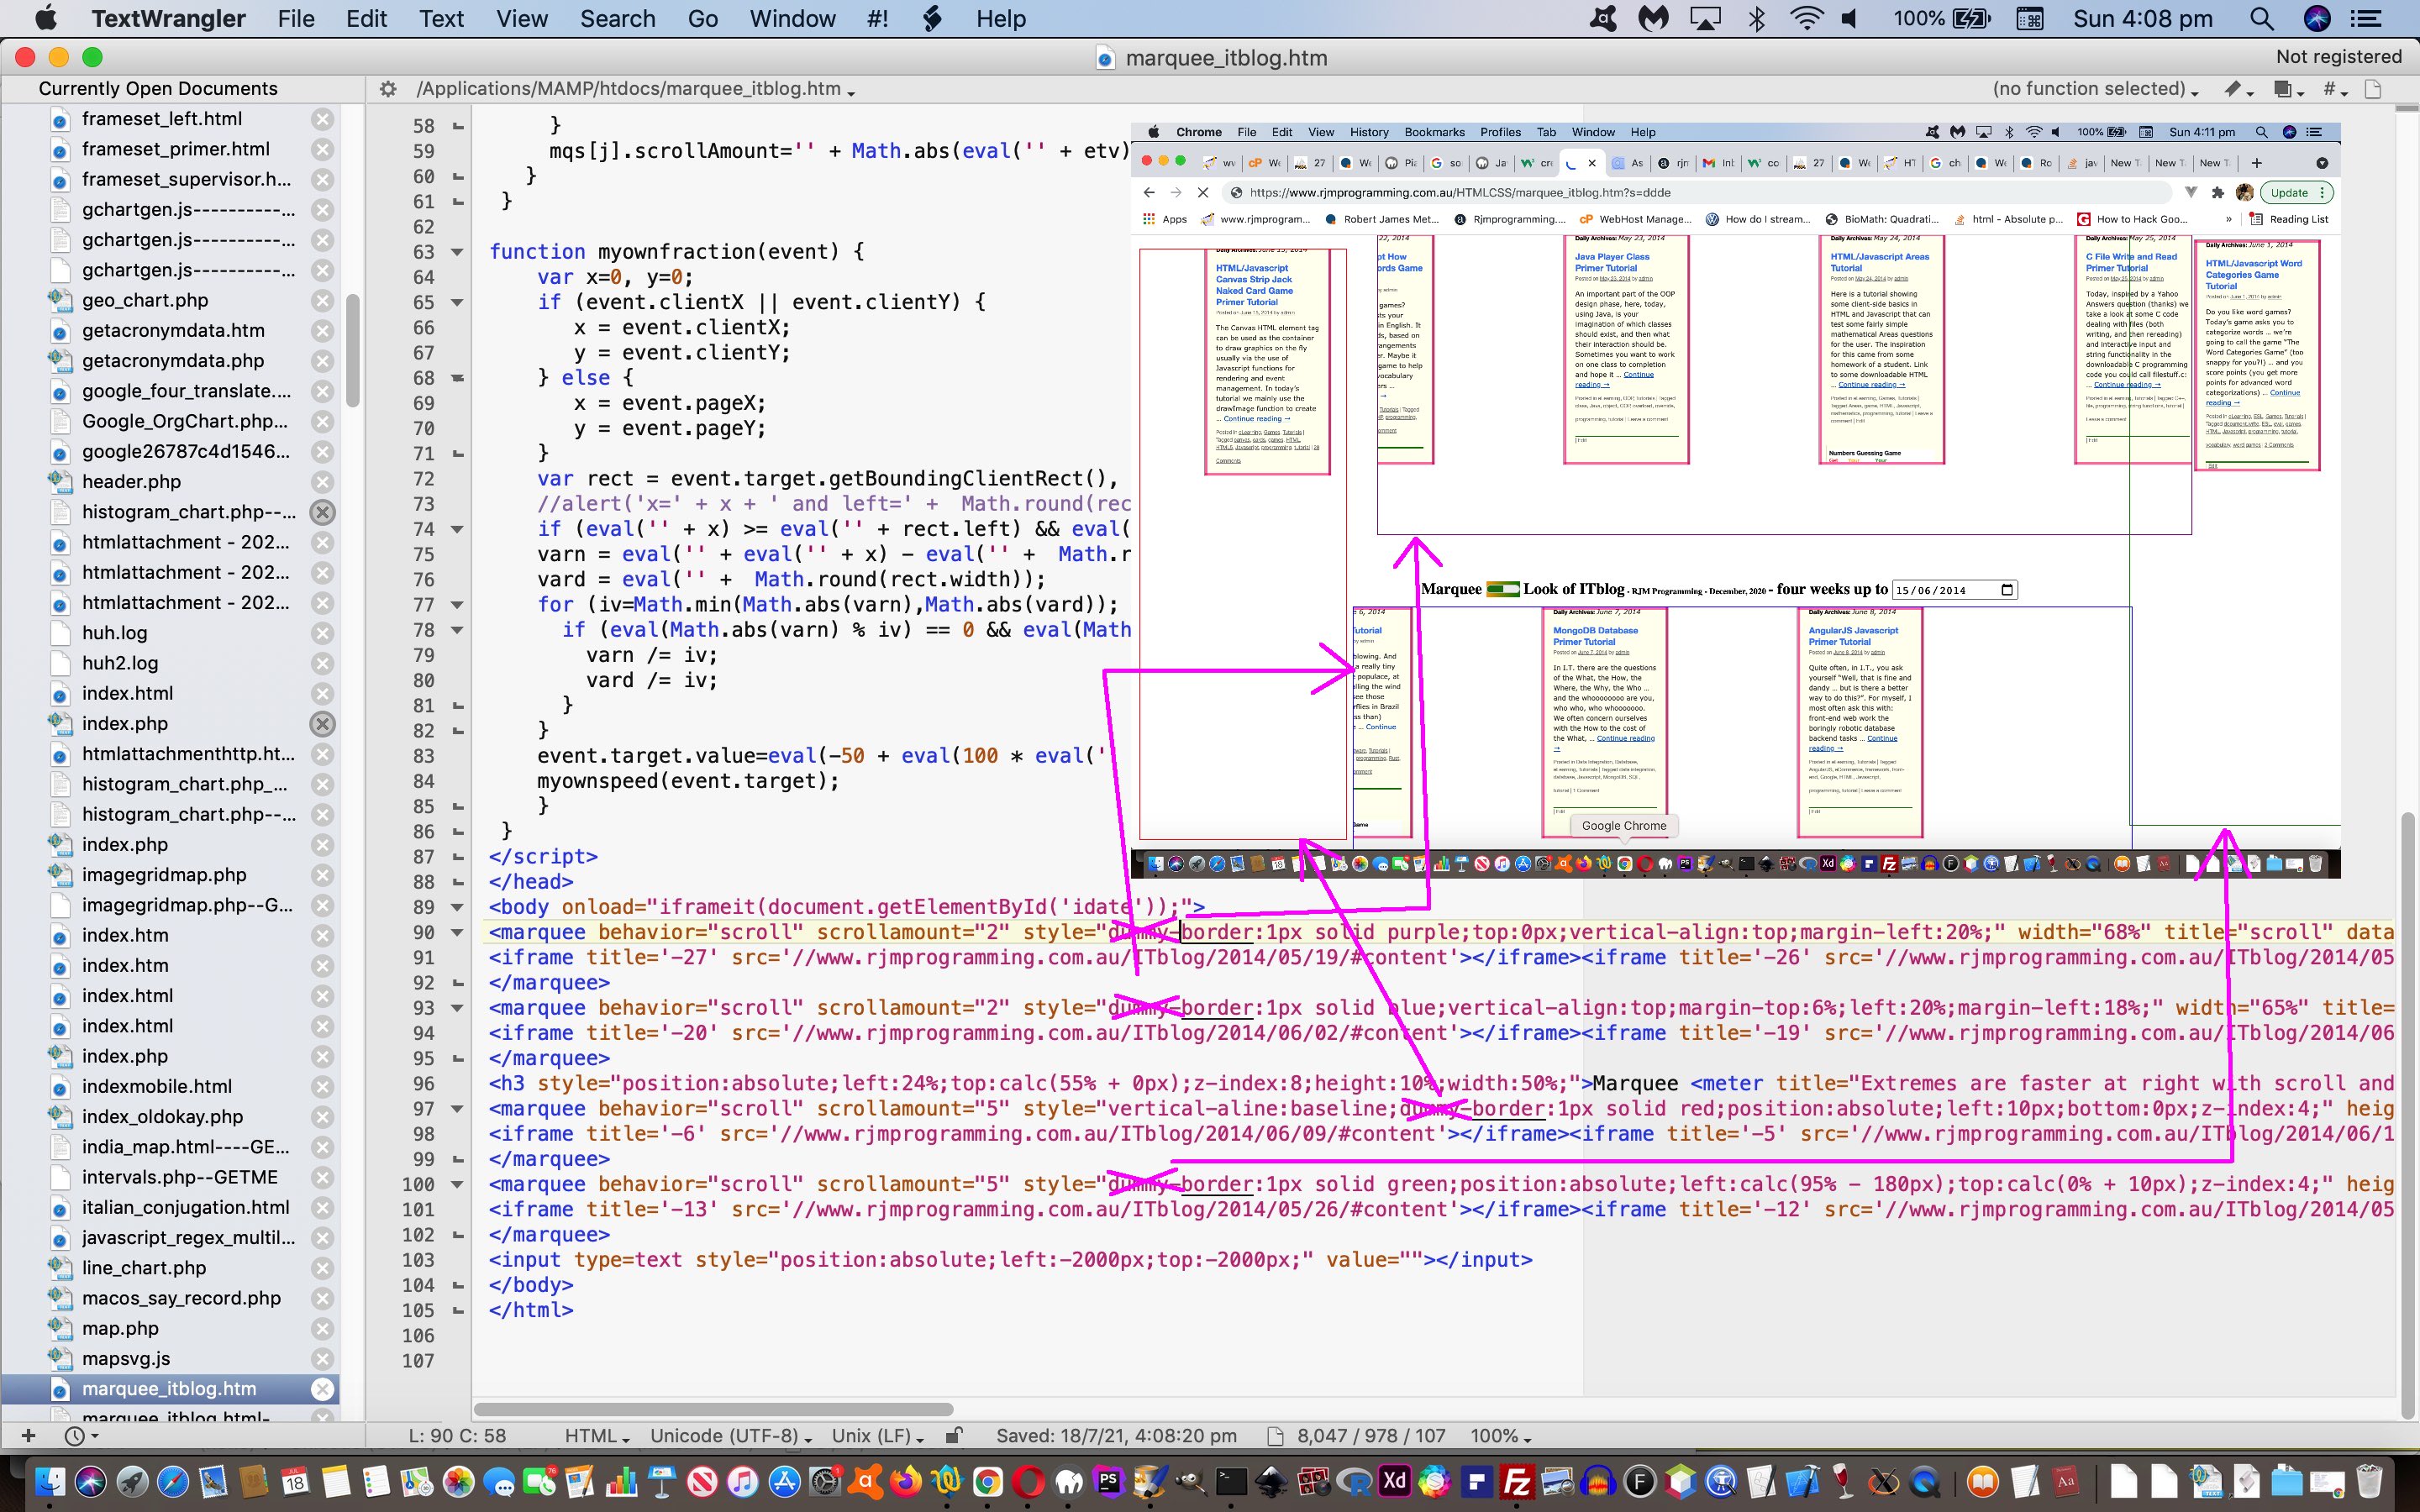
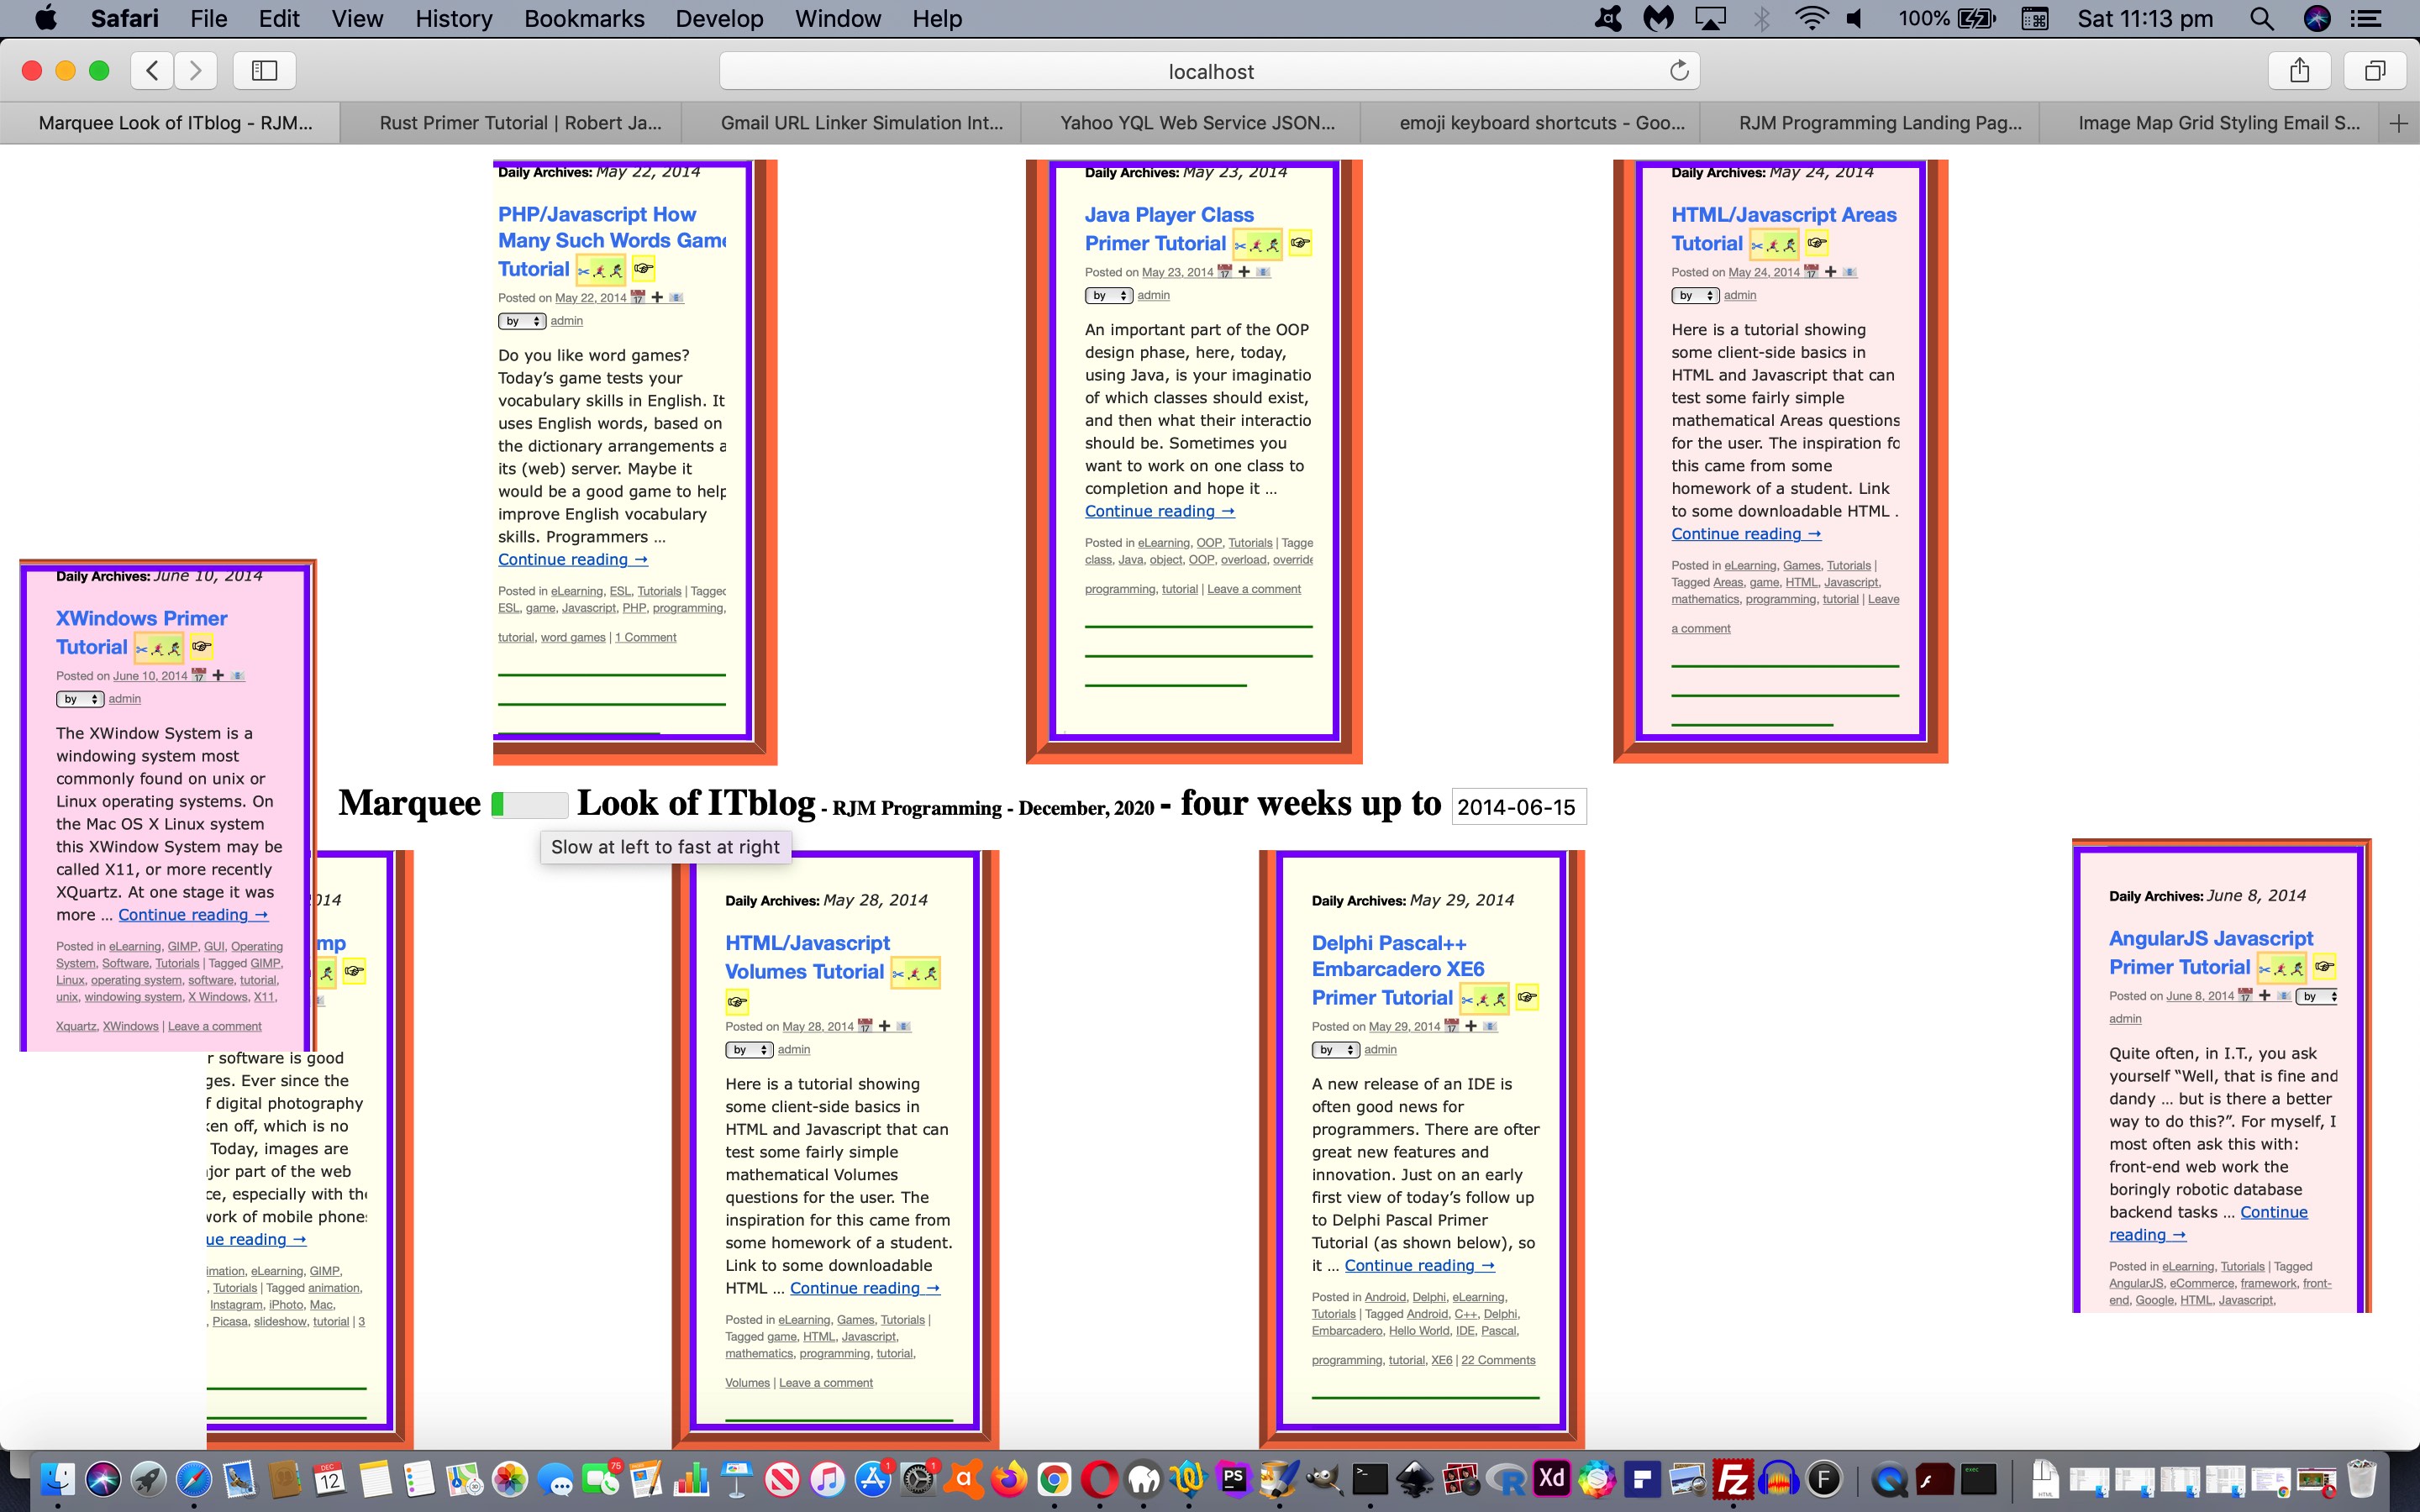
We’ve reworked the CSS styling mainly of the HTML marquee element HTML Marquee and Meter and Input Date Tutorial‘s web application.
In such a web application featuring a mix of CSS style …
| position: | absolute |
| relative |
… and so dependent on correct positioning of HTML elements you may find your best tool is the temporary creation of border CCC styling …
<marquee behavior="scroll" scrollamount="1" style=""border:1px solid purple;margin-left:20%;" width="68%" title="scroll" data-alt="alternate" direction="left" height="600px">

<iframe title='-27' src='//www.rjmprogramming.com.au/ITblog/2014/05/19/#content'></iframe><iframe title='-26' src='//www.rjmprogramming.com.au/ITblog/2014/05/20/#content'></iframe><iframe title='-25' src='//www.rjmprogramming.com.au/ITblog/2014/05/21/#content'></iframe><iframe title='-24' src='//www.rjmprogramming.com.au/ITblog/2014/05/22/#content'></iframe><iframe title='-23' src='//www.rjmprogramming.com.au/ITblog/2014/05/23/#content'></iframe><iframe title='-22' src='//www.rjmprogramming.com.au/ITblog/2014/05/24/#content'></iframe><iframe title='-21' src='//www.rjmprogramming.com.au/ITblog/2014/05/25/#content'></iframe>

</marquee>

<marquee behavior="scroll" scrollamount="1" style=""border:1px solid blue;margin-top:-20%;margin-left:8%;" width="68%" title="scroll" data-alt="alternate" direction="right" height="600px">

<iframe title='-20' src='//www.rjmprogramming.com.au/ITblog/2014/06/02/#content'></iframe><iframe title='-19' src='//www.rjmprogramming.com.au/ITblog/2014/06/03/#content'></iframe><iframe title='-18' src='//www.rjmprogramming.com.au/ITblog/2014/06/04/#content'></iframe><iframe title='-17' src='//www.rjmprogramming.com.au/ITblog/2014/06/05/#content'></iframe><iframe title='-16' src='//www.rjmprogramming.com.au/ITblog/2014/06/06/#content'></iframe><iframe title='-15' src='//www.rjmprogramming.com.au/ITblog/2014/06/07/#content'></iframe><iframe title='-14' src='//www.rjmprogramming.com.au/ITblog/2014/06/08/#content'></iframe>

</marquee>

<marquee behavior="scroll" scrollamount="1" style=""border:1px solid red;position:absolute;left:10px;top:10px;z-index:4;" height="68%" title="scroll" data-alt="alternate" direction="up" width="600px">

<iframe title='-6' src='//www.rjmprogramming.com.au/ITblog/2014/06/09/#content'></iframe><iframe title='-5' src='//www.rjmprogramming.com.au/ITblog/2014/06/10/#content'></iframe><iframe title='-4' src='//www.rjmprogramming.com.au/ITblog/2014/06/11/#content'></iframe><iframe title='-3' src='//www.rjmprogramming.com.au/ITblog/2014/06/12/#content'></iframe><iframe title='-2' src='//www.rjmprogramming.com.au/ITblog/2014/06/13/#content'></iframe><iframe title='-1' src='//www.rjmprogramming.com.au/ITblog/2014/06/14/#content'></iframe><iframe title='0' src='//www.rjmprogramming.com.au/ITblog/2014/06/15/#content'></iframe>

</marquee>

<marquee behavior="scroll" scrollamount="1" style=""border:1px solid green;position:absolute;left:calc(100% - 180px);top:calc(20% + 10px);z-index:4;" height="68%" title="scroll" data-alt="alternate" direction="down" width="600px">

<iframe title='-13' src='//www.rjmprogramming.com.au/ITblog/2014/05/26/#content'></iframe><iframe title='-12' src='//www.rjmprogramming.com.au/ITblog/2014/05/27/#content'></iframe><iframe title='-11' src='//www.rjmprogramming.com.au/ITblog/2014/05/28/#content'></iframe><iframe title='-10' src='//www.rjmprogramming.com.au/ITblog/2014/05/29/#content'></iframe><iframe title='-9' src='//www.rjmprogramming.com.au/ITblog/2014/05/30/#content'></iframe><iframe title='-8' src='//www.rjmprogramming.com.au/ITblog/2014/05/31/#content'></iframe><iframe title='-7' src='//www.rjmprogramming.com.au/ITblog/2014/06/01/#content'></iframe>

</marquee>

<h3 style="position:absolute;left:14%;top:46%;z-index:8;">Marquee <meter title="Extremes are faster at right with scroll and at left with alternate" style="background-image: linear-gradient( 90deg, orange, green);width:40px;display:inline-block;" onclick="myownfraction(event);" value="1" min="-50" max="50"></meter> Look of ITblog<font size=1> - RJM Programming - December, 2020 </font>- four weeks up to <input id=idate onblur="iframeit(this);" onchange="iframeit(this);" style="display:inline-block;width:70px;" title="2014-06-15" type=date value="2014-06-15" placeholder="2014-06-15"></input></h3>

<input type=text style="position:absolute;left:-2000px;top:-2000px;" value=""></input>
… to tweak via the look of these border helpers to end up with the better, and when happy, disappearing (and “self-commenting”, while tipping the hat towards the process (good for future tweaking, perhaps)) …
<marquee behavior="scroll" scrollamount="2" style="dummy-border:1px solid purple;top:0px;vertical-align:top;margin-left:20%;" width="68%" title="scroll" data-alt="alternate" direction="left" height="50%">

<iframe title='-27' src='//www.rjmprogramming.com.au/ITblog/2014/05/19/#content'></iframe><iframe title='-26' src='//www.rjmprogramming.com.au/ITblog/2014/05/20/#content'></iframe><iframe title='-25' src='//www.rjmprogramming.com.au/ITblog/2014/05/21/#content'></iframe><iframe title='-24' src='//www.rjmprogramming.com.au/ITblog/2014/05/22/#content'></iframe><iframe title='-23' src='//www.rjmprogramming.com.au/ITblog/2014/05/23/#content'></iframe><iframe title='-22' src='//www.rjmprogramming.com.au/ITblog/2014/05/24/#content'></iframe><iframe title='-21' src='//www.rjmprogramming.com.au/ITblog/2014/05/25/#content'></iframe>

</marquee>

<marquee behavior="scroll" scrollamount="2" style="dummy-border:1px solid blue;vertical-align:top;margin-top:6%;left:20%;margin-left:18%;" width="65%" title="scroll" data-alt="alternate" direction="right" height="50%">

<iframe title='-20' src='//www.rjmprogramming.com.au/ITblog/2014/06/02/#content'></iframe><iframe title='-19' src='//www.rjmprogramming.com.au/ITblog/2014/06/03/#content'></iframe><iframe title='-18' src='//www.rjmprogramming.com.au/ITblog/2014/06/04/#content'></iframe><iframe title='-17' src='//www.rjmprogramming.com.au/ITblog/2014/06/05/#content'></iframe><iframe title='-16' src='//www.rjmprogramming.com.au/ITblog/2014/06/06/#content'></iframe><iframe title='-15' src='//www.rjmprogramming.com.au/ITblog/2014/06/07/#content'></iframe><iframe title='-14' src='//www.rjmprogramming.com.au/ITblog/2014/06/08/#content'></iframe>

</marquee>

<h3 style="position:absolute;left:24%;top:calc(55% + 0px);z-index:8;height:10%;width:50%;">Marquee <meter title="Extremes are faster at right with scroll and at left with alternate" style="background-image: linear-gradient( 90deg, orange, green);width:40px;display:inline-block;" onclick="myownfraction(event);" value="1" min="-50" max="50"></meter> Look of ITblog<font size=1> - RJM Programming - December, 2020 </font>- four weeks up to <input id=idate onblur="iframeit(this);" onchange="iframeit(this);" style="display:inline-block;width:150px;" title="2014-06-15" type=date value="2014-06-15" placeholder="2014-06-15"></input></h3>

<marquee behavior="scroll" scrollamount="5" style="vertical-aline:baseline;dummy-border:1px solid red;position:absolute;left:10px;bottom:0px;z-index:4;" height="96%" title="scroll" data-alt="alternate" direction="up" width="17%">

<iframe title='-6' src='//www.rjmprogramming.com.au/ITblog/2014/06/09/#content'></iframe><iframe title='-5' src='//www.rjmprogramming.com.au/ITblog/2014/06/10/#content'></iframe><iframe title='-4' src='//www.rjmprogramming.com.au/ITblog/2014/06/11/#content'></iframe><iframe title='-3' src='//www.rjmprogramming.com.au/ITblog/2014/06/12/#content'></iframe><iframe title='-2' src='//www.rjmprogramming.com.au/ITblog/2014/06/13/#content'></iframe><iframe title='-1' src='//www.rjmprogramming.com.au/ITblog/2014/06/14/#content'></iframe><iframe title='0' src='//www.rjmprogramming.com.au/ITblog/2014/06/15/#content'></iframe>

</marquee>

<marquee behavior="scroll" scrollamount="5" style="dummy-border:1px solid green;position:absolute;left:calc(95% - 180px);top:calc(0% + 10px);z-index:4;" height="96%" title="scroll" data-alt="alternate" direction="down" width="20%">

<iframe title='-13' src='//www.rjmprogramming.com.au/ITblog/2014/05/26/#content'></iframe><iframe title='-12' src='//www.rjmprogramming.com.au/ITblog/2014/05/27/#content'></iframe><iframe title='-11' src='//www.rjmprogramming.com.au/ITblog/2014/05/28/#content'></iframe><iframe title='-10' src='//www.rjmprogramming.com.au/ITblog/2014/05/29/#content'></iframe><iframe title='-9' src='//www.rjmprogramming.com.au/ITblog/2014/05/30/#content'></iframe><iframe title='-8' src='//www.rjmprogramming.com.au/ITblog/2014/05/31/#content'></iframe><iframe title='-7' src='//www.rjmprogramming.com.au/ITblog/2014/06/01/#content'></iframe>

</marquee>

<input type=text style="position:absolute;left:-2000px;top:-2000px;" value=""></input>
… in the changed marquee_itblog.htm‘s live run link.
Previous relevant HTML Marquee and Meter and Input Date Tutorial is shown below.
If you are designing a web application with …
- maximum pizazz
- maximum colour and movement
- maximal presenting of lots of information fleetingly
… then the HTML marquee element, though not popular all over, could be the go for you.
Content-wise it is an “Eat at Joe’s” type of experience showing text (like teletext) or images moving left/right or up/down across your screen. Today, we wanted to see whether …
- content could be HTML iframe content … spoiler alert … yes … could have two attributes …
-
- behavior
- scrollamount
… be user controllable … spoiler alert … yes … that controller being a …
- meter element … spoiler alert … yes … and the iframe content being this blog’s postings by date controlled by …
- input type=”date” element … spoiler alert … yes … and thereby …
- presenting 28 iframes representing this blog’s daily blog post over the four weeks preceeding that date be presented in an “Eat at Joe’s” x 4 (“direction” attribute presented in left/down/right/up clockwise display) “extravaganza” … spoiler alert … yes
Why? Because we need to see lots of different approaches to “presentation” to spark ideas, whether they be ones you reject or take on. It’s all in the mix, we figure.
We’ve used the marquee element before, as you can read with HTML Marquee and Data Feeds and the Cache Primer Tutorial and we direct you to the HTML and Javascript and CSS “Marquee ITblog Look” live run you can try that is underpinned by marquee_itblog.html code, to see what we mean. Of interest in the more subtle ways here, are the way the meter …
<meter title="Extremes are faster at right with scroll and at left with alternate" style="background-image: linear-gradient( 90deg, orange, green);width:40px;display:inline-block;" onclick="myownfraction(event);" value="1" min="-50" max="50"></meter>
… element has been made into an interactive input clicking “tool” via the Javascript “onclick” event (function myownfraction(event)) logic …
function myownfraction(event) {

    var x=0, y=0;

    if (event.clientX || event.clientY) {

       x = event.clientX;

       y = event.clientY;

    } else {

       x = event.pageX;

       y = event.pageY;

    }

    var rect = event.target.getBoundingClientRect(), varn=0, vard=0, iv=0;

    //alert('x=' + x + ' and left=' +  Math.round(rect.left));

    if (eval('' + x) >= eval('' + rect.left) && eval('' + x) <= eval('' + eval('' + Math.round(rect.left)) + eval('' +  Math.round(rect.width)))) {

    varn = eval('' + eval('' + x) - eval('' +  Math.round(rect.left)));

    vard = eval('' +  Math.round(rect.width));

    for (iv=Math.min(Math.abs(varn),Math.abs(vard)); iv>=2; iv--) {

      if (eval(Math.abs(varn) % iv) == 0 && eval(Math.abs(vard) % iv) == 0) {

        varn /= iv;

        vard /= iv;

      }

    }

    event.target.value=eval(-50 + eval(100 * eval('' + varn) / eval('' + vard)));

    myownspeed(event.target);

    }

 }


 function myownspeed(et) {

   var etv=et.value;

   var j=0;

   var mqs=document.getElementsByTagName('marquee');

   for (j=0; j<mqs.length; j++) {

     if (eval('' + etv) >= 0) {

       //et.style.backgroundImage="linear-gradient( 90deg, green, green, green, green, green)";

       mqs[j].behavior='' + mqs[j].title;

     } else {

       //et.style.backgroundImage="linear-gradient( 90deg, orange, orange, orange, orange, orange)";

       mqs[j].behavior='' + mqs[j].getAttribute('data-alt');

     }

     mqs[j].scrollAmount='' + Math.abs(eval('' + etv));

   }

 }
Previous relevant HTML Marquee and Data Feeds and the Cache Primer Tutorial is shown below.
No matter how cheezy you think the HTML marquee element feels, it’s got to be said that …
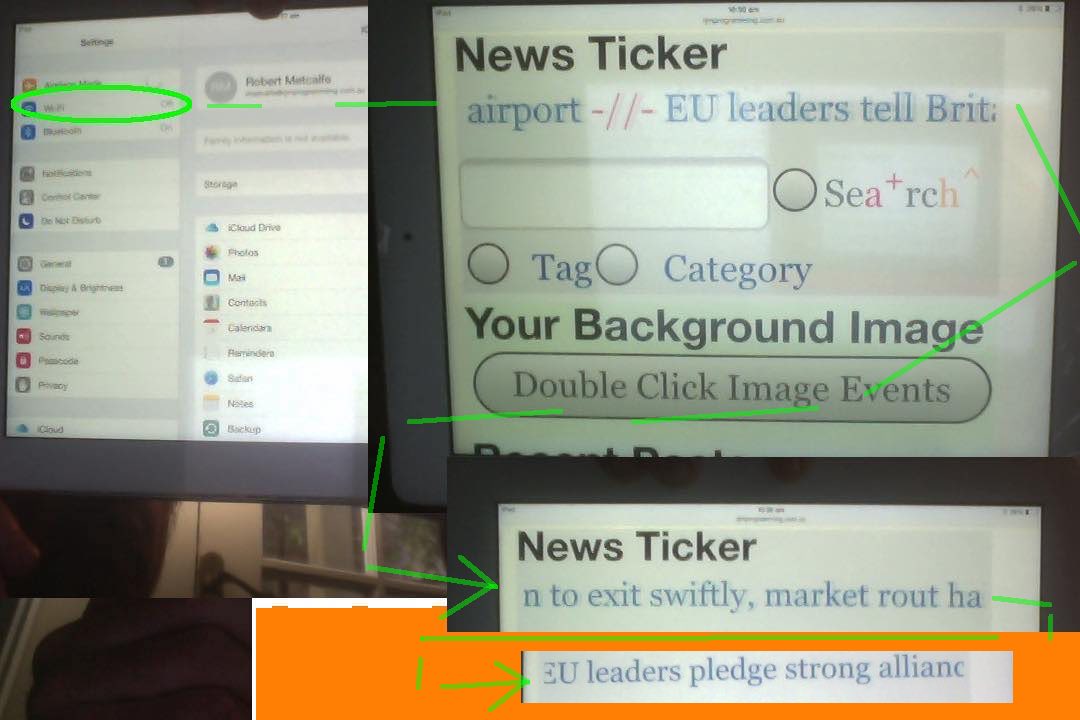
… can be quite a potent team. Here at our (older) RJM Programming blog we utilize a WordPress plugin by Creative Software Design Solutions (here, and installable via WordPress’s admin area’s Plugin -> Add New functionality) that creates a “ticker-tape” (machine) news and weather widget near the top of this blog’s webpages that uses an HTML marquee tag and a data feed to bring recent news and weather.
Given any sort of a “wind up” earlier in the day when the WiFi is on, “charges” the web browser cache with this information, reminiscent of our “Did you Know?” section in HTML/Javascript/CSS Reveal via Image Focus Primer Tutorial, as shown below. That means, particularly with a mobile device, like we show, today, regarding our tutorial picture view of an iPad, that if we are out and about with it, and cannot get a WiFi connection, we cannot navigate to any new pages, else we’ll get a “cannot connect to the internet” type of message, but we can read the news via that marquee element, and the wonders of web browser cache mechanisms. If we blow our chance of surviving on Earth, we hope the cockroaches left can still read about the latest news and weather this way, as they’re out and about with their newly acquired mobile devices?!
Did you know?
If you are into navigation using online means, and not always being connected, in the same “wind up” and then “chuff off” mindset of ideas, you probably can’t beat the concept of Google offline maps as an idea.
Previous relevant HTML/Javascript/CSS Reveal via Image Focus Primer Tutorial is shown below.
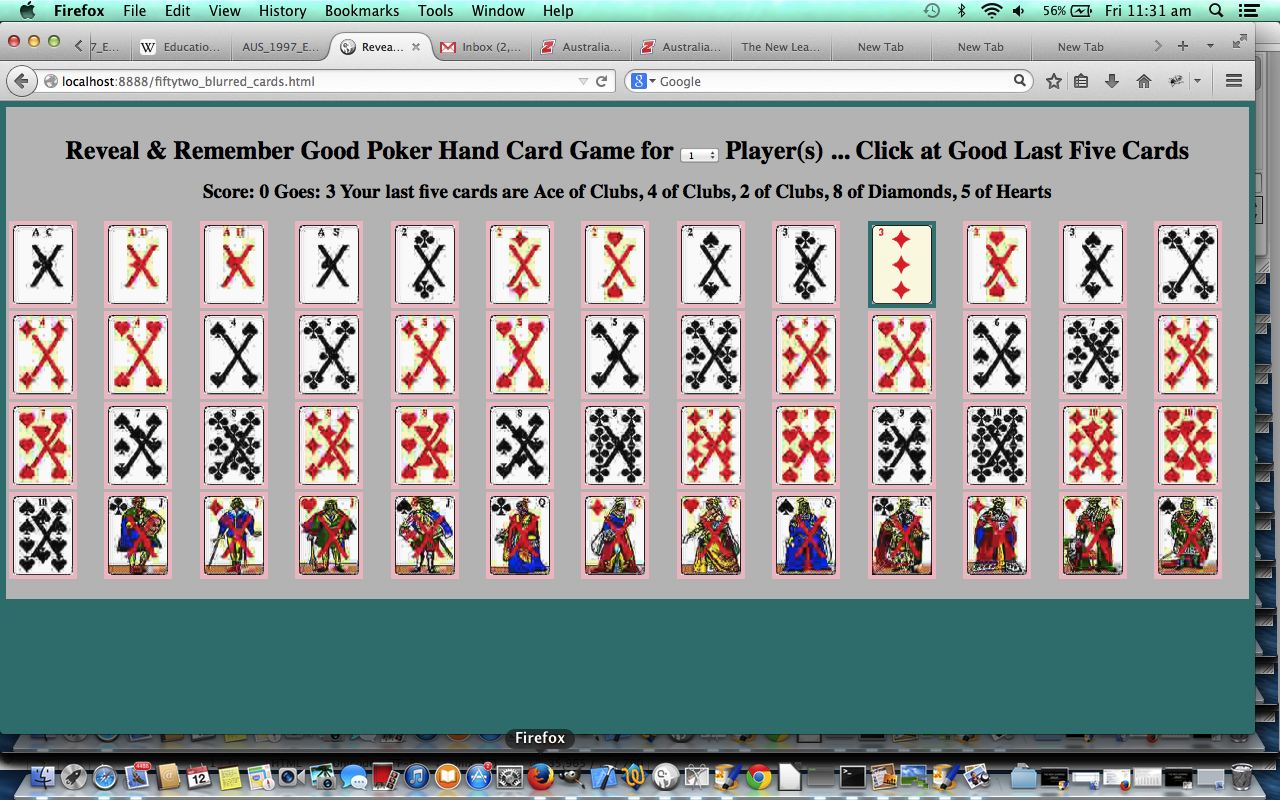
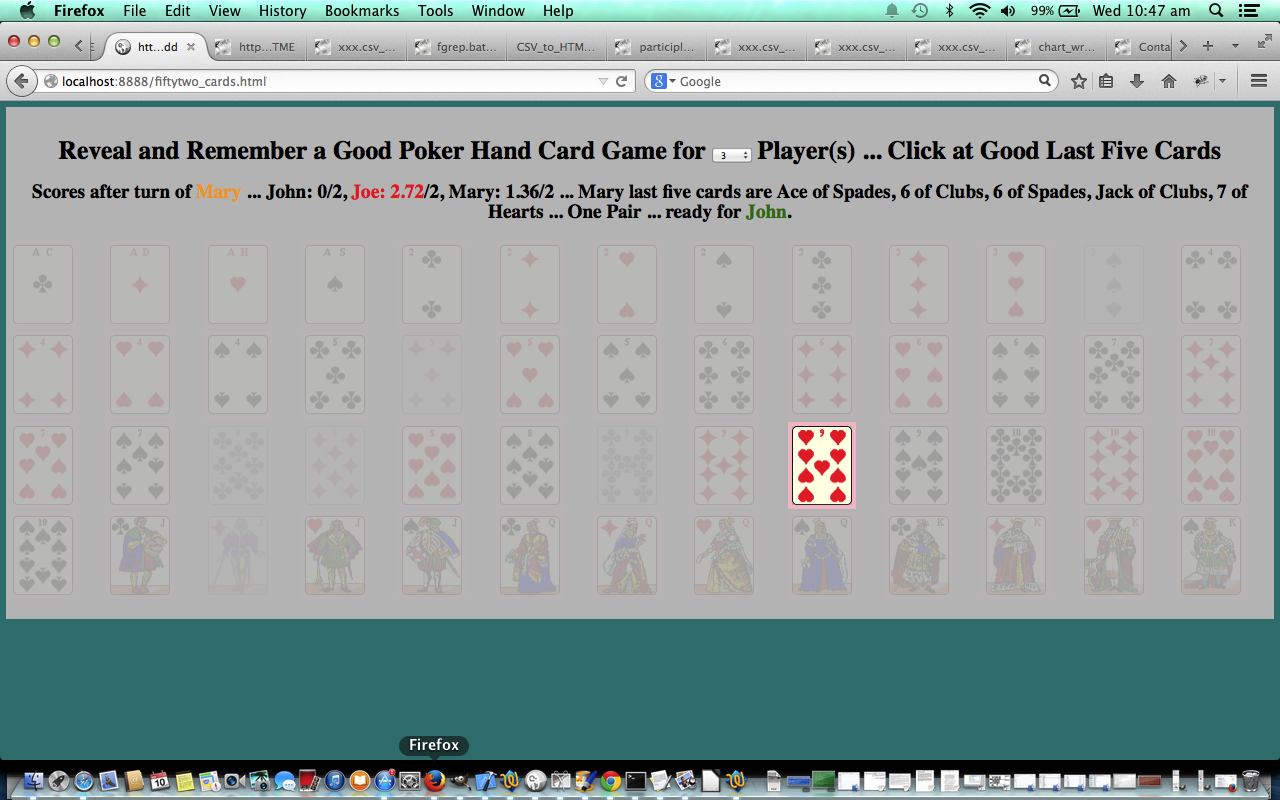
Good to see you back at the ongoing discussion regarding HTML, Javascript and CSS on the theme of “reveal”. We’ll be doing several postings on this theme, and today we continue on with an image focussing method of “reveal” of some playing cards where you (and some friends maybe) try to recall the last 5 cards revealed and interrupt when you think it makes a good Poker hand in our tutorial game today, which is building on previous “reveal” themed tutorials like the one below called HTML/Javascript/CSS Reveal via Opacity Primer Tutorial.
Here is a tutorial that “reveals” playing cards, revealed from unclear to clear (via image quality changes made to gif files to become unclear (manipulated) jpeg files via the Batch Manipulation functionality of GIMP (called bimp)), using HTML, Javascript and CSS, featuring:
- Image quality changes made to gif files to become unclear (manipulated) jpeg files via the Batch Manipulation functionality of GIMP
- Encasing working visible HTML elements within div element for ease of:
- positioning
- scrolling, or not
- visibility control
- Javascript setInterval timer functionality
- Javascript DOM methods to dynamically change HTML (over time)
- The usual “game” Javascript suspects Math.floor() and Math.random() as in the code
thisc = Math.floor(Math.random() * 52) + 0; - HTML/CSS body element background colour
So here is today’s tutorial’s live run, and here is the HTML programming source code you could call fiftytwo_blurred_cards.html.
The base code used as the basis for this HTML code was from HTML/Javascript/CSS Reveal via Opacity Primer Tutorial and the code differences can be seen at this link … fiftytwo_blurred_cards.html
Enjoy the card game asking for quick reactions, memory and observational skills! If you get a kick out of the scoring method, there is a kind of method in the madness … have a read of this.
Did you know?
Some web applications can be played without an Internet connection, once first set up when there is an Internet connection, like the game above. This is because they work off Javascript (DOM) once running, and ask nothing of the server, just using client-side Javascript to do their “thang”.
In Sydney, for instance, with our no Wi-Fi public transport (how ironic?!), you could start the game at home/work with your Internet connection, leave the webpage window open, and keep playing all the way to work/home (with or without an Internet connection) on your laptop, tablet or phone … and beyond … perhaps?! The game only finishes (its functionality) when you close the webpage.
Previous relevant HTML/Javascript/CSS Reveal via Opacity Primer Tutorial is shown below.
Welcome back to the ongoing discussion regarding HTML, Javascript and CSS on the theme of “reveal”. We’ll be doing several postings on this theme, and today we continue on with an opacity method of “reveal” of some playing cards where you (and some friends maybe) try to recall the last 5 cards revealed and interrupt when you think it makes a good Poker hand in our tutorial game today, which is building on previous “reveal” themed tutorials like the one below called HTML/Javascript Reveal Image In Front of Image Tutorial.
Here is a tutorial that “reveals” playing cards, revealed from faint to bright (via the image opacity), using HTML, Javascript and CSS, featuring:
- CSS opacity style property
- Encasing working visible HTML elements within div element for ease of:
- positioning
- scrolling, or not
- visibility control
- Javascript setInterval timer functionality
- Javascript DOM methods to dynamically change HTML (over time)
- The usual “game” Javascript suspects Math.floor() and Math.random() as in the code
thisc = Math.floor(Math.random() * 52) + 0; - HTML/CSS body element background colour
So here is today’s tutorial’s live run, and here is the HTML programming source code you could call fiftytwo_cards.html.
The base code used as the basis for this HTML code was from HTML/Javascript Ahead of the Odds Game Tutorial and the code differences can be seen at this link … fiftytwo_cards.html
Enjoy the card game asking for quick reactions, memory and observational skills! If you get a kick out of the scoring method, there is a kind of method in the madness … have a read of this.
Did you know?
Some web applications can be played without an Internet connection, once first set up when there is an Internet connection, like the game above. This is because they work off Javascript (DOM) once running, and ask nothing of the server, just using client-side Javascript to do their “thang”.
In Sydney, for instance, with our no Wi-Fi public transport (how ironic?!), you could start the game at home/work with your Internet connection, leave the webpage window open, and keep playing all the way to work/home (with or without an Internet connection) on your laptop, tablet or phone … and beyond … perhaps?! The game only finishes (its functionality) when you close the webpage.
Previous relevant HTML/Javascript Reveal Image In Front of Image Tutorial is shown below.
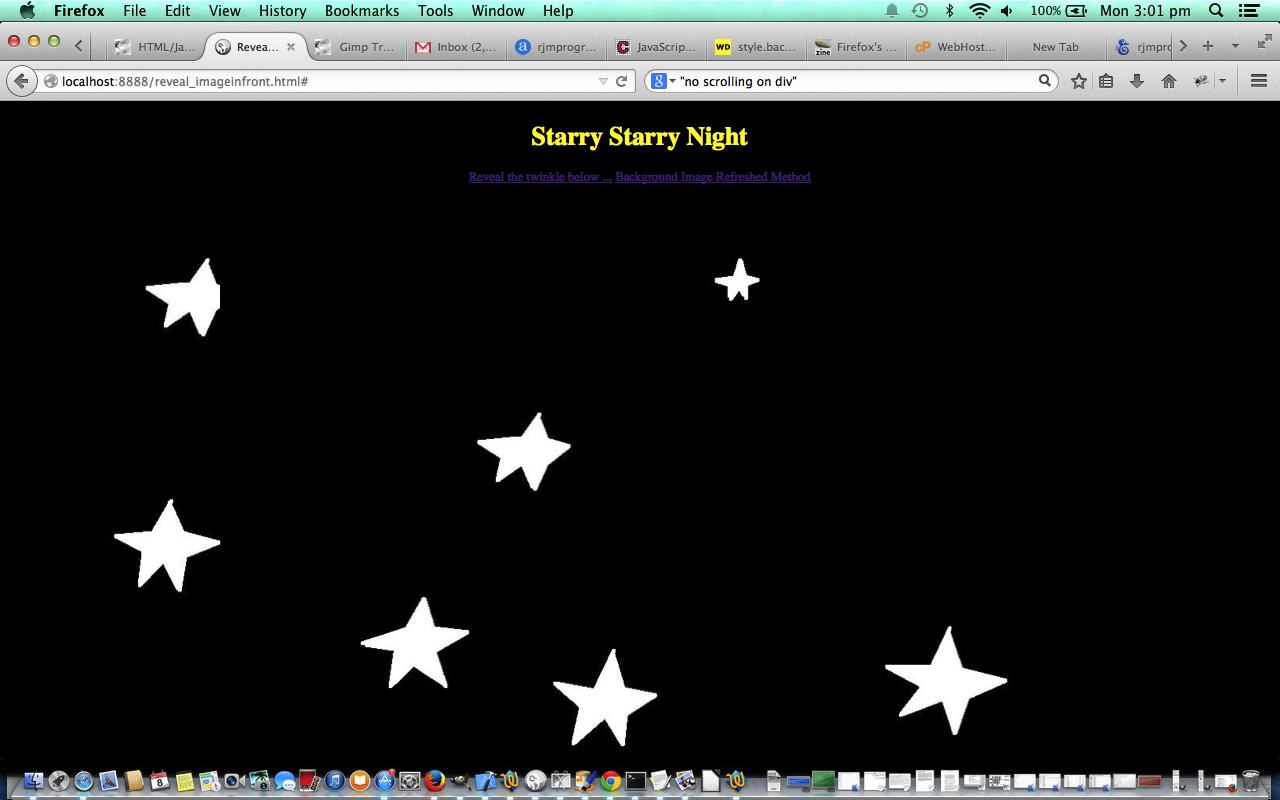
Continuing on with our discussion regarding HTML, Javascript and CSS on the theme of “reveal”, today we reveal an image in front of another, and triggered when the user clicks a link, following on from the previous HTML/Javascript/CSS Reveal Image Behind Primer Tutorial as shown below.
With today’s tutorial you could argue that it also belongs with the series of blog posts related to “overlay”.
Here is a tutorial that “reveals” that image in front of an image of the night sky using HTML, Javascript and CSS, featuring:
- Encasing working visible HTML elements within div element for ease of:
- positioning
- scrolling, or not
- visibility control
- z-index
- position:absolute
- Javascript DOM methods to dynamically change HTML, particularly with respect to visibility, and size and positioning
So here is a tutorial about Images “revealed” in front of others, and here is the HTML programming source code you could call reveal_imageinfront.html for the theme of an image in front of the night sky.
Previous relevant HTML/Javascript Reveal Image Behind Image Primer Tutorial is shown below.
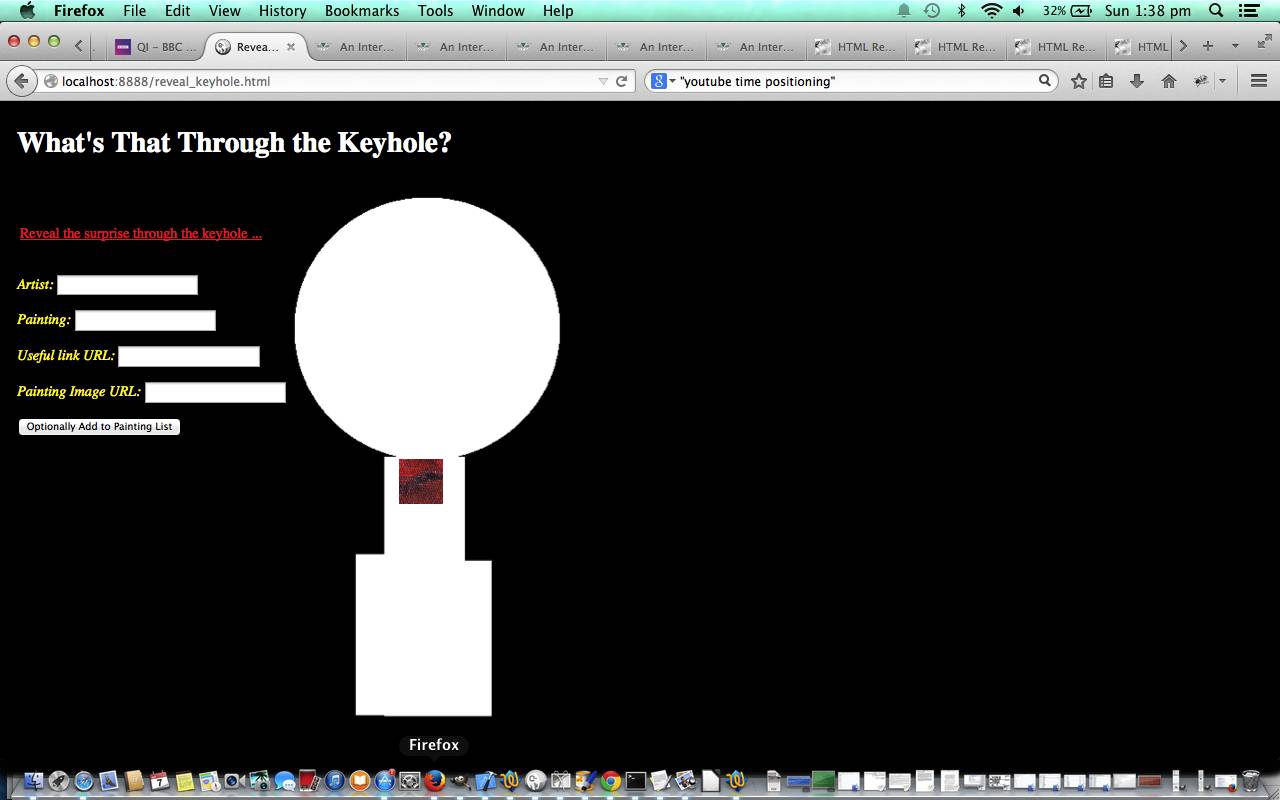
Continuing on with our discussion regarding HTML, Javascript and CSS on the theme of “reveal”, today we reveal an image behind another, increasing its size over time, and all triggered when the user clicks a link, following on from the previous HTML/Javascript/CSS Reveal Information Primer Tutorial as shown below.
Here is a tutorial that “reveals” that image behind a keyhole image using HTML, Javascript and CSS, featuring:
- Encasing working visible HTML elements within div element for ease of:
- positioning
- scrolling, or not
- visibility control
- z-index
- position:absolute
- Simple masking image keyhole.png which would only require an image editor to the sophistication of PaintBrush to create
- Javascript DOM methods to dynamically change HTML, particularly with respect to visibility, and size and positioning
So here is a tutorial about Images “revealed” behind others, and here is the HTML programming source code you could call reveal_keyhole.html for the theme of an image behind a keyhole … huh?! If you try this game you may discover its inspiration.
Content-wise, how could there be thanks enough to the “masters”, but have you ever read Giorgio Vasari‘s book Lives of the Most Excellent Painters, Sculptors, and Architects ? … and we’ll include some links (or inactive link prefixes) below … thank you, terima kasih, gracias, merci, 谢谢, danke, спасибо, धन्यवाद, grazie, ขอขอบคุณ, cảm ơn bạn, آپ کا شکریہ, ありがとう, teşekkür ederim, dankon, obrigado, dankie,شكرا, σας ευχαριστώ, 감사합니다, asante:
- How to Link to a Specific Time in YouTube Videos
- How to replace 1 with first, 2 with second,3 with third etc [duplicate]
-
https://encrypted-tbn1.gstatic.com/
-
https://encrypted-tbn2.gstatic.com/
-
https://encrypted-tbn3.gstatic.com/
- http://legomenon.com/meaning-of-the-scream-1893-painting-by-edvard-munch.html
-
http://2.bp.blogspot.com/
- http://www.bbc.co.uk/news/uk-england-leeds-13887717
-
http://news.bbcimg.co.uk/
- http://www.theepochtimes.com/
- http://thegreatdali.weebly.com/masterpiece.html
- http://www.theguardian.com/artanddesign/2011/jun/22/picasso-sold-auction
- http://www.wellcorps.com/Explaining-The-Hidden-Meaning-Of-Michelangelos-Creation-of-Adam.html
- http://topartnews.blogspot.com.au/2009/10/defining-masterpiece-at-minneapolis.html
- http://www.telegraph.co.uk/news/worldnews/europe/italy/6377214/Italian-palace-fresco-may-hide-Leonardo-da-Vinci-masterpiece.html
- http://www.dailymail.co.uk/news/article-2413253/Van-Goghs-sunflowers-He-painted-seven-versions-glorious-masterpiece.html
- http://www.essentialvermeer.com/catalogue/girl_with_a_pearl_earring.html
- http://artinvestment.ru/en/news/artnews/20100111_veronese_to_venice.html
- http://www.fodors.com/
- http://www.thelocal.it/20140324/spaniard-strips-naked-in-front-of-botticelli-masterpiece
Hope you have a go at today’s “reveal” game.
Previous relevant HTML/Javascript/CSS Reveal Information Primer Tutorial is shown below.
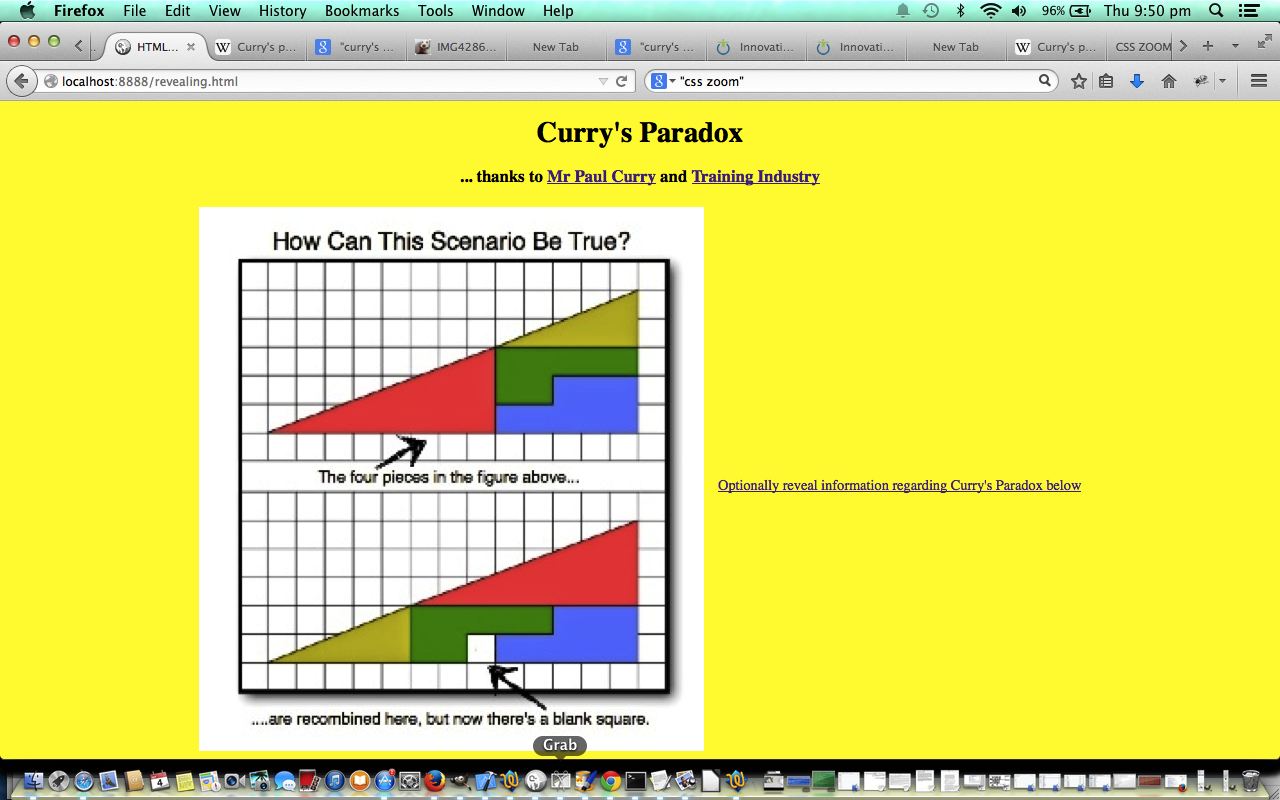
HTML/Javascript/CSS Reveal Information Primer Tutorial ... thanks to Training Industry ( http://www.trainingindustry.com/ ) for the image, within an image
Welcome to the continuing discussion regarding HTML, Javascript and CSS on the theme of “reveal”. We’ll be doing several postings on this theme, and today we continue these ideas with the revealing of information in the (simple) form of a hidden div element only revealed when the user clicks a link, following on from the previous HTML/Javascript/CSS Reveal Top to Bottom Primer Tutorial as shown below.
Here is a tutorial that “reveals” wording, or information regarding a puzzle using HTML, Javascript and CSS, featuring:
- Encasing working visible HTML elements within div element for ease of:
- positioning
- scrolling, or not
- visibility control
- Javascript DOM methods to dynamically change HTML, particularly with respect to visibility
- Javascript prompt windows to receive, analyze and act on user interaction
- HTML/CSS body element that it is Clickable via a div supervising a “background” a tag (but this is not popular with the search engines)
So here is a tutorial about Curry’s Paradox, and here is the HTML programming source code you could call revealing.html which called on the content of this tutorial. Today there will be no links below regarding getting to other links regarding Curry’s Paradox (ie. the content), but this is available via the live run link (as above, also) (except that to say the inspiration came from an answer on the BBC quiz show QI) … don’t want to give away any surprises before they surprise!
Previous relevant HTML/Javascript/CSS Reveal Top to Bottom Primer Tutorial is shown below.
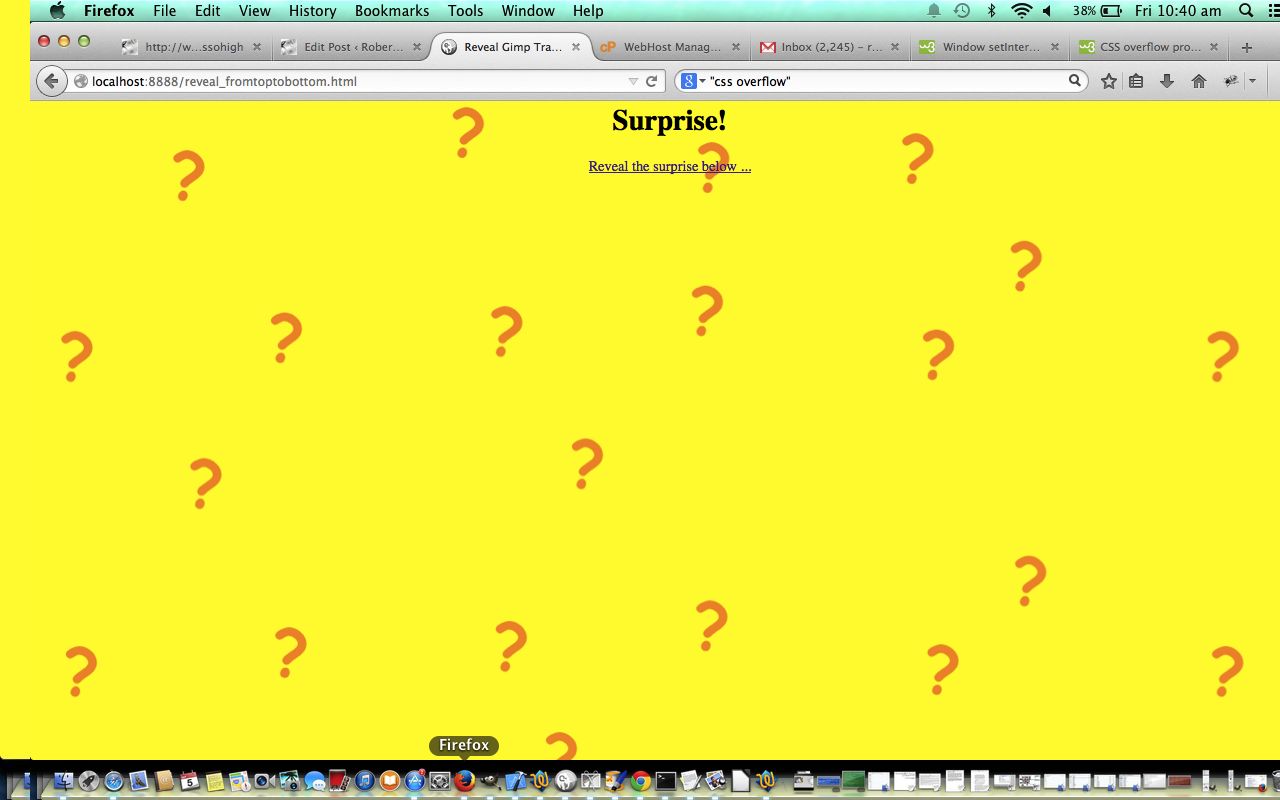
Welcome to a new discussion regarding HTML, Javascript and CSS on the theme of “reveal”. We’ll be doing several postings on this theme, and today we have the first.
Do you often wish to make webpages that hide things until the user interacts with the webpage or some time period has expired, so that there is some sort of element of surprise?
No?
Do you sometimes wish to make webpages that hide things until the user interacts with the webpage or some time period has expired, so that there is some sort of element of surprise?
Still no, huh? (Aside: two can play this little game)
Do you occasionally wish to make webpages that hide things until the user interacts with the webpage or some time period has expired, so that there is some sort of element of surprise … OR …
will allow those who have never had this thought in their life on Earth?
No again, huh? (Aside: two planets can play this puerile little game!)
Do you ever wish to make webpages that hide things until the user interacts with the webpage or some time period has expired, so that there is some sort of element of surprise … OR …
will allow those who have never had this thought in their life on Earth, nor Mars?
Non? Nicht? Good nicht! (chortle, chortle)
Well, that’s fixed their little red wagon.
Here is a tutorial that “reveals” a surprise from top to bottom using HTML, Javascript and CSS, featuring:
- CSS overflow: hidden; style property
- Encasing working visible HTML elements within div element for ease of:
- positioning
- scrolling, or not
- visibility control
- Javascript setInterval and clearInterval timer functionality
- Javascript DOM methods to dynamically change HTML (over time)
- HTML/CSS body element background URL (with fallback background colour) and the Javascript control of its fallback to just the background colour
So here is today’s tutorial’s live run, and here is the HTML programming source code you could call reveal_fromtoptobottom.html which called on the content of this tutorial.
Chow for now, brown cow (she’s always on(line), you know … but is anything sinking in?! … I haven’t been able to moo respectfully in public after 63.5 lessons?! … she still owes me that half lesson when she didn’t get up in time for milking).
If this was interesting you may be interested in this too.
If this was interesting you may be interested in this too.
If this was interesting you may be interested in this too.
If this was interesting you may be interested in this too.
If this was interesting you may be interested in this too.
If this was interesting you may be interested in this too.
If this was interesting you may be interested in this too.
If this was interesting you may be interested in this too.
If this was interesting you may be interested in this too.

