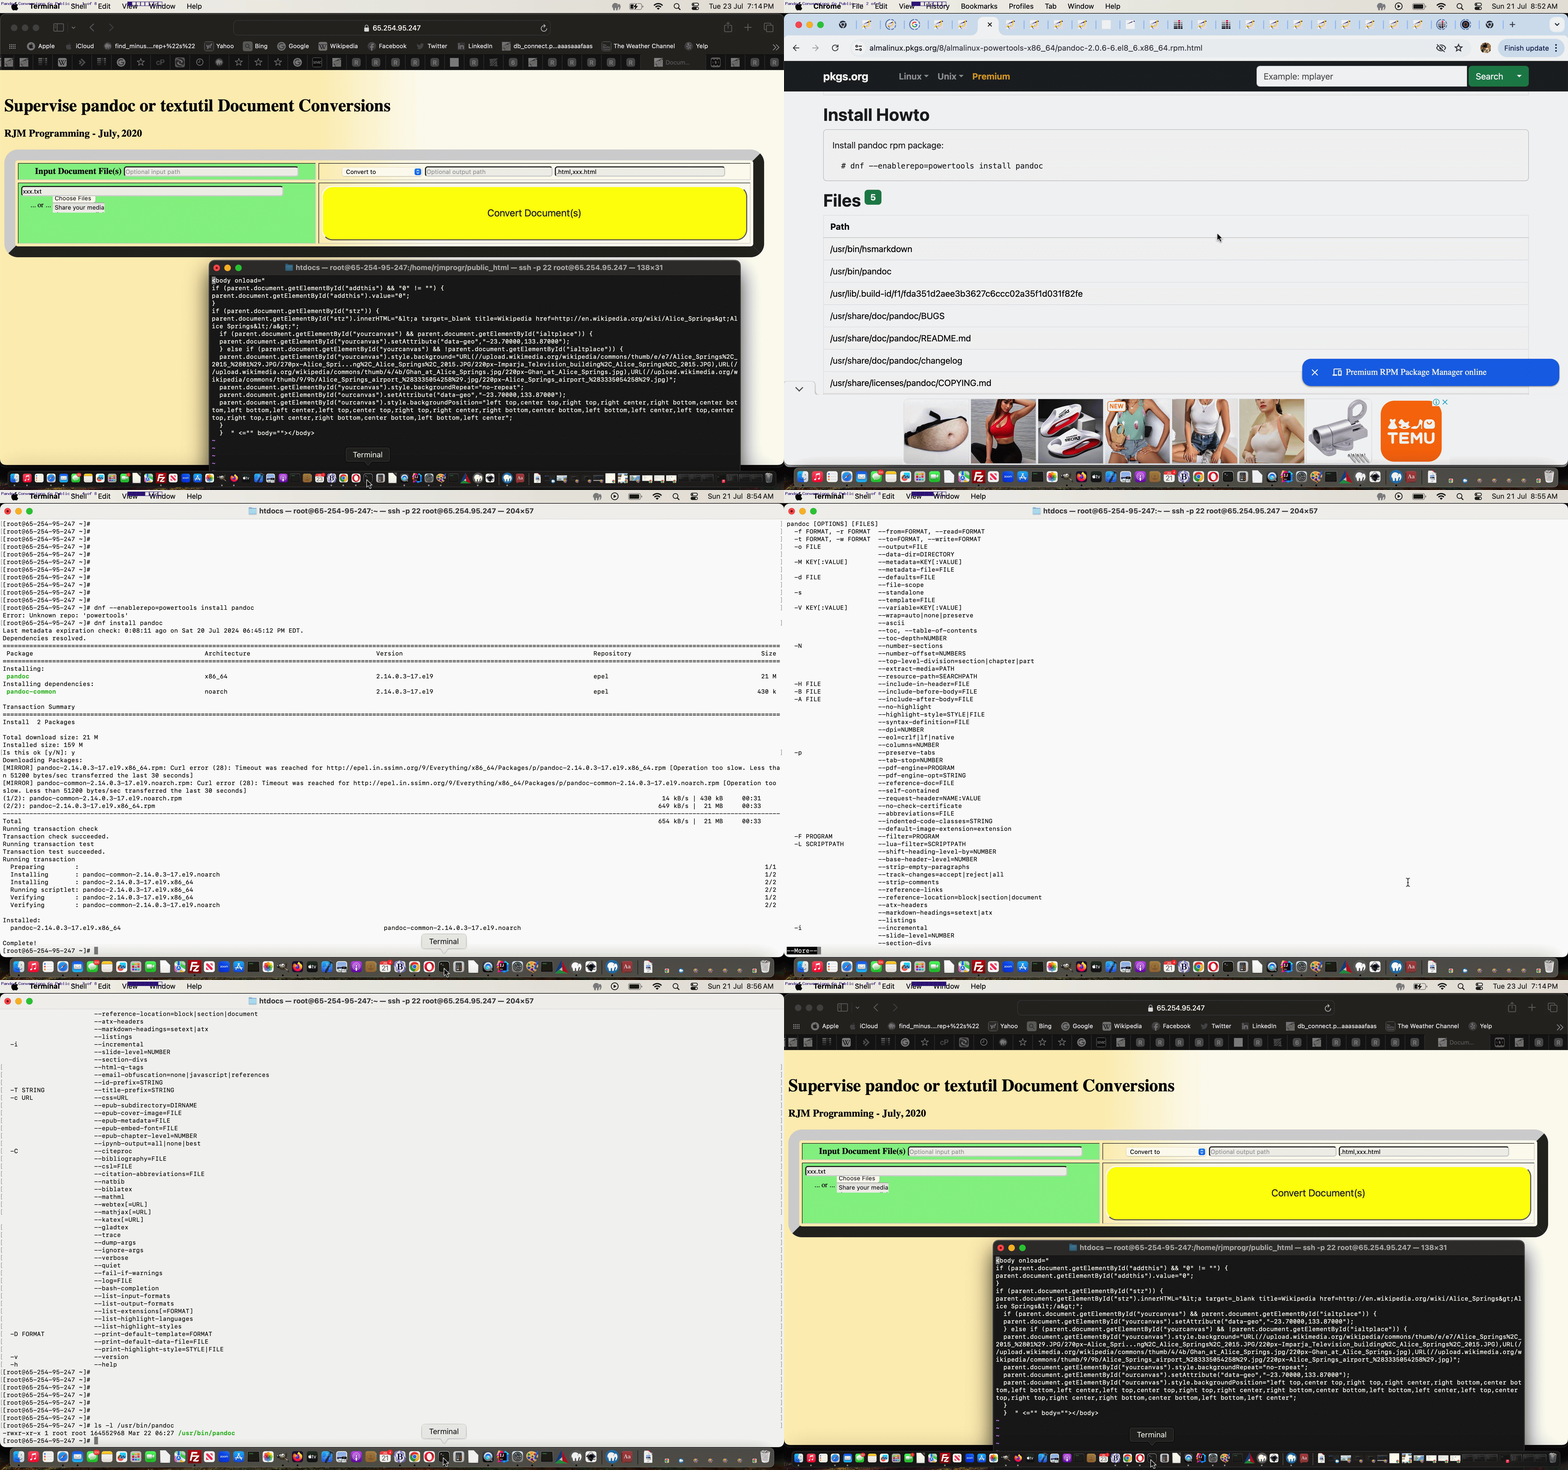
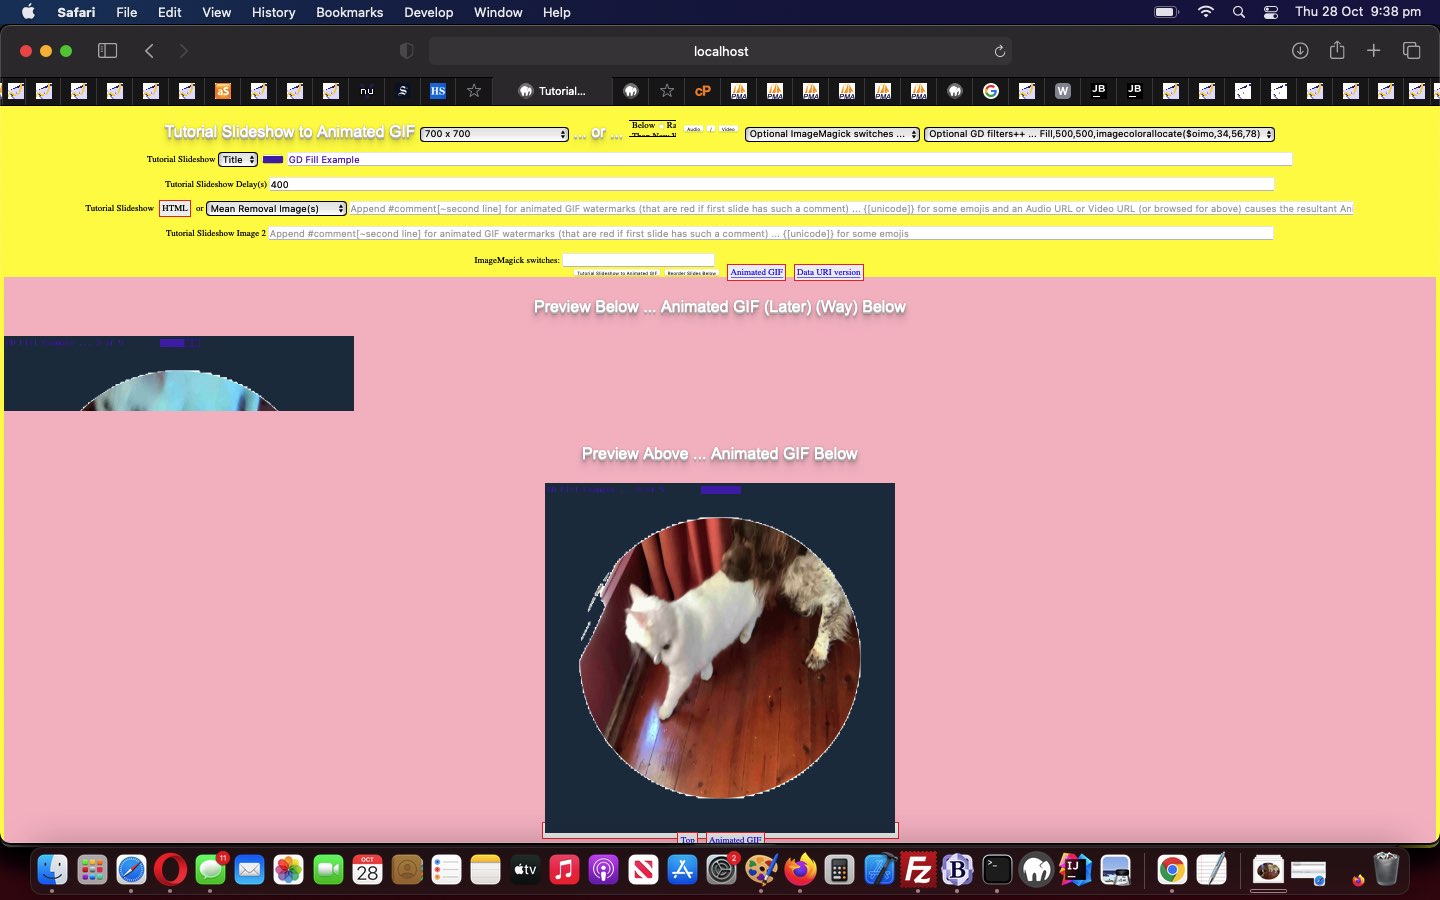
It’s interesting thinking on today’s work, further to yesterday’s Pandoc Install and Public Face Tutorial, teaming …
- sharing … and …
- security
… ideas and concepts do not feel like likely “conceptfellows”. But these two ideas share the same repository, if you will … our turning to …
/tmp/
… Linux output file placement, as a safe place to not only …
- not be seen or accessible to the public … but also …
- a place where if clobbering takes place it is of little consequence (as it is not available to any Javascript)
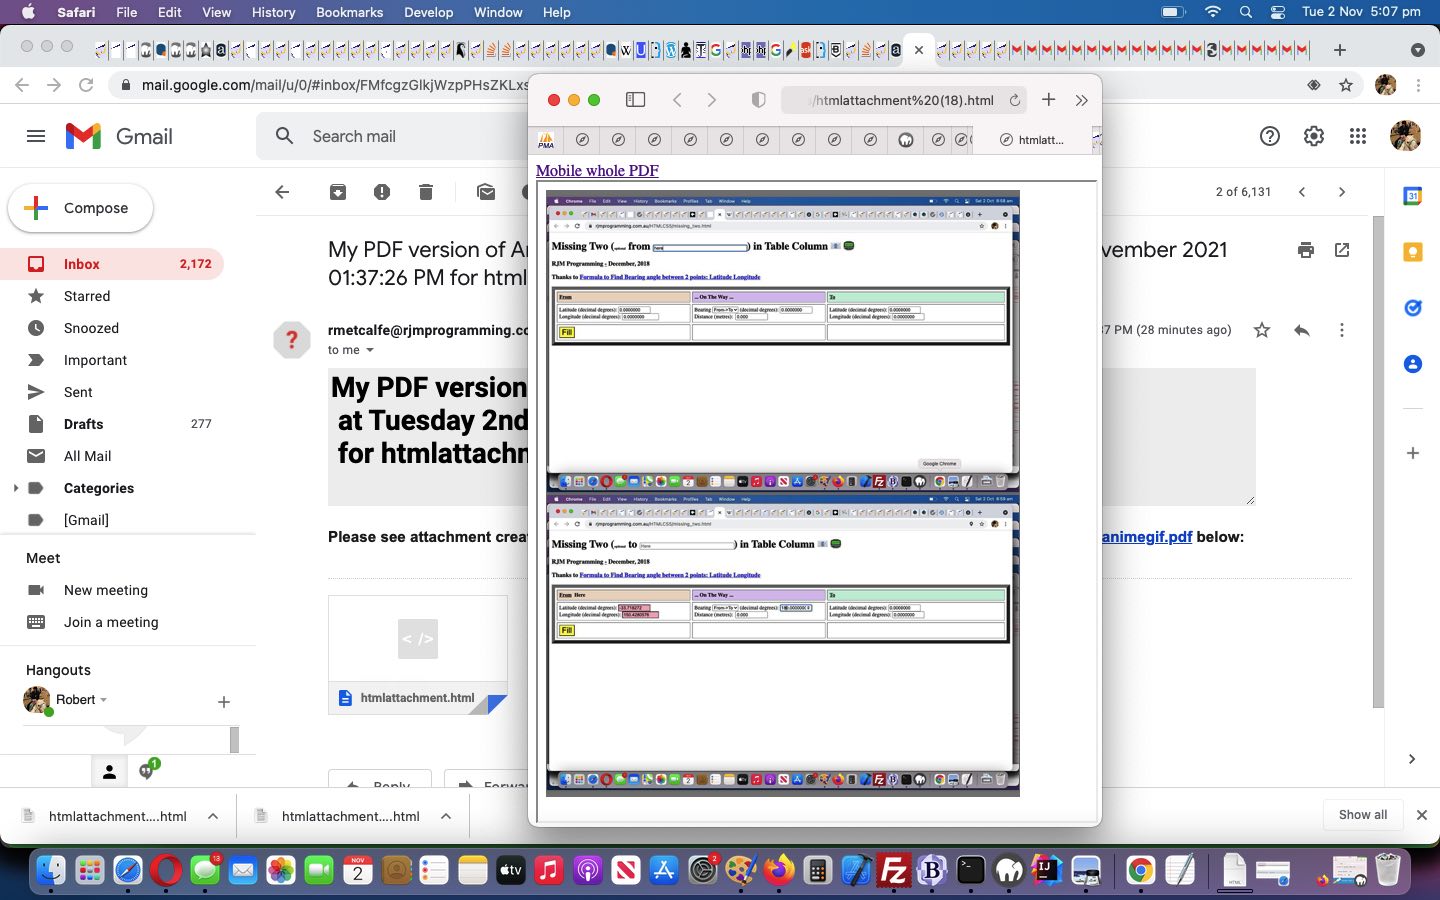
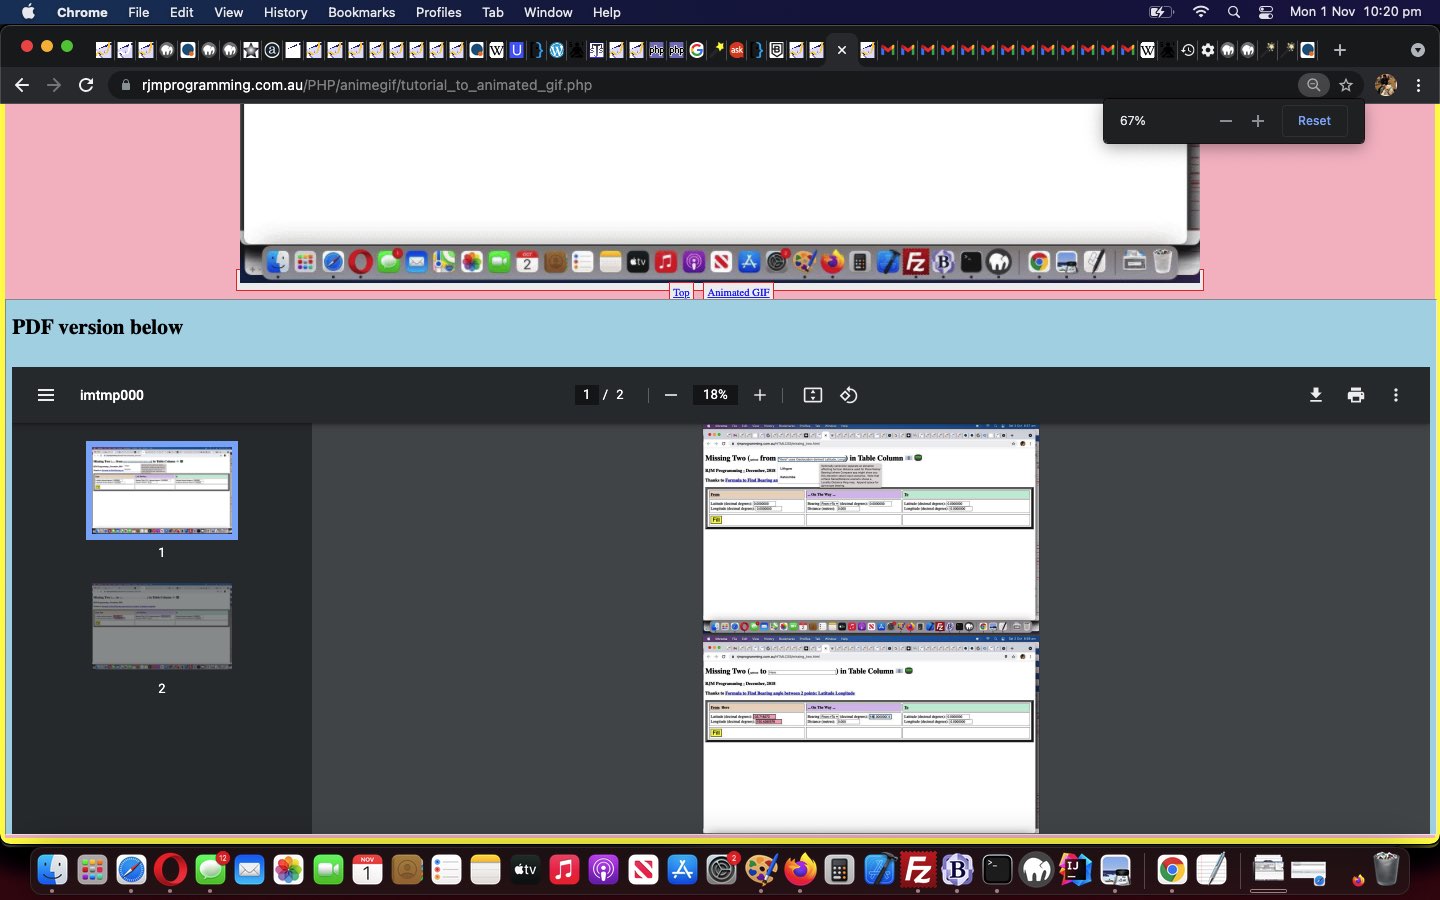
… you can see us implementing with the changed macos_textutil_convert.php working in the old way and now in the new way now with safer “midair feeling” outputs.
Previous relevant Pandoc Install and Public Face Tutorial is shown below.
As with the recent Ffmpeg Install and Public Face Tutorial there’s an opportunity with our new web server to install Document Conversion command line software known as …
… we install on AlmaLinux9 via …
dnf install pandoc
… and which we can interface to via our “public facing” inhouse PHP …
- the changed macos_textutil_convert.php works the old way and now in the new way … and is helped out by …
- a tweaked client_browsing.htm client side HTML and Javascript inhouse helper
As you can imagine there is an extra security concern here, and working through being a stage two set of changes, before we display the output document file directly, and concern ourselves with similar security issues uploads worry us with, but, for now, see where we are at so far.
Previous relevant Ffmpeg Install and Public Face Tutorial is shown below.
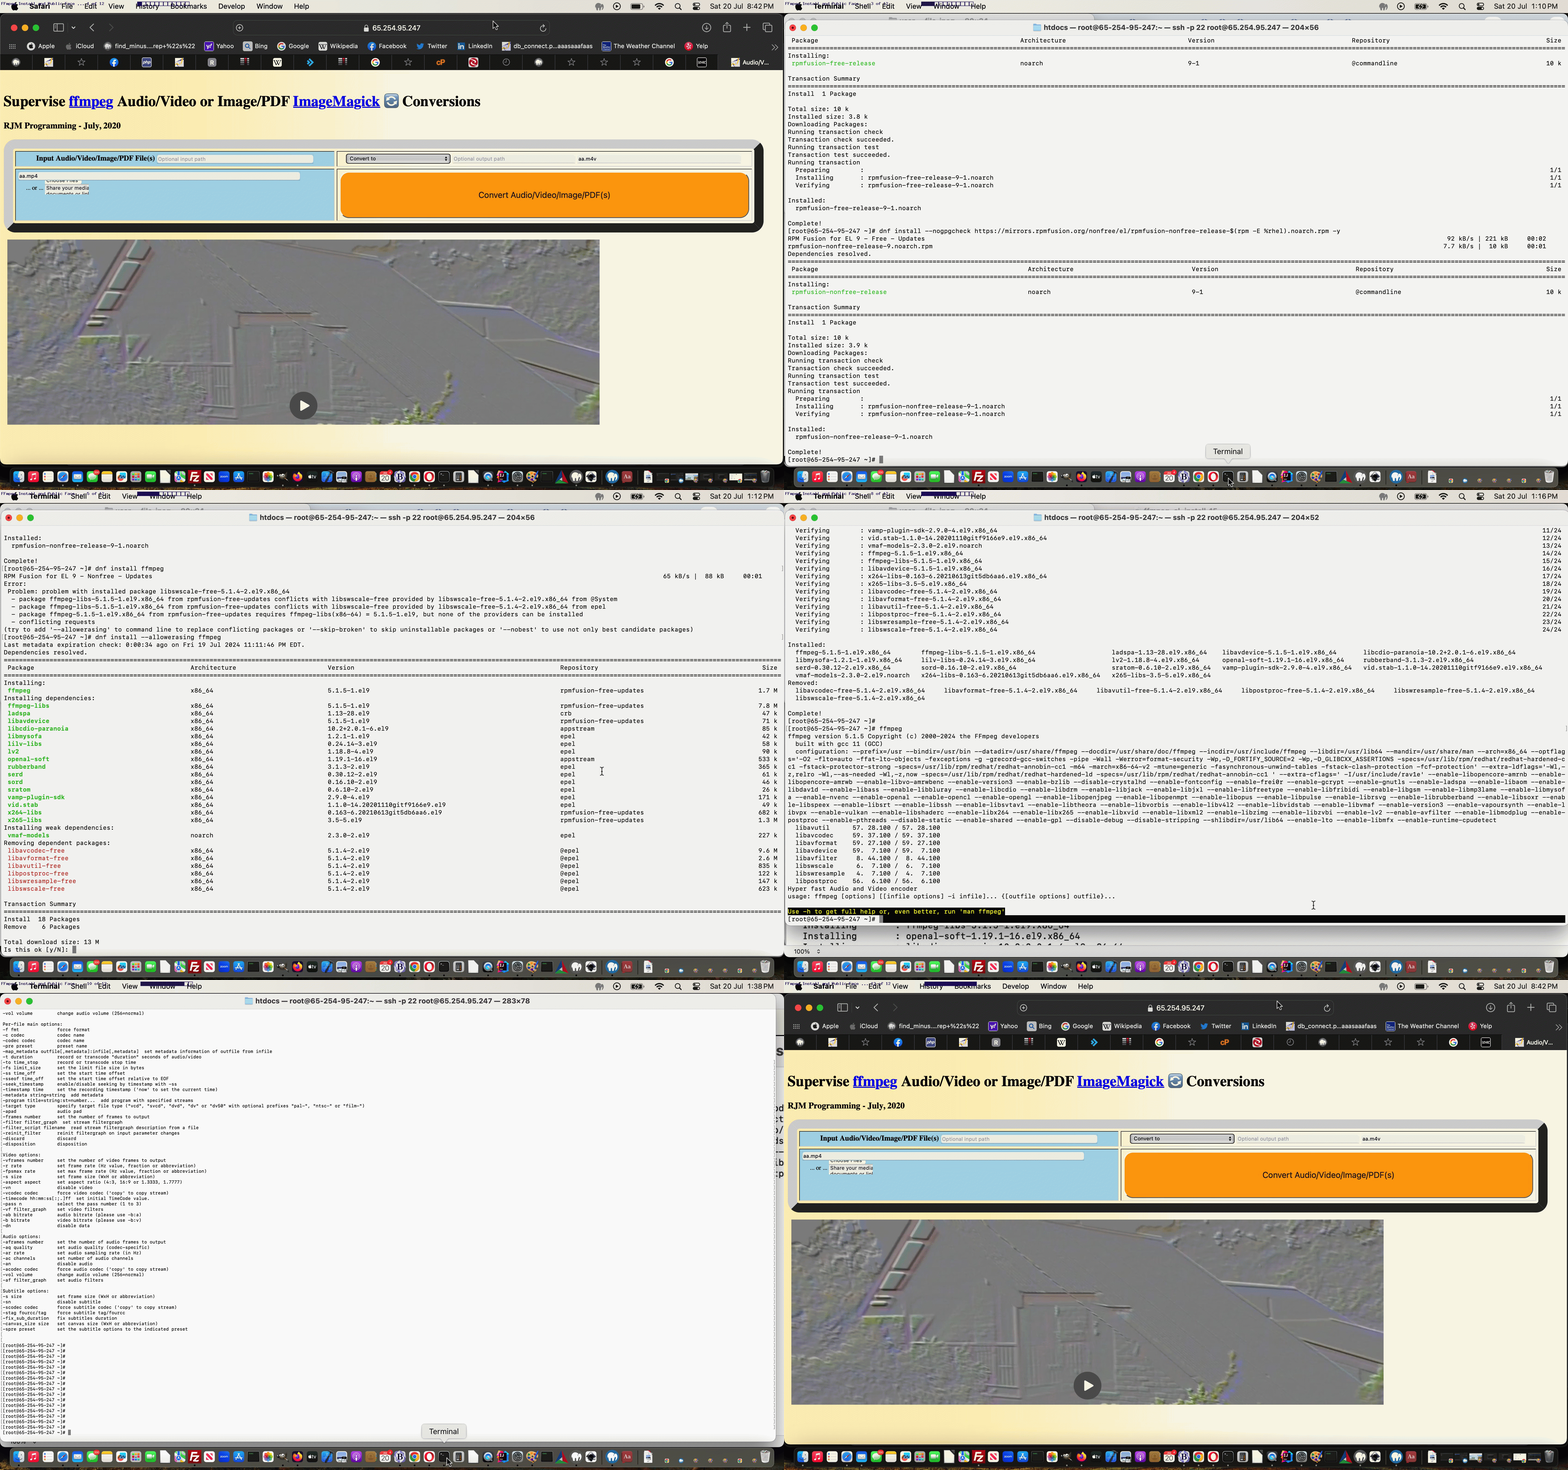
Our recent web server VPS migration can not only be …
- a migration of functionality (eg. this WordPress blog) … as well as …
- an opportunity to open up new vistas of serverside functionality
… such as today’s ffmpeg install, which is only feasible because of the …
- additional diskspace … chance on new web server allows for …
- chance to install ffmpeg …
dnf config-manager --set-enabled powertools

dnf install --nogpgcheck https://mirrors.rpmfusion.org/free/el/rpmfusion-free-release-$(rpm -E %rhel).noarch.rpm -y

dnf install --nogpgcheck https://mirrors.rpmfusion.org/nonfree/el/rpmfusion-nonfree-release-$(rpm -E %rhel).noarch.rpm -y

dnf install ffmpeg
… thanks to this great link, along with ImageMagick …
… on this new “public face” (even more public when DNS is applied later).
Codewise this involved …
- the changed macos_ffmpeg_convert.php works the old way and now in the new way … and is helped out by …
- a tweaked client_browsing.htm client side HTML and Javascript inhouse helper
… further to recent work touching these ideas with Animated GIF Creator Overlayed Images Top Left Tutorial.
See some of this public install of ffmpeg here.
Previous relevant Animated GIF Creator Overlayed Images Top Left Tutorial is shown below.
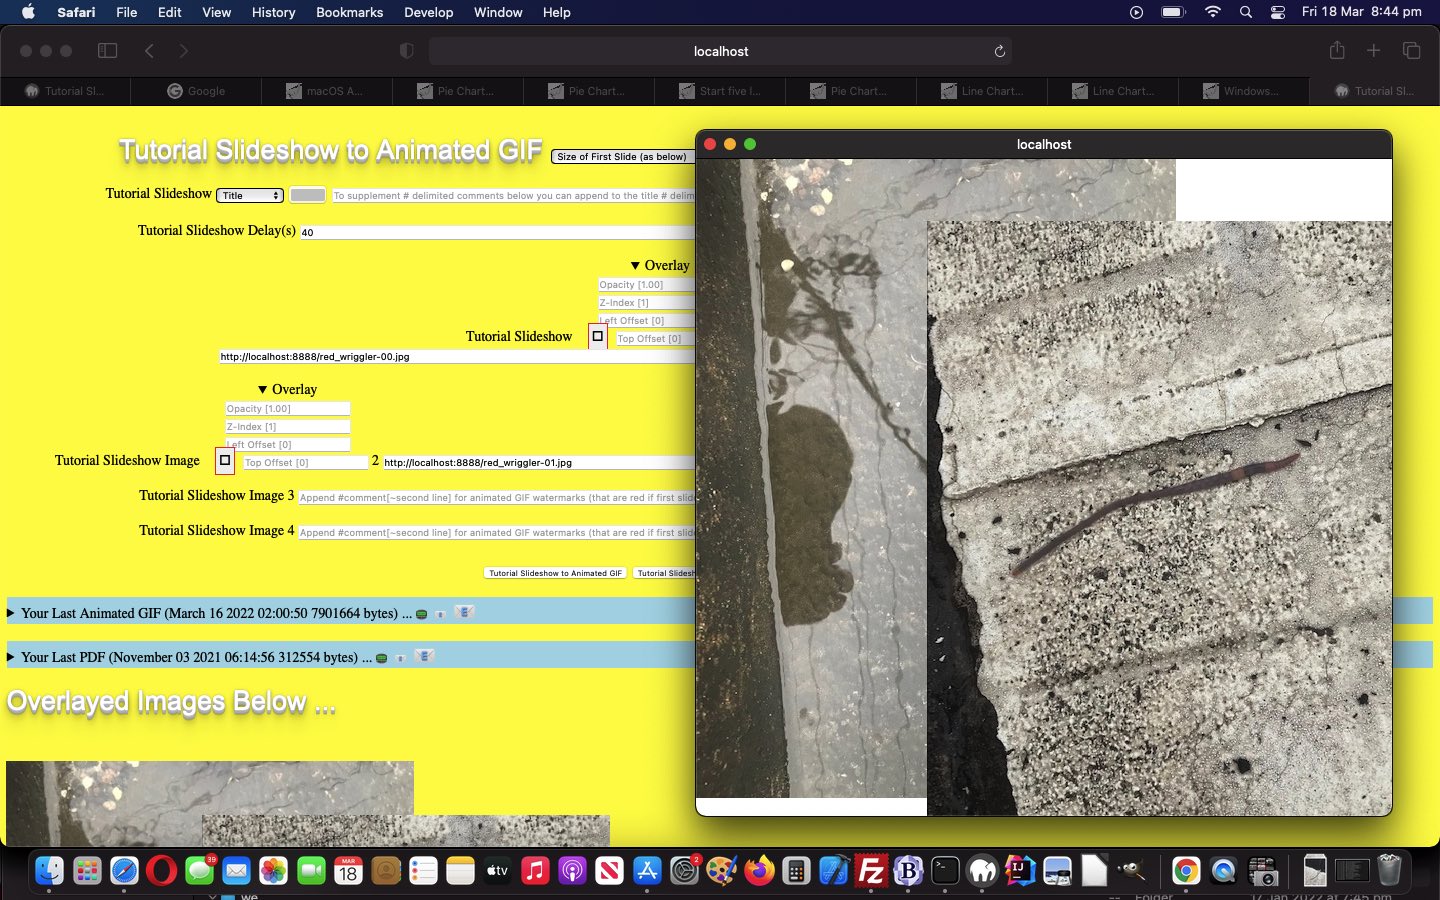
To add to the recent Animated GIF Creator Overlayed Images Tutorial‘s user interaction logic, we add a way to control those two “overlay” CSS properties …
- left
- top
… but more in the sense that we allow CSS …
- margin-eft
- margin-top
… come into the picture, after a dalliance with CSS calc thoughts.
This allows for offsetted images be part of the “overlay mix” that you can retry this at our changed tutorial_to_animated_gif.php inhouse public domain Animated GIF Creator.
Previous relevant Animated GIF Creator Overlayed Images Tutorial is shown below.
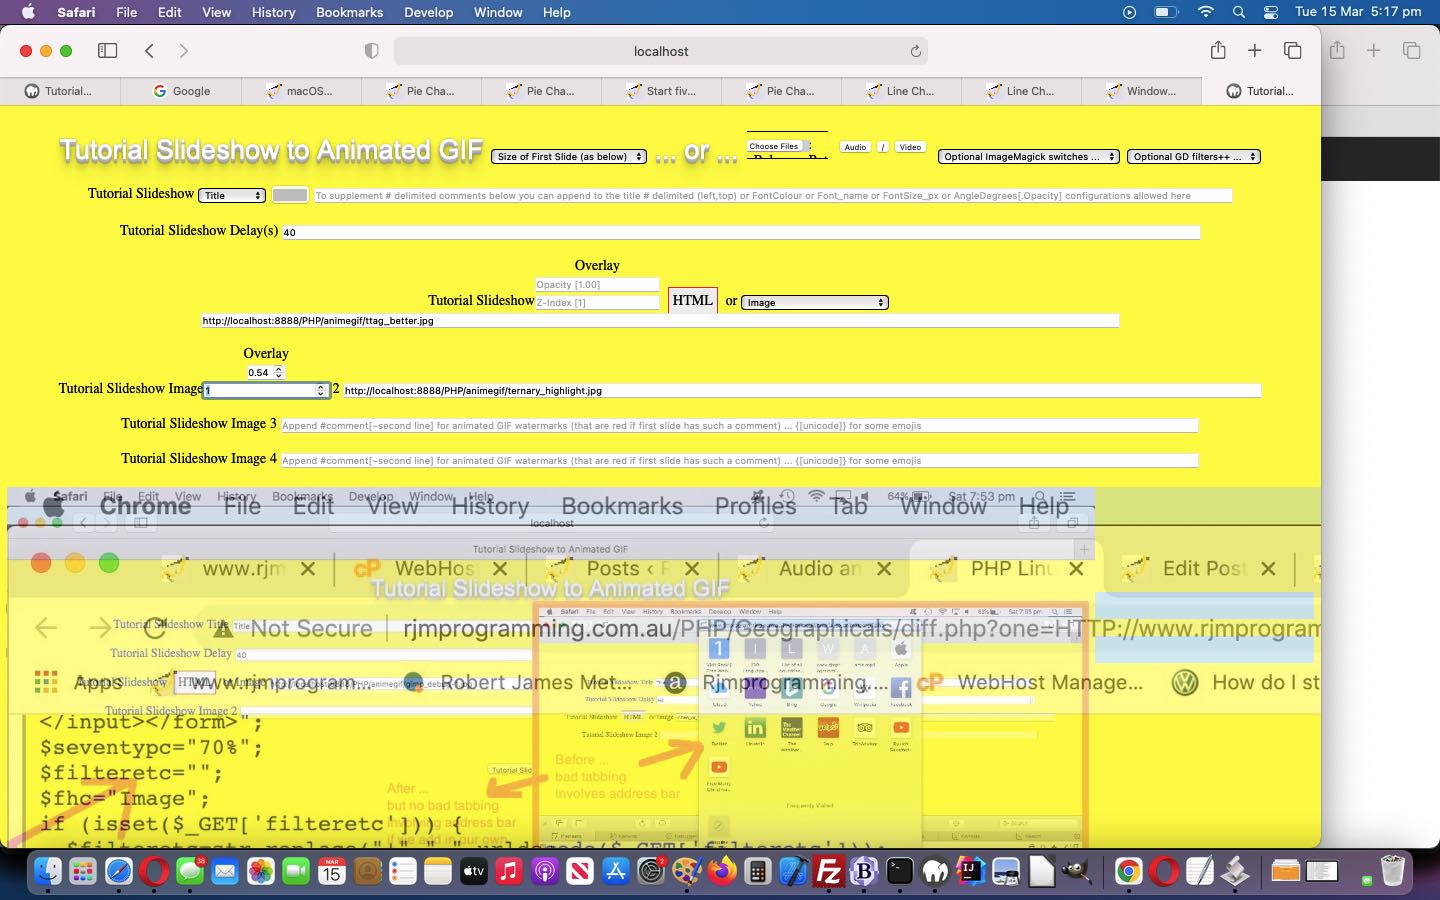
We wanted to add an “Overlayed Images” functionality component to the “Animated GIF Creator” of Animated GIF Creator Video Intranet Tutorial, today.
The work involves both of the HTML design “big concepts” we are keen on at this blog …
- overlay … via CSS control of …
- position:absolute;top:0px;left:0px;
- opacity:1.0;
- z-index:1;
- reveal … lately, mostly, via HTML use of …
- details
- summary
… the latter being the “container” for our interactive input be able to control overlay items 2 and 3, which affect the “overlayed images” output display via the clicking of a new “Overlay Images” button. That button …
<input disabled onclick="overlaythem();" id="overlayit" type="button" title='Overlay Images' value='Overlay Images'></input>
… starts off as disabled … and works with new HTML div elements …
<div id=overlayedj><h1> </h1><br></div><div id=overlayedi></div>
… until at least two images are defined, at which time the button becomes enabled …
function onfit(ithis) {
if (ithis.value == '' && ('' + ithis.placeholder).indexOf(']') != -1) {
ithis.value=('' + ithis.placeholder).split('[')[1].split(']')[0];
}
ithis.type='number';
}
function overlayds(inm, newop, newzi) {
var outdets='';
var divrect=null;
var poslt=' data-style=\"position:absolute;left:px;top:px;\" ';
var reposit='';
if (!document.getElementById('detsum' + ('' + inm))) {
if (document.getElementById('overlayedi').innerHTML == '') {
document.getElementById('overlayedi').title='Overlayed Images Below ... Click for It in New Window ...';
document.getElementById('overlayedj').innerHTML='<h1>Overlayed Images Below ...</h1><br>';
divrect=document.getElementById('overlayedi').getBoundingClientRect();
poslt=' data-style=\"position:absolute;left:' + ('' + divrect.left).split('.')[0].trim() + 'px;top:' + ('' + eval(200 + eval('' + ('' + divrect.top).split('.')[0]))).trim() + 'px;\" ';
} else {
poslt=' data-style=\"' + document.getElementById('detsum1').getAttribute('data-style') + '\" ';
}
outdets=' <details ' + poslt + ' id=\"detsum' + ('' + inm) + '\" style=\" display:inline-block; \" open><summary id=\"sumdet' + ('' + inm) + '\">Overlay</summary><input onchange=overlayds(' + inm + ',this.value,String.fromCharCode(32)); onblur=overlayds(' + inm + ',this.value,String.fromCharCode(32)); type=text onfocus=onfit(this); id=\"opacity' + ('' + inm) + '\" style=\" display:inline-block; \" placeholder=\"Opacity [1.00]\" value=\"\" step=0.01 min=0.00 max=1.00></input><br><input onfocus=onfit(this); onchange=overlayds(' + inm + ',String.fromCharCode(32),this.value); onblur=overlayds(' + inm + ',String.fromCharCode(32),this.value); type=text id=\"zindex' + ('' + inm) + '\" style=\" display:inline-block; \" placeholder=\"Z-Index [1]\" value=\"\" min==999 max=999 step=1></input><br></details>';
reposit=poslt.replace(' data-',' ');
reposit=reposit.replace('\"', '\"opacity:1.0;z-index:1;');
if (document.getElementById('overlayedi').innerHTML == '') {
document.getElementById('overlayedi').innerHTML='<img id=\"imgdet' + ('' + inm) + '\" src=\"' + document.getElementById('slideshow' + ('' + inm).replace(/^1$/g,'')).value + '\" ' + reposit + '></img>';
document.getElementById('overlayedi').style.width=('' + document.getElementById('imgdet' + ('' + inm)).width).replace('px','') + 'px';
document.getElementById('overlayedi').style.height=('' + document.getElementById('imgdet' + ('' + inm)).height).replace('px','') + 'px';
document.getElementById('overlayedi').onclick = function(){ var woo=window.open('','_blank','top=100,left=100,width=' + document.getElementById('overlayedi').style.width.replace('px','') + ',height=' + document.getElementById('overlayedi').style.height.replace('px','')); woo.document.write('<html><head><title>Overlayed Images Below ...</title></head><body>' + document.getElementById('overlayedi').outerHTML.replace(/left\:[\ ]*/g,'left:0.0').replace(/top\:[\ ]*/g,'top:0.0') + '</body></html>'); woo.document.title='Overlayed Images Below ...'; };
} else {
document.getElementById('overlayedi').innerHTML+='<img id=\"imgdet' + ('' + inm) + '\" src=\"' + document.getElementById('slideshow' + ('' + inm).replace(/^1$/g,'')).value + '\" ' + reposit + '></img>';
}
} else {
document.getElementById('detsum' + ('' + inm)).style.display='inline-block';
if (newop != ' ') {
if (newop.trim() == '') {
document.getElementById('imgdet' + inm).style.opacity='1.0';
} else {
document.getElementById('imgdet' + inm).style.opacity='' + newop;
}
}
if (newz != ' ') {
if (newz.trim() == '') {
document.getElementById('imgdet' + inm).style.zIndex='1';
} else {
document.getElementById('imgdet' + inm).style.zIndex='' + newzi;
}
}
}
return outdets;
}
function overlaythem() {
var suffidea=1;
while (document.getElementById('slideshow' + ('' + suffidea).replace(/^1$/g, '')).value != '') {
document.getElementById('ours' + ('' + suffidea)).innerHTML+=overlayds(suffidea,'','');
suffidea++;
}
}
You can try this at our changed tutorial_to_animated_gif.php inhouse public domain Animated GIF Creator.
Previous relevant Animated GIF Creator Video Intranet Tutorial is shown below.
With the recent Animated GIF Creator Video Revisit Tutorial (preceding Animated GIF Creator Video Share Tutorial) we wrote …
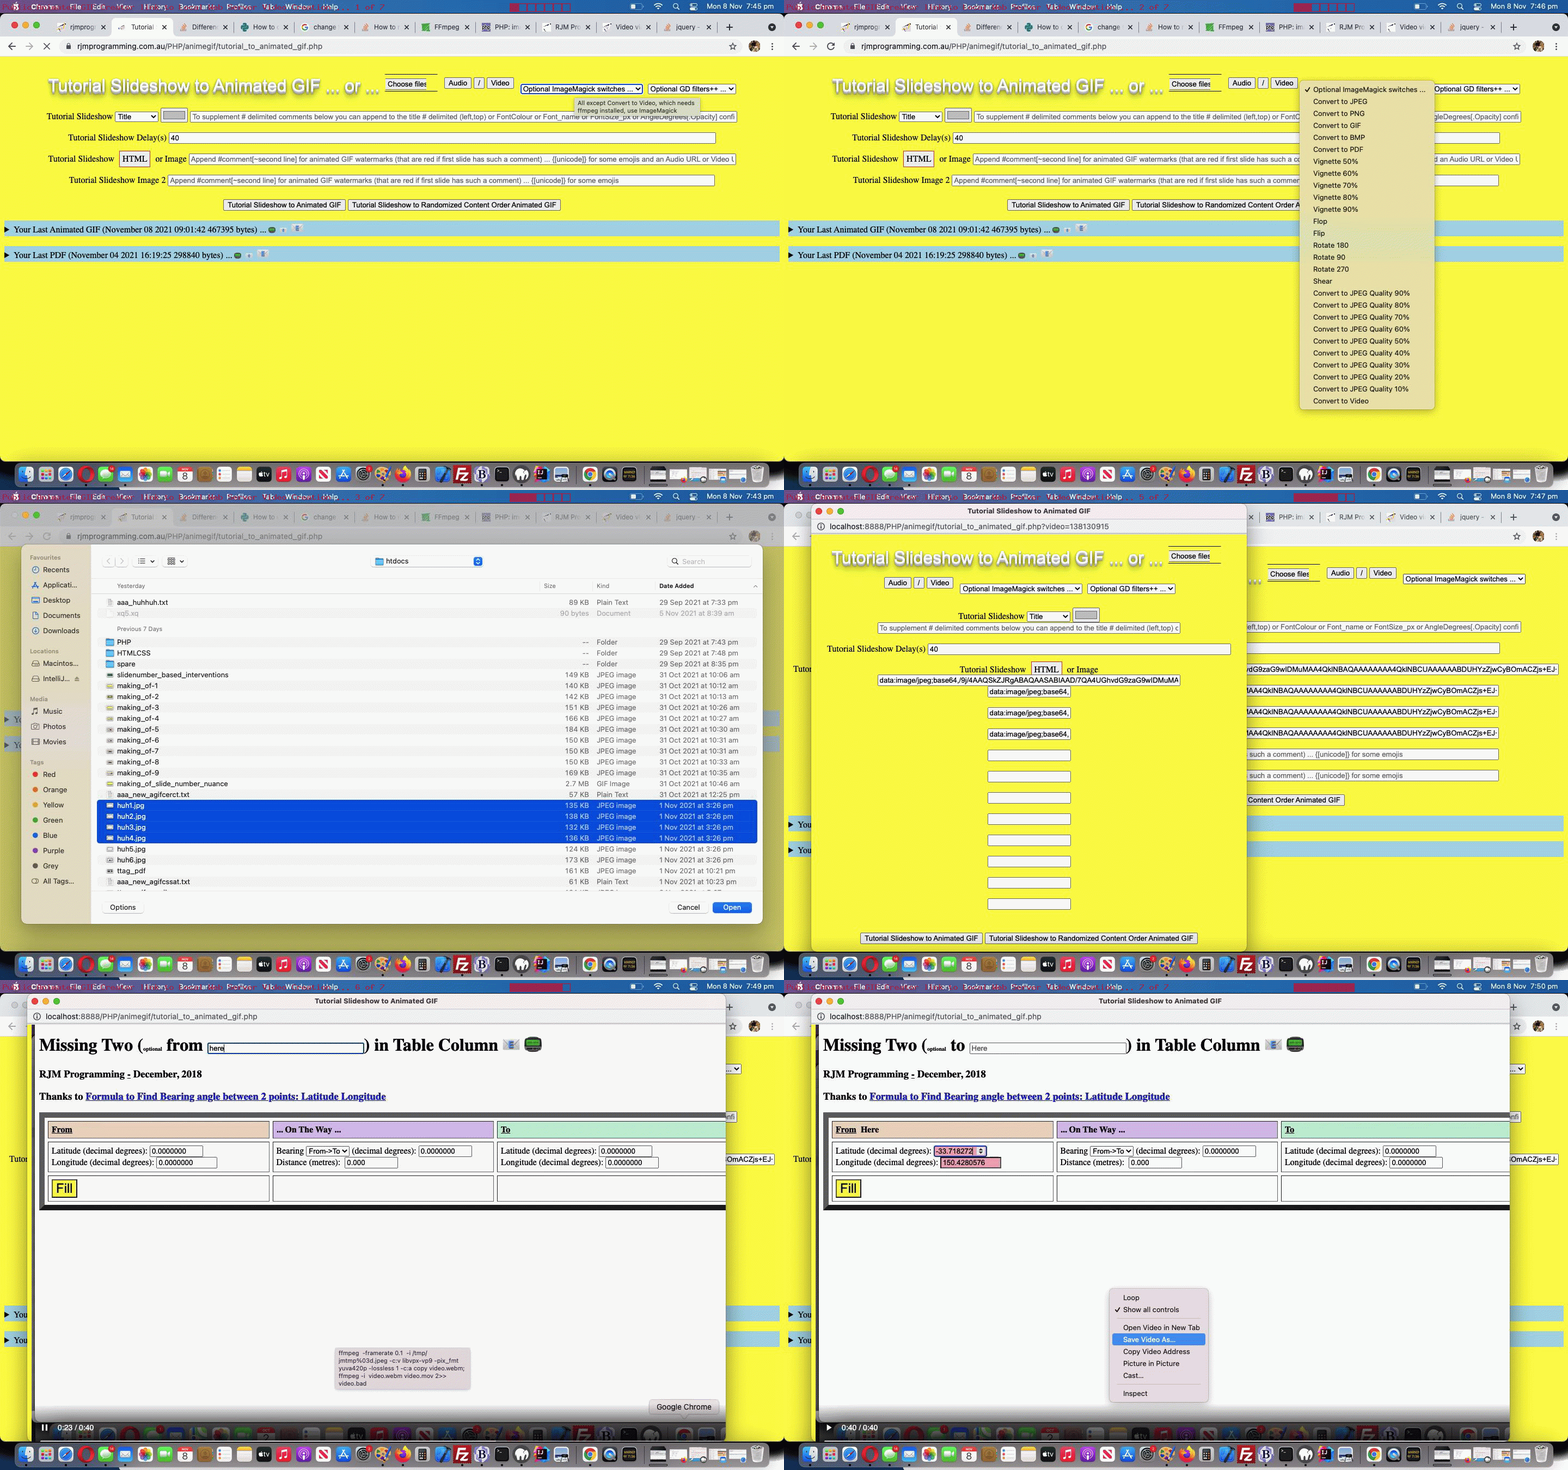
… one reason being that we do not want to install the wonderful ffmpeg (command line video creation tool) on the RJM Programming domain, but, in macOS, here with MAMP, we are quite happy to live with the Homebrew (Terminal application’s) install …
… setting up what could be “lost functionality”, but today, we come around to either adding a new …
Convert to Video
… dropdown option should all be ritchy ditch, and if not, often we will add new “Advice” dropdown options to remind the user what they’d need to arrange to get to a “Convert to Video” scenario.
Selecting “Convert to Video” sets up a hydrid “Internet/Intranet” feeling scenario where …
- the user is using our changed tutorial_to_animated_gif.php inhouse public domain Animated GIF Creator containing this new “Convert to Video” option off the “ImageMagick” dropdown …
- the user defines some image slide data … eg. browsing to create data-URIs (but careful not to do too many) …
- the user selects that “Convert to Video” option …
- a window.open popup calls URL like …
HTTP://localhost:8888/PHP/animegif/tutorial_to_animated_gif.php?video=1687644
… in a new window … - those data-URIs are converted into /tmp/jmtmp0*.[imageExt] files … ready for …
- ffmpeg commands like …
ffmpeg -framerate 0.1 -i /tmp/jmtmp%03d.jpeg -c:v libvpx-vp9 -pix_fmt yuva420p -lossless 1 -c:a copy video.webm; ffmpeg -i video.webm video.mov 2>> video.bad
… be nested in PHP exec (via MAMP local web server incarnation of the inhouse Animated GIF Creator) as a way to create videos … - which can be downloaded within that public domain “parent” inhouse Animated GIF Creator session
Which begs the question …
How do we know when to offer the "Convert to Video" option on that dropdown?
This logic is centred around a few useful ideas (with this cross domain scenario ruling out Ajax and Iframe src= definitions, as useful ways to go) …
- open the MAMP local web server “HTTP://localhost:8888/PHP/animegif/tutorial_to_animated_gif.php” URLs in an iframe (with onload event logics) pointed at by a window.open second argument (effectively avoiding any loose useful or not popup windows hanging around) …
- the most we can ask at the receiver is that window.opener is defined … and if so, just at that discovery …
- an image called “amhere.jpg” is created via PHP GD functionality … and back at the “public domain” parent within the iframe onload logic (where with contentWindow or contentDocument do not expect a document.body or even a document) …
- we attempt to “hotlink” that MAMP local web server image … as per …
            var tryit='http://localhost:8888/PHP/animegif/amhere.jpg';


            document.getElementById('ctvopt').value='advice';

            document.getElementById('ctvopt').innerHTML='Advice on Convert to Video';


            if (tryit != '') {

            var im=new Image();


    im.onload = function() {

            document.getElementById('ctvopt').value='video';

            console.log('this.height=' + eval('' + this.height));

            if (eval('' + this.height) >= 20) {

            document.getElementById('ctvopt').innerHTML='Convert to Video';

            } else {

            document.getElementById('ctvopt').innerHTML='Convert to Video (but ffmpeg not installed or in unexpected place)';

            }

            document.getElementById('imsel').title='All except Convert to Video, which needs ffmpeg installed, use ImageMagick';

    };


            im.src=tryit;

            tryit='';

            }
Previous relevant Animated GIF Creator Video Revisit Tutorial is shown below.
We hope you realize that our changed tutorial_to_animated_gif.php inhouse Animated GIF Creator (helped out by a changed emailhtml.php inhouse email creator helper serverside PHP web application) can be accessed …
- in that public RJM Programming mode of use above … but even better can be …
- download relevant code to macOS MAMP local web server places off /Applications/MAMP/htdocs/ $_SERVER[‘DOCUMENT_ROOT’] places …
- GIFEncoder.class.php … thanks … to “PHP/animegif/”
- tutorial_to_animated_gif.php to “PHP/animegif/”
- animegif.php to “PHP/animegif/”
- haiku_animated_gif.html to “PHP/animegif/”
- macos_ffmpeg_convert.php to $_SERVER[‘DOCUMENT_ROOT’]
- macos_textutil_convert.php to $_SERVER[‘DOCUMENT_ROOT’]
- macos_say_record.php to $_SERVER[‘DOCUMENT_ROOT’]
- client_browsing.htm to “HTMLCSS/”
- emailhtml.php to “HTMLCSS/”
- read_exif_off_image_rotate.php to “PHP/”
… and check the code for the validity of any ImageMagick paths … and if not all these conditions, simulate the same and cobble it together in the code
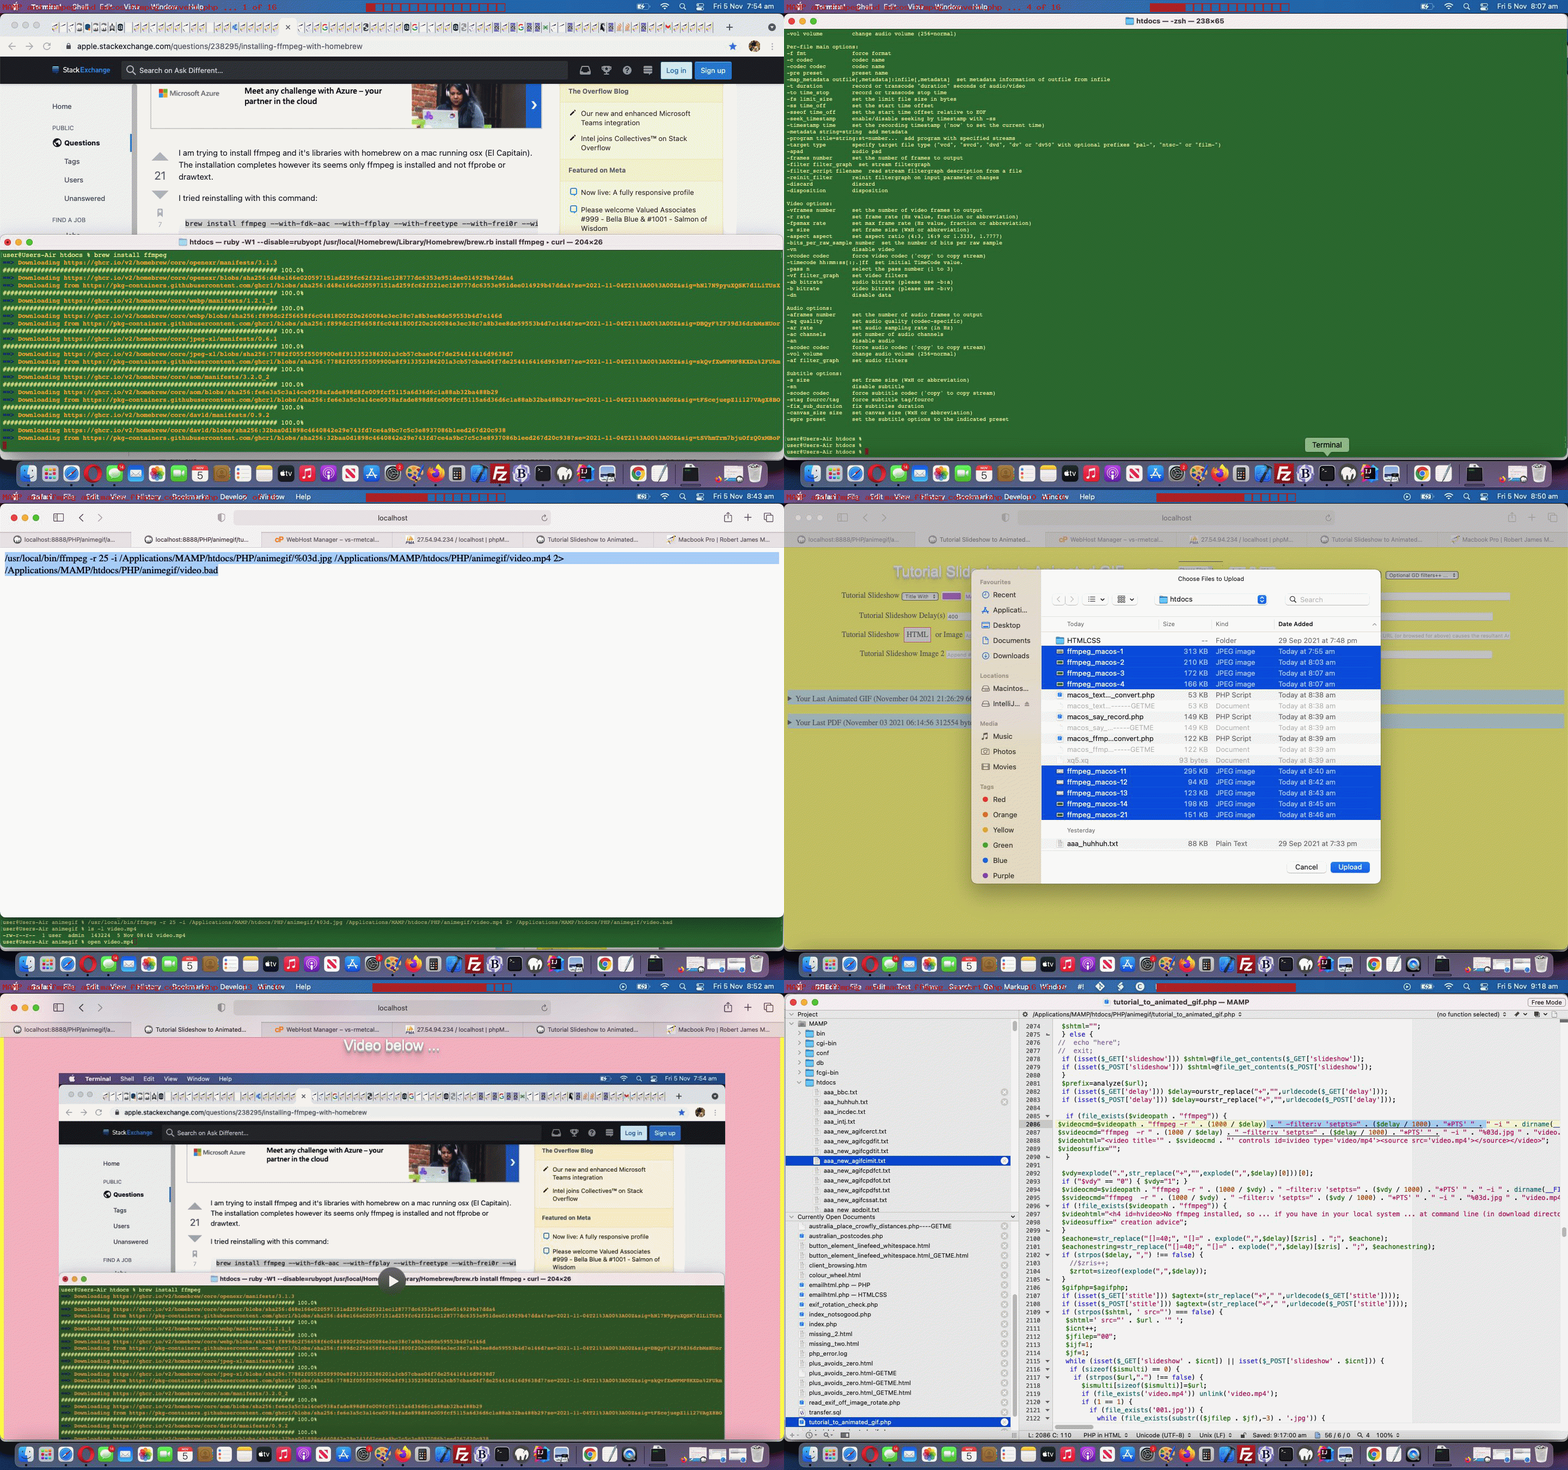
… one reason being that we do not want to install the wonderful ffmpeg (command line video creation tool) on the RJM Programming domain, but, in macOS, here with MAMP, we are quite happy to live with the Homebrew (Terminal application’s) install …
brew install ffmpeg
… to open a whole new woooooorrrrlllllddd of video creation opportunities using this MAMP local web URL …
HTTP://localhost:8888/PHP/animegif/tutorial_to_animated_gif.php# Animated GIF Creator on MAMP local web server
And so, onto yesterday’s Animated GIF Creator PDF Last Reveal Tutorial we decided to revisit video creation parts of our inhouse Animated GIF Creator on this MacBook Air. We needed to reinstall ffmpeg, and we show that in today’s animated GIF tutorial picture and also created the “video.mov” video below, in the process …
… we tweaked out of “video/mp4” ffmpeg created videos thinking towards “video/webm” or “video.mov” ffmpeg created videos that suit the “few frames but spaced out video” we wanted to achieve for all practical purposes, that “video/mp4” playing too fast for us to see anything much but the first and last slide …
<?php
$videofr=" -r " . (1000 / $delay) . " ";

$videofr=" -r " . (1000 / $delay) . " -filter:v setpts=" . ($delay / 1000) . "*PTS ";

$videomime="video/mp4";

$videoext=".mp4";


$videofr=" -framerate 0.1 ";

$videoext=".webm";

$videomime="video/webm";

$videomidbit="-c:v libvpx-vp9 -pix_fmt yuva420p -lossless 1 -c:a copy";

//$videocmd=$videopath . "ffmpeg  -r " . (1000 / $delay) . " -filter:v setpts=" . ($delay / 1000) . "*PTS " . " -i " . dirname(__FILE__) . DIRECTORY_SEPARATOR . "%03d.jpg " . dirname(__FILE__) . DIRECTORY_SEPARATOR . "video.mp4 2> " . dirname(__FILE__) . DIRECTORY_SEPARATOR . "video.bad";

//$svideocmd="ffmpeg  -r " . (1000 / $delay) . " -filter:v setpts=" . ($delay / 1000) . "*PTS " . " -i " . "%03d.jpg " . "video.mp4";

  $videocmd=$videopath . "ffmpeg " . $videofr . " -i " . dirname(__FILE__) . DIRECTORY_SEPARATOR . "%03d.jpg " . $videomidbit . " " . dirname(__FILE__) . DIRECTORY_SEPARATOR . "video" . $videoext . " 2> " . dirname(__FILE__) . DIRECTORY_SEPARATOR . "video.bad";

  $svideocmd="ffmpeg " . $videofr . " -i " . "%03d.jpg " . $videomidbit . " " . "video" . $videoext;

  $videocmd.="; " . $videopath . "ffmpeg -i " . " " . dirname(__FILE__) . DIRECTORY_SEPARATOR . "video" . $videoext . " " . dirname(__FILE__) . DIRECTORY_SEPARATOR . "video.mov 2>> " . dirname(__FILE__) . DIRECTORY_SEPARATOR . "video.bad";

  $svideocmd.="; " . "ffmpeg -i " . " " . dirname(__FILE__) . DIRECTORY_SEPARATOR . "video" . $videoext . " " . dirname(__FILE__) . DIRECTORY_SEPARATOR . "video.mov 2>> " . dirname(__FILE__) . DIRECTORY_SEPARATOR . "video.bad";

$videohtml="<video title='" . $svideocmd . "' controls id=ivideo type='" . $videomime . "'><source src='video.mov'></source><source src='video" . $videoext . "'></source></video>";

$videosuffix="";
?>
Previous relevant Animated GIF Creator PDF Last Reveal Tutorial is shown below.
As a web application programmer we like buttons. There are “buttons” and there are buttons. Yes, there is an HTML button element, and it and the input type=button element render as that part of a webpage most recognizable to users the world over. You click or tap this button and something usually happens.
But we also enjoy “Emoji Buttons” for we graphically challenged programmers. Using an emoji text and graphic can make span elements or p elements or lots of other HTML elements that have an innerHTML property, be like a very succinct button like entity, also appreciated around here because it takes up so little webpage “real estate”.
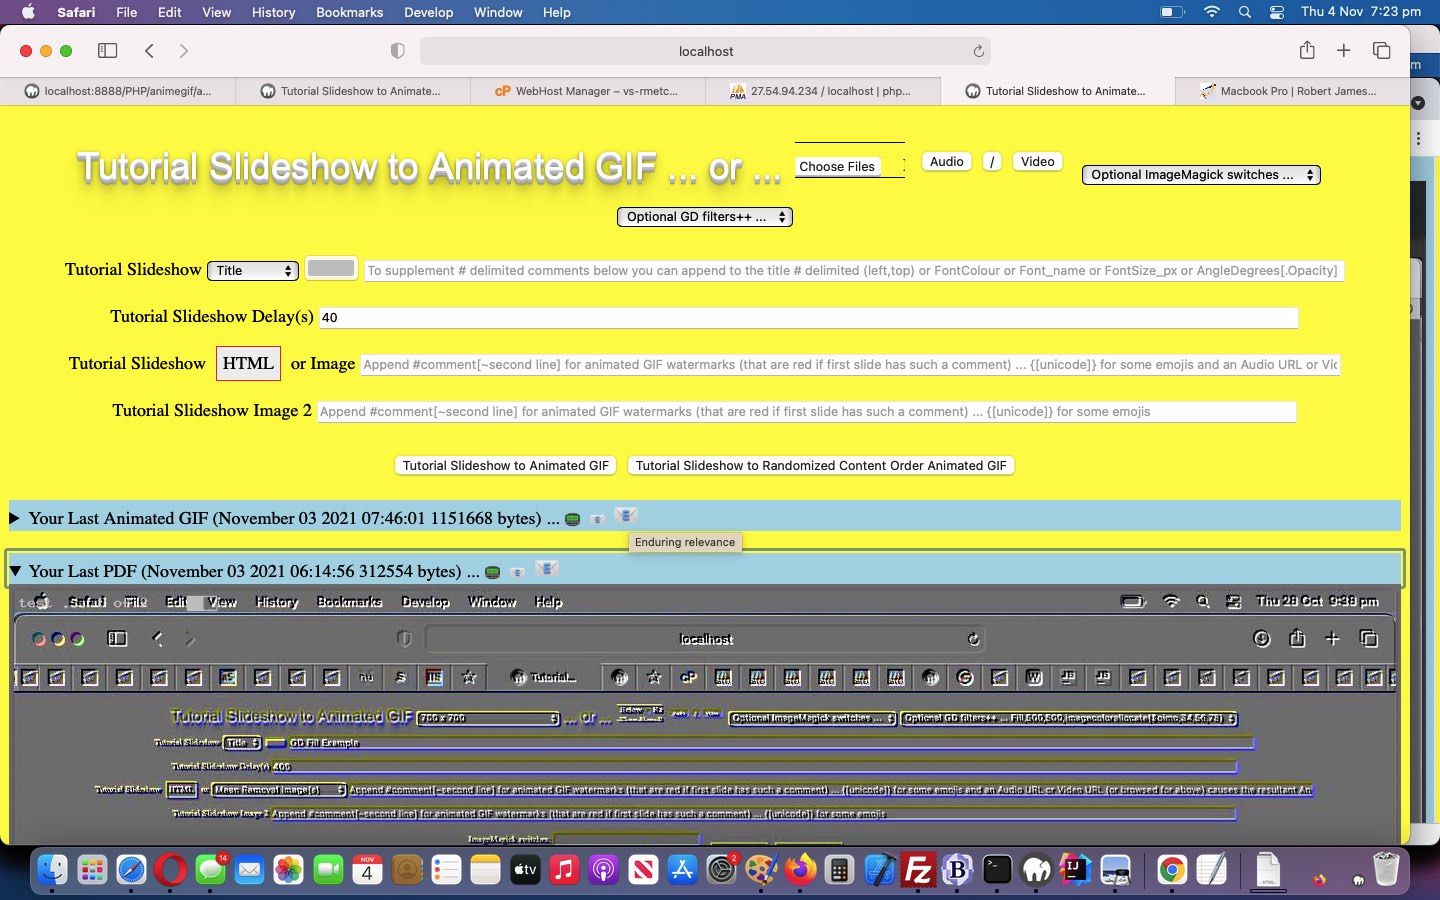
And so onto yesterday’s Animated GIF Creator PDF Order Tutorial we set about, today, “revealing” any enduring animated GIF and/or PDF created during a previous session, using Emoji Buttons as the email/SMS sharing action buttons.
We say “revealing” because, like the way “Emoji Buttons” save webpage “real estate”, so can the use of the HTML5 details/summary element combination. It is in that summary “enduring” header part of that combination we can place some “Emoji Buttons”. You will (once you start creating and sharing animated GIFs and/or PDFs) see from our changed tutorial_to_animated_gif.php inhouse Animated GIF Creator (helped out by a changed emailhtml.php inhouse email creator helper serverside PHP web application) that we place three Emoji Buttons …
- 📟 SMS (Animated GIF or PDF) Limited relevance period (ie. no data URIs involved, so rely on an absolute URL whose content might change or start not to exist down the track) … via “a” “sms:” link click/tap
- 📧 Email (Animated GIF or PDF) Limited relevance period (ie. no data URIs involved, so rely on an absolute URL whose content might change or start not to exist down the track) … via “a” “mailto:” link click/tap
- 📧 Email (Animated GIF or PDF) Enduring relevance (ie. data URIs involved, so do not rely on any absolute URL whose content might change or start not to exist down the track) … via PHP mail function means of sending email with HTML attachment containing the relevant Animated GIF or PDF
Yes, “Emoji Buttons” can have their size controlled but not by the usual CSS width and height properties, but by the CSS font-size property. Here is the new Javascript function that those Emoji Button “onclick” logic points to …
<?php eho ”
function askes(isemail, isoab) {

  var esask='', izhr=null, izform=null;

  var isoa=document.getElementById(isoab.id.replace('b',''));

  if (isemail) {

    esask=prompt('Please enter email address to send this to', '');

    if (esask != null) {

      if (esask.indexOf('@') != -1) {

        if (isoa.outerHTML.indexOf('<img') == 0) {

        //alert('More Animated GIF to come');

  izhr = new XMLHttpRequest();

  izform=new FormData();

  izform.append('to', esask.trim());

  izform.append('inline', '" . dirname(__FILE__) . DIRECTORY_SEPARATOR . server_remote_addr() . ".gif" . "');

  izform.append('subj', 'My Latest Animated GIF via RJM Programming ... ');

  izform.append('tdhuhta', ('<body><div title=\"" . explode('/animegif',$durlis)[0] . '/animegif/' . server_remote_addr() . "\" style=\"overflow:auto;-webkit-overflow-scrolling:touch;height:100%;\"><img style=\"width:100%;height:900px;\" src=\"" . dirname(__FILE__) . DIRECTORY_SEPARATOR . server_remote_addr() . ".gif" . "\"></img></div></body>'));

  izhr.open('post', '//www.rjmprogramming.com.au/HTMLCSS/emailhtml.php', true);

  izhr.send(izform);

        } else if (isoa.outerHTML.indexOf('<a') != 0) {

        //alert('More PDF to come');

  izhr = new XMLHttpRequest();

  izform=new FormData();

  izform.append('to', esask.trim());

  izform.append('inline', '" . dirname(__FILE__) . DIRECTORY_SEPARATOR . server_remote_addr() . "_animegif.pdf" . "');

  izform.append('subj', 'My Latest PDF via Animated GIF via RJM Programming ... ');

  izform.append('tdhuhta', ('<body><div title=\"" . explode('/animegif',$durlis)[0] . '/animegif/' . server_remote_addr() . "_\" style=\"overflow:auto;-webkit-overflow-scrolling:touch;height:100%;\"><object style=\"width:100%;height:900px;\" type=\"application/pdf\" data=\"" . dirname(__FILE__) . DIRECTORY_SEPARATOR . server_remote_addr() . "_animegif.pdf" . "\"></object></div></body>'));

  izhr.open('post', '//www.rjmprogramming.com.au/HTMLCSS/emailhtml.php', true);

  izhr.send(izform);

        } else {

        isoa.href='mailto:' + esask.trim() + '?' + isoa.href.split('?')[1];

        isoa.click();

        }

      }

    }

  } else {

    esask=prompt('Please enter SMS number to send this to', '');

    if (esask != null) {

      if ((esask.trim() != '' && esask.trim().replace(/0/g,'').replace(/1/g,'').replace(/2/g,'').replace(/3/g,'').replace(/4/g,'').replace(/5/g,'').replace(/6/g,'').replace(/7/g,'').replace(/8/g,'').replace(/9/g,'') == '')) {

         isoa.href='sms:' + esask.trim() + '&' + isoa.href.split('&')[1];

         isoa.click();

      }

    }

  }

}
“; ?>
Cute, huh?!
Previous relevant Animated GIF Creator PDF Order Tutorial is shown below.
Order becomes an interesting subject to us today regarding the PDF conversions possible in amongst the Animated GIF creating of yesterday’s Animated GIF Creator PDF Share Tutorial.
That is because we may have some advanced users out there that want that possibility of differentiating the data of …
- animated GIF … containing all features asked for, in totality … from the chance for the user to have any of the PDF conversion option sets below …
- PDF … one of …
- no PDF conversion
- full PDF conversion … with the user choices regarding raw image content and title and watermarking and ImageMagick and GD modifiers
- light PDF conversion … with the user choices regarding just raw image content (the only option out of these last three available before today’s work)
- medium PDF conversion … with the user choices regarding just ImageMagick and GD modifiers
… perhaps as a “before and after” tool regarding presentations, maybe?
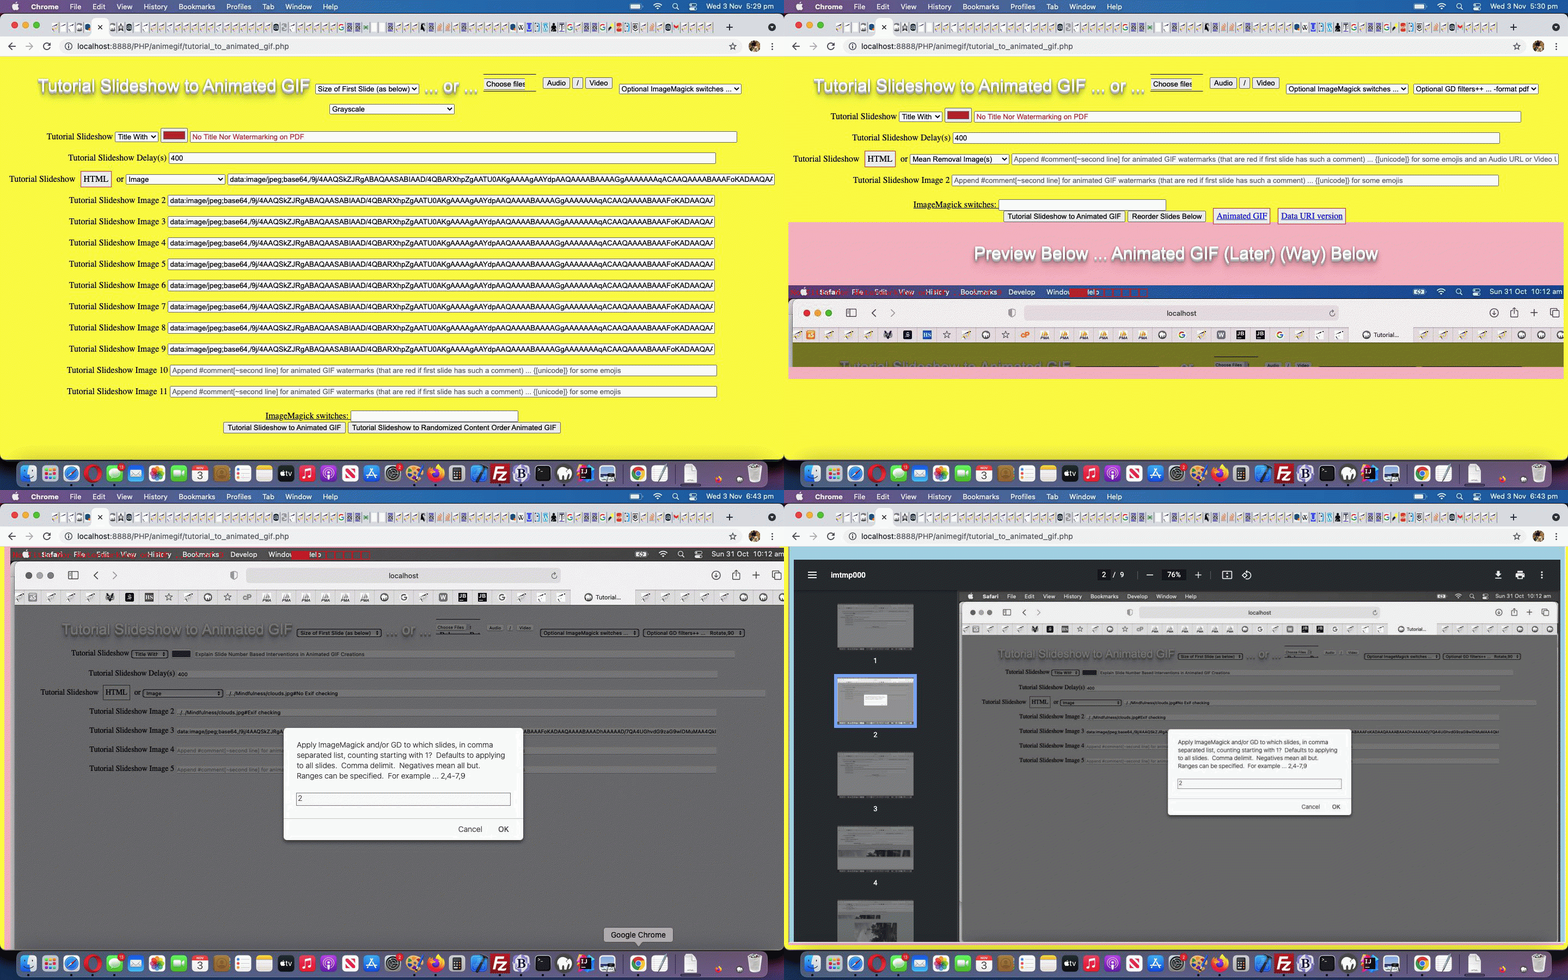
No dropdowns used here (enforcing an order), just the user’s order in which they choose to select the “PDF conversion” option from the ImageMagick dropdown (in relation to other selections) determining how and when this PDF conversion occurs in the workflow through to creating the animated GIF with our changed tutorial_to_animated_gif.php inhouse Animated GIF Creator serverside PHP web application. Just remember to select PDF Conversion as early as possible to do that “light PDF conversion” option above and last thing if you are interested in “full PDF conversion” (where you can create PDF documents with the bells and whistles ImageMagick and GD modifiers can offer) and today’s tutorial picture is an example of “medium PDF conversion” (when we ordered our settings by first Grayscale, second PDF conversion and last title and watermarking options). Clicking or tapping the ImageMagick link can get the user to the Javascript popup window where they might define the email or SMS recipient for that PDF conversion data file download.
Previous relevant Animated GIF Creator PDF Share Tutorial is shown below.
To share yesterday’s Animated GIF Creator PDF Conversion Tutorial PDF data formatted image slides (and then onto an animated GIF) would be a step forward, wouldn’t you say?
What sharing conduits do we code for? We always intended …
- email … but as the day wore on trying to get the usage to work on mobile and non-mobile we decided to relinquish our wish to not have to create a user specific enduring (until that same browser type and user combination share) PDF document for the user request … mainly to get mobile email downloads to be friendly … and so this opened the door for …
- SMS … to access that enduring PDF as a URL in the SMS message (that becomes a link for the recipient)
… the email methodology used being that “midair feeling” Ajax/FormData approach in our changed tutorial_to_animated_gif.php inhouse Animated GIF Creator serverside PHP web application …
<?php echo ”
function emailhtmlit() {

 var induri=ginduri;

 var pemail='" . urldecode($_GET['outpdf']) . urldecode($_POST['outpdf']) . "';

 if (pemail != null) {

   if (pemail.indexOf('@') != -1 || (pemail.trim() != '' && pemail.trim().replace(/0/g,'').replace(/1/g,'').replace(/2/g,'').replace(/3/g,'').replace(/4/g,'').replace(/5/g,'').replace(/6/g,'').replace(/7/g,'').replace(/8/g,'').replace(/9/g,'') == '')) {

   if (induri.trim() == '') {

   if (induri == '') {

   document.getElementById('pdfproposed').src='./animegif.pdf?rand=' + Math.floor(Math.random() * 19854654);

   } else {

   ginduri='found';

   }

   setTimeout(emailhtmlit, 15000);

   } else {

   ginduri='';

  var zhr = new XMLHttpRequest();

  var zform=new FormData();

  if (pemail.indexOf('@') != -1) { zform.append('to', pemail); }

  zform.append('inline', '" . dirname(__FILE__) . DIRECTORY_SEPARATOR . "animegif.pdf" . "');

  zform.append('subj', 'My PDF version of Animated GIF via RJM Programming ... ');

  zform.append('tdhuhta', ('<body><div title=\"" . explode('/animegif',$durlis)[0] . '/animegif/' . server_remote_addr() . "_\" style=\"overflow:auto;-webkit-overflow-scrolling:touch;height:100%;\"><object style=\"width:100%;height:900px;\" type=\"application/pdf\" data=\"" . dirname(__FILE__) . DIRECTORY_SEPARATOR . 'animegif.pdf' . "\"><embed style=\"width:100%;height:900px;\" type=\"application/pdf\" src=\"" . dirname(__FILE__) . DIRECTORY_SEPARATOR . 'animegif.pdf' . "\"></embed></object></div></body>'));

  //zform.append('tdhuhta', ('<body><iframe srcdoc=\"" . dirname(__FILE__) . DIRECTORY_SEPARATOR . 'animegif.pdf' . "\"></iframe></body>'));

  zhr.open('post', '//www.rjmprogramming.com.au/HTMLCSS/emailhtml.php', true);

  zhr.send(zform);

  if (pemail.indexOf('@') == -1) {

    var hrefp=document.getElementById('pdfsms').href.split('&body=')[0];

    hrefp+=pemail.trim() + '&body=' + document.getElementById('pdfsms').href.split('&body=')[1];

    document.getElementById('pdfsms').href=hrefp;

    document.getElementById('pdfsms').click();

  }

  }

   }

 }

}
“; ?>
… and this called on our PHP email creator helper to better interface in its $_POST arguments reading section in our changed emailhtml.php inhouse email creator helper serverside PHP web application …
<?php
$psacv="";

$okayin=true;

$subd="";

$subptitle='';

$subdata="";

$subfile="";

$getpostfound=false;

<br>

foreach( $_POST as  $name=>$val ) {

  if ($val != "") {

// blah blah blah    //file_put_contents("jnv." . $name, "jnv.inv00 " . strlen($phpcont));

  if ($name == "tdhuhta" && $subfile != "" && $subdata != "" && strpos(str_replace("+"," ",urldecode($val)), $subfile) !== false) {

   if (strpos(str_replace("+"," ",urldecode($val)), ' srcdoc="') !== false || strpos(str_replace("+"," ",urldecode($val)), ' data="') !== false) {

      if (strpos(str_replace("+"," ",urldecode($val)), ' title="') !== false) {      //file_put_contents('haaa.aaa',explode('/animegif/', explode('"', explode(' title="', str_replace("+"," ",urldecode($val)))[1])[0])[1]);

        if (!file_exists('../PHP/animegif/' . explode('/animegif/', explode('"', explode(' title="', str_replace("+"," ",urldecode($val)))[1])[0])[1] . 'animegif.pdf')) {

        if (file_exists('../PHP/animegif/animegif.pdf')) {

          copy('../PHP/animegif/animegif.pdf', '../PHP/animegif/' . explode('/animegif/', explode('"', explode(' title="', str_replace("+"," ",urldecode($val)))[1])[0])[1] . 'animegif.pdf');

        }

        }

        $psacv=explode('"', explode(' title="', str_replace("+"," ",urldecode($val)))[1])[0] . 'animegif.pdf';

        $subptitle='<a target=_blank href="' . explode('"', explode(' title="', str_replace("+"," ",urldecode($val)))[1])[0] . 'animegif.pdf">Mobile whole PDF</a><br>';

      }

     $vrest=explode('"', explode(' srcdoc="',str_replace("+"," ",urldecode($val)))[1])[0];

     $val=urlencode("<body>" . $subptitle . "<iframe style='width:100%;height:95vh;overflow:auto;-webkit-overflow-scrolling:touch;' srcdoc='<div style=width:92%;height:95vh;overflow:auto;-webkit-overflow-scrolling:touch;><object id=myobj style=width:95%;height:95vh; type=application/pdf data=\"" . $subdata . "\"></object></div>'></iframe></body>");

   }

// blah blah blah

   if ($name == "inline") {

    if (strpos(str_replace("+"," ",urldecode($val)), 'animegif.pdf') !== false && isset($_POST['tdhuhta'])) {

     if (file_exists(str_replace("+"," ",urldecode($val)))) {

      $subfile=str_replace("+"," ",urldecode($val));

      $subdata='data:application/pdf;base64,' . base64_encode(file_get_contents(str_replace("+"," ",urldecode($val))));

      $val="";

      $name="x";

      $okayin=false;

     }

    }

// blah blah blah

  }

}
?>
Creating the PDFs got helped out in “reliability terms” via the introduced animegif.php inhouse Wait Around Longer serverside PHP web application.
Previous relevant Animated GIF Creator PDF Conversion Tutorial is shown below.
Up to yesterday’s Animated GIF Creator Slide Specific Application Tutorial the recent progress had us …
- knowing the good places to intervene between the original slide image data being read in and the animated GIF slide output … and …
- involvement of ImageMagick … so, today, these two help us down the path to …
- adding PDF as an output format possibility, in addition to the animated GIF and other ideas floated as output formats
… with our changed tutorial_to_animated_gif.php inhouse Animated GIF Creator serverside PHP web application.
We have more “reliability work” and “email sharing work” to go after today’s start, but it primarily called on ImageMagick command line’s talent for a command like …
convert /tmp/imtmp0*.*[gGmMiI]* /tmp/imtmp000.pdf
… to “concatenate” into the one output PDF file (called “/tmp/imtmp000.pdf”) the slides, arranged by our code into that “/tmp/imtmp0*.*[gGmMiI]*” (file specification) arrangement above. Yes, we meant “convert” above, as “mogrify” (batch work) appears not to be able to perform this task.
We hope you stay the course!
Previous relevant Animated GIF Creator Slide Specific Application Tutorial is shown below.
It’s all fine and good improving on the ImageMagick and GD and Exif functionality modifications like with yesterday’s Animated GIF Creator Exif Rotation Compensation Tutorial, but in reality, if you are going to start creating animated GIFs to explain a process, you are going to want to apply these “slide modifiers” on a slide by slide basis, rather than enforcing a “whole of animated GIF slide set” paradigm, as for the last few days worth of work.
And so, we decided to do what we often do, “sliding in” more functionality (chortle, chortle). We tend to want to …
- start with hardcoded text (or element) … somewhere … today it happens to be in an HTML span element that once involved just …
<span id="smyim"></span>
… and used to get filled, Javascript DOM wise, when needed via …
document.getElementById('smyim').innerHTML='ImageMagick switches: '; // and yes, it remains that way even now, but read on ...
- add intelligence (quite often that being onclick logic(s)) to that hardcoded element via …
<span id=smyim title=Application onclick=applyto(); style=cursor:pointer;text-decoration:underline;></span>
- that serves the purpose, as the user clicks/taps it (alerted to that fact, perhaps, because we underline the element and add an appropriate cursor when hovering over it (plus a title)), of calling Javascript …
function applyto() {

  var huhto=prompt('Apply ImageMagick and/or GD to which slides, in comma separated list, counting starting with 1?  Defaults to applying to all slides.  Comma delimit.  Negatives mean all but.  Ranges can be specified.  For example ... 2,4-7,9', document.getElementById('appliedto').value);

  if (huhto == null) { huhto=''; }

  if (huhto.trim() == '') {

    document.getElementById('appliedto').value='';

    document.getElementById('smyim').title='Application';

  } else {

    document.getElementById('appliedto').value=huhto.trim();

    document.getElementById('smyim').title=huhto.trim();

  }

}
- to glean an (often times out of the normal workflow of the web application) informational piece of data, interactively, from the user, via a Javascript prompt popup
So that’s the clientside of this work … “alerting the user to the existance of the functionality” you might say.
And then there’s “the application” of that nuanced user requirement. And that’s where the “inhouse ‘our’ prefix to wrapper function name paradigms” come in handy. We introduced “blanket” functionality thoughts via this approach, and so to “partially undo” that thinking, we make the “our” prefix conditional, as is available to us with our changed tutorial_to_animated_gif.php inhouse Animated GIF Creator serverside PHP web application (helped out by a changed exif_rotation_check.php inhouse Exif detector PHP helper), as per …
<?php
function ourcomplicated($inio, $iappl) {

  $ideasl=explode(",", str_replace(' ','',$iappl));

  $xour="our";

  for ($iqa=0; $iqa<sizeof($ideasl); $iqa++) {

    if (trim($ideasl[$iqa]) != '') {

      $xour="";

      if (('-' . $inio) == trim($ideasl[$iqa])) { return "";  }

      $ideasr=explode("-", str_replace(' ','',trim($ideasl[$iqa])));

      for ($iqb=0; $iqb<sizeof($ideasr); $iqb++) {

        if (('' . $inio) == trim($ideasr[$iqb])) {

          return "our";

        }

        if ($iqb == 1) {

          if (trim($ideasr[1]) == "") { $ideasr[1]="99999999"; }

          if ($inio >= $ideasr[0] && $inio <= $ideasr[1]) { return "our";  }

        }

      }

    }

  }

  return $xour;

}
?>
… teamed with …
<?php
$ours="our";
for ($io=1; $io
// blah blah blah
if (strpos($aphoto[0], ";base64,") !== false) {
$gifphp.=str_replace("imagecreatefromjpeg('source01.jpg');", "" . $ours . "imagecreatefromstring(base64_decode('" . explode(";base64,",$aphoto[0])[1] . "'));", str_replace("\$text='';", "\$text=\"" . str_replace("+"," ",urldecode($atext)) . "\";", $eachonestring));
} else if (strpos(strtolower($aphoto[0]), "//") !== false) {
$gifphp.=str_replace("imagecreatefromjpeg('source01.jpg');", "" . $ours . "imagecreatefromstring(@file_get_contents('" . $prefix . $aphoto[0] . "'));", str_replace("\$text='';", "\$text=\"" . str_replace("+"," ",urldecode($atext)) . "\";", $eachone));
} else if (strpos(strtolower($aphoto[0]), ".jp") !== false) {
if (strpos($prefix, "../../") !== false && !file_exists($prefix . $aphoto[0]) && file_exists(str_replace("../../","../",$prefix) . $aphoto[0])) {
$prefix=str_replace("../../","../",$prefix);
}
//file_put_contents('qpqp.qpqp', $eachone . "\n\n" . $atext . "\n\n" . str_replace("\$text='';", "\$text=\"" . str_replace("+"," ",urldecode($atext)) . "\";", $eachone));
$gifphp.=str_replace("imagecreatefromjpeg('source01.jpg');", "" . $ours . "imagecreatefromjpeg('" . $prefix . $aphoto[0] . "');", str_replace("\$text='';", "\$text=\"" . str_replace("+"," ",urldecode($atext)) . "\";", $eachone));
//file_put_contents('qpqpqp.qpqpqp', $gifphp);
} else if (strpos(strtolower($aphoto[0]), ".png") !== false) {
if (strpos($prefix, "../../") !== false && !file_exists($prefix . $aphoto[0]) && file_exists(str_replace("../../","../",$prefix) . $aphoto[0])) {
$prefix=str_replace("../../","../",$prefix);
}
$gifphp.=str_replace("imagecreatefromjpeg('source01.jpg');", "" . $ours . "imagecreatefrompng('" . $prefix . $aphoto[0] . "');", str_replace("\$text='';", "\$text=\"" . str_replace("+"," ",urldecode($atext)) . "\";", $eachone));
} else if (strpos(strtolower($aphoto[0]), ".gif") !== false) {
if (strpos($prefix, "../../") !== false && !file_exists($prefix . $aphoto[0]) && file_exists(str_replace("../../","../",$prefix) . $aphoto[0])) {
$prefix=str_replace("../../","../",$prefix);
}
$gifphp.=str_replace("imagecreatefromjpeg('source01.jpg');", "" . $ours . "imagecreatefromgif('" . $prefix . $aphoto[0] . "');", str_replace("\$text='';", "\$text=\"" . str_replace("+"," ",urldecode($atext)) . "\";", $eachone));
} else if (strpos(strtolower($aphoto[0]), ".bmp") !== false) {
if (strpos($prefix, "../../") !== false && !file_exists($prefix . $aphoto[0]) && file_exists(str_replace("../../","../",$prefix) . $aphoto[0])) {
$prefix=str_replace("../../","../",$prefix);
}
$gifphp.=str_replace("imagecreatefromjpeg('source01.jpg');", "" . $ours . "imagecreatefrombmp('" . $prefix . $aphoto[0] . "');", str_replace("\$text='';", "\$text=\"" . str_replace("+"," ",urldecode($atext)) . "\";", $eachone));
}
// blah blah blah
}
?>
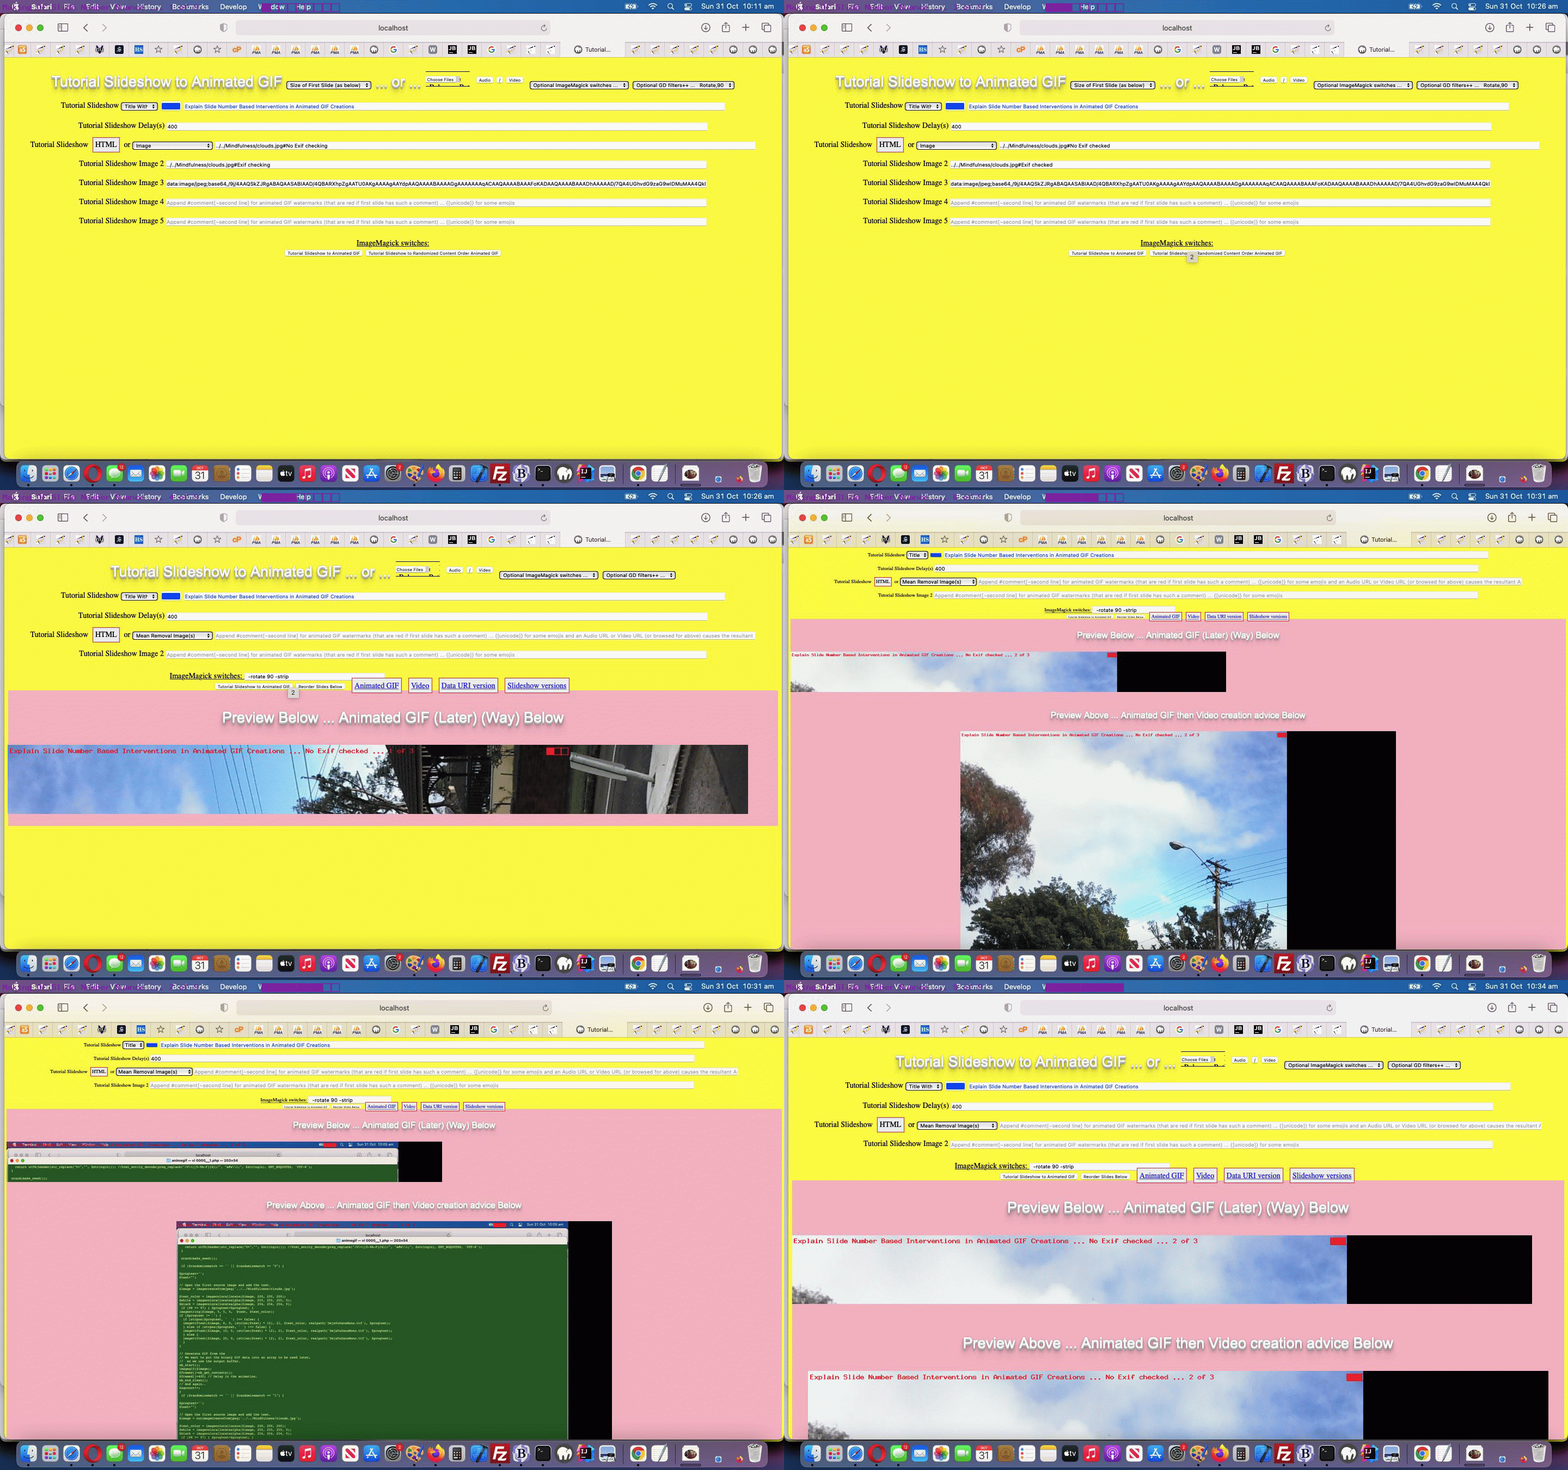
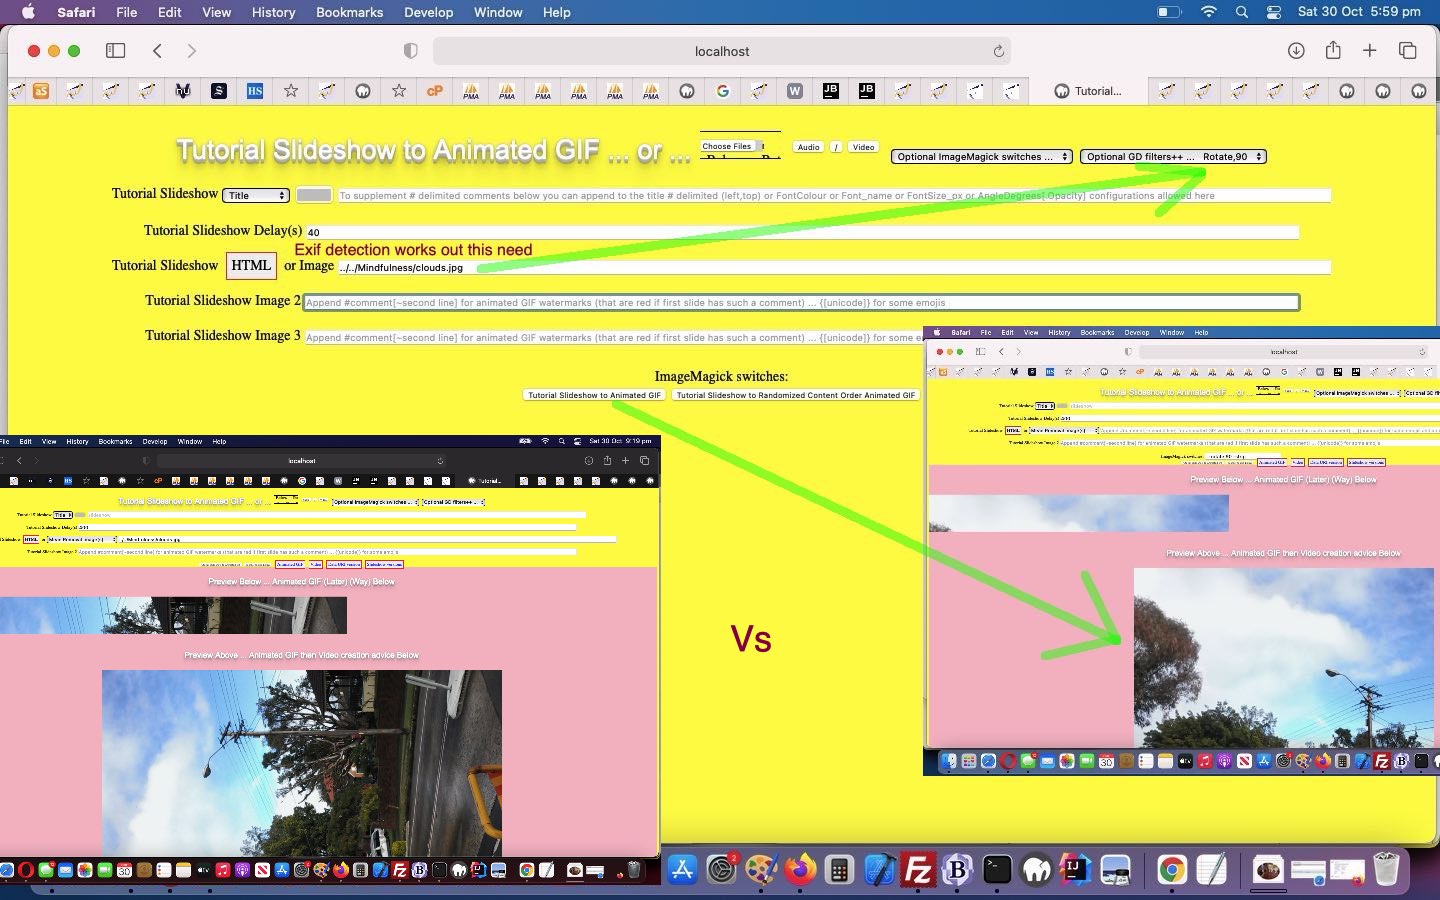
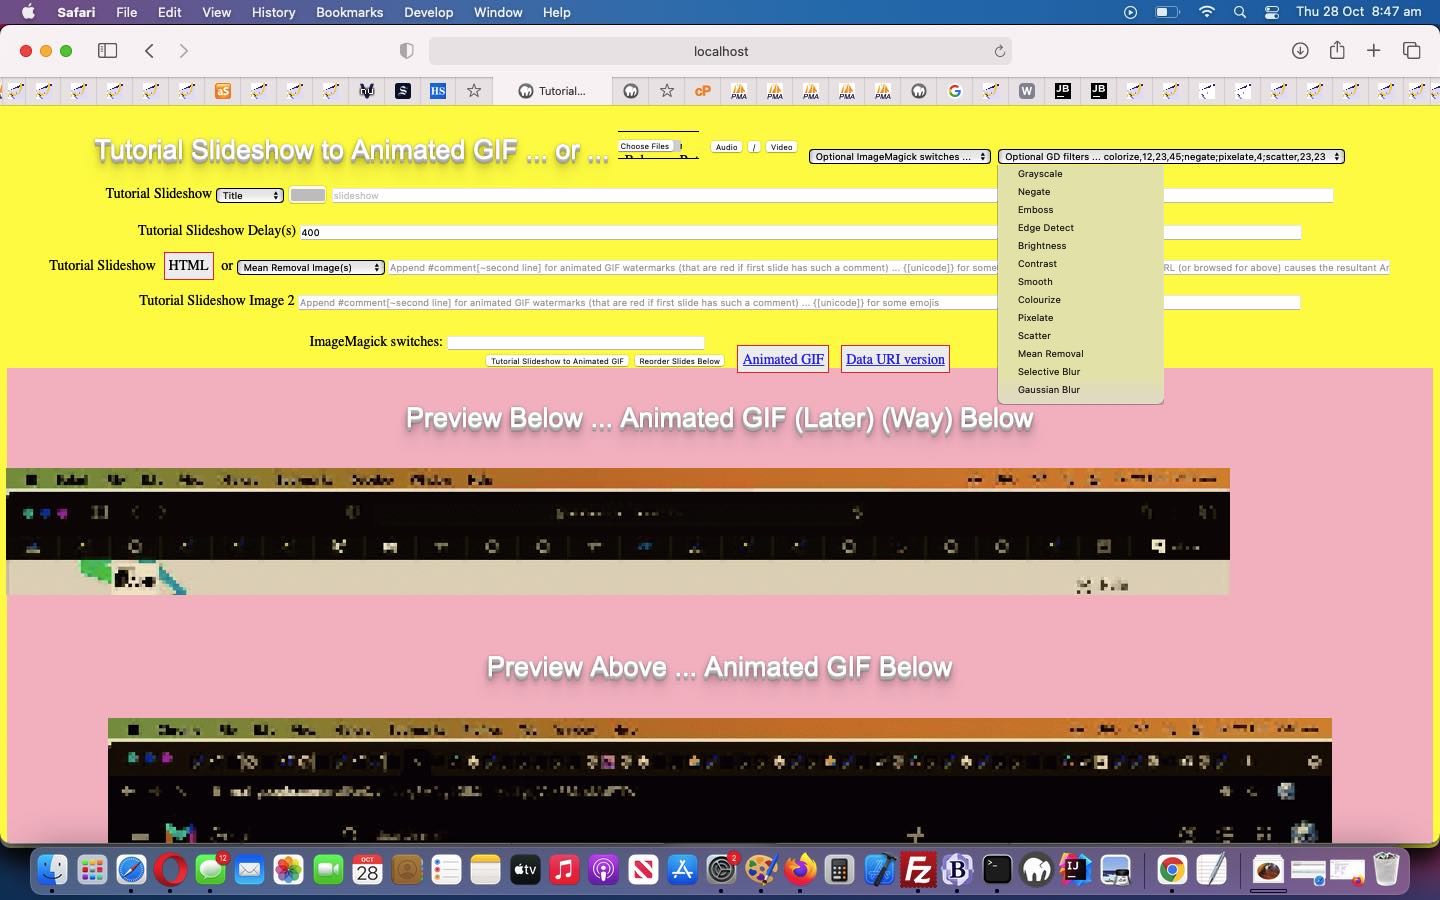
We use these “new abilities” better explaining “the abscence or otherwise of Exif checking”, and the implications of that in the animated GIF creator woooooorrrrrrlllllddd, contrasting the first two slides, showing one with “No Exif checking” (the bad old days) versus “With Exif checking” (the renaissance of liberated thinking in the South South East woooorrrrrlllldddd) in today’s animated GIF presentation.
Get the picture?!
Previous relevant Animated GIF Creator Exif Rotation Compensation Tutorial is shown below.
The recent couple of days of work like yesterday’s Animated GIF Creator GD Transformations Interfacing Tutorial have given us “rotation functionality” tools to counteract the unusual effects Exif …
Exchangeable image file format (officially Exif, according to JEIDA/JEITA/CIPA specifications) is a standard that specifies the formats for images, sound, and ancillary tags used by digital cameras (including smartphones), scanners and other systems handling image and sound files recorded by digital cameras.
… can have converting mobile device camera created images into animated GIFs via our changed tutorial_to_animated_gif.php inhouse Animated GIF Creator PHP web application.
But with some photos it’s there in the photo’s metadata information letting the future user know what orientation the camera of that mobile device was in as you took the photo. In order to help our animated GIF creator, the first slide image is scoured for Exif metadata and if found, a suitable rotation correction can be applied to the slides there and then. In order to scour for Exif metadata we needed to write a exif_rotation_check.php inhouse Exif detector PHP helper.
Previous relevant Animated GIF Creator GD Transformations Interfacing Tutorial is shown below.
The PHP GD image library is so much more useful than for the “filters” interfaced to with yesterday’s Animated GIF Creator GD Filter Interfacing Tutorial. Under an “umbrella term” transformations, today we add interfacing to GD functionality …
… into our changed tutorial_to_animated_gif.php inhouse Animated GIF Creator PHP web application. We found it more user friendly to tailor the asking of numerical parameters for these GD calls work via …
<?php
 $gfcds='';

 $gdfs=[];

 if (strpos(($imvgn . $imafn . $imqty . $imgds), '|') !== false) {

    $gdfs=explode(';', trim(explode('|', $imvgn . $imafn . $imqty . $imgds)[1]));

    for ($itf=0; $itf<sizeof($gdfs); $itf++) {

     if (trim($gdfs[$itf]) != '') {

      if (trim($gdfs[$itf]) == strtolower(trim($gdfs[$itf]))) {

      $gfcds.=chr(10) . " imagefilter(" . "$" . "oimo, IMG_FILTER_" . strtoupper(trim($gdfs[$itf])) . "); " . chr(10);

      } else if (trim($gdfs[$itf]) == strtoupper(trim($gdfs[$itf]))) {

      $gfcds.=chr(10) . " image" . explode(',',explode(" ",strtolower(trim($gdfs[$itf])))[0])[0] . "(" . "$" . "oimo, IMG_" . str_replace(" ","_",strtoupper(trim(  str_replace(explode(' ',$gdfs[$itf])[0] . ' ','',$gdfs[$itf])   ))) . "); " . chr(10);

      } else if (strpos(strtoupper(trim($gdfs[$itf])), "SCALE") !== false) {

      $gfcds.=chr(10) . " $" . "oimo=image" . explode(',',explode(" ",strtolower(trim($gdfs[$itf])))[0])[0] . "(" . "$" . "oimo" . str_replace(" ","_",(trim(  str_replace(explode(',',explode(" ",(trim($gdfs[$itf])))[0])[0],'',$gdfs[$itf])   ))) . "); " . chr(10);

      } else if (strpos(strtoupper(trim($gdfs[$itf])), "COPY") === false) {

      $gfcds.=chr(10) . " image" . explode(',',explode(" ",strtolower(trim($gdfs[$itf])))[0])[0] . "(" . "$" . "oimo" . str_replace(" ","_",(trim(  str_replace(explode(',',explode(" ",(trim($gdfs[$itf])))[0])[0],'',$gdfs[$itf])   ))) . "); " . chr(10);

      } else {

      $gfcds.=chr(10) . " image" . explode(',',explode(" ",strtolower(trim($gdfs[$itf])))[0])[0] . "(" . "$" . "oimo" . "," . "$" . "oimo" . explode("," . "$" . "oimo", $gdfs[$itf])[1] . "); " . chr(10);

      }

     }

    }

 }
?>
… to work with modified PHP writes PHP of the ilk …
<?php echo ”
function ourimagecreatefromstring(\$inidis) {

global \$imvgn, \$imafn, \$imqty, \$imgds, \$gfcds;

  if ((\$imvgn . \$imafn . \$imqty . \$imgds) != '' && strpos(\$inidis, ';base64,') !== false) {

    \$extis=str_replace('jpeg','jpg',explode('/', explode(';base64,', \$inidis)[0])[1]);

    \$inextis=\$extis;

    \$sofarout='/tmp/imtmp.' . \$extis;

    foreach (glob('/tmp/imtmp.*') as \$imfilename) {

       unlink(\$imfilename);

    }

    file_put_contents(\$sofarout, base64_encode(explode(';base64,', \$inidis)[1]));

    \$fzis=filesize(\$sofarout);

    if (trim(explode('|', \$imvgn . \$imafn . \$imqty . \$imgds)[0]) != '') {

    exec('" . $immogpath . "mogrify ' . explode('|', \$imvgn . \$imafn . \$imqty . \$imgds)[0] . ' /tmp/imtmp.' . \$extis);

    }

    foreach (glob('/tmp/imtmp.*') as \$imfilename) {

       if (filesize(\$imfilename) != \$fzis) {  // strpos(\$imfilename, '.' . \$extis) === false ||

         \$sofarout=\$imfilename;

         \$extis=explode('.', \$imfilename)[1];

       }

    }

    \$oimo=null;

    if (strtolower(\$extis) == 'png') {

      \$oimo=imagecreatefrompng('/tmp/imtmp.' . \$extis); " . $gfcds . "

    } else if (strtolower(\$extis) == 'bmp') {

      \$oimo=imagecreatefrombmp('/tmp/imtmp.' . \$extis); " . $gfcds . "

    } else if (strtolower(\$extis) == 'gif') {

      \$oimo=imagecreatefromgif('/tmp/imtmp.' . \$extis); " . $gfcds . "

    } else if (strpos(strtolower(\$extis), 'jp') !== false) {

      \$oimo=imagecreatefromjpeg('/tmp/imtmp.' . \$extis); " . $gfcds . "

    }

    if (\$oimo) { return \$oimo; }

  } else if ((\$imvgn . \$imafn . \$imqty . \$imgds) != '') {

    \$extis=str_replace('jpeg','jpg','" . $inextis . "');

    \$inextis=\$extis;

    \$sofarout='/tmp/imtmp.' . \$extis;

    foreach (glob('/tmp/imtmp.*') as \$imfilename) {

       unlink(\$imfilename);

    }

    file_put_contents(\$sofarout, \$inidis);

    \$fzis=filesize(\$sofarout);

    if (strpos(strtolower((\$imvgn . \$imafn . \$imqty . \$imgds)), '-format ') === false) { \$imvgn.=' -format " . str_replace('jpg','jpeg',$inextis) . " ';  }

    if (trim(explode('|', \$imvgn . \$imafn . \$imqty . \$imgds)[0]) != '') {

    exec('" . $immogpath . "mogrify ' . explode('|', \$imvgn . \$imafn . \$imqty . \$imgds)[0] . ' /tmp/imtmp.' . \$extis);

    }

    foreach (glob('/tmp/imtmp.*') as \$imfilename) {

       if (filesize(\$imfilename) != \$fzis) {  // strpos(\$imfilename, '.' . \$extis) === false) {

         \$sofarout=\$imfilename;

         \$extis=explode('.', \$imfilename)[1];

       }

    }

    \$oimo=null;

    if (strtolower(\$extis) == 'png') {

      \$oimo=imagecreatefrompng('/tmp/imtmp.' . \$extis);  " . $gfcds . "

    } else if (strtolower(\$extis) == 'bmp') {

      \$oimo=imagecreatefrombmp('/tmp/imtmp.' . \$extis);  " . $gfcds . "

    } else if (strtolower(\$extis) == 'gif') {

      \$oimo=imagecreatefromgif('/tmp/imtmp.' . \$extis);  " . $gfcds . "

    } else if (strpos(strtolower(\$extis), 'jp') !== false) {

      \$oimo=imagecreatefromjpeg('/tmp/imtmp.' . \$extis);  " . $gfcds . "

    }

    if (\$oimo) { return \$oimo; }

  }

  return imagecreatefromstring(\$inidis);

}
“; “?>
… and to get there clientwise, in the Javascript …
function gdadd(oselo) {

 var pari=1, thispari='0';

 if (oselo.value != '') {

  //alert(oselo.value);

  var oselovalue=oselo.value.replace(',' + '$' + 'oimo','~' + '$' + 'oimo').split(',')[0];

  //alert(oselovalue);

  var oseloval=oselo.value;

  if (document.getElementById('imgds')) { if (document.getElementById('imgds').value == '') { document.getElementById('imgds').value='|';  } else { document.getElementById('imgds').value+=';'; } }

  oseloval=oseloval.replace(',' + '$' + 'oimo','~' + '$' + 'oimo');

  oseloval=oseloval.replace(oseloval.split(',')[0], '');

  while (oseloval.indexOf(',') != -1) {

  //alert(oseloval);

      if ((oseloval + ' ').substring(1).split(',')[0].trim() != '') {

      if ((' ' + (oseloval + ' ').substring(1).split(',')[0].trim() + ' ').toLowerCase().indexOf(' colour ') != -1) {

      thispari=prompt('Enter' + (' ' + (oseloval + ' ').substring(1).split(',')[0].trim() + ' ').toLowerCase().replace(' colour ', ' red,green,blue colour ') + 'parameter for GD ' + oselo.value.split(',')[0] + ' ' + pari + ' of ' + eval(-1 + oselo.value.replace(',' + '$' + 'oimo','').split(',').length)  + '?', '0');

      if (thispari == null) {

        thispari='0';

      } else if (thispari.trim() == '') {

        thispari='0';

      } else if (thispari.indexOf(',') == -1) {

        oselovalue+=',' + thispari + '';

      } else {

        oselovalue+=',imagecolorallocate(' + '$' + 'oimo,' + thispari + ')';

      }

      } else {

      thispari=prompt('Enter ' + (oseloval + ' ').substring(1).split(',')[0].trim() + ' parameter for GD ' + oselo.value.split(',')[0] + ' ' + pari + ' of ' + eval(-1 + oselo.value.replace(',' + '$' + 'oimo','').split(',').length)  + '?', '0');

      if (thispari == null) {

        thispari='0';

      } else {

        oselovalue+=',' + thispari;

      }

      }

      oseloval=oseloval.replace(',' + (oseloval + ' ').substring(1).split(',')[0].trim(),'').trim();

      } else {

      thispari=prompt('Enter numerical parameter for GD ' + oselo.value.split(',')[0] + ' ' + pari + ' of ' + eval(-1 + oselo.value.replace(',' + '$' + 'oimo','').split(',').length)  + '?', '0');

      oseloval=oseloval.replace(',','');

      if (thispari == null) {

        thispari='0';

      } else {

        oselovalue+=',' + thispari;

      }

      }

      //oseloval=oseloval.replace(oseloval.split(',')[0] + ',', '');

      //oseloval=oseloval.replace(',','');

      pari++;

  }

  if (document.getElementById('gdopt')) {

    document.getElementById('gdopt').innerHTML+='  ' + oselovalue.replace('~',',');

  }

  if (document.getElementById('imgds')) {

    document.getElementById('imgds').value+=oselovalue.replace('~',',');

    //document.getElementById('imgds').style.display='inline-block';

    //document.getElementById('imgds').style.width='300px';

    if (document.getElementById('smyim').innerHTML == '') {  document.getElementById('smyim').innerHTML='ImageMagick switches: '; }

  } else if (document.getElementById('myim')) {

    document.getElementById('myim').innerHTML='<span is=smyim>ImageMagick switches: </span><input id=imqty name=imqty type=text style=display:inline-block; value=\"\"></input><input id=imgds name=imgds type=hidden style=display:inline-block; value=\"|' + oselovalue.replace('~',',') + '\"></input>';

    document.getElementById('imqty').style.width='300px';

  }

  oselo.value='';

 }

}
Previous relevant Animated GIF Creator GD Filter Interfacing Tutorial is shown below.
We are into image modification on the way to creating “compiled” animated GIF images, at the moment. Yesterday’s Animated GIF Creator ImageMagick Interfacing Tutorial got us interfacing (or integrating) …
- ImageMagick batch processing “mogrify” ideas … and, today, it is the turn of …
- GD image filters …
… into our changed tutorial_to_animated_gif.php inhouse Animated GIF Creator PHP web application.
Previous relevant Animated GIF Creator ImageMagick Interfacing Tutorial is shown below.
Yes, you guessed it! On top of yesterday’s ImageMagick Vignette Primer Tutorial, today we want to interface the ImageMagick batch processing “mogrify” ideas into our changed tutorial_to_animated_gif.php inhouse Animated GIF Creator PHP web application.
“Interfacing” (or integrating) into code often has you asking the question …
Where do we intervene to place our logic?
We’ve decided to “wrap” our PHP GD calls …
… into inhouse “our” prefixed function versions as per (PHP writing out PHP) …
<?php echo ”
 \$imvgn='" . $imvgn . "'; /" . "/ vignette factor

 \$imafn='" . $imafn . "'; /" . "/ affine transformation

 \$imqty='" . $imqty . "'; /" . "/ image conversion and/or quality RE jpeg


function ourimagecreatefromstring(\$inidis) {

global \$imvgn, \$imafn, \$imqty;

  if ((\$imvgn . \$imafn . \$imqty) != '' && strpos(\$inidis, ';base64,') !== false) {

    \$extis=str_replace('jpeg','jpg',explode('/', explode(';base64,', \$inidis)[0])[1]);

    \$inextis=\$extis;

    \$sofarout='/tmp/imtmp.' . \$extis;

    foreach (glob('/tmp/imtmp.*') as \$imfilename) {

       unlink(\$imfilename);

    }

    file_put_contents(\$sofarout, base64_encode(explode(';base64,', \$inidis)[1]));

    \$fzis=filesize(\$sofarout);

    exec('" . $immogpath . "mogrify ' . \$imvgn . \$imafn . \$imqty . ' /tmp/imtmp.' . \$extis);

    foreach (glob('/tmp/imtmp.*') as \$imfilename) {

       if (filesize(\$imfilename) != \$fzis) {  // strpos(\$imfilename, '.' . \$extis) === false ||

         \$sofarout=\$imfilename;

         \$extis=explode('.', \$imfilename)[1];

       }

    }

    if (strtolower(\$extis) == 'png') {

      return imagecreatefrompng('/tmp/imtmp.' . \$extis);

    } else if (strtolower(\$extis) == 'bmp') {

      return imagecreatefrombmp('/tmp/imtmp.' . \$extis);

    } else if (strtolower(\$extis) == 'gif') {

      return imagecreatefromgif('/tmp/imtmp.' . \$extis);

    } else if (strpos(strtolower(\$extis), 'jp') !== false) {

      return imagecreatefromjpeg('/tmp/imtmp.' . \$extis);

    }

  } else if ((\$imvgn . \$imafn . \$imqty) != '') {

    \$extis=str_replace('jpeg','jpg','" . $inextis . "');

    \$inextis=\$extis;

    \$sofarout='/tmp/imtmp.' . \$extis;

    foreach (glob('/tmp/imtmp.*') as \$imfilename) {

       unlink(\$imfilename);

    }

    file_put_contents(\$sofarout, \$inidis);

    \$fzis=filesize(\$sofarout);

    if (strpos(strtolower((\$imvgn . \$imafn . \$imqty)), '-format ') === false) { \$imvgn.=' -format " . str_replace('jpg','jpeg',$inextis) . " ';  }

    exec('" . $immogpath . "mogrify ' . \$imvgn . \$imafn . \$imqty . ' /tmp/imtmp.' . \$extis);

    foreach (glob('/tmp/imtmp.*') as \$imfilename) {

       if (filesize(\$imfilename) != \$fzis) {  // strpos(\$imfilename, '.' . \$extis) === false) {

         \$sofarout=\$imfilename;

         \$extis=explode('.', \$imfilename)[1];

       }

    }

    if (strtolower(\$extis) == 'png') {

      return imagecreatefrompng('/tmp/imtmp.' . \$extis);

    } else if (strtolower(\$extis) == 'bmp') {

      return imagecreatefrombmp('/tmp/imtmp.' . \$extis);

    } else if (strtolower(\$extis) == 'gif') {

      return imagecreatefromgif('/tmp/imtmp.' . \$extis);

    } else if (strpos(strtolower(\$extis), 'jp') !== false) {

      return imagecreatefromjpeg('/tmp/imtmp.' . \$extis);

    }

  }

  return imagecreatefromstring(\$inidis);

}


function ourimagecreatefromjpeg(\$inidis) {

global \$imvgn, \$imafn, \$imqty;

  if ((\$imvgn . \$imafn . \$imqty) != '') {

    \$extis='jpg';

    \$inextis=\$extis;

    \$sofarout='/tmp/imtmp.' . \$extis;

    foreach (glob('/tmp/imtmp.*') as \$imfilename) {

       unlink(\$imfilename);

    }

    file_put_contents(\$sofarout, \$inidis);

    \$fzis=filesize(\$sofarout);

    exec('" . $immogpath . "mogrify ' . \$imvgn . \$imafn . \$imqty . ' /tmp/imtmp.' . \$extis);

    foreach (glob('/tmp/imtmp.*') as \$imfilename) {

       if (filesize(\$imfilename) != \$fzis) {  // strpos(\$imfilename, '.' . \$extis) === false) {

         \$sofarout=\$imfilename;

         \$extis=explode('.', \$imfilename)[1];

       }

    }

    if (strtolower(\$extis) == 'png') {

      return imagecreatefrompng('/tmp/imtmp.' . \$extis);

    } else if (strtolower(\$extis) == 'bmp') {

      return imagecreatefrombmp('/tmp/imtmp.' . \$extis);

    } else if (strtolower(\$extis) == 'gif') {

      return imagecreatefromgif('/tmp/imtmp.' . \$extis);

    } else if (strpos(strtolower(\$extis), 'jp') !== false) {

      return imagecreatefromjpeg('/tmp/imtmp.' . \$extis);

    }

  }

  return imagecreatefromjpeg(\$inidis);

}


function ourimagecreatefrompng(\$inidis) {

global \$imvgn, \$imafn, \$imqty;

  if ((\$imvgn . \$imafn . \$imqty) != '') {

    \$extis='png';

    \$inextis=\$extis;

    \$sofarout='/tmp/imtmp.' . \$extis;

    foreach (glob('/tmp/imtmp.*') as \$imfilename) {

       unlink(\$imfilename);

    }

    file_put_contents(\$sofarout, \$inidis);

    \$fzis=filesize(\$sofarout);

    exec('" . $immogpath . "mogrify ' . \$imvgn . \$imafn . \$imqty . ' /tmp/imtmp.' . \$extis);

    foreach (glob('/tmp/imtmp.*') as \$imfilename) {

       if (filesize(\$imfilename) != \$fzis) {  // strpos(\$imfilename, '.' . \$extis) === false) {

         \$sofarout=\$imfilename;

         \$extis=explode('.', \$imfilename)[1];

       }

    }

    if (strtolower(\$extis) == 'png') {

      return imagecreatefrompng('/tmp/imtmp.' . \$extis);

    } else if (strtolower(\$extis) == 'bmp') {

      return imagecreatefrombmp('/tmp/imtmp.' . \$extis);

    } else if (strtolower(\$extis) == 'gif') {

      return imagecreatefromgif('/tmp/imtmp.' . \$extis);

    } else if (strpos(strtolower(\$extis), 'jp') !== false) {

      return imagecreatefromjpeg('/tmp/imtmp.' . \$extis);

    }

  }

  return imagecreatefrompng(\$inidis);

}


function ourimagecreatefromgif(\$inidis) {

global \$imvgn, \$imafn, \$imqty;

  if ((\$imvgn . \$imafn . \$imqty) != '') {

    \$extis='gif';

    \$inextis=\$extis;

    \$sofarout='/tmp/imtmp.' . \$extis;

    foreach (glob('/tmp/imtmp.*') as \$imfilename) {

       unlink(\$imfilename);

    }

    file_put_contents(\$sofarout, \$inidis);

    \$fzis=filesize(\$sofarout);

    exec('" . $immogpath . "mogrify ' . \$imvgn . \$imafn . \$imqty . ' /tmp/imtmp.' . \$extis);

    foreach (glob('/tmp/imtmp.*') as \$imfilename) {

       if (filesize(\$imfilename) != \$fzis) {  // strpos(\$imfilename, '.' . \$extis) === false) {

         \$sofarout=\$imfilename;

         \$extis=explode('.', \$imfilename)[1];

       }

    }

    if (strtolower(\$extis) == 'png') {

      return imagecreatefrompng('/tmp/imtmp.' . \$extis);

    } else if (strtolower(\$extis) == 'bmp') {

      return imagecreatefrombmp('/tmp/imtmp.' . \$extis);

    } else if (strtolower(\$extis) == 'gif') {

      return imagecreatefromgif('/tmp/imtmp.' . \$extis);

    } else if (strpos(strtolower(\$extis), 'jp') !== false) {

      return imagecreatefromjpeg('/tmp/imtmp.' . \$extis);

    }

  }

  return imagecreatefromgif(\$inidis);

}


function ourimagecreatefrombmp(\$inidis) {

global \$imvgn, \$imafn, \$imqty;

  if ((\$imvgn . \$imafn . \$imqty) != '') {

    \$extis='bmp';

    \$inextis=\$extis;

    \$sofarout='/tmp/imtmp.' . \$extis;

    foreach (glob('/tmp/imtmp.*') as \$imfilename) {

       unlink(\$imfilename);

    }

    file_put_contents(\$sofarout, \$inidis);

    \$fzis=filesize(\$sofarout);

    exec('" . $immogpath . "mogrify ' . \$imvgn . \$imafn . \$imqty . ' /tmp/imtmp.' . \$extis);

    foreach (glob('/tmp/imtmp.*') as \$imfilename) {

       if (filesize(\$imfilename) != \$fzis) {  // strpos(\$imfilename, '.' . \$extis) === false) {

         \$sofarout=\$imfilename;

         \$extis=explode('.', \$imfilename)[1];

       }

    }

    if (strtolower(\$extis) == 'png') {

      return imagecreatefrompng('/tmp/imtmp.' . \$extis);

    } else if (strtolower(\$extis) == 'bmp') {

      return imagecreatefrombmp('/tmp/imtmp.' . \$extis);

    } else if (strtolower(\$extis) == 'gif') {

      return imagecreatefromgif('/tmp/imtmp.' . \$extis);

    } else if (strpos(strtolower(\$extis), 'jp') !== false) {

      return imagecreatefromjpeg('/tmp/imtmp.' . \$extis);

    }

  }

  return imagecreatefrombmp(\$inidis);

}
“; ?>
… and change existant calls into (equivalent inhouse) “our” function calls as above.
Previous relevant ImageMagick Vignette Primer Tutorial is shown below.
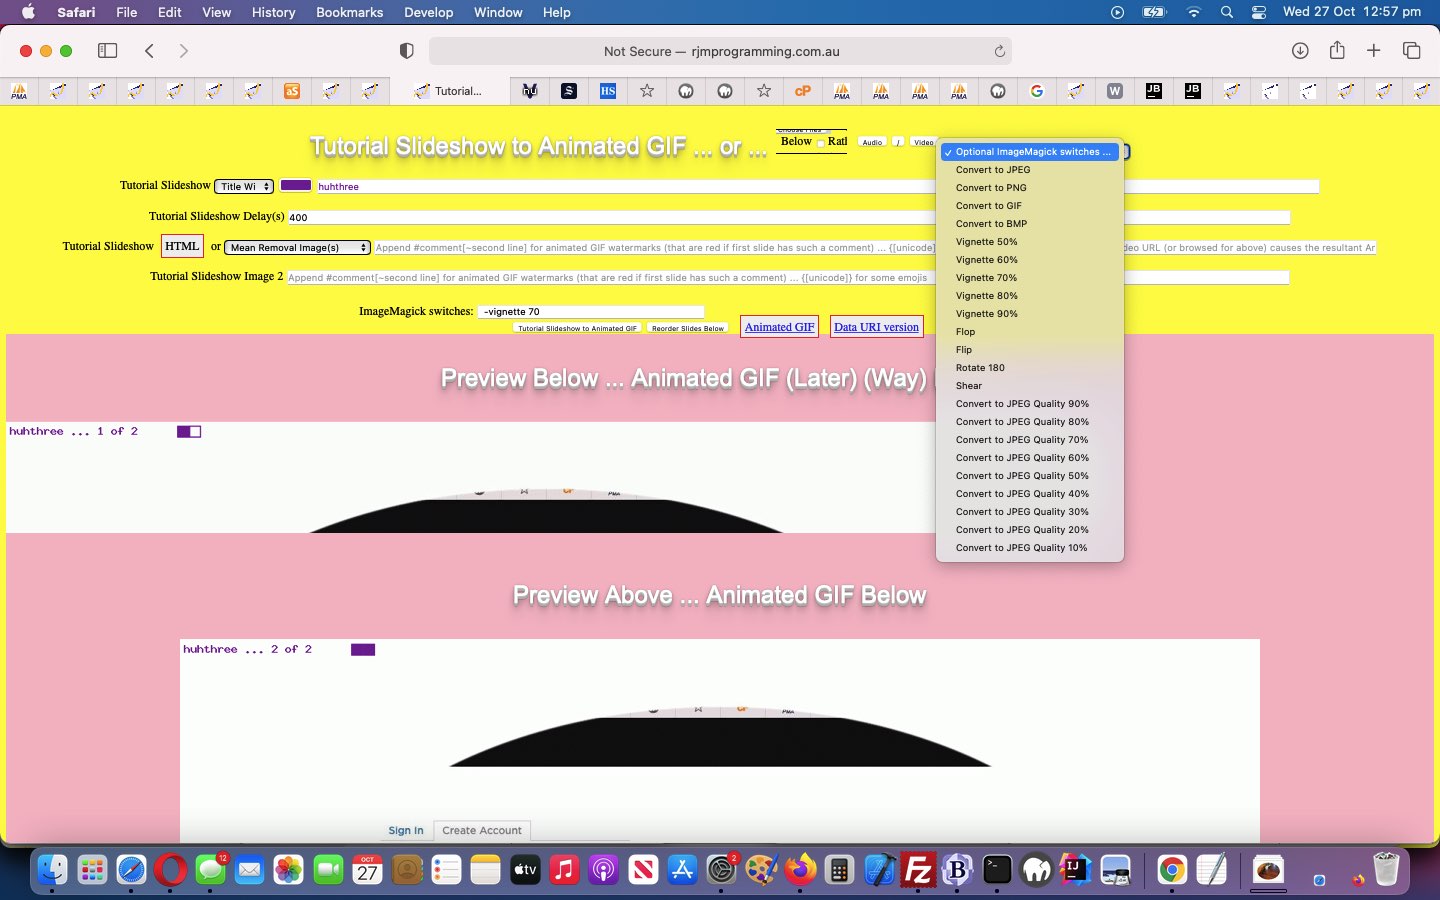
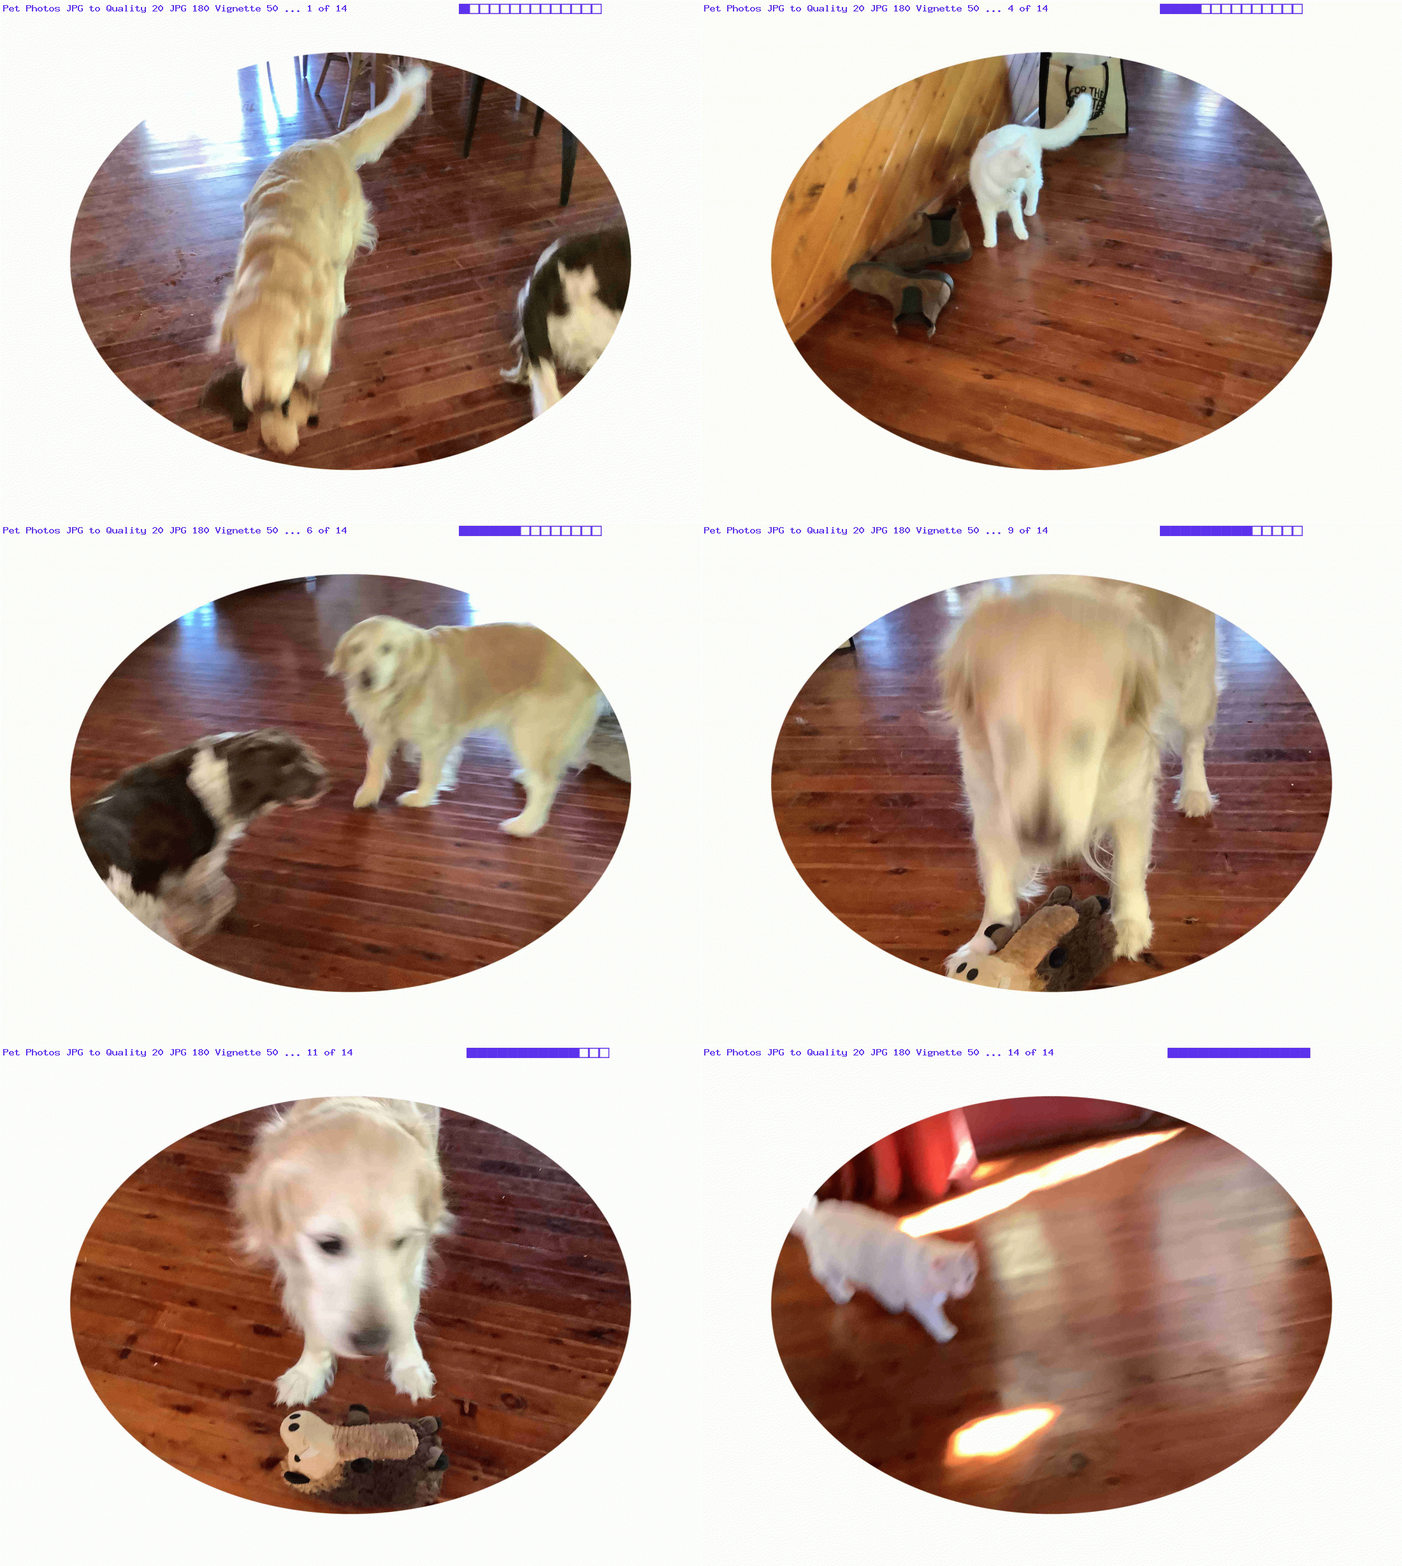
Continuing on with the ImageMagick batch processing “mogrify” ideas of yesterday’s ImageMagick Batch Image Conversion Affine Transformation Tutorial and the “vignette” image editing ideas of Gimp Vignette Primer Tutorial, as below, today, we took some pet photos with an iPad’s Camera app and shared them off the Photos app via two Mail sharing option emails containing seven attachments each. Using an iPad, the JPEG “jpg” output files were too big for our inhouse Animated GIF Creator PHP web application to handle, and so to perform the …
- animated GIF presentation, off these downloaded email photo attachments … and along the way …
- quality adjusted them (yes, “mogrify” does not stuff JPG to JPG conversions, and we used “mogrify” -quality 20% switch here) … and …
- rotate them 180 degrees (“mogrify” uses switches -affine -1,0,0,-1,0,0 -transform +repage here) … and …
- vignette 50% (“mogrify” uses switch -vignette 50 here)
… on the way to compiling into an animated GIF image, and we turned to ImageMagick again, using its affine transformation talents, along with its awesome vignetting talents …
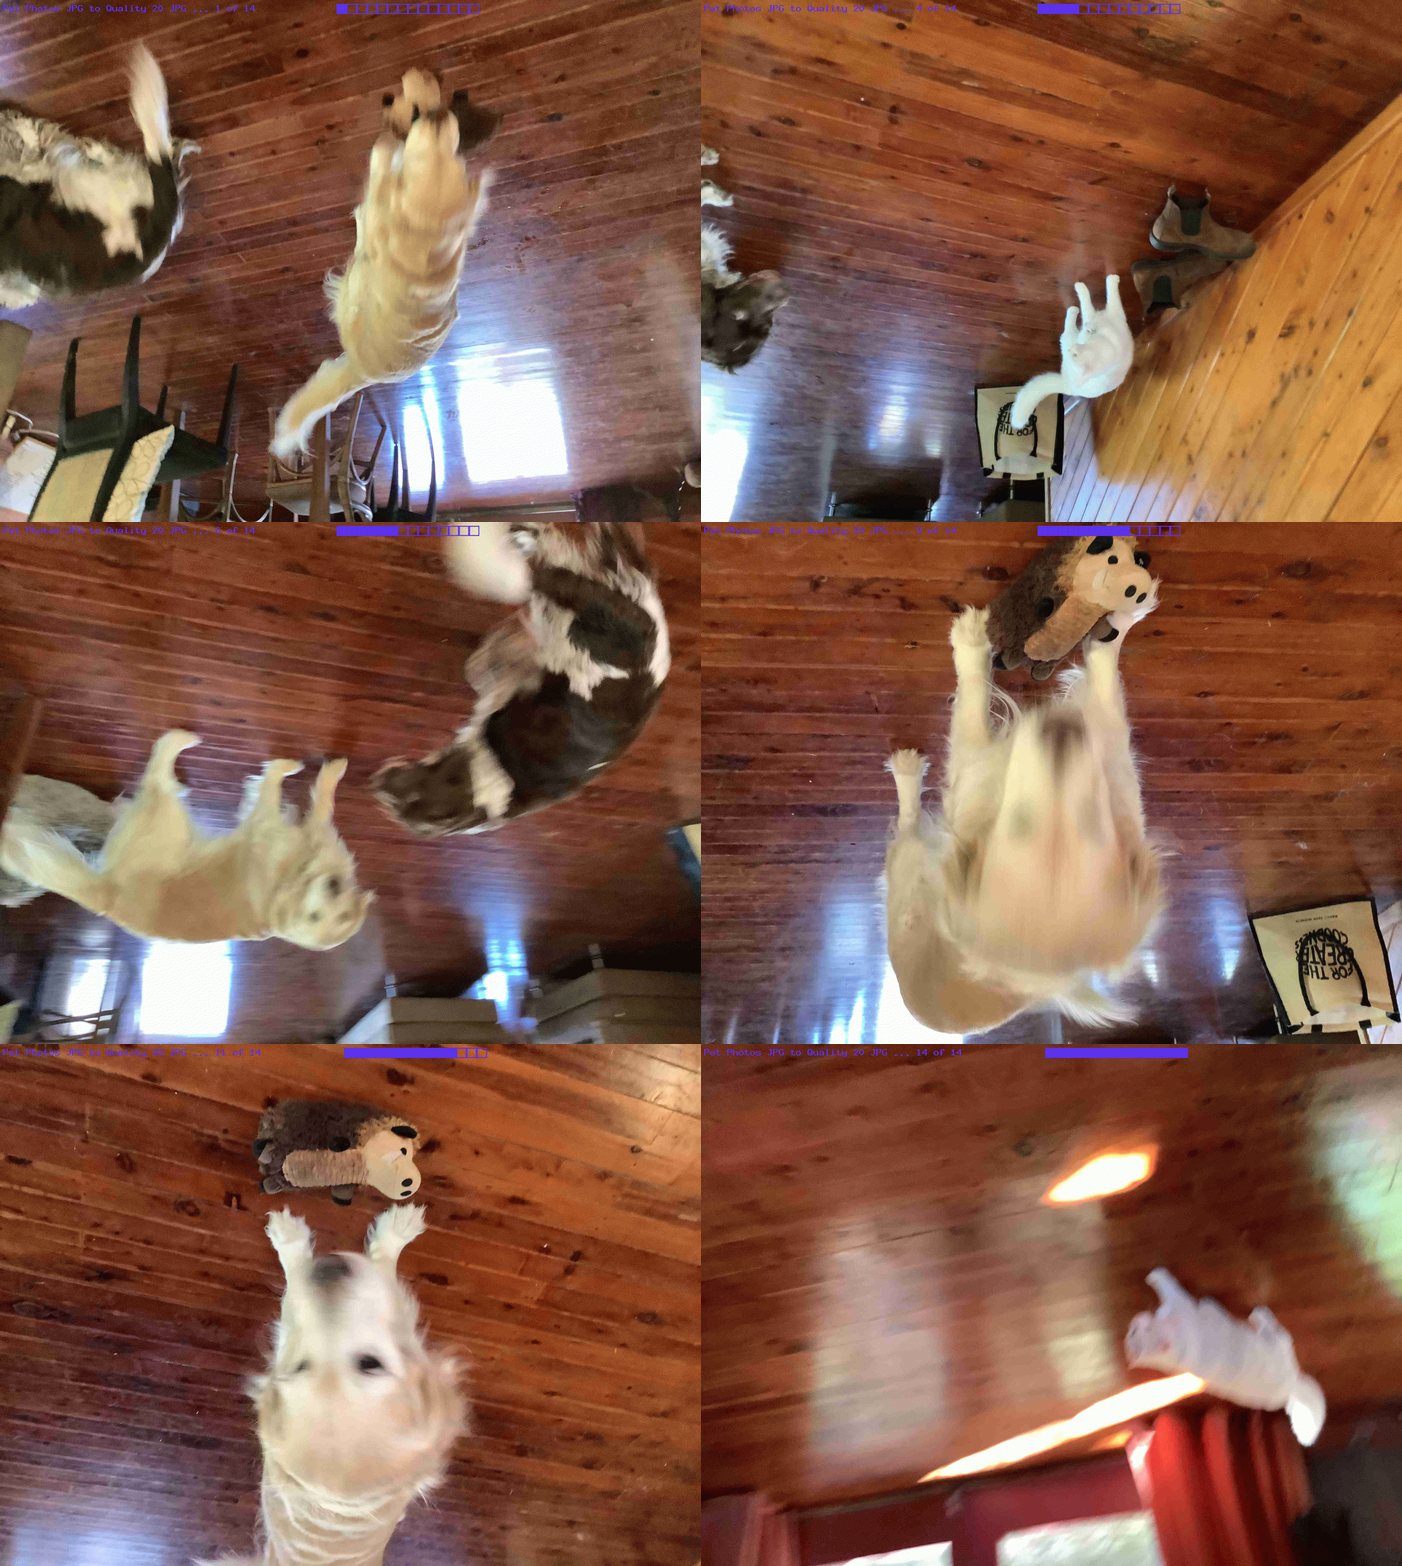
… where the last two dropdown options will be similar, the last showing the input image into ImageMagick can be an animated GIF that is truely treated like an animated GIF.
By the way, should you be interested in photo orientation off a mobile device camera, have a read of PHP Exif Image Information Revisit Tutorial.
Nala and Luna and Charlie bid you a fond farewell!
Previous relevant Gimp Vignette Primer Tutorial is shown below.
The last time we talked about the miraculous, redolent and amazing image editor called Gimp am sure there was someone in a shower … it stands to reason … and one of those showerers, surely, would have been singing The Gimp Song … and if not … why not? … but we digress … anyway we had the Gimp Transparency Primer Tutorial as shown below go into some image transparency issues with Gimp.
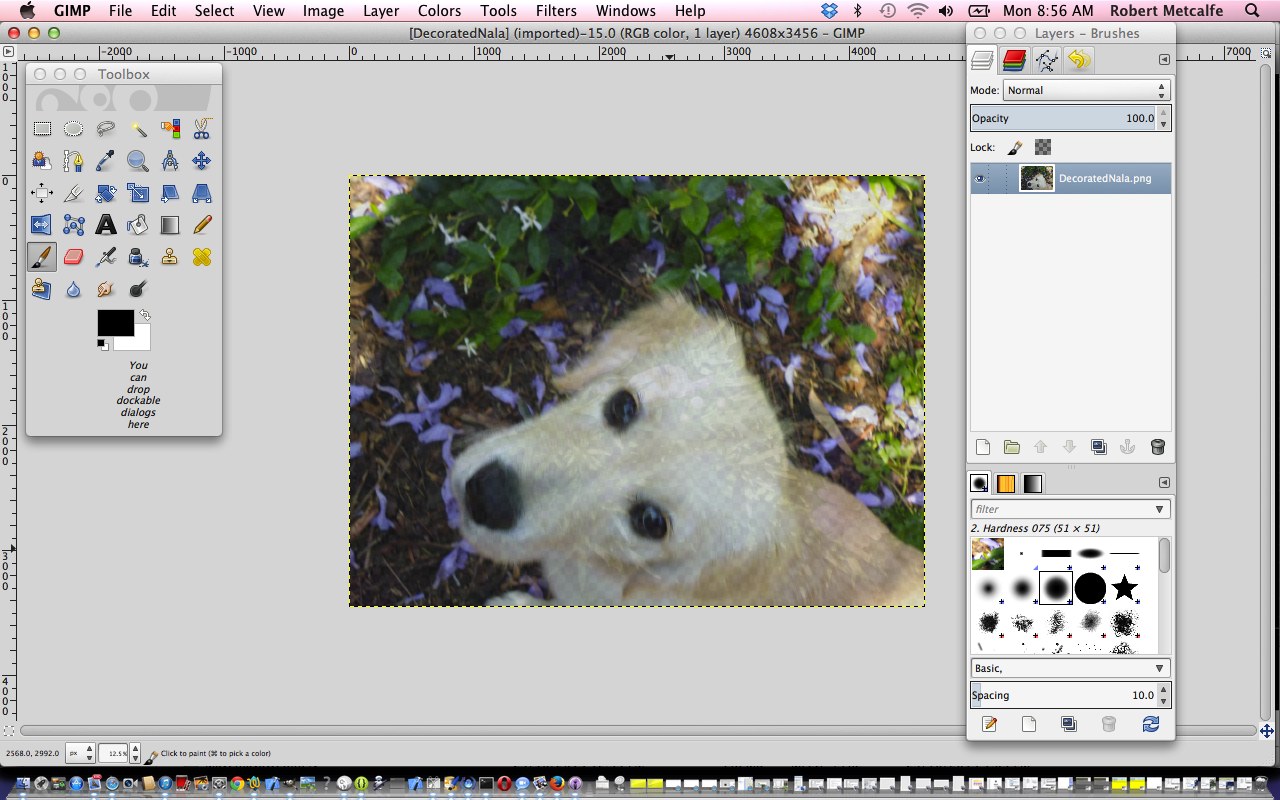
In today’s tutorial we make use of a great tutorial (even so far as with direct quotes below) called Add a Vignette to a Photograph with GIMP (thanks) to try a photographic technique called vignetting on one of the photographs we added, recently, into the mix of those of the Custom Header Image mix at this blog … specifically the one of Nala, the dog, on the door ledge. Need to warn you here and now that if there was the time all over again, it would be better achieved that second time around, but this is not the point with learning, but rather getting some starting point with a great “product” like Gimp, and trying it yourself, once you have a method. It boils down to:
- Open Gimp graphical editor application
- File->Open … pick your image file
- Layer->New Layer (we’ll call “Vg”) … pick Foreground Colour
- In the Layers dialog, click on your “Vg” layer to select it, and select Soft light from the “Mode” drop-down box
- Right click on your “Vg” layer and go to Add Layer Mask. In the dialog that pops up, you want “Initialise Layer Mask to” set to “White (full opacity)”. Click “Add”
- Below Opacity bar select Link icon next to Eye icon, which will already be showing
- Use the freeform select tool (press F to bring this up) and draw a selection somewhere around the primary point of interest in your photo
- Use your bucket tool (Shift+B) and click within the selection to fill it
- Deselect your selection with Select->None
- Go to Filters->Blur->Gaussian Blur. In the dialog that comes up, you want “Radius” set to a very large amount; a tenth of the longest edge of the photo is not too much
- Click on your “Vg” layer to select it (if it isn’t already selected), and then slide the opacity slider towards the right until the effect is subtle enough. Our (ever so subtle) example of Nala, in the tutorial, used an opacity of about 66%
- Click Export button in two windows (NB. this overwrites the image file, so if this is not desirable, export to a different image file name and/or type)
Here is an image comparison link.
As with most Gimp ideas, jump in and give it a go, as you’ll find your own ways and means of using this great product … am pretty sure.
Link to Gimp “spiritual home” … here.
Link to Gimp forum … here.
Previous relevant Gimp Transparency Primer Tutorial is shown below.
Here is a tutorial that adds to a previous Gimp Layers Primer Tutorial as shown below, and gives you more insight into the massive possibilities of using a sophisticated image editor and use layers with various amounts of transparency, especially suited to use with png image files.
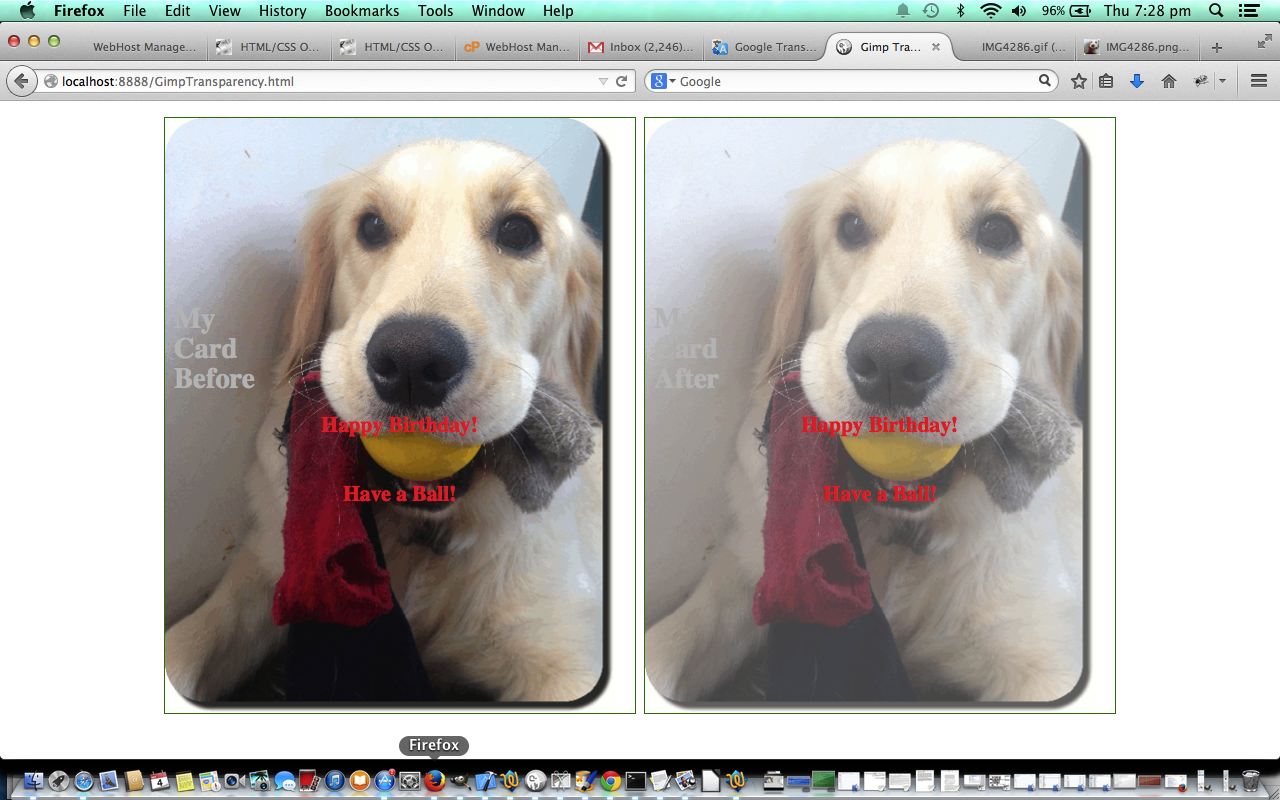
Today’s tutorial where we construct a Birthday Card that needs tweaking for the words in front to be seen a bit more clearly, by making the image behind a bit more transparent, changes the transparency of a single image via:
- Open Gimp graphical editor application
- File->Open Layers … pick your image file
- If Layers window not showing, make it show via Windows->Layers – Brushes
- Below Opacity bar select Link icon next to Eye icon, which will already be showing
- Change Opacity bar setting to a value of Transparency (100% is Opaque, 0% is Transparent) that suits … today we do 70%
- File->Export
- Click Export button in two windows (NB. this overwrites the image file, so if this is not desirable, export to a different image file name and/or type)
As with most Gimp ideas, jump in and give it a go, as you’ll find your own ways and means of using this great product … am pretty sure.
Link to Gimp “spiritual home” … here.
Link to Gimp forum … here.
Previous relevant Gimp Layers Primer Tutorial is shown below.
Here is a tutorial that gives you an insight into the massive possibilities of using a sophisticated image editor and use layers with various amounts of transparency, especially suited to use with png image files.
Transparency (or its obverse, opacity) can be used to have the one image achieve several “ends” (ie. purposes). Although it is a bit of a clumsy example in the tutorial, you can see that the technique can be used for artistic purposes … often called “Photoshopping” (named after the more famous, and also brilliant, rival product, Photoshop).
Lots of those classic “Photoshopping” techniques can be achieved in Gimp, and some other tutorials at this blog touch on that.
Am sure you can imagine what the concept of a layer is with regard to image manipulation. Within Gimp, for beginners not used to this concept, you find yourself underestimating and underplaying what can be achieved with the various layers of a multi-layered image. In simplistic terms each layer has the functionality in Gimp to be treated as a whole new image, and this is the best way to think of it when trying to achieve what you want to achieve with Gimp.
Link to Gimp “spiritual home” … here.
Link to Gimp forum … here.
If this was interesting you may be interested in this too.
If this was interesting you may be interested in this too.
If this was interesting you may be interested in this too.
If this was interesting you may be interested in this too.
If this was interesting you may be interested in this too.
If this was interesting you may be interested in this too.
If this was interesting you may be interested in this too.
If this was interesting you may be interested in this too.
If this was interesting you may be interested in this too.
If this was interesting you may be interested in this too.
If this was interesting you may be interested in this too.
If this was interesting you may be interested in this too.
If this was interesting you may be interested in this too.
If this was interesting you may be interested in this too.
If this was interesting you may be interested in this too.
If this was interesting you may be interested in this too.
If this was interesting you may be interested in this too.
If this was interesting you may be interested in this too.
If this was interesting you may be interested in this too.
If this was interesting you may be interested in this too.
If this was interesting you may be interested in this too.


