When we presented PDF via Slide Images and Back Again via ImageMagick Primer Tutorial we referenced …
- the great ImageMagick suite of software capable of extracting PDF pages as an image … as distinct from our curiosity today …
- we discovered, thanks, that the great Pdfimages suite of software can extract the images contained within a PDF
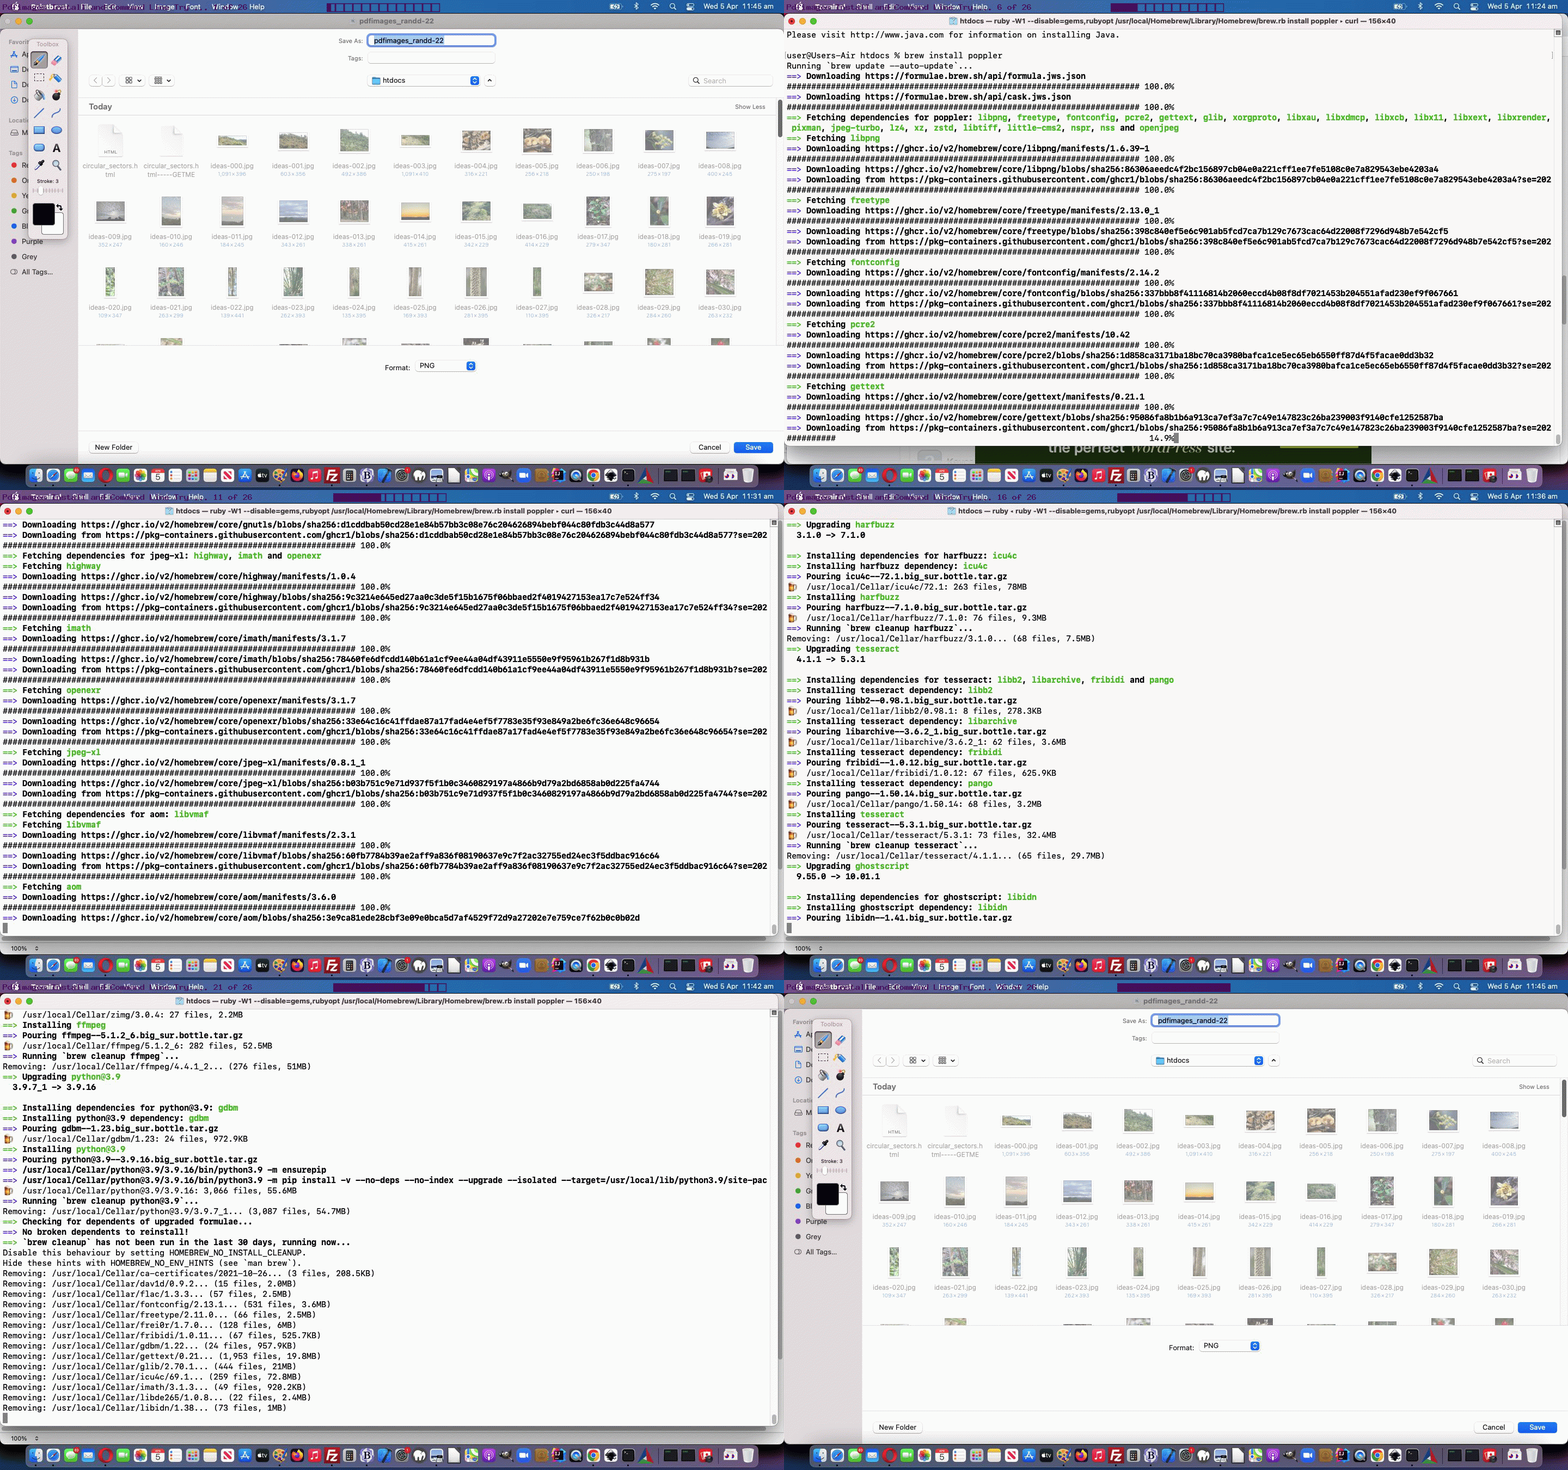
And so, today, we show with today’s animated GIF presentation …
- installing Pdfimages on macOS via …
brew install poppler
- using a macOS command line (via Terminal application) issued command …
pdfimages -j "September 22 record.pdf" ideas -png
… to extract the 242 images (curiously, as jpeg images) contained within our input PDF.
Interesting, huh?
Previous relevant PDF via Slide Images and Back Again via ImageMagick Primer Tutorial is shown below.
Does today’s blog posting title sound familiar to you? If so, I’m impressed. If not, get the whole picture, in context (we hope), today of …
- today’s “PDF via Slide Images and Back Again via ImageMagick Primer Tutorial” … gets its cues from a …
- previous “Video via Slide Images and Back Again via ffmpeg Primer Tutorial” … so that …
- PDF is the output file format as distinct from a Video Format such as *.mov or *.mp4
- ImageMagick is the conduit to that work as distinct from ffmpeg
… and that what is a common denominator here to be able to convert between Video and PDF and vice versa, is a set of image slides (or frames) of the animation concerned, today’s being, again, that Ant Video we took on our iPhone (that became the “Star Ant Video”), and that today takes as its starting point …
- image slides (or frames) from Video via Slide Images and Back Again via ffmpeg Primer Tutorial our MacBook Pro (via an email attachment download) … a listing of which looks like …
$ ls -l image-000*.jpeg

-rw-r--r--  1 user  admin  170993 26 Jul 11:20 image-0001.jpeg

-rw-r--r--  1 user  admin  205565 26 Jul 11:20 image-0002.jpeg

-rw-r--r--  1 user  admin  218950 26 Jul 11:20 image-0003.jpeg

-rw-r--r--  1 user  admin  164271 26 Jul 11:20 image-0004.jpeg

-rw-r--r--  1 user  admin  171662 26 Jul 11:20 image-0005.jpeg

-rw-r--r--  1 user  admin  155528 26 Jul 11:20 image-0006.jpeg

-rw-r--r--  1 user  admin   53193 26 Jul 11:20 image-0007.jpeg
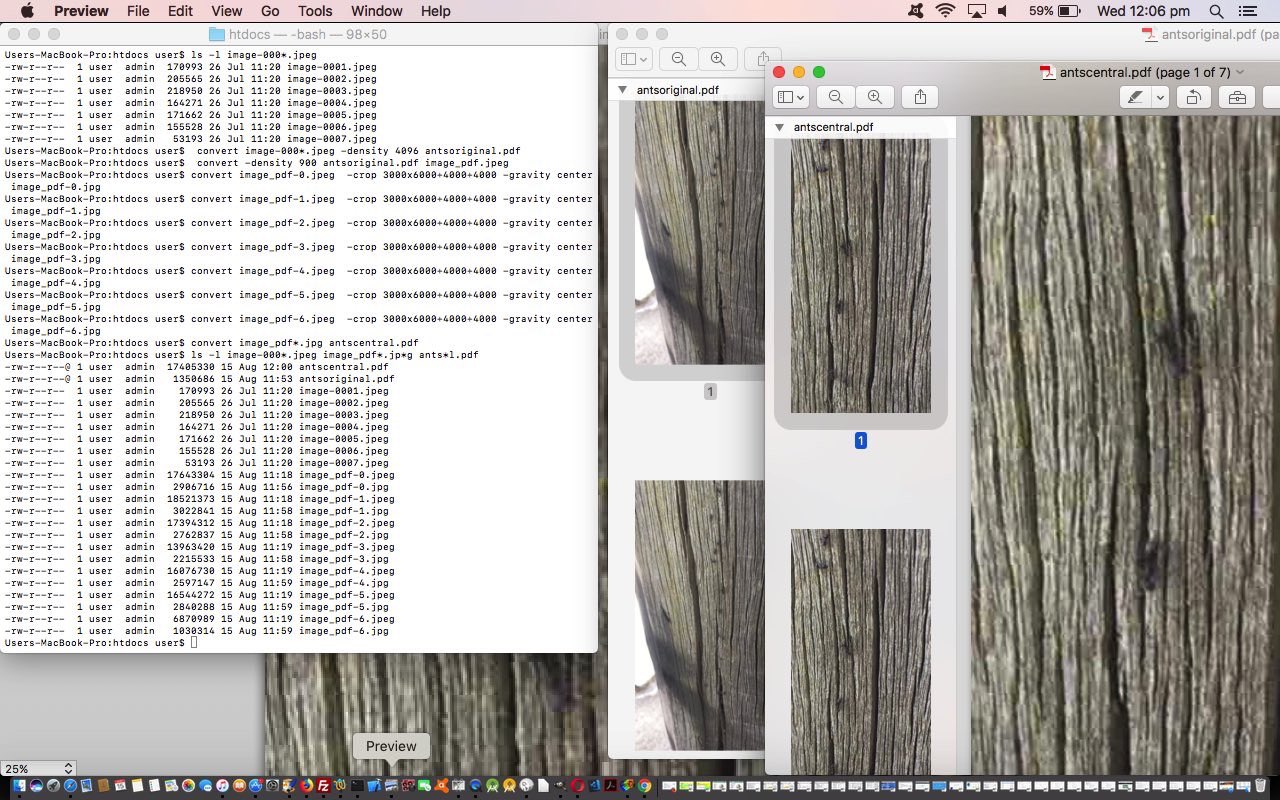
- gets converted to an original (input) PDF (antsoriginal.pdf) (with slideshow capabilities via applications like Mac OS X’s Preview or Adobe Acrobat Reader) via Mac OS X Terminal application command line’s ImageMagick executable convert command …
convert image-000*.jpeg -density 4096 antsoriginal.pdf
… and then we act as though this PDF was our original source of data and decide to … - break that PDF into its constituent image slides (or frames) via …
convert -density 900 antsoriginal.pdf image_pdf.jpeg
… and then use ImageMagick convert commands again to … - crop those image slides via Mac OS X Terminal application command line’s ImageMagick executable convert commands (thanks to this great advice) …
$ convert image_pdf-0.jpeg  -crop 3000x6000+4000+4000 -gravity center image_pdf-0.jpg

$ convert image_pdf-1.jpeg  -crop 3000x6000+4000+4000 -gravity center image_pdf-1.jpg

$ convert image_pdf-2.jpeg  -crop 3000x6000+4000+4000 -gravity center image_pdf-2.jpg

$ convert image_pdf-3.jpeg  -crop 3000x6000+4000+4000 -gravity center image_pdf-3.jpg

$ convert image_pdf-4.jpeg  -crop 3000x6000+4000+4000 -gravity center image_pdf-4.jpg

$ convert image_pdf-5.jpeg  -crop 3000x6000+4000+4000 -gravity center image_pdf-5.jpg

$ convert image_pdf-6.jpeg  -crop 3000x6000+4000+4000 -gravity center image_pdf-6.jpg
… into new PDF slide images (or frames) that can be converted to (output) PDF (antscentral.pdf) via ImageMagick executable convert command …
convert image_pdf*.jpg antscentral.pdf
… to see … - we end up with the (relevant) file listing …
$ ls -l image-000*.jpeg image_pdf*.jp*g ants*l.pdf

-rw-r--r--@ 1 user  admin  17405330 15 Aug 12:00 antscentral.pdf

-rw-r--r--@ 1 user  admin   1350686 15 Aug 11:53 antsoriginal.pdf

-rw-r--r--  1 user  admin    170993 26 Jul 11:20 image-0001.jpeg

-rw-r--r--  1 user  admin    205565 26 Jul 11:20 image-0002.jpeg

-rw-r--r--  1 user  admin    218950 26 Jul 11:20 image-0003.jpeg

-rw-r--r--  1 user  admin    164271 26 Jul 11:20 image-0004.jpeg

-rw-r--r--  1 user  admin    171662 26 Jul 11:20 image-0005.jpeg

-rw-r--r--  1 user  admin    155528 26 Jul 11:20 image-0006.jpeg

-rw-r--r--  1 user  admin     53193 26 Jul 11:20 image-0007.jpeg

-rw-r--r--  1 user  admin  17643304 15 Aug 11:18 image_pdf-0.jpeg

-rw-r--r--  1 user  admin   2906716 15 Aug 11:56 image_pdf-0.jpg

-rw-r--r--  1 user  admin  18521373 15 Aug 11:18 image_pdf-1.jpeg

-rw-r--r--  1 user  admin   3022841 15 Aug 11:58 image_pdf-1.jpg

-rw-r--r--  1 user  admin  17394312 15 Aug 11:18 image_pdf-2.jpeg

-rw-r--r--  1 user  admin   2762837 15 Aug 11:58 image_pdf-2.jpg

-rw-r--r--  1 user  admin  13963420 15 Aug 11:19 image_pdf-3.jpeg

-rw-r--r--  1 user  admin   2215533 15 Aug 11:58 image_pdf-3.jpg

-rw-r--r--  1 user  admin  16076730 15 Aug 11:19 image_pdf-4.jpeg

-rw-r--r--  1 user  admin   2597147 15 Aug 11:59 image_pdf-4.jpg

-rw-r--r--  1 user  admin  16544272 15 Aug 11:19 image_pdf-5.jpeg

-rw-r--r--  1 user  admin   2840288 15 Aug 11:59 image_pdf-5.jpg

-rw-r--r--  1 user  admin   6870989 15 Aug 11:19 image_pdf-6.jpeg

-rw-r--r--  1 user  admin   1030314 15 Aug 11:59 image_pdf-6.jpg
- install ImageMagick via that previous link’s relevant download link … then at Terminal application command line …
sudo -k ln -s /opt/ImageMagick/bin/convert /usr/bin/convert
- install GhostScript via that previous link’s relevant download link … then at Terminal application command line …
sudo -k ln -s /opt/Ghostscript/bin/gs /usr/local/bin/gs
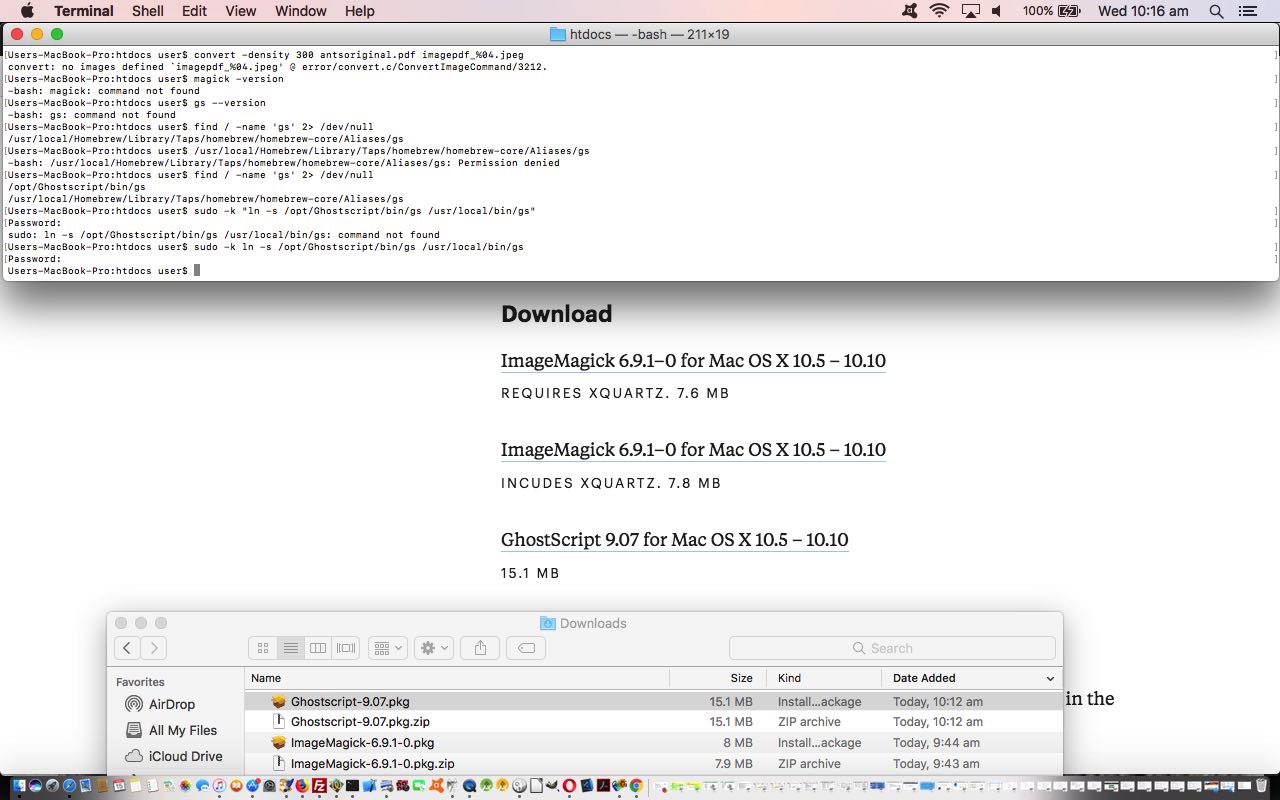
- install XQuartz via via XQuartz download page, thanks
- the queen ant (often just one per ant colony) is not a leader as such in thinking out strategies … believe it or not …
- it is believed ant colony strategies are worked by what we might call “groupthink”
- ants march in line often and the scent that the ants leave behind is pheromone, that non-leader ants follow off that left behind by the “leader ant” … ie. “leader” of position, rather than “leader” of hierarchy
- break the video into its component parts … just like animations like “Bugs Bunny” … a series of (slide, or frame) images
- edit those (slide) images to add the (we’ve decided should be) red ringing of our “Star Ant” … who we’ve decided you, the user can call whatever you so desire … aaaaaaarrrrrrr
- reconstitute a new video from some new (slide) image components
- animated GIF
- slideshow
- video
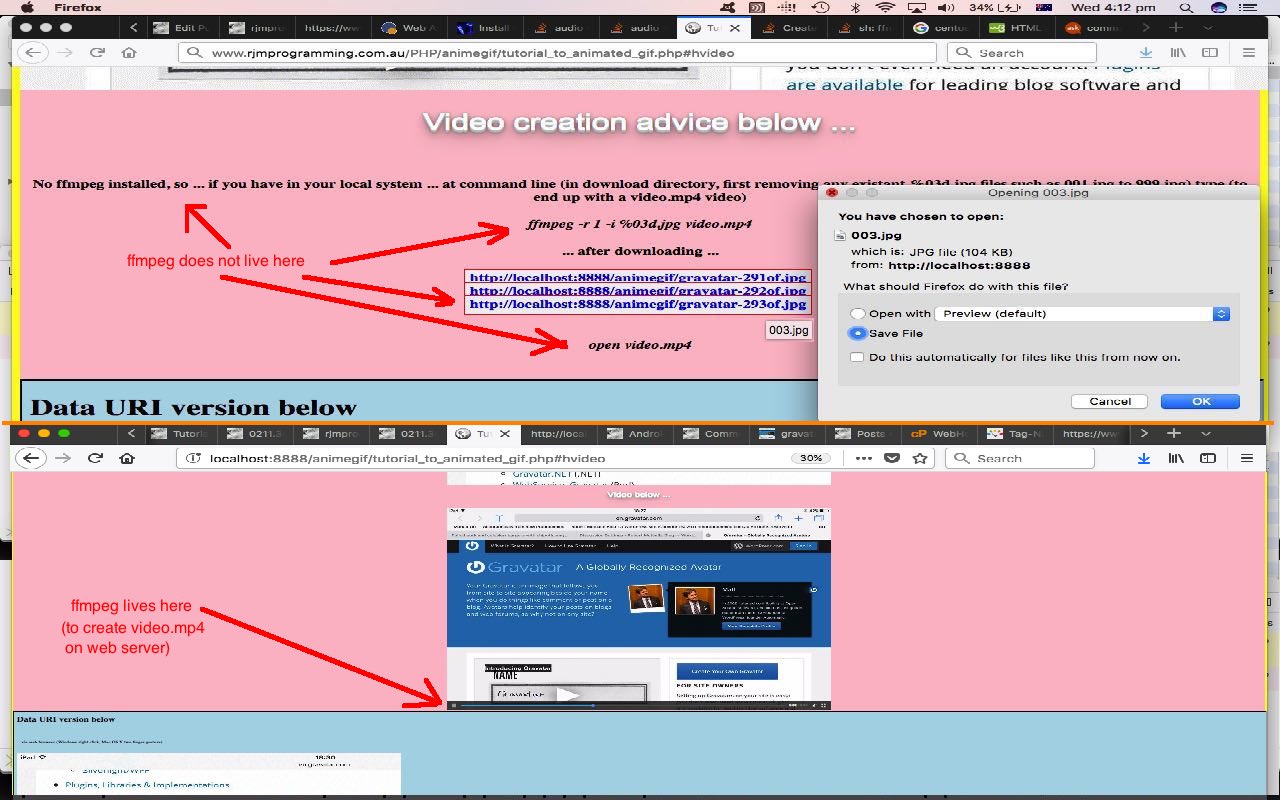
- create the video data there and then via “FFmpeg” and PHP’s exec method … or …
- provide instructions to be able to create the video back at your client computer (that has “FFmpeg” perhaps) … to suit the …
ffmpeg -r 1 -i %03d.jpg video.mp4
… to create a video called video.mp4 with 1 second delays between (input) slides named 001.jpg then 002.jpg then 003.jpg etcetera … thanks useful webpage for the help … that in the command line can sometimes be played via …
open video.mp4
… or used in some HTML as per …
<video controls id=ivideo type='video/mp4'><source src='video.mp4'></source></video>
… that we show you, below, the Mac OS X local MAMP (Apache/PHP/MySql) web server running of today’s PHP to create …
- slideshow creation (using our inhouse methods) which defaults to a horizontal (hashtag type of) navigation … as well as adding a …
- slideshow creation, with Data URI image data, using functionality as if CSS z-index (ie. slides stacked on top of each other in “overlay” style) was being used, but actually isn’t …
- future mobile development web form navigation benefits from their usage
- the use of data URIs make your web pages independent of web server location issues, so make your web data more portable, and flexible
- normal run with HTML form which posts back to itself … live run
- example GET parameters run (like our tutorial picture)
Just as we decided to reinstall ffmpeg due to that disk crash, we decided to reinstall ImageMagick to this MacBook Pro here, and found, thanks to great advice, we found that we needed to …
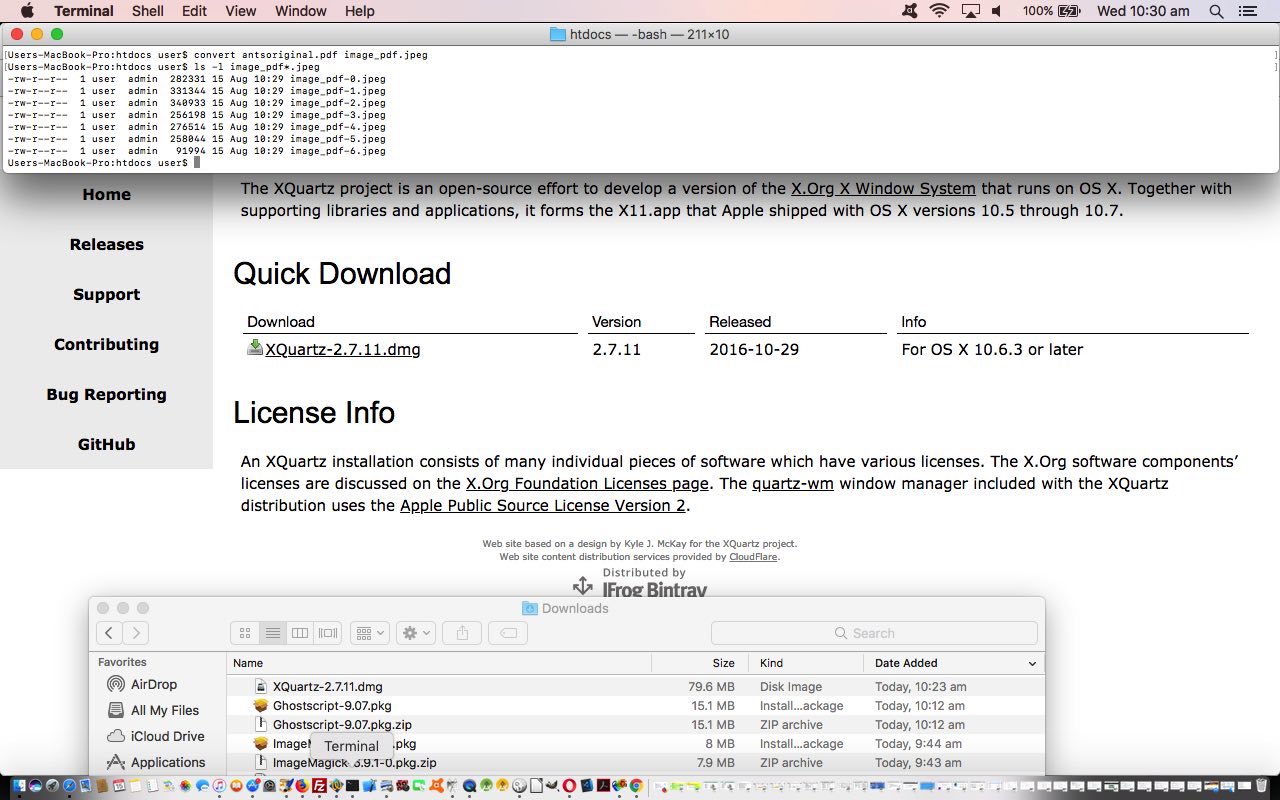
All animations, different forms (or formats), all presentation facilitators, is the message here today.
Previous relevant Video via Slide Images and Back Again via ffmpeg Primer Tutorial is shown below.
Reading yesterday’s LibreOffice Spreadsheet via dBase Primer Tutorial you can’t say I didn’t warn you about my interest in ants (and bees)? Glad you asked?
Did you know?
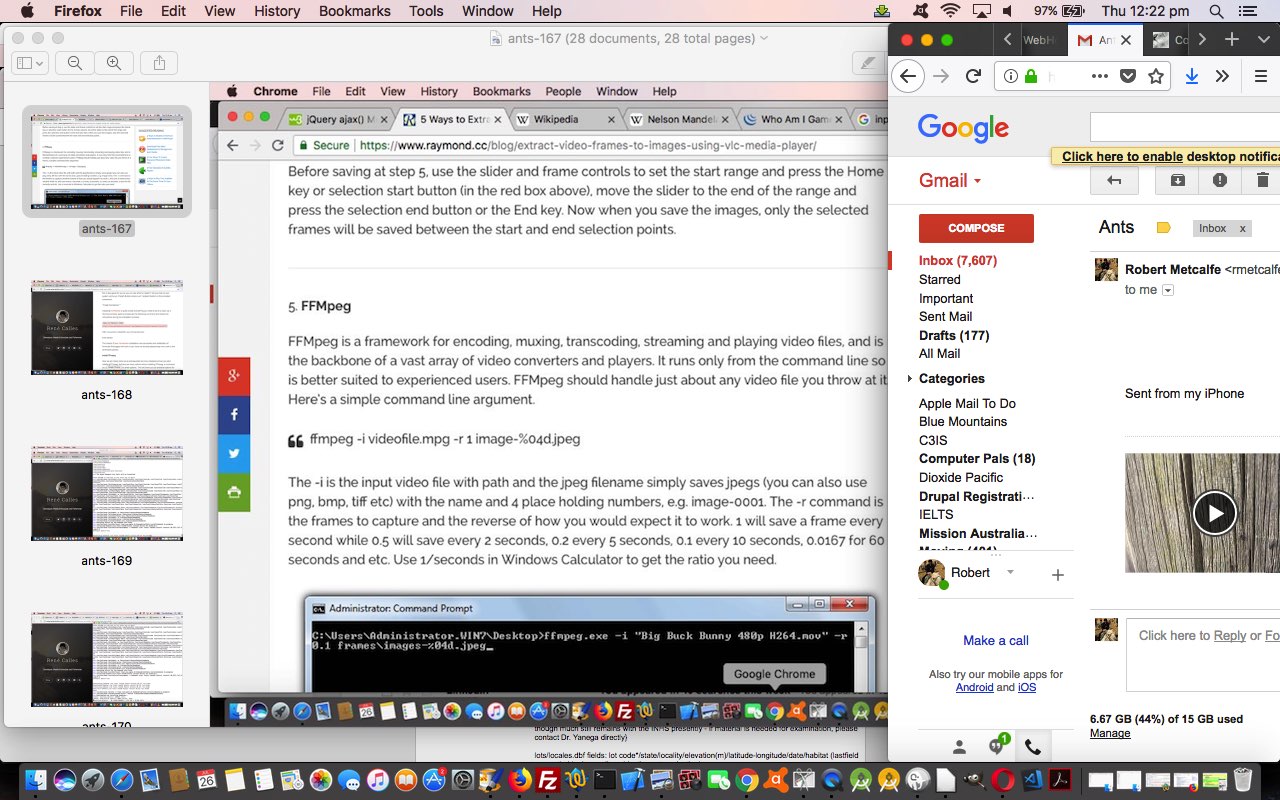
So seeing some ants walking in line up a power pole, used an iPhone to capture a very short video (short enough to use the iPhone’s Photo app’s Share via Mail (attachment) method of emailing to the MacBook Pro, and then (Gmail website) downloading) of this, and later, buck the “ant” trend, and “anthropomorphise” a “star ant”, by honing in on an ant in this video and ring it (and its movement) before creating another “Star Ant Video”.
There are video editing approaches you could use, but what got us interested was the thought of …
That’s where one of our favourite Mac Os X friendly media players, which is also a command line “player” (yayyyyyy!) comes to the fore, for us. It’s the wonderful ffmpeg which we’ve had for a long time now on this MacBook Pro until a disk crash mentioned some weeks back. Could get it back off restore, but decided to reconsitute …
… as a fairly straightforward exercise (given you have Xcode installed already) via a How to install FFmpeg on Mac OS X webpage by René Calles, thanks, heaps, we discovered the commands that worked well for us that go …
ruby -e "$(curl -fsSL https://raw.githubusercontent.com/Homebrew/install/master/install)"

brew install ffmpeg --with-fdk-aac --with-ffplay --with-freetype --with-frei0r --with-libass --with-libvo-aacenc --with-libvorbis --with-libvpx --with-opencore-amr --with-openjpeg --with-opus --with-rtmpdump --with-schroedinger --with-speex --with-theora --with-tools
… to (re)install ffmpeg so that, then …
ffmpeg -i IMG_0738.MOV -r 1 image-%04d.jpeg
… could create those original 7 (slide) images, though the use of a value bigger than 1 frames per second for the “-r” switch could be on the cards for your usages.
How to edit those images? We just used the Mac OS X version of PaintBrush and lined a lot of these images side by side across the screen to try to track our “Star Ant” and award it the “Red Ellipse PaintBrush Order of Merit” (for individualism … tee hee).
Reconstituting the new slides into a new video we remember was another talent of ffmpeg and found this useful webpage, thanks, on the topic of taking raw (slide) images to create a video via ffmpeg. Actually, though, we also had our previous very useful Animated GIF and Video via PHP Writing PHP Data URI Tutorial (presented below) to turn to to end up with the Mac OS X (Terminal session command line command …
ffmpeg -r 1 -i image-%04d.jpg ants.mp4
There are no worries with video file “workings” to do with uppercase and lowercase and names, so we …
cp IMG_0738.MOV ants.mov
… just for some consistency purposes (and could use “mv” to rename instead) so that we can show you …
| Before … | After … “Star Ant Video” |
|---|---|
See a lot of all these goings on at today’s PDF slideshow.
Previous relevant Animated GIF and Video via PHP Writing PHP Data URI Tutorial is shown below.
There is a great open source command line application called “FFmpeg” that can create video (or convert video) from image slides (for instance), and so, if we merge functionality for this into yesterday’s Animated GIF and Slideshow via PHP Writing PHP Data URI Tutorial some “presentation” styles that our web application can process are now …
As useful as “FFmpeg” is, it is not necessarily a default application existing on web server operating systems like our rjmprogramming.com.au’s CentOS server. But we do have it on our Mac OS X (MacBook Pro) operating system’s command line, so we write our PHP determining whether to …
If you are a regular at this blog and “FFmpeg” sounds a bit familiar to you, that’s probably because you’ve read FFmpeg Image Optimization Primer Tutorial on an earlier occasion … by candlelight … with the lights dimmed?!
See this in the context of how this PHP tutorial_to_animated_gif.php code changed for videos in this way or try it as a live run.
Previous relevant Animated GIF and Slideshow via PHP Writing PHP Data URI Tutorial is shown below.
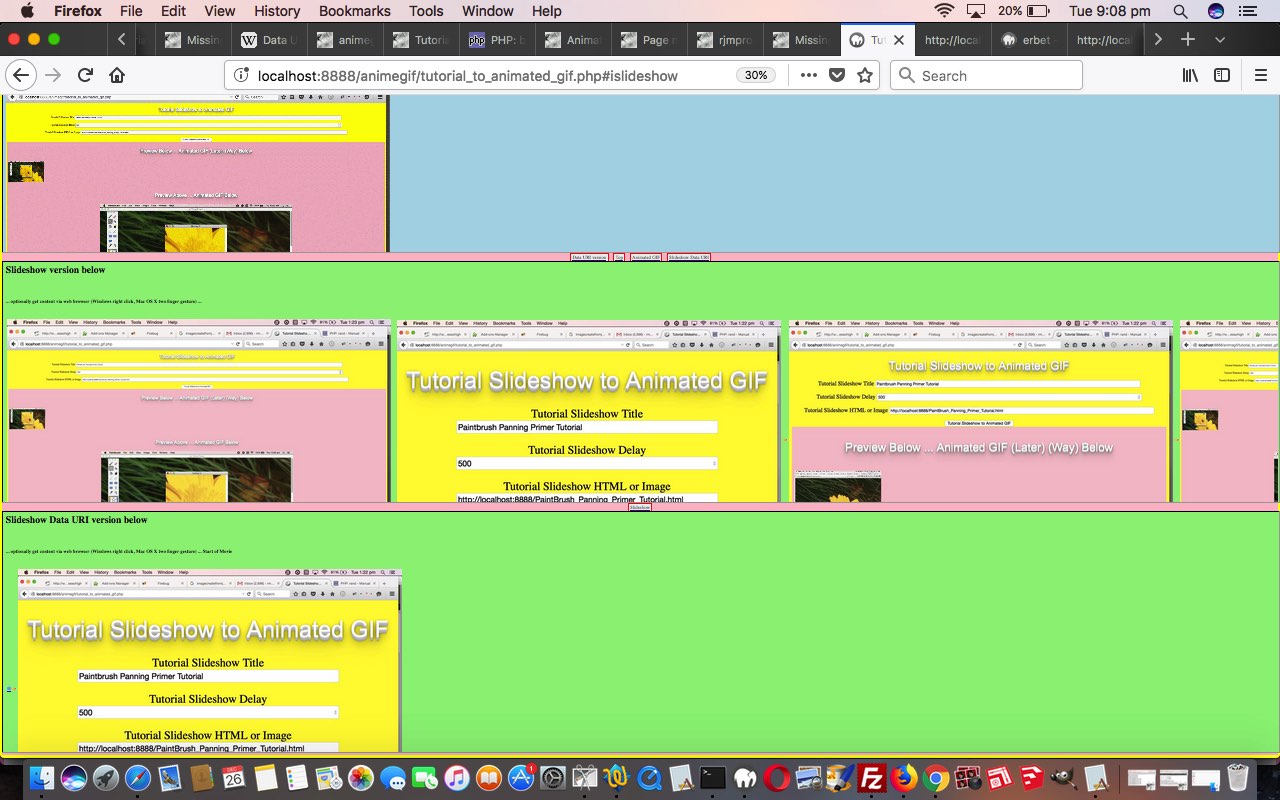
To us, there are great similarities between animated GIFs and slideshows, as two forms of “presentation”, and so to extend yesterday’s Animated GIF via PHP Writing PHP Data URI Tutorial animated GIF creator “PHP Writes PHP” web application that now has the option for data URI “exports” we add the functionality for …
… that little bit different to another “stacked” (or z-index feeling) approach we talked about with Multiple Class Slideshow Details Tutorial, where HTML element “class” properties were changed so that the last class defined reflects the look of the slideshow slide desired at any given time. We just use an array, and a setTimeout timer to achieve the same ends today, with our work (or “presentation”). If this “horizontal versus stack” navigation choice interests you, also take a read of HTML Input Element Types Randomized History Tutorial.
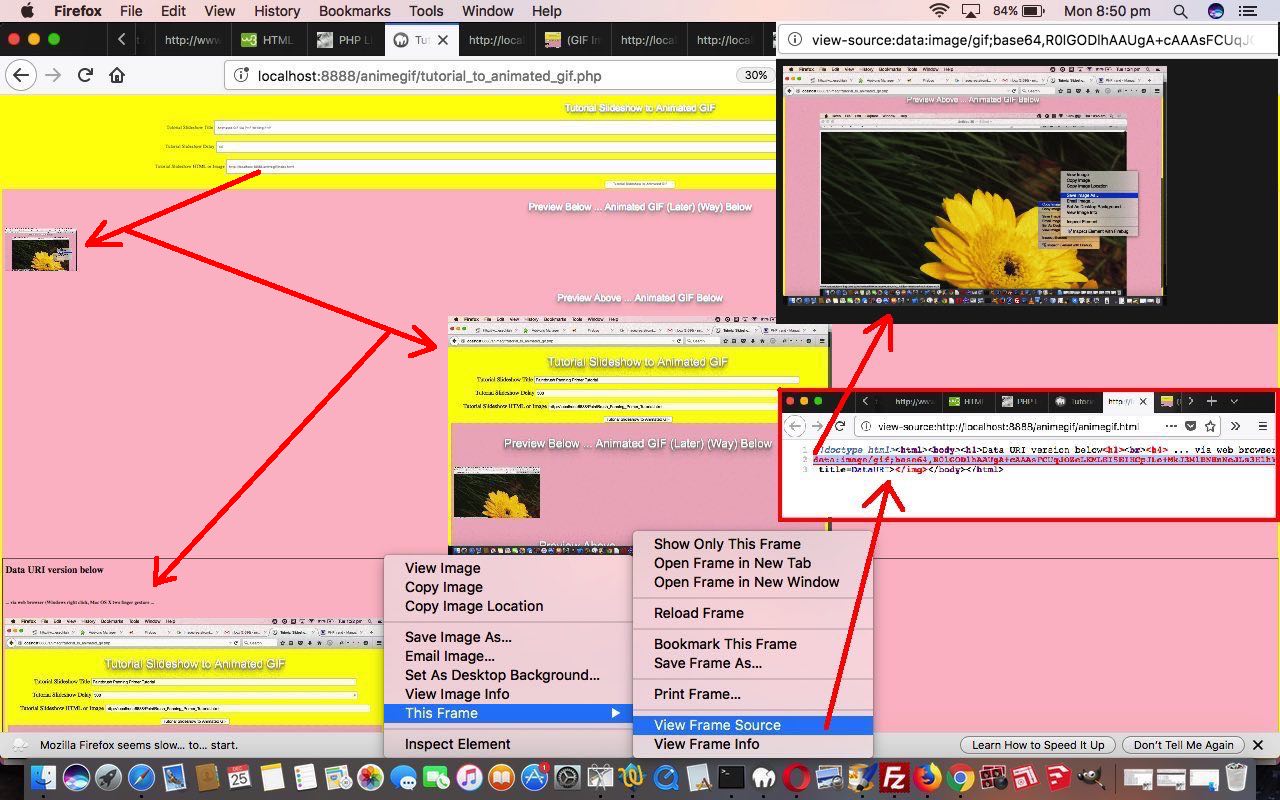
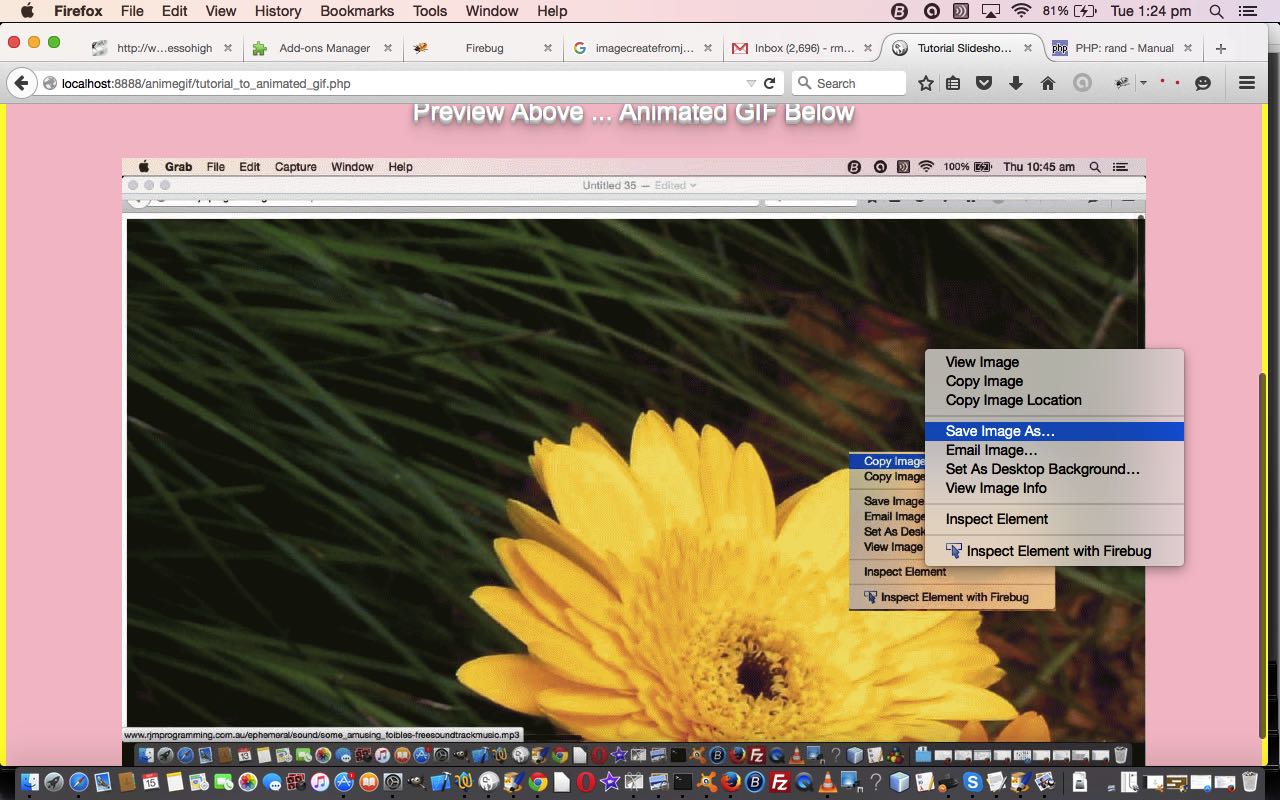
Again, with all this added functionality, because it is “hosted” in an HTML iframe element all the existant web browser (Windows right click or Mac OS X two finger gesture) functionality can come into play, and make life quite interesting for your non-mobile users “collecting” data URIs … there are worse hobbies!
You can see this in the context of how this PHP tutorial_to_animated_gif.php code changed for slideshows in this way or try it as a live run.
Previous relevant Animated GIF via PHP Writing PHP Data URI Tutorial is shown below.
The previous relevant “PHP writes PHP” methodology animated GIF creator we talked about, first, with Animated GIF via PHP Writing PHP Primer Tutorial came back to mind yesterday with our Missing Javascript Audio on Unmute Tutorial, where we pondered on whether an animated GIF could be represented on a webpage by a data URI. Why take an interest in this? Data URIs are very important to do with …
… and ideally, animated GIFs are also not just a decorative part of all this web application usage (as they can be a very efficient representation of an animation that could not be a more succinct way to show that animation or presentation), and if they can be made to be like any other GIF or image data file in the ways they can be represented (and used), then that is all for the good.
So we changed the Jeroen van Wissen’s inspired PHP (“PHP writes PHP” methodology) code tutorial_to_animated_gif.php code allow for this extra animated GIF data URI representation in a new additional HTML iframe (containing the animegif.html of code below) that when harnessing existant web browser (Windows right click or Mac OS X two finger gesture) functionality can glean for us, as required, that animated GIF’s data URI representation. But don’t get too excited about this being rocket science, in that with a bit of effort, and PHP, it could have been gleaned from what we already produced, in that (in PHP “land”) …
$lastbitto="\$fp = fopen('animegif.gif', 'w');

\$data = \$gif->GetAnimation();

\$dataUri = 'data:image/gif;base64,' . base64_encode(\$data);

fwrite(\$fp, \$data);

fclose(\$fp);

\$fp = fopen('animegif.html', 'w');

fwrite(\$fp, '<!doctype html><html><body><h1>Data URI version below<h1><br><h4> ... via web browser (Windows right click, Mac OS X two finger gesture ...</h4><br><img src=' . \"\\n\" . \$dataUri . \"\\n\" . ' title=DataURI></img></body></html>');

fclose(\$fp);";
You can see this in the context of how this PHP code changed in this way or try it as a live run.
Previous relevant Animated GIF via PHP Writing PHP Primer Tutorial is shown below.
We find another very useful reason for PHP to write PHP. Today we establish a PHP web application to dynamically create Animated GIF images via some still images, like Gifpal would do.
We have some great open source PHP code to thank for the basis of the functionality we found at Jeroen van Wissen’s very useful link, thanks.
Then we added a more user friendly interface to get the information off the user we need. We present this in an HTML form, which navigates to the same PHP to do the actual assembly of the Animated GIF via techniques where PHP writes PHP … and really needs to, to be useful.
Do you remember, last, when we did some PHP writing PHP functionality … PHP Writes PHP Vertical TextBoxes Primer Tutorial?
And inside the PHP it makes big use of the GD and Image Functions to read and write the image data we assemble via the user information.
This Animated GIF form of animation is the easiest to implement, as it consists of just the one GIF image file, but the user has very little control over the animation settings, such as the delay between stills, one of the settings we ask about in our web application.
Our PHP source code today you could call tutorial_to_animated_gif.php and we redirect you to some live run ideas …
Hope you find this tutorial useful.
If this was interesting you may be interested in this too.
If this was interesting you may be interested in this too.
If this was interesting you may be interested in this too.
If this was interesting you may be interested in this too.
If this was interesting you may be interested in this too.
If this was interesting you may be interested in this too.
If this was interesting you may be interested in this too.

