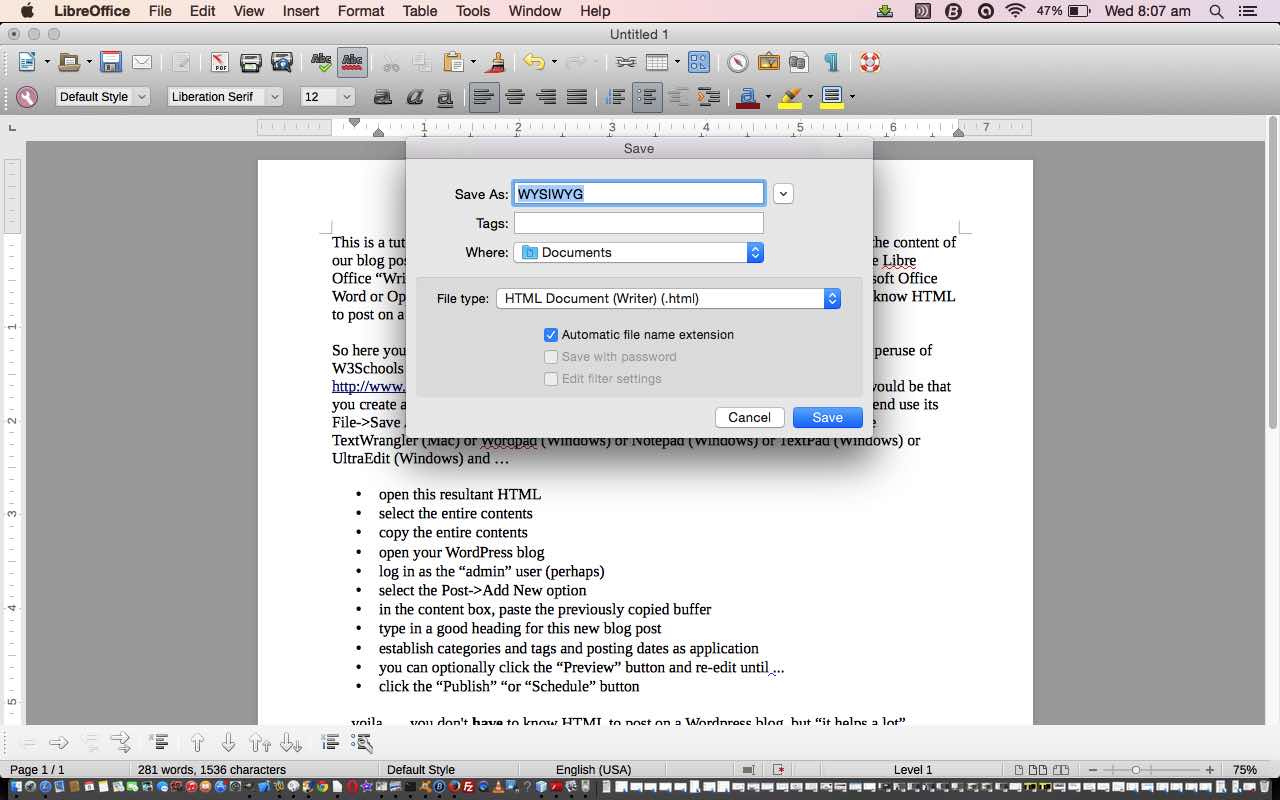
Often get asked if you can blog on WordPress with very little HTML knowledge, in a WYSIWYG (what you see is what you get) approach. The answer we give is … yes … but the results may disappoint without some other programming intelligence applied. The idea of a WYSIWYG approach to anything that involves a conversion to anything is tenuous enough, without all the font styling and whitespace issues involved. However, the discussion is important, as what people have to say, is much more important that what it looks like, in our opinion.
Have to say that, for us, hand crafted HTML is preferable once you get to that Post->Add New functionality as Julius Sumner Miller used to say … “observe” …
Take a look at the look of LibreOffice “Writer Document” Save As… HTML (+ get rid of some annoying <span …> … </span> elements … ie. WYSIWYG + translation to HTML) …
This is a tutorial
about WYSIWYG in the sense that today we make up a large part of the
content of our blog posting not using raw HTML coding. We create the
middle bits here using the Libre Office “Writer Document”
functionality, but it could just as easily be done with Microsoft
Office Word or Open Office or perhaps even Wordperfect. In other
words, you don’t have to
know HTML to post on a WordPress blog, but, as we always say, “it
helps a lot”.
So
here you are a bit trepidatious
about HTML. First thing we’d say is to do an online peruse of
W3Schools at
http://www.w3schools.com or
read more at this blog via
http://www.rjmprogramming.com.au/wordpress/?tag=HTML
and then the next thing would be that you create a document in a word
processor as naturally as you normally do, and at the end use its
File->Save As… menu to save as HTML, and then open that HTML in
a text editor like TextWrangler (Mac) or Wordpad (Windows) or Notepad
(Windows) or TextPad (Windows) or UltraEdit (Windows) and …
-
open
this resultant HTML -
select
the contents between <body and </body> -
copy
the contents between <body and </body> -
open
your WordPress blog -
log
in as the “admin” user (perhaps) -
select
the Post->Add New option -
in
the content box, paste the previously copied buffer -
type
in a good heading for this new blog post -
establish
categories and tags and posting dates as application -
you
can optionally click the “Preview” button and re-edit until … -
click
the “Publish” “or “Schedule” button
… voila
… you don’t have
to
know HTML to post on a WordPress blog, but “it helps a lot”.
… versus hand crafted HTML of the same content below …
This is a tutorial about WYSIWYG in the sense that today we make up a large part of the content of our blog posting not using raw HTML coding. We create the middle bits here using the Libre Office “Writer Document” functionality, but it could just as easily be done with Microsoft Office Word or Open Office or perhaps even Wordperfect. In other words, you don’t have to know HTML to post on a WordPress blog, but, as we always say, “it helps a lot”.
So here you are a bit trepidatious about HTML. First thing we’d say is to do an online peruse of W3Schools at http://www.w3schools.com or read more at this blog via http://www.rjmprogramming.com.au/wordpress/?tag=HTML and then the next thing would be that you create a document in a word processor as naturally as you normally do, and at the end use its File->Save As… menu to save as HTML, and then open that HTML in a text editor like TextWrangler (Mac) or Wordpad (Windows) or Notepad (Windows) or TextPad (Windows) or UltraEdit (Windows) and …
- open this resultant HTML
- select the contents between <body and </body>
- copy the contents between <body and </body>
- open your WordPress blog
- log in as the “admin” user (perhaps)
- select the Post->Add New option
- in the content box, paste the previously copied buffer
- type in a good heading for this new blog post
- establish categories and tags and posting dates as application
- you can optionally click the “Preview” button and re-edit until …
- click the “Publish” “or “Schedule” button
… voila … you don’t have to know HTML to post on a WordPress blog, but “it helps a lot”.
… hence … you don’t have to know HTML to post on a WordPress blog, but “it helps a lot”.
Please note that with a WordPress blog posting you can avoid HTML coding altogether (except whatever HTML emanates by using the functionality buttons WordPress presents), and try it that way also. Also of use is the approach to use the “Add Media” button functionality which adds a link and uploads your local media file that ends up as a link that the user can download, in your blog posting.
If this was interesting you may be interested in this too.


17 Responses to WordPress Blog Post WYSIWYG Primer Tutorial